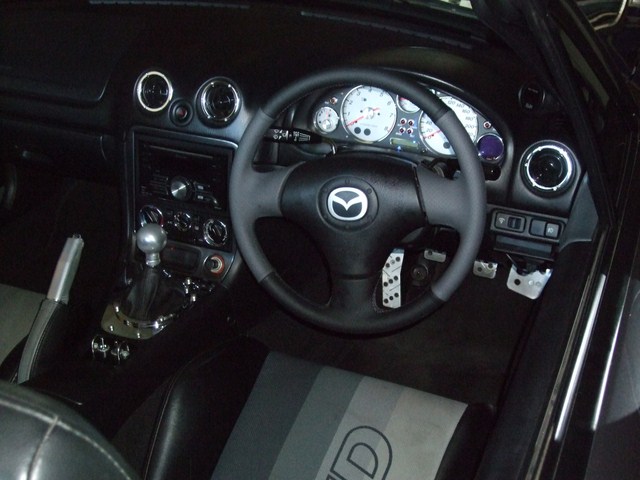
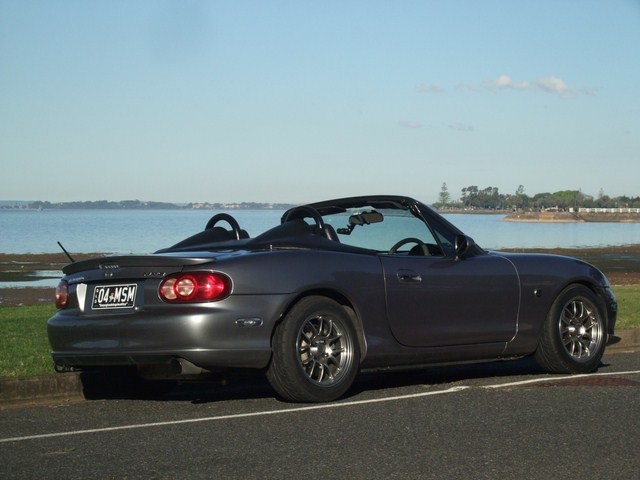
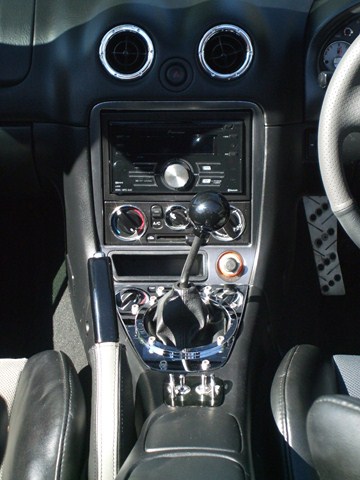
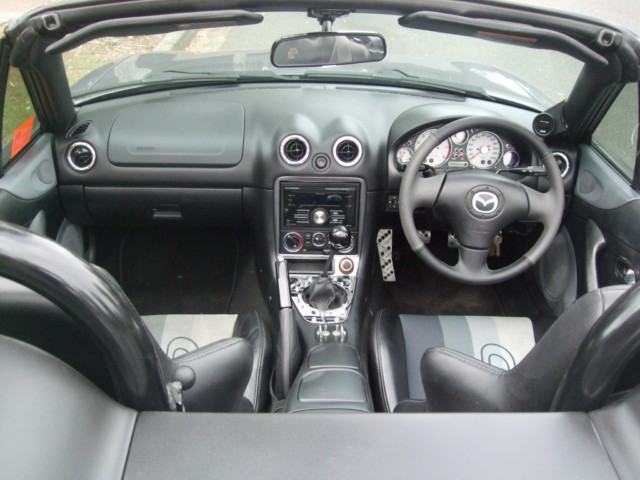
Lokiel's "Gina" (2004 Titanium SE)
Moderators: timk, Stu, zombie, Andrew, The American, Lokiel, -alex, miata, StanTheMan, greenMachine, ManiacLachy, Daffy
- Lokiel
- Forum legend
- Posts: 4126
- Joined: Thu May 28, 2009 2:39 pm
- Vehicle: NB SE
- Location: Brisbania
Re: Lokiel's "Gina" (once a 2004 Titanium SE) Recreated AGAIN
Originally posted by Lokiel, Sun Sep 24, 2017 4:06 pm
Originally posted by Lokiel, Sat Apr 21, 2012 10:17 pm[
I'd hoped to have completed the PLX sensor install over the 4-day Easter weekend but unfortunately after 2 days of crawling around under the car to fit the Wideband O2 sensor and kneeling in the passenger side footwell (wire stripping, crimping, soldering and wire-weaving), my knees and back couldn't take any more so I didn't get far after that - I think I'm getting OLD!!! I finished it up today.
I'd decided to mount the PLX sensor modules in the glovebox since I couldn't find enough room under the dash anywhere that allowed me easy access to them - this is VERY important because there's a LOT of connections so a lot can go wrong. In hindsight I now think I should have removed the passenger seat and mounted all PLX modules on the passenger seat floor, then put the seat back in when everything was working.
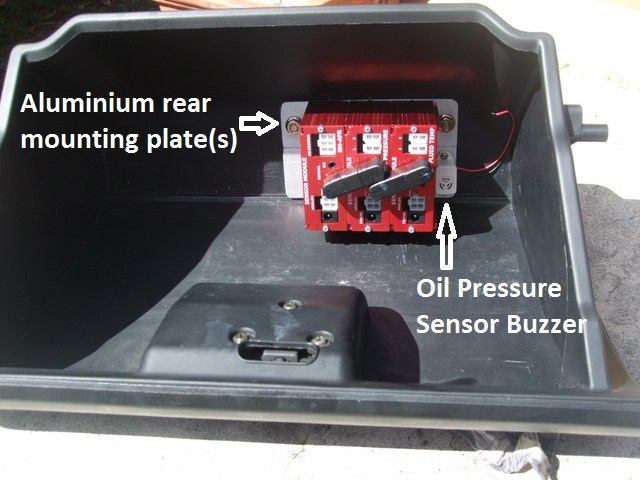
Initially I mounted the sensor modules to the rear of the glovebox by removing the sensor backplates and screwing them into a couple of wider aluminium strips that allowed me to bolt it to the glovebox and mount the oil pressure sensor's buzzer to it.
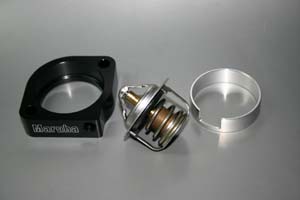
I started the Easter weekend by installing the Maruha 78Thermostat adapter.
(see http://www.maruhamotors.co.jp/miata/parts/watertempsensor.html).
The adapter has a 1/8" PT thread (aka 1/8" BSPT-28) but the PLX sensor has a 1/8" NPT-27 thread. The adapter's threading didn't extend too deep and I wanted to mount the temperature sensor as deep as possible so I figured why not re-tap it as a 1/8" NPT-27 thread? The 1/8" NPT-27 tap I ordered had arrived so I re-tapped the adapter and installed the PLX sensor using Loctite Copper Maxx Silicone (as used on the oil drain blanking plate) to ensure that it sealed completely. This silicone is sensor safe and doesn't affect its electrical conductivity. I drained the coolant and fitted the adapter using the same Loctite Copper Maxx Silicone, then let it set for 24 hours before re-filling the coolant.
While waiting for the silicone to set, I wired the water temperature sensor into my new sensor harness and tidied it up using split loom. The green dots below show the routing of the new sensor harness.
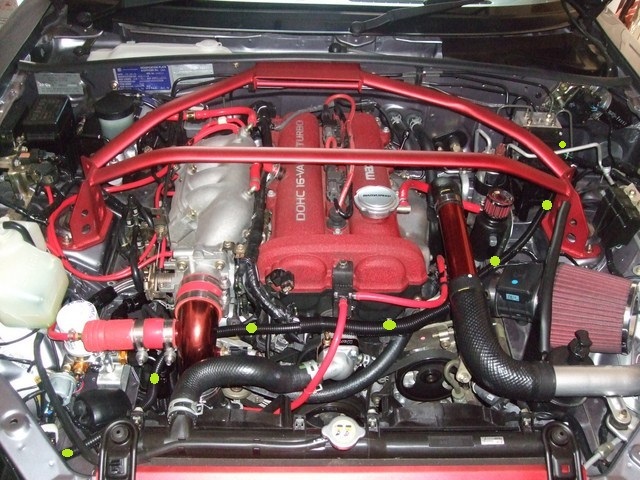
I wrapped the new harness to the existing factory harness in front of the engine using larger split loom (see just below the boost solenoid) which keeps everything nice and tidy.
I needed to swap my Innovate LC-1 Wideband O2 sensor for the PLX sensor. Luckily swapping the sensors in the exhaust pipe wasn't as much of a drama as removing the blank sensor bung was originally - that took forever to get out with an Allen key. Removing the O2 sensor only took a few minutes with a spanner - unfortunately on the SE/MSM though you need to remove a plate first to access it. Periodically fresh-air calibrating the LC-1 sensor isn't as much of a drama as I feared it may have been. I was quite surprised how caked in carbon crud the LC-1 sensor was but it probably was due to the fact that its been in the car when I did my initial dodgy "filthy-rich" tune and has had a few professional tunes since then too. Even though the PLX sensor doesn't require fresh air calbration, it may be prudent to clean it up every now and then.
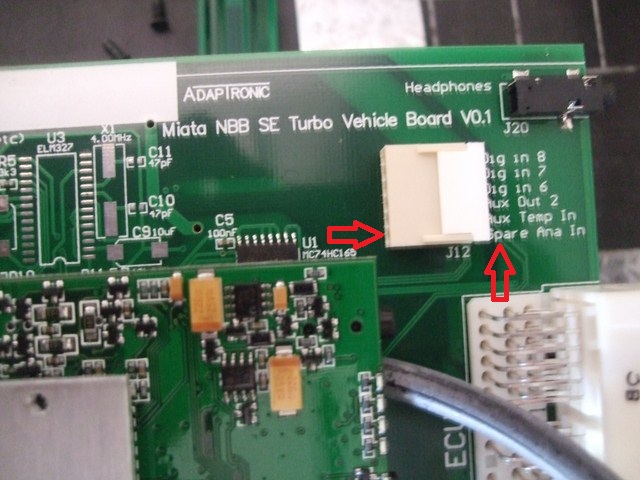
The Innovate LC-1 Wideband O2 sensor interfaced to the Adaptronic e440 ECU via a serial cable. The PLX AFR sensor module only provides a 0-5V analog output which needs to be wired into the Adaptronic's "Spare Analog Input" (0-5V Analog In) on its 6-pin connector so I had to crack open the e440 and connect it to the PLX AFR Sensor Module's Wideband 0-5V output.
Since my oil filter cooler/relocation kit install had taken so long to install, the original PLX DM-100 OBDII gauge+module I wanted had finally become available so I ordered it and it arrived just prior to Easter (AFTER I'd drilled holes into my glovebox unfortunately).
The DM100/DM200 gauge module is twice as long as the other sensor modules and has connections on the front and rear:
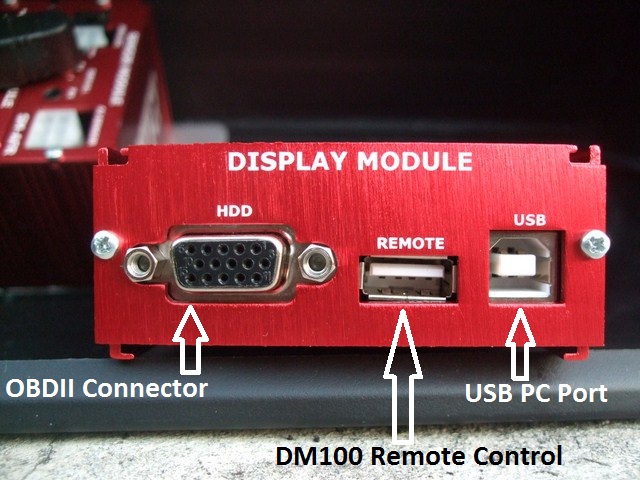
This meant I could't simply join it to the other modules, it would need to be mounted separately and I would have to move the sensor modules
At this point I still hadn't thought of the "under the passenger-seat" mounting idea so I shifted the sensor modules to one side of the glovebox and the display module to the other side of the glovebox:
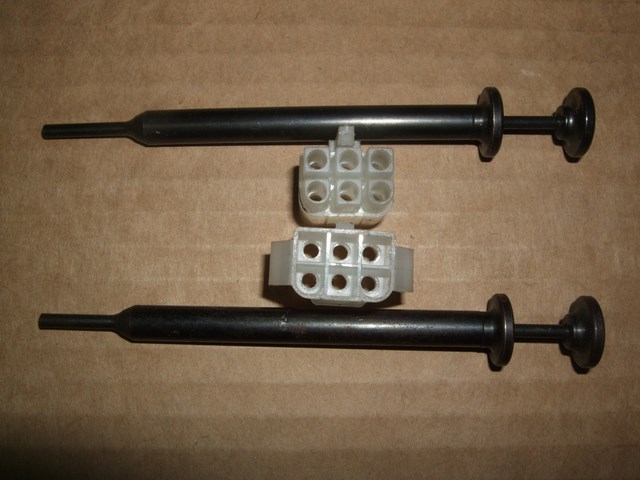
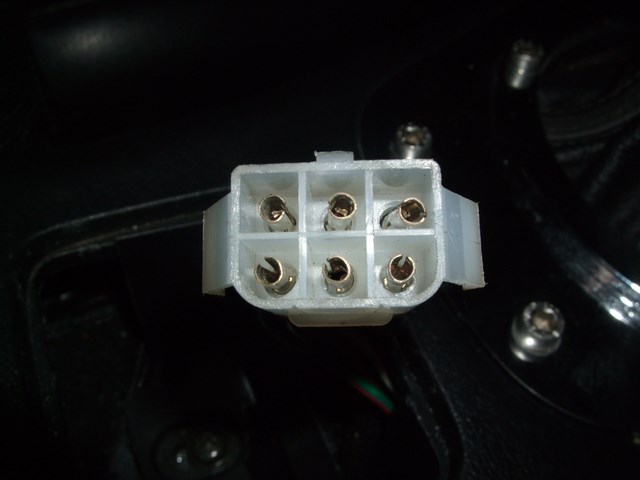
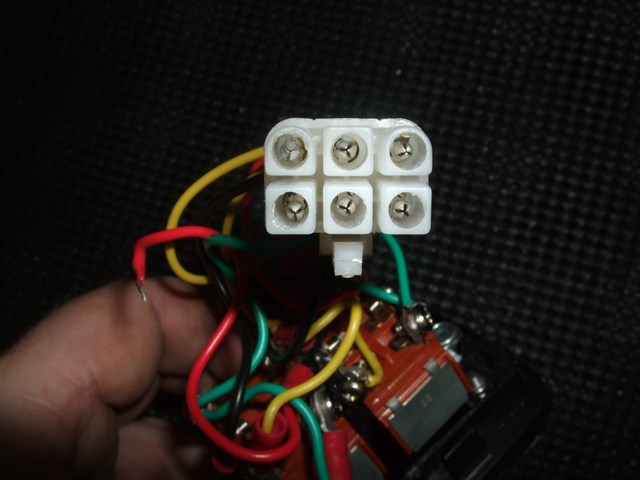
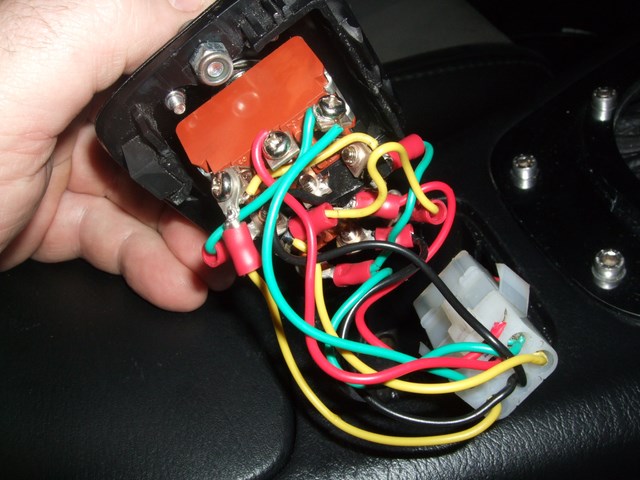
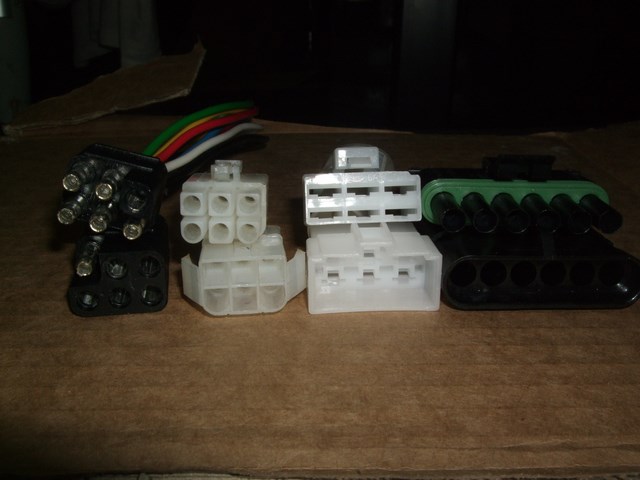
That's a 5x3 molex connector there! Each sensor/gauge module requires its own power supply and the oil pressure buzzer requires its own 12V input too so I needed at least 9 connections (plus it never hurts to have spares).
The AFR sensor module's 12V power is tapped from the demister since it's only active when the ignition switch is in the ON position, not during cranking (important if the battery is low) or when in the Accessories position (important since it wont drain the battery - the AFR sensor needs to be heated to operating temperature so it draws a lot of power and will drain the battery in the Accessories position).
The AFR sensor module's GND is connected to the e440's GND to ensure that there is no variation (important since the AFR analog output is fed into the e440).
All other power and GND connections are wired into the cigarette lighter.
The demister and cigarette lighter 12V taps contain 5 Amp fuses (tucked under the dashboard and easy to access).
Everything has been connected via plugs&sockets so it can be disassembled/reassembled.
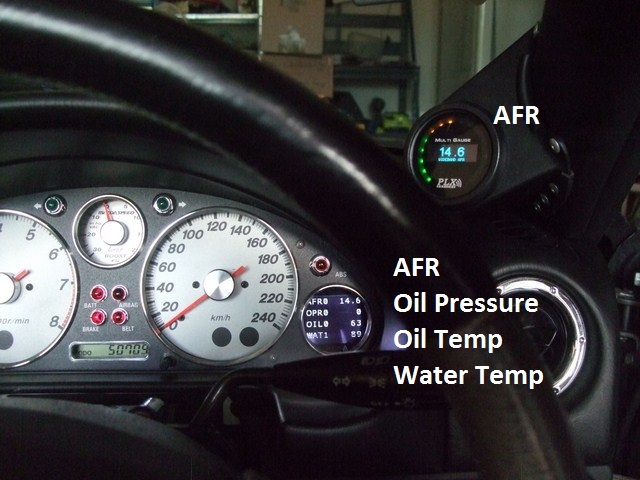
Since I now had 2 PLX gauges, the DM-100 and DM-6, I decided to mount the DM-100 in the OEM water temperature gauge's location (the factory water temperature gauge, like the factory oil pressure gauge, is essentially a dummy gauge and even the linear resistor mod I did wasn't that great) and the DM-6 in the A-pillar.
The DM-100 has a 4-button USB remote that allows it to be configured and controlled so mounting it in the instrument cluster meant it could still be manipulated.
The DM-6 gauge has 3 touch-spots that allow it to be controlled so it needs to be accessable.
To fit the DM100 gauge into the instrument cluster I needed to do the following:
* remove the DM-100 bezel (this causes the gauge to fall apart so I had to be careful with it)
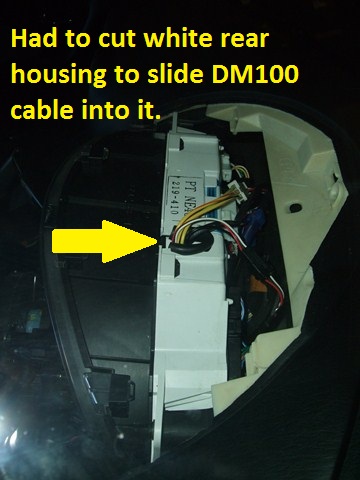
* cut a notch into the rear white plastic housing to slide the gauge's cable into (previously I had cut a hole there to pass the SpeedHut gauge's cables through)
* "Dremel-down" the two original gauge mount points so that the gauge sat at the right level (when the cluster is re-assembled, it must press down on the PLX gauge's plastic face edges to ensure that it sits securely in the gauge's "cup" - that's what the original PLX bezel was doing)
* add two rubber "strips" to ensure that the gauge was centred correctly
When I fired it up initially, without the engine running, the oil pressure thermostat buzzer started screaming loudly - when the engine's not running, there's no oil pressure - DUH! I wish I'd thought of that initially, then I would have wired up an LED instead. For now I've disconnected the power to the buzzer.
I'm not even going to try and fool you into thinking this install worked "right off the bat". There are a lot of connections required and it took quite a bit of trouble shooting to track down connectivity issues and lots of searching on the PLX forums to configure the system.
So how's the DM-100 gauge look?
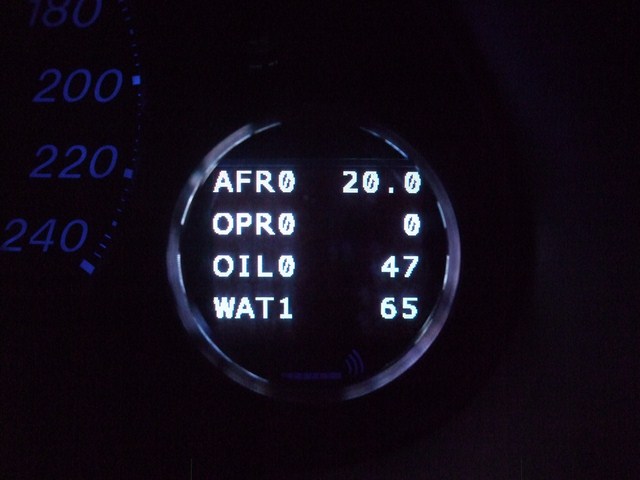
Note: Oil Pressure is set to zero since the engine wasn't running when these photos were taken.
Unfortunately glare is an issue with the DM-100 gauge. A polarised film over the gauge, or even polarised sunglasses may help - must try this.
When viewed from the driver's seat, not directly in front of the DM-100 gauge, you cannot see the extreme top left and bottom left corners - not really an issue.
Initially I configured the 4-parameter view to use increasingly darker shades of blue (to match my dashboard LEDs) which looked fantastic at night but was almost unreadable during the day so now I've simply set them all to white which is more readable (when there is direct sunlight on the gauge, shading it with your fingers is necessary which is easy to do in this location since your hand is typically in that spot on the steering wheel anyway).
I'll probably use this 4-parameter view mostly (I configured it to display AFR, Oil Pressure, Oil Temperature and Water Temperature) but there are other useful views:
Single sensor analog view (unreadble with this colour scheme in day):
Single sensor digital view (easily readable in this colour scheme during the day):
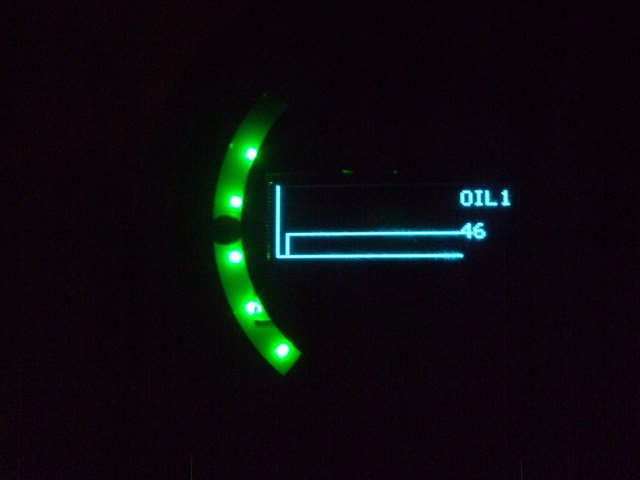
Single sensor realtime graph view (almost unreadable in the day):
There is also a customisable gauge for a single sensor but this is unreadable during the day. You can create your own animations for this or download existing ones from PLX.
You can configure the DM-100 sensor to poll 4 OBDII values too.
Unfortunately Battery Voltage is not reported by our OBDII port
The Adaptronic e440 passes a dummy/fixed AIT value to the factory ECU so that value is useless for me.
Water temperature IS reported so I really didn't need to install the Maruha adapter for the water temperature sensor, I could have used the OBDII value. I may purchase another PLX temperature sensor and install that in the Air Intake or somewhere useful, then wire it to my new harness.
There's not a lot of useful information so I've configured the OBDII polled sensors as:
* Water Temperature
* Narrowband O2
* Engine Load
* Engine Timing
The USB remote can be a bit finicky at times. The right button is tricky to press at times, the other 3 are OK though.
What about the DM-6 gauge?
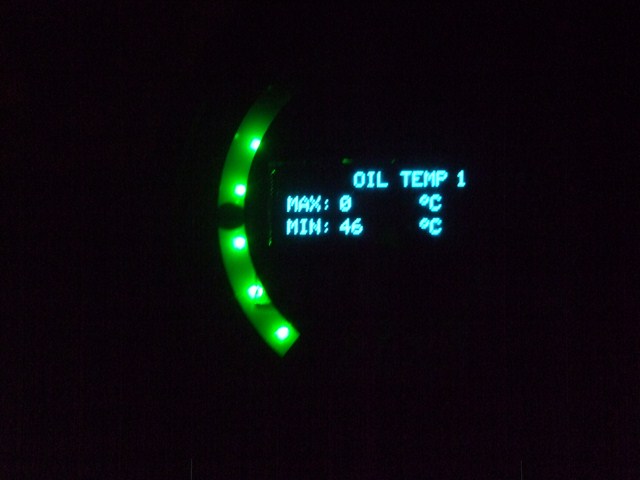
The DM-6 gauge can display information from a single sensor, any of the sensor module sensors or OBDII monitored sensors (these can be cycled through using the gauge's left-most touch-spot). The current digital value, real-time plot and max/min values can be displayed (these can be cycled through using the right-most touch-spot).
Note: The MAX value is set to zero here since I had just turned the engine off, then on again without starting it.
This gauge IS readable during the day.
Watching the AFR real-time plot is interesting.
Here's todays reported values, first values are hot@Idle, second are hot@3000rpm - looks OK:
* Oil Pressure(psi): 25-27 61-62
* Oil Temp(C): 92-95 88-91
* WaterTemp(C): 87-89 82
Was it worth it?
I think so.
* I'm not a fan of gauges scattered throughout the cabin since many end up in hard-to-view locations so they're virtually useless anyway.
* These gauges are mounted in easily viewable locations and I can see a lot of values all at once.
* I've now gotten rid of another useless gauge in my car and replaced it with something of use.
* Having immediate access to Min/Max values is useful.
What could be improved?
* Fix the glare issue on the DM-100 gauge.
* Make the USB remote less finicky. I think I'm going to make something a bit more mechanical/reliable and mount it in my foglight switch location since I now no longer have foglights and don't need it.
* Implement Day/Night mode to allow sexy colours at night and boring white/readable colours during the day.
Originally posted by Lokiel, Sat Apr 21, 2012 10:17 pm[
I'd hoped to have completed the PLX sensor install over the 4-day Easter weekend but unfortunately after 2 days of crawling around under the car to fit the Wideband O2 sensor and kneeling in the passenger side footwell (wire stripping, crimping, soldering and wire-weaving), my knees and back couldn't take any more so I didn't get far after that - I think I'm getting OLD!!! I finished it up today.
I'd decided to mount the PLX sensor modules in the glovebox since I couldn't find enough room under the dash anywhere that allowed me easy access to them - this is VERY important because there's a LOT of connections so a lot can go wrong. In hindsight I now think I should have removed the passenger seat and mounted all PLX modules on the passenger seat floor, then put the seat back in when everything was working.
Initially I mounted the sensor modules to the rear of the glovebox by removing the sensor backplates and screwing them into a couple of wider aluminium strips that allowed me to bolt it to the glovebox and mount the oil pressure sensor's buzzer to it.
I started the Easter weekend by installing the Maruha 78Thermostat adapter.
(see http://www.maruhamotors.co.jp/miata/parts/watertempsensor.html).
The adapter has a 1/8" PT thread (aka 1/8" BSPT-28) but the PLX sensor has a 1/8" NPT-27 thread. The adapter's threading didn't extend too deep and I wanted to mount the temperature sensor as deep as possible so I figured why not re-tap it as a 1/8" NPT-27 thread? The 1/8" NPT-27 tap I ordered had arrived so I re-tapped the adapter and installed the PLX sensor using Loctite Copper Maxx Silicone (as used on the oil drain blanking plate) to ensure that it sealed completely. This silicone is sensor safe and doesn't affect its electrical conductivity. I drained the coolant and fitted the adapter using the same Loctite Copper Maxx Silicone, then let it set for 24 hours before re-filling the coolant.
While waiting for the silicone to set, I wired the water temperature sensor into my new sensor harness and tidied it up using split loom. The green dots below show the routing of the new sensor harness.
I wrapped the new harness to the existing factory harness in front of the engine using larger split loom (see just below the boost solenoid) which keeps everything nice and tidy.
I needed to swap my Innovate LC-1 Wideband O2 sensor for the PLX sensor. Luckily swapping the sensors in the exhaust pipe wasn't as much of a drama as removing the blank sensor bung was originally - that took forever to get out with an Allen key. Removing the O2 sensor only took a few minutes with a spanner - unfortunately on the SE/MSM though you need to remove a plate first to access it. Periodically fresh-air calibrating the LC-1 sensor isn't as much of a drama as I feared it may have been. I was quite surprised how caked in carbon crud the LC-1 sensor was but it probably was due to the fact that its been in the car when I did my initial dodgy "filthy-rich" tune and has had a few professional tunes since then too. Even though the PLX sensor doesn't require fresh air calbration, it may be prudent to clean it up every now and then.
The Innovate LC-1 Wideband O2 sensor interfaced to the Adaptronic e440 ECU via a serial cable. The PLX AFR sensor module only provides a 0-5V analog output which needs to be wired into the Adaptronic's "Spare Analog Input" (0-5V Analog In) on its 6-pin connector so I had to crack open the e440 and connect it to the PLX AFR Sensor Module's Wideband 0-5V output.
Since my oil filter cooler/relocation kit install had taken so long to install, the original PLX DM-100 OBDII gauge+module I wanted had finally become available so I ordered it and it arrived just prior to Easter (AFTER I'd drilled holes into my glovebox unfortunately).
The DM100/DM200 gauge module is twice as long as the other sensor modules and has connections on the front and rear:
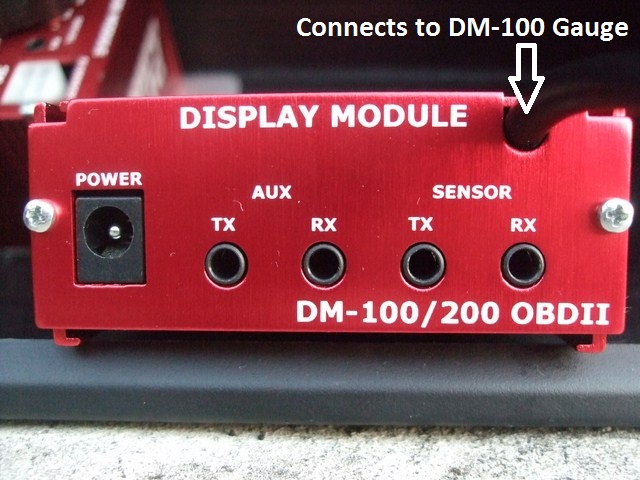
This meant I could't simply join it to the other modules, it would need to be mounted separately and I would have to move the sensor modules
At this point I still hadn't thought of the "under the passenger-seat" mounting idea so I shifted the sensor modules to one side of the glovebox and the display module to the other side of the glovebox:
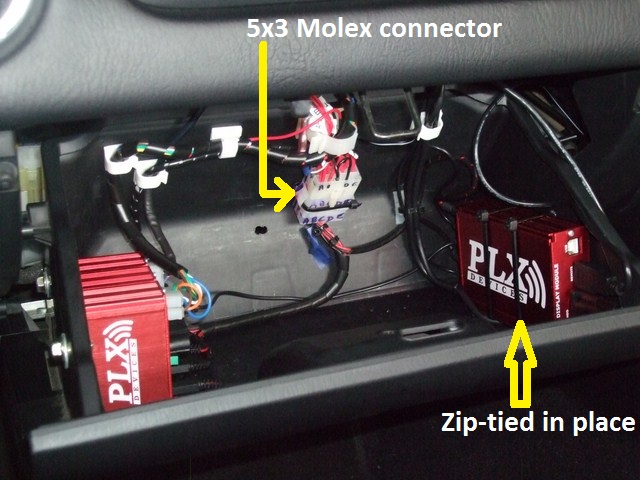
That's a 5x3 molex connector there! Each sensor/gauge module requires its own power supply and the oil pressure buzzer requires its own 12V input too so I needed at least 9 connections (plus it never hurts to have spares).
The AFR sensor module's 12V power is tapped from the demister since it's only active when the ignition switch is in the ON position, not during cranking (important if the battery is low) or when in the Accessories position (important since it wont drain the battery - the AFR sensor needs to be heated to operating temperature so it draws a lot of power and will drain the battery in the Accessories position).
The AFR sensor module's GND is connected to the e440's GND to ensure that there is no variation (important since the AFR analog output is fed into the e440).
All other power and GND connections are wired into the cigarette lighter.
The demister and cigarette lighter 12V taps contain 5 Amp fuses (tucked under the dashboard and easy to access).
Everything has been connected via plugs&sockets so it can be disassembled/reassembled.
Since I now had 2 PLX gauges, the DM-100 and DM-6, I decided to mount the DM-100 in the OEM water temperature gauge's location (the factory water temperature gauge, like the factory oil pressure gauge, is essentially a dummy gauge and even the linear resistor mod I did wasn't that great) and the DM-6 in the A-pillar.
The DM-100 has a 4-button USB remote that allows it to be configured and controlled so mounting it in the instrument cluster meant it could still be manipulated.
The DM-6 gauge has 3 touch-spots that allow it to be controlled so it needs to be accessable.
To fit the DM100 gauge into the instrument cluster I needed to do the following:
* remove the DM-100 bezel (this causes the gauge to fall apart so I had to be careful with it)
* cut a notch into the rear white plastic housing to slide the gauge's cable into (previously I had cut a hole there to pass the SpeedHut gauge's cables through)
* "Dremel-down" the two original gauge mount points so that the gauge sat at the right level (when the cluster is re-assembled, it must press down on the PLX gauge's plastic face edges to ensure that it sits securely in the gauge's "cup" - that's what the original PLX bezel was doing)
* add two rubber "strips" to ensure that the gauge was centred correctly
When I fired it up initially, without the engine running, the oil pressure thermostat buzzer started screaming loudly - when the engine's not running, there's no oil pressure - DUH! I wish I'd thought of that initially, then I would have wired up an LED instead. For now I've disconnected the power to the buzzer.
I'm not even going to try and fool you into thinking this install worked "right off the bat". There are a lot of connections required and it took quite a bit of trouble shooting to track down connectivity issues and lots of searching on the PLX forums to configure the system.
So how's the DM-100 gauge look?
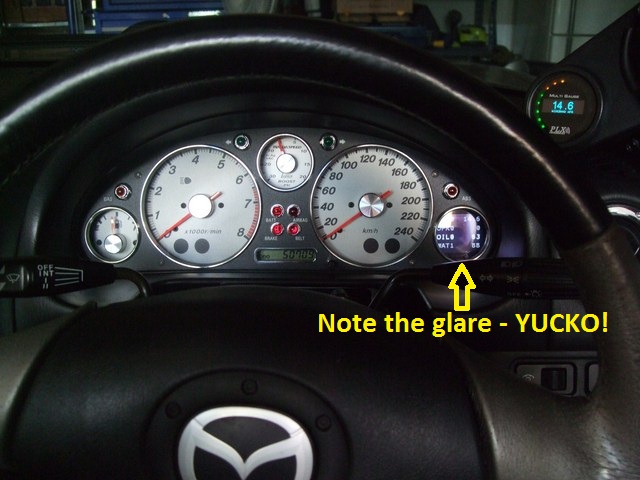
Note: Oil Pressure is set to zero since the engine wasn't running when these photos were taken.
Unfortunately glare is an issue with the DM-100 gauge. A polarised film over the gauge, or even polarised sunglasses may help - must try this.
When viewed from the driver's seat, not directly in front of the DM-100 gauge, you cannot see the extreme top left and bottom left corners - not really an issue.
Initially I configured the 4-parameter view to use increasingly darker shades of blue (to match my dashboard LEDs) which looked fantastic at night but was almost unreadable during the day so now I've simply set them all to white which is more readable (when there is direct sunlight on the gauge, shading it with your fingers is necessary which is easy to do in this location since your hand is typically in that spot on the steering wheel anyway).
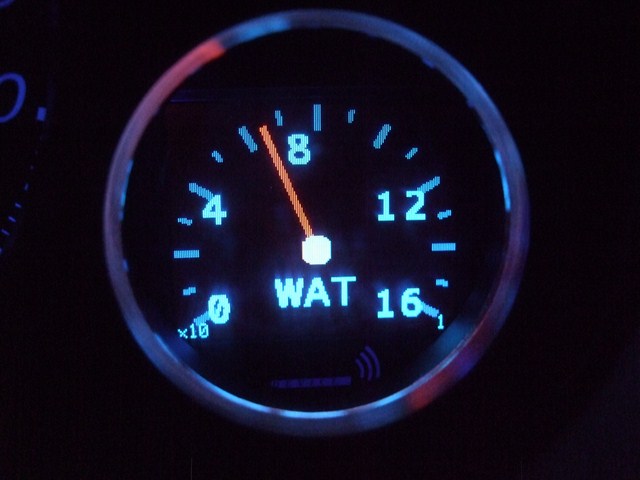
I'll probably use this 4-parameter view mostly (I configured it to display AFR, Oil Pressure, Oil Temperature and Water Temperature) but there are other useful views:
Single sensor analog view (unreadble with this colour scheme in day):
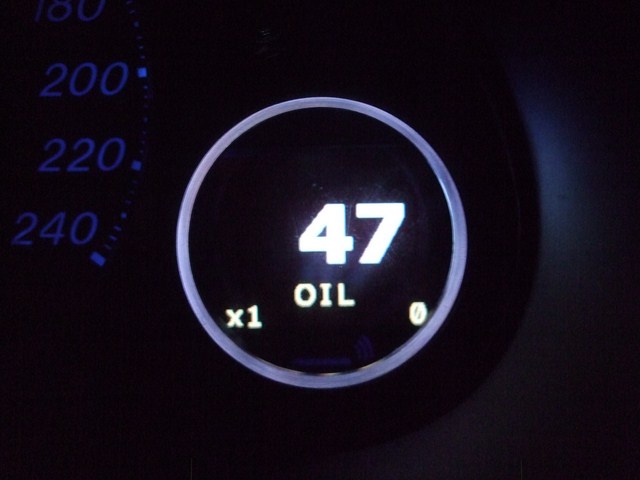
Single sensor digital view (easily readable in this colour scheme during the day):
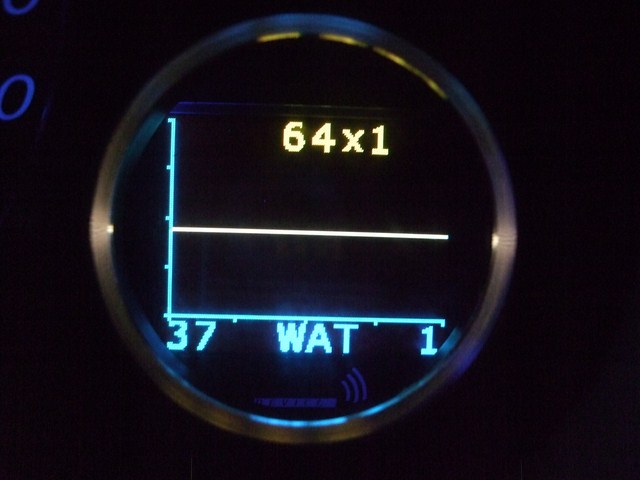
Single sensor realtime graph view (almost unreadable in the day):
There is also a customisable gauge for a single sensor but this is unreadable during the day. You can create your own animations for this or download existing ones from PLX.
You can configure the DM-100 sensor to poll 4 OBDII values too.
Unfortunately Battery Voltage is not reported by our OBDII port
The Adaptronic e440 passes a dummy/fixed AIT value to the factory ECU so that value is useless for me.
Water temperature IS reported so I really didn't need to install the Maruha adapter for the water temperature sensor, I could have used the OBDII value. I may purchase another PLX temperature sensor and install that in the Air Intake or somewhere useful, then wire it to my new harness.
There's not a lot of useful information so I've configured the OBDII polled sensors as:
* Water Temperature
* Narrowband O2
* Engine Load
* Engine Timing
The USB remote can be a bit finicky at times. The right button is tricky to press at times, the other 3 are OK though.
What about the DM-6 gauge?
The DM-6 gauge can display information from a single sensor, any of the sensor module sensors or OBDII monitored sensors (these can be cycled through using the gauge's left-most touch-spot). The current digital value, real-time plot and max/min values can be displayed (these can be cycled through using the right-most touch-spot).
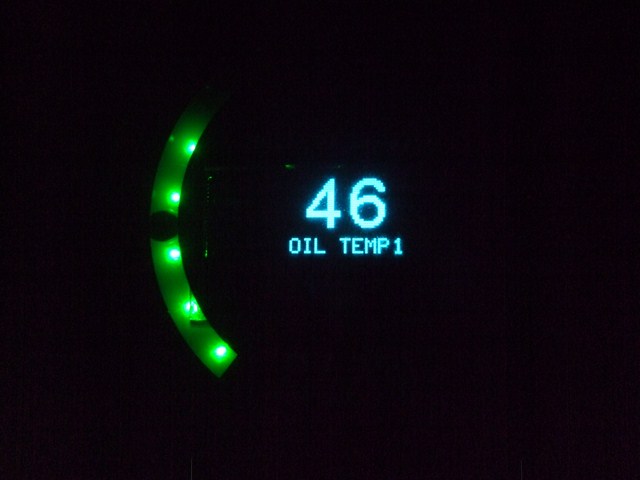
Note: The MAX value is set to zero here since I had just turned the engine off, then on again without starting it.
This gauge IS readable during the day.
Watching the AFR real-time plot is interesting.
Here's todays reported values, first values are hot@Idle, second are hot@3000rpm - looks OK:
* Oil Pressure(psi): 25-27 61-62
* Oil Temp(C): 92-95 88-91
* WaterTemp(C): 87-89 82
Was it worth it?
I think so.
* I'm not a fan of gauges scattered throughout the cabin since many end up in hard-to-view locations so they're virtually useless anyway.
* These gauges are mounted in easily viewable locations and I can see a lot of values all at once.
* I've now gotten rid of another useless gauge in my car and replaced it with something of use.
* Having immediate access to Min/Max values is useful.
What could be improved?
* Fix the glare issue on the DM-100 gauge.
* Make the USB remote less finicky. I think I'm going to make something a bit more mechanical/reliable and mount it in my foglight switch location since I now no longer have foglights and don't need it.
* Implement Day/Night mode to allow sexy colours at night and boring white/readable colours during the day.
Don't worry about dying, worry about not living!
Garage Thread: http://www.mx5cartalk.com/forum/viewtopic.php?f=57&t=76716
- Lokiel
- Forum legend
- Posts: 4126
- Joined: Thu May 28, 2009 2:39 pm
- Vehicle: NB SE
- Location: Brisbania
Re: Lokiel's "Gina" (once a 2004 Titanium SE) Recreated AGAIN
Originally posted by Lokiel, Sun Sep 24, 2017 4:06 pm
Originally posted by Okibi, Sat Apr 21, 2012 11:46 pm[
Very cool, wish I could see your car in person!
Originally posted by timk, Sun Apr 22, 2012 12:49 am[
Dave, the quality of the mods Simon has done are awesome, and you know how anal I am!
Simon, does the OBD2 port give you an accurate temp signal? On the older Adaptronic plugin, it would only pass through one of two temps and this was solely to allow the factory ECU to run idle in either warmup mode (higher target RPM) or warmed up mode.
Originally posted by sailaholic, Sun Apr 22, 2012 8:10 am[
Very interesting!
Originally posted by Lokiel, Sun Apr 22, 2012 8:26 am[
This is from the e440's Pinout diagram and confirmed with Andy:
* Pin 4N (Intake air temperature sensor/Air Temperature signal input) IS connected to both ECUs
* Pin 4R (Air temperature sensor/ Aux Temperature signal input) is no longer connected to the factory ECU.
Here's Andy's comment in regard to my query on the fixed/dummy IAT reported by the OBDII port:
"That air temp sensor does not go through to the factory ECU. This is because you can only turn off the bias of the coolant and air temp sensors in our ECU (not the 3rd auxiliary temperature input) so I made a call to just feed that input to the factory ECU with a fixed value resistor as it doesn't affect idle control or the other things the ECU may need."
Notes on the SE/MSM:
* the Intake Air Temperature sensor is connected at the throttle body (Pin 4N)
* the Aux Temperature signal is connected at the air filter (Pin 4R) like N/A NA/NBs
* stupidly, the OBDII port reports the Aux Temperature signal (to be consistant with other NA/NBs ?) - it SHOULD report the value from Pin 4N!
When the engine is warm, the water temperature reported by the PLX sensor and the OBDII port match so my temperature calibration was pretty good.
When the engine has just been started, they're off by a few degrees, probably because the Maruha 78 thermostat doesn't open until 78C.
Originally posted by Okibi, Sat Apr 21, 2012 11:46 pm[
Very cool, wish I could see your car in person!
Originally posted by timk, Sun Apr 22, 2012 12:49 am[
Okibi wrote:Very cool, wish I could see your car in person!
Dave, the quality of the mods Simon has done are awesome, and you know how anal I am!
Simon, does the OBD2 port give you an accurate temp signal? On the older Adaptronic plugin, it would only pass through one of two temps and this was solely to allow the factory ECU to run idle in either warmup mode (higher target RPM) or warmed up mode.
Originally posted by sailaholic, Sun Apr 22, 2012 8:10 am[
Very interesting!
Originally posted by Lokiel, Sun Apr 22, 2012 8:26 am[
saboteur wrote::does the OBD2 port give you an accurate temp signal? On the older Adaptronic plugin, it would only pass through one of two temps and this was solely to allow the factory ECU to run idle in either warmup mode (higher target RPM) or warmed up mode.
This is from the e440's Pinout diagram and confirmed with Andy:
* Pin 4N (Intake air temperature sensor/Air Temperature signal input) IS connected to both ECUs
* Pin 4R (Air temperature sensor/ Aux Temperature signal input) is no longer connected to the factory ECU.
Here's Andy's comment in regard to my query on the fixed/dummy IAT reported by the OBDII port:
"That air temp sensor does not go through to the factory ECU. This is because you can only turn off the bias of the coolant and air temp sensors in our ECU (not the 3rd auxiliary temperature input) so I made a call to just feed that input to the factory ECU with a fixed value resistor as it doesn't affect idle control or the other things the ECU may need."
Notes on the SE/MSM:
* the Intake Air Temperature sensor is connected at the throttle body (Pin 4N)
* the Aux Temperature signal is connected at the air filter (Pin 4R) like N/A NA/NBs
* stupidly, the OBDII port reports the Aux Temperature signal (to be consistant with other NA/NBs ?) - it SHOULD report the value from Pin 4N!
When the engine is warm, the water temperature reported by the PLX sensor and the OBDII port match so my temperature calibration was pretty good.
When the engine has just been started, they're off by a few degrees, probably because the Maruha 78 thermostat doesn't open until 78C.
Don't worry about dying, worry about not living!
Garage Thread: http://www.mx5cartalk.com/forum/viewtopic.php?f=57&t=76716
- Lokiel
- Forum legend
- Posts: 4126
- Joined: Thu May 28, 2009 2:39 pm
- Vehicle: NB SE
- Location: Brisbania
Re: Lokiel's "Gina" (once a 2004 Titanium SE) Recreated AGAIN
Originally posted by Lokiel, Sun Sep 24, 2017 4:07 pm
Originally posted by Lokiel, Sun Apr 29, 2012 6:43 pm[
MAF BEGONE!!!
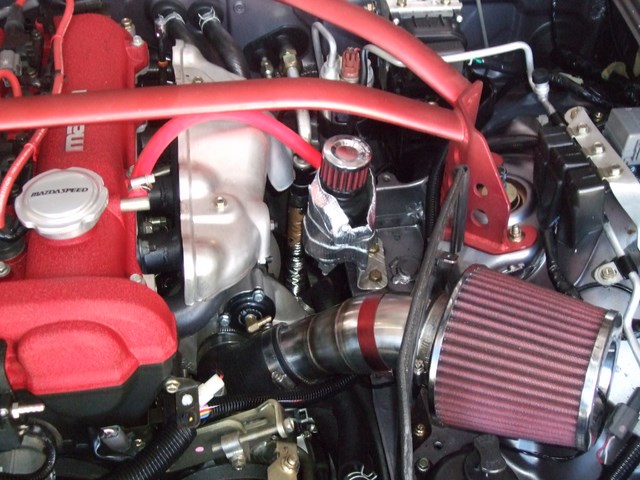
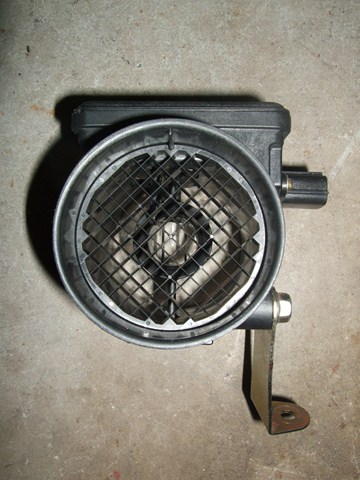
Since installing the Adaptronic e440, the OEM MAF sensor is no longer used and is just an impediment to airflow (the Adaptronic uses the MAP sensor rather than the MAF sensor):
Look at all that airflow restricting mesh! (OK, it probably makes "bugger-all" impact but it's still a restriction).
I bought a stainless steel exhaust section from SuperCheap and cut it to the length of the MAF sensor.
The MAF sensor has a mounting bracket to support it, see bottom right of photo above, and I needed to do something similar. I used a SuperCheap brand hose clamp since when tightened around the shaft, it had enough length on the bolt to thread through a bracket and put a nut on the end to secure it to the bracket. I made an aluminium bracket to to mount it to the original chassis mount point and fitted everything:
Nice and solid but something's not quite right - it needs to be painted metallic red to match the other pipe. That'll be next weekend's job, along with moving the wiring harness below the air filter and deleting the MAF plug (the grey thing sticking out of the split loom above the stainless steel pipe).
Since I've done a foglight delete and could redirect the air from the port foglight, I'm thinking of doing something like this, possibly using a Skreem enclosed air filter:
Any thoughts on this?
Should I keep my setup and just make my own air box instead?
Originally posted by bruce, Sun Apr 29, 2012 6:56 pm[
Wasn't there a long thread about there being no benefit of CAI for a turbo car? Being the air after the intercooler being the same temp either way.
Originally posted by bootz, Mon Apr 30, 2012 1:40 pm[
IMHO, if you dump the filter to the foglight you will have a MUCH cleaner looking engine bay.
Originally posted by cooper1896, Mon Apr 30, 2012 2:51 pm[
Any idea / guestimate as to how much the passenger airbag weighs?
Super usefull build thread btw!
Originally posted by Lokiel, Mon Apr 30, 2012 5:22 pm[
I wouldn't do that since I'd be worried when it rained that the filter would get wet and filthy - the foglight sits very low so would collect a lot of moisture and dirt.
I didn't weigh it but it's probably a tad under 2kgs - it's really quite heavy for its size so is definitely NOT needed on a track car.
Originally posted by Okibi, Mon Apr 30, 2012 10:06 pm[
Also you get more radiant heat off the road.
Originally posted by Lokiel, Sun Apr 29, 2012 6:43 pm[
MAF BEGONE!!!
Since installing the Adaptronic e440, the OEM MAF sensor is no longer used and is just an impediment to airflow (the Adaptronic uses the MAP sensor rather than the MAF sensor):
Look at all that airflow restricting mesh! (OK, it probably makes "bugger-all" impact but it's still a restriction).
I bought a stainless steel exhaust section from SuperCheap and cut it to the length of the MAF sensor.
The MAF sensor has a mounting bracket to support it, see bottom right of photo above, and I needed to do something similar. I used a SuperCheap brand hose clamp since when tightened around the shaft, it had enough length on the bolt to thread through a bracket and put a nut on the end to secure it to the bracket. I made an aluminium bracket to to mount it to the original chassis mount point and fitted everything:
Nice and solid but something's not quite right - it needs to be painted metallic red to match the other pipe. That'll be next weekend's job, along with moving the wiring harness below the air filter and deleting the MAF plug (the grey thing sticking out of the split loom above the stainless steel pipe).
Since I've done a foglight delete and could redirect the air from the port foglight, I'm thinking of doing something like this, possibly using a Skreem enclosed air filter:
Any thoughts on this?
Should I keep my setup and just make my own air box instead?
Originally posted by bruce, Sun Apr 29, 2012 6:56 pm[
Wasn't there a long thread about there being no benefit of CAI for a turbo car? Being the air after the intercooler being the same temp either way.
Originally posted by bootz, Mon Apr 30, 2012 1:40 pm[
IMHO, if you dump the filter to the foglight you will have a MUCH cleaner looking engine bay.
Originally posted by cooper1896, Mon Apr 30, 2012 2:51 pm[
Any idea / guestimate as to how much the passenger airbag weighs?
Super usefull build thread btw!
Originally posted by Lokiel, Mon Apr 30, 2012 5:22 pm[
bootz wrote:IMHO, if you dump the filter to the foglight you will have a MUCH cleaner looking engine bay.
I wouldn't do that since I'd be worried when it rained that the filter would get wet and filthy - the foglight sits very low so would collect a lot of moisture and dirt.
cooper1896 wrote:Any idea / guestimate as to how much the passenger airbag weighs?
:
I didn't weigh it but it's probably a tad under 2kgs - it's really quite heavy for its size so is definitely NOT needed on a track car.
Originally posted by Okibi, Mon Apr 30, 2012 10:06 pm[
Lokiel wrote:... the foglight sits very low so would collect a lot of moisture and dirt....
Also you get more radiant heat off the road.
Don't worry about dying, worry about not living!
Garage Thread: http://www.mx5cartalk.com/forum/viewtopic.php?f=57&t=76716
- Lokiel
- Forum legend
- Posts: 4126
- Joined: Thu May 28, 2009 2:39 pm
- Vehicle: NB SE
- Location: Brisbania
Re: Lokiel's "Gina" (once a 2004 Titanium SE) Recreated AGAIN
Originally posted by Lokiel, Sun Sep 24, 2017 4:07 pm
Originally posted by Lokiel, Tue May 01, 2012 6:56 pm[
I've been driving around on 225/45/50 Toyo R1Rs for a while now since I sold my OEM 17" boat anchors. These were intended to be track tyres only but due to economics, they were used as my DD tyres - lucky for me, I take the bus to work each day and due to my modz, it has largely been a "garage queen" so they don't have as may K's on them as they could have.
I purchased a set of 2nd hand 15x8 6ULs a while ago via the forums and some Dunlop Direzza Sport Z1 Star Specs recently from http://www.tirerack.com since the Direzza's have a good reputation in the US in both wet and dry conditions. The Direzzas have a UTQG rating of "200 A A" vs the R1R's "140 AA A" rating so will last longer on the road. I've been avoiding any long driving trips on the R1Rs since it seems a waste of a good/expensive tyre.
The 2nd hand rims were quite a bit more dinged up than my DD rims so I got Beaurepairs (Morningside) to swap the R1Rs onto them and put the Direzzas on my DD rims. Beaurepairs were even good enough to drop my "track tyres" off which was appreciated, saving me multiple trips ferrying the tyres in my car.
My impressions after an initial "fang" in the car with the new Dunlop Direzzas:
* MUCH louder than the R1Rs (I noticed this immediately when pulling out of Beaurepairs' driveway)
* Definitely firmer/harsher than the R1Rs; the R1Rs soaked up bumps and potholes brilliantly - the Direzzas let you know about them
* Steering is sharper due to the narrower tyres
* The car doesn't look as tough (can a NA/NB really look tough?) with the narrower tyres which might be a good thing since it wont draw as much unwanted attention
* I drove over some wet patches and don't get as much crap thrown down the side of the car behind the front wheels; the narrower tyres keep the car cleaner - the wider 225s threw up a lot of crap. I bought some front and rear mudflaps a while ago to minimise this but probably don't need them now.
Originally posted by Lokiel, Mon May 14, 2012 2:40 pm[
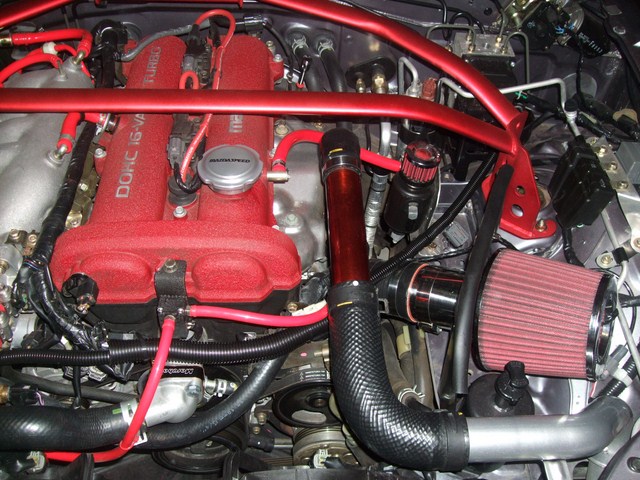
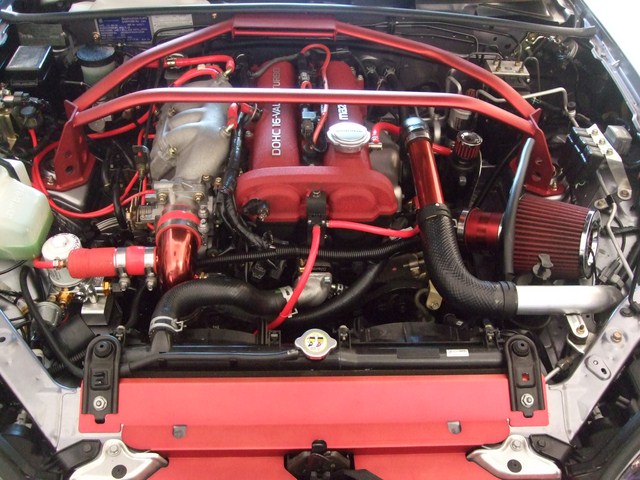
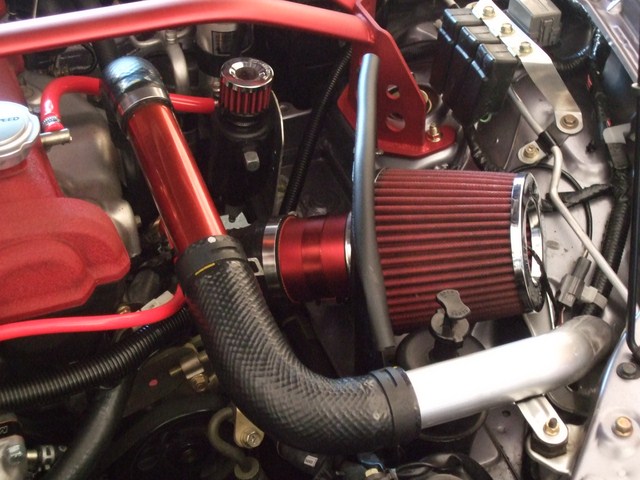
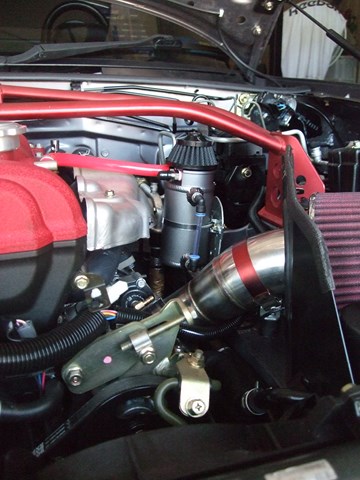
Replaced the stainless steel CAI tube I used above with an aluminium one (lighter is "gooder"), painted it plus the attaching worm clamp, and re-routed the PLX sensor wiring harness underneath the CAI for a cleaner look:
- now I may have to paint that OEM intercooler pipe too.
Originally posted by Okibi, Tue May 15, 2012 2:49 am[
then the intake manifold?
Originally posted by Lokiel, Tue May 15, 2012 9:52 am[
Fingers in ears, saying loudly "Not listening, not listening, ..." ('coz deep down inside I've thought the same thing but common sense said NO! - one of the rare occasions where I've listened to that little voice, but that was mainly because I had other stuff to do at the time).
Originally posted by bruce, Tue May 15, 2012 12:23 pm[
There is a point when there is too much red and it become overpowering.
I would mix it up with some nice shiny polished parts.
Originally posted by Lokiel, Tue May 01, 2012 6:56 pm[
I've been driving around on 225/45/50 Toyo R1Rs for a while now since I sold my OEM 17" boat anchors. These were intended to be track tyres only but due to economics, they were used as my DD tyres - lucky for me, I take the bus to work each day and due to my modz, it has largely been a "garage queen" so they don't have as may K's on them as they could have.
I purchased a set of 2nd hand 15x8 6ULs a while ago via the forums and some Dunlop Direzza Sport Z1 Star Specs recently from http://www.tirerack.com since the Direzza's have a good reputation in the US in both wet and dry conditions. The Direzzas have a UTQG rating of "200 A A" vs the R1R's "140 AA A" rating so will last longer on the road. I've been avoiding any long driving trips on the R1Rs since it seems a waste of a good/expensive tyre.
The 2nd hand rims were quite a bit more dinged up than my DD rims so I got Beaurepairs (Morningside) to swap the R1Rs onto them and put the Direzzas on my DD rims. Beaurepairs were even good enough to drop my "track tyres" off which was appreciated, saving me multiple trips ferrying the tyres in my car.
My impressions after an initial "fang" in the car with the new Dunlop Direzzas:
* MUCH louder than the R1Rs (I noticed this immediately when pulling out of Beaurepairs' driveway)
* Definitely firmer/harsher than the R1Rs; the R1Rs soaked up bumps and potholes brilliantly - the Direzzas let you know about them
* Steering is sharper due to the narrower tyres
* The car doesn't look as tough (can a NA/NB really look tough?) with the narrower tyres which might be a good thing since it wont draw as much unwanted attention
* I drove over some wet patches and don't get as much crap thrown down the side of the car behind the front wheels; the narrower tyres keep the car cleaner - the wider 225s threw up a lot of crap. I bought some front and rear mudflaps a while ago to minimise this but probably don't need them now.
Originally posted by Lokiel, Mon May 14, 2012 2:40 pm[
Replaced the stainless steel CAI tube I used above with an aluminium one (lighter is "gooder"), painted it plus the attaching worm clamp, and re-routed the PLX sensor wiring harness underneath the CAI for a cleaner look:
- now I may have to paint that OEM intercooler pipe too.
Originally posted by Okibi, Tue May 15, 2012 2:49 am[
then the intake manifold?
Originally posted by Lokiel, Tue May 15, 2012 9:52 am[
Okibi wrote:then the intake manifold?
Fingers in ears, saying loudly "Not listening, not listening, ..." ('coz deep down inside I've thought the same thing but common sense said NO! - one of the rare occasions where I've listened to that little voice, but that was mainly because I had other stuff to do at the time).
Originally posted by bruce, Tue May 15, 2012 12:23 pm[
There is a point when there is too much red and it become overpowering.
I would mix it up with some nice shiny polished parts.
Don't worry about dying, worry about not living!
Garage Thread: http://www.mx5cartalk.com/forum/viewtopic.php?f=57&t=76716
- Lokiel
- Forum legend
- Posts: 4126
- Joined: Thu May 28, 2009 2:39 pm
- Vehicle: NB SE
- Location: Brisbania
Re: Lokiel's "Gina" (once a 2004 Titanium SE) Recreated AGAIN
Originally posted by Lokiel, Sun Sep 24, 2017 4:08 pm
Originally posted by Lokiel, Mon May 21, 2012 10:15 pm[
I did my first official track day today at Queensland Raceway and now have some some data on the effectiveness of the oil cooler.
Peak temperature was 102C, lower than what I expected (110C is what I would have guessed) so the oil cooler and ducting are working well.
I just wish that I'd thought of putting some tape over the foglight grille on one session to see the difference the oil cooler makes.
I now need to learn to trust the car's brakes and grip more (Wilwood brakes with Carbotech XP-10 pads and Toyo R1R 225/45/15s pull me up in about 1/3 of the distance I was allowing for I reckon), I brake WAYYY too early and learned a lot on the last session where I sat behind another driver in a N/A NB for the whole session. I just wished I'd done this earlier, it was very educational.
Originally posted by zero00, Mon May 21, 2012 10:22 pm[
Lokiel
Last run I tried to sit behind another who said 'follow my lines' !! I found the warm-up lap he was so far in front I had to drive my butt of trying to catch him!! First flying and still trying to get up behind him I was ragged as hell BUT managed to drop my lap time by OVER a full second!! Funny, when I came in he said 'now how's that?' I said I couldn't catch you to see the lines but managed to peel 1.1sec off!! It worked but in a different way!! It's fine so long as the car in front doesn't spin!!
Well done, you drove well and 'Gina' looked great!!
Originally posted by Lokiel, Mon May 21, 2012 11:14 pm[
Roger, the extra power of my modified turbo makes my times more impressive than they should be, I really make up time on the straights, it's the lines and braking I really need to work on so I was more than happy to follow Ross on my last session and learn from him.
Originally posted by MINX, Tue May 22, 2012 4:49 am[
Great to see Gina out on the track - well done
times and lines and stuff will come with practice - very diferant to driving on the road huh?
Hope you get the bug and come along again, and out to lakeside aswell.
Originally posted by Lokiel, Sat May 26, 2012 8:17 pm[
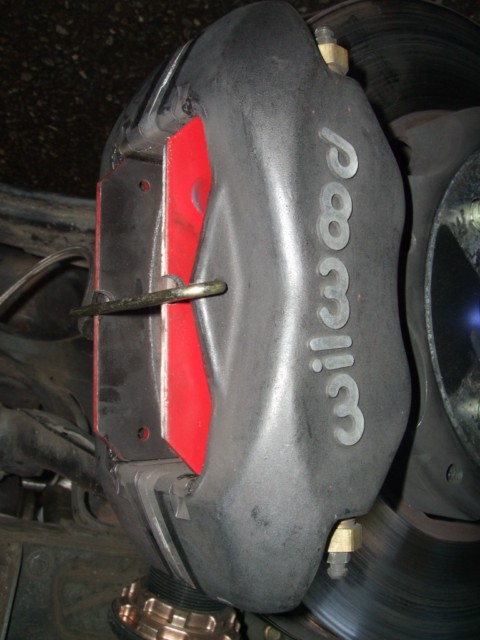
For the QLD MX5 Car Club Track day at Willowbank, I switched my Wilwood EBC RedStuff brake pads to Carbotech XP-10 pads.
Previously I'd bought the Goodwin Racing caliper pins since I knew that I'd be swapping the front pads for track days (the Wilwood brakes make changing pads a cinch, especially since I swap to dedicated track wheels anyway) and eventually the Wilwood cotter pins will snap from being bent back and forth too many times.
See http://www.good-win-racing.com/Mazda-Performance-Part/13-1051.html
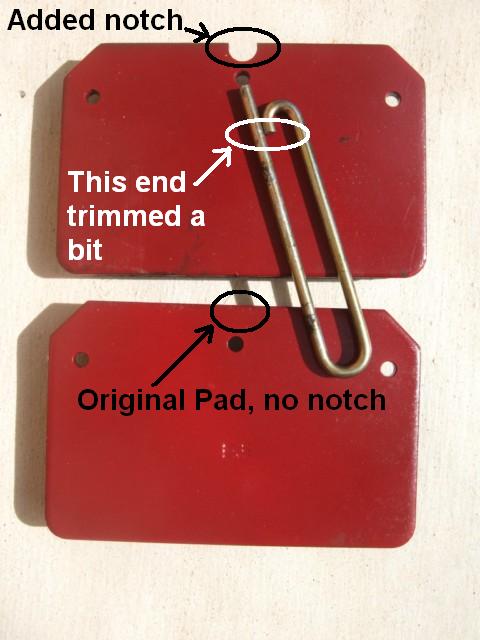
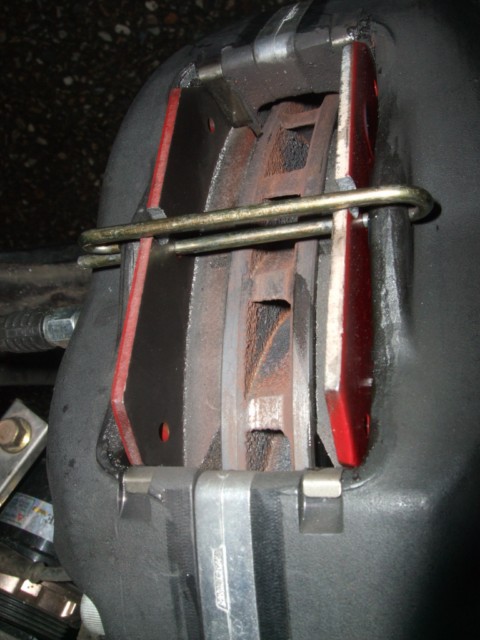
The Carbotech pads are taller than the EBC pads so the caliper pins did not sit flush, they were splayed more open than they should be. I decided to fix this problem by filing notches above the pin holes so that the pins can sit flush. The top pad below shows the notch above the pin hole (the caliper pin is pointing to it) and the bottom pad shows the original pad.
Note: When I first got the Goodwin Racing caliper pins, I needed to trim the curved end a fraction so that it would fit snugly over the inside caliper (see last photo below).
Here's what they look like installed, nice and flush:
Originally posted by charlie_91, Sun May 27, 2012 11:00 am[
What were your times? Good to see you getting use out of it
Originally posted by Lokiel, Sun May 27, 2012 12:41 pm[
I was pretty slow given the capabilities of the car, 1.11.8416 on the Clubman circuit (see http://www.natsoft.com.au/cgi-bin/results.cgi?21/05/2012.QR1.P1). This was the first time I'd done any club sprints and 2nd time I'd been on a racetrack - last year I drove on the National circuit at a charity day.
I need to learn to trust my brakes and grip more; after following closely behind a more experienced driver in a N/A car in the last session, I learned that I was braking WAYYY too early. It's a pity I didn't do this earlier since I learned a lot from that session - people had been telling me all day that I was braking too early but I didn't appreciate just how early I was breaking until I followed a more experienced driver.
MINX has more track experience than I do and his car has similar modz to mine so he gives me a target to aim for, 1.05.4063.
Given that my first lap was around 1.24.???, I improved 13 seconds which is an eternity. With later braking and using 5th on the two straights, I should be able to knock off at least 3 seconds even with my crap driving ability.
Looking forward to the next Track Day at Lakeside.
Originally posted by zero00, Sun May 27, 2012 1:22 pm[
Lokiel
You did fine for a first timer, some go out and hammer it, I find that hard to do regardless, so I'm never flat out!
Lakeside will be great, was there for a short while yesterday and drummed up some more for next meet, Alex with a nice gold NA from the Gold Coast and his mate Jason with an AE86, also hope Charlie can get the day off and come have some fun as well
Just keep chipping away at those times, get the corners right and it will fall into place
You will find Lakeside much more fun, a bigger challenge but totally satisfying
Originally posted by Lokiel, Mon May 21, 2012 10:15 pm[
I did my first official track day today at Queensland Raceway and now have some some data on the effectiveness of the oil cooler.
Peak temperature was 102C, lower than what I expected (110C is what I would have guessed) so the oil cooler and ducting are working well.
I just wish that I'd thought of putting some tape over the foglight grille on one session to see the difference the oil cooler makes.
I now need to learn to trust the car's brakes and grip more (Wilwood brakes with Carbotech XP-10 pads and Toyo R1R 225/45/15s pull me up in about 1/3 of the distance I was allowing for I reckon), I brake WAYYY too early and learned a lot on the last session where I sat behind another driver in a N/A NB for the whole session. I just wished I'd done this earlier, it was very educational.
Originally posted by zero00, Mon May 21, 2012 10:22 pm[
Lokiel
Last run I tried to sit behind another who said 'follow my lines' !! I found the warm-up lap he was so far in front I had to drive my butt of trying to catch him!! First flying and still trying to get up behind him I was ragged as hell BUT managed to drop my lap time by OVER a full second!! Funny, when I came in he said 'now how's that?' I said I couldn't catch you to see the lines but managed to peel 1.1sec off!! It worked but in a different way!! It's fine so long as the car in front doesn't spin!!
Well done, you drove well and 'Gina' looked great!!
Originally posted by Lokiel, Mon May 21, 2012 11:14 pm[
Roger, the extra power of my modified turbo makes my times more impressive than they should be, I really make up time on the straights, it's the lines and braking I really need to work on so I was more than happy to follow Ross on my last session and learn from him.
Originally posted by MINX, Tue May 22, 2012 4:49 am[
Great to see Gina out on the track - well done
times and lines and stuff will come with practice - very diferant to driving on the road huh?
Hope you get the bug and come along again, and out to lakeside aswell.
Originally posted by Lokiel, Sat May 26, 2012 8:17 pm[
For the QLD MX5 Car Club Track day at Willowbank, I switched my Wilwood EBC RedStuff brake pads to Carbotech XP-10 pads.
Previously I'd bought the Goodwin Racing caliper pins since I knew that I'd be swapping the front pads for track days (the Wilwood brakes make changing pads a cinch, especially since I swap to dedicated track wheels anyway) and eventually the Wilwood cotter pins will snap from being bent back and forth too many times.
See http://www.good-win-racing.com/Mazda-Performance-Part/13-1051.html
The Carbotech pads are taller than the EBC pads so the caliper pins did not sit flush, they were splayed more open than they should be. I decided to fix this problem by filing notches above the pin holes so that the pins can sit flush. The top pad below shows the notch above the pin hole (the caliper pin is pointing to it) and the bottom pad shows the original pad.
Note: When I first got the Goodwin Racing caliper pins, I needed to trim the curved end a fraction so that it would fit snugly over the inside caliper (see last photo below).
Here's what they look like installed, nice and flush:
Originally posted by charlie_91, Sun May 27, 2012 11:00 am[
What were your times? Good to see you getting use out of it
Originally posted by Lokiel, Sun May 27, 2012 12:41 pm[
I was pretty slow given the capabilities of the car, 1.11.8416 on the Clubman circuit (see http://www.natsoft.com.au/cgi-bin/results.cgi?21/05/2012.QR1.P1). This was the first time I'd done any club sprints and 2nd time I'd been on a racetrack - last year I drove on the National circuit at a charity day.
I need to learn to trust my brakes and grip more; after following closely behind a more experienced driver in a N/A car in the last session, I learned that I was braking WAYYY too early. It's a pity I didn't do this earlier since I learned a lot from that session - people had been telling me all day that I was braking too early but I didn't appreciate just how early I was breaking until I followed a more experienced driver.
MINX has more track experience than I do and his car has similar modz to mine so he gives me a target to aim for, 1.05.4063.
Given that my first lap was around 1.24.???, I improved 13 seconds which is an eternity. With later braking and using 5th on the two straights, I should be able to knock off at least 3 seconds even with my crap driving ability.
Looking forward to the next Track Day at Lakeside.
Originally posted by zero00, Sun May 27, 2012 1:22 pm[
Lokiel
You did fine for a first timer, some go out and hammer it, I find that hard to do regardless, so I'm never flat out!
Lakeside will be great, was there for a short while yesterday and drummed up some more for next meet, Alex with a nice gold NA from the Gold Coast and his mate Jason with an AE86, also hope Charlie can get the day off and come have some fun as well
Just keep chipping away at those times, get the corners right and it will fall into place
You will find Lakeside much more fun, a bigger challenge but totally satisfying
Don't worry about dying, worry about not living!
Garage Thread: http://www.mx5cartalk.com/forum/viewtopic.php?f=57&t=76716
- Lokiel
- Forum legend
- Posts: 4126
- Joined: Thu May 28, 2009 2:39 pm
- Vehicle: NB SE
- Location: Brisbania
Re: Lokiel's "Gina" (once a 2004 Titanium SE) Recreated AGAIN
Originally posted by Lokiel, Sun Sep 24, 2017 4:09 pm
Originally posted by Lokiel, Sat Jun 09, 2012 3:51 pm[
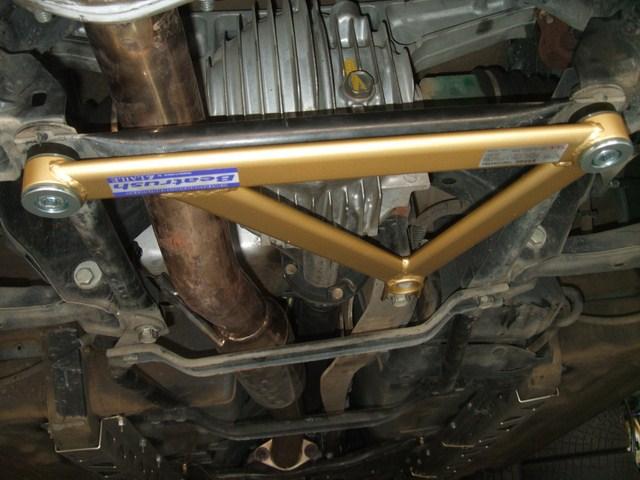
I installed a Beatrush PPF Brace today. I'd been wanting to install one for a while because it stops "wheel hop" under hard acceleration from standstill but was hesitant since my car is low and I worried this brace would scrape everywhere. After MINX installed his and cleared the speed bump at my my place with no issues I decided to get it.
My cordless Ryobi impact wrench made the job a cinch - given how much dirt/rust that came out when undoing the bolts, undoing them by hand would have been tough.
Screwing in the two supplied rear Allen bolts was a bit tough since it felt like I was stripping the threads - I suspect this is why the Beatrush kit supplies 4 of these Allen bolts when you only need 2. The OEM bolts are shorter and have narrower tips to assist in alignment whereas the supplied Allen bolts are longer and the same width; this is probably why it felt I was stripping the threads since the tip was constantly pulling the bolt into alignment.
The GOOD:
Definitely stops "wheel-hop". I have a right turn at a stop light that leads onto a 70kph zone. From standstill, if I really "gun it", I could feel the rear wheels bouncing off the road in the turn. With the PPF brace in place, this didn't occur at all, just 100% power to the wheels which really caught me by surprise, I was at 70kph before I expected it.
The BAD:
In the photo above you can see that the left-side diagonal brace crosses the diff - my usual jacking point. I normally use a block of hardwood on top of the jack but this is no longer possible if I lay it flat. It's a pity they didn't move the left diagonal brace to the left-most bolt-point but I suspect it was made like this since it forms an equilateral triangle which provides the strongest bracing. If I lay the block of hardwood on its side on top of the jack with its long side against the inner side of the left diagonal brace, I can still use the diff as a jacking point but the contact area is reduced by about 1/3
Originally posted by Nemo, Sat Jun 09, 2012 4:28 pm[
Is there any point of keeping the stock bracing across the rear sub frame on top of the PPF brace (or are they one piece with the bracing going forward on NB's)? Could probably gain that little bit of extra clearance if you were really worried by taking it off.
Originally posted by Regie, Sat Jun 09, 2012 4:46 pm[
The rear brace is all one unit on the nb's
Originally posted by Nemo, Sat Jun 09, 2012 4:47 pm[
Ahh right, makes sense then.
Originally posted by Lokiel, Sat Jun 09, 2012 7:51 pm[
It's not quite an "all one unit" brace, the rear OEM bar appears to be held to the others only by two tack-welds on either side of the bar (you can see a tack weld clearly in the top left corner) and I thought about busting out the Dremel to detach it.
Since the kit included plinth spacers (the black things between the OEM brace and the Beatrush brace) to clear the OEM brace, I figured I wouldn't risk it.
Also, the instructions are all in Japanese so it was installed based on the diagram only. If the Japanese instructions stated that the rear brace could easily be removed by cutting those tack welds I might have done it but I don't read Japanese so will never know.
I suspect that if that rear brace was removed, the control arms would've splayed outwards (unless I had the rear wheels sitting on ramps instead of having the car on stands) and been almost impossible to squeeze back into alignment.
Originally posted by bruce, Sun Jun 10, 2012 12:57 pm[
An instant 20 degrees positive camber!
Originally posted by Lokiel, Sat Jun 09, 2012 3:51 pm[
I installed a Beatrush PPF Brace today. I'd been wanting to install one for a while because it stops "wheel hop" under hard acceleration from standstill but was hesitant since my car is low and I worried this brace would scrape everywhere. After MINX installed his and cleared the speed bump at my my place with no issues I decided to get it.
My cordless Ryobi impact wrench made the job a cinch - given how much dirt/rust that came out when undoing the bolts, undoing them by hand would have been tough.
Screwing in the two supplied rear Allen bolts was a bit tough since it felt like I was stripping the threads - I suspect this is why the Beatrush kit supplies 4 of these Allen bolts when you only need 2. The OEM bolts are shorter and have narrower tips to assist in alignment whereas the supplied Allen bolts are longer and the same width; this is probably why it felt I was stripping the threads since the tip was constantly pulling the bolt into alignment.
The GOOD:
Definitely stops "wheel-hop". I have a right turn at a stop light that leads onto a 70kph zone. From standstill, if I really "gun it", I could feel the rear wheels bouncing off the road in the turn. With the PPF brace in place, this didn't occur at all, just 100% power to the wheels which really caught me by surprise, I was at 70kph before I expected it.
The BAD:
In the photo above you can see that the left-side diagonal brace crosses the diff - my usual jacking point. I normally use a block of hardwood on top of the jack but this is no longer possible if I lay it flat. It's a pity they didn't move the left diagonal brace to the left-most bolt-point but I suspect it was made like this since it forms an equilateral triangle which provides the strongest bracing. If I lay the block of hardwood on its side on top of the jack with its long side against the inner side of the left diagonal brace, I can still use the diff as a jacking point but the contact area is reduced by about 1/3
Originally posted by Nemo, Sat Jun 09, 2012 4:28 pm[
Is there any point of keeping the stock bracing across the rear sub frame on top of the PPF brace (or are they one piece with the bracing going forward on NB's)? Could probably gain that little bit of extra clearance if you were really worried by taking it off.
Originally posted by Regie, Sat Jun 09, 2012 4:46 pm[
Nemo wrote:Is there any point of keeping the stock bracing across the rear sub frame on top of the PPF brace (or are they one piece with the bracing going forward on NB's)? Could probably gain that little bit of extra clearance if you were really worried by taking it off.
The rear brace is all one unit on the nb's
Originally posted by Nemo, Sat Jun 09, 2012 4:47 pm[
Regie wrote:Nemo wrote:Is there any point of keeping the stock bracing across the rear sub frame on top of the PPF brace (or are they one piece with the bracing going forward on NB's)? Could probably gain that little bit of extra clearance if you were really worried by taking it off.
The rear brace is all one unit on the nb's
Ahh right, makes sense then.
Originally posted by Lokiel, Sat Jun 09, 2012 7:51 pm[
It's not quite an "all one unit" brace, the rear OEM bar appears to be held to the others only by two tack-welds on either side of the bar (you can see a tack weld clearly in the top left corner) and I thought about busting out the Dremel to detach it.
Since the kit included plinth spacers (the black things between the OEM brace and the Beatrush brace) to clear the OEM brace, I figured I wouldn't risk it.
Also, the instructions are all in Japanese so it was installed based on the diagram only. If the Japanese instructions stated that the rear brace could easily be removed by cutting those tack welds I might have done it but I don't read Japanese so will never know.
I suspect that if that rear brace was removed, the control arms would've splayed outwards (unless I had the rear wheels sitting on ramps instead of having the car on stands) and been almost impossible to squeeze back into alignment.
Originally posted by bruce, Sun Jun 10, 2012 12:57 pm[
Lokiel wrote:I suspect that if that rear brace was removed, the control arms would've splayed outwards
An instant 20 degrees positive camber!
Don't worry about dying, worry about not living!
Garage Thread: http://www.mx5cartalk.com/forum/viewtopic.php?f=57&t=76716
- Lokiel
- Forum legend
- Posts: 4126
- Joined: Thu May 28, 2009 2:39 pm
- Vehicle: NB SE
- Location: Brisbania
Re: Lokiel's "Gina" (once a 2004 Titanium SE) Recreated AGAIN
Originally posted by Lokiel, Sun Sep 24, 2017 4:10 pm
Originally posted by Lokiel, Sun Jul 01, 2012 7:58 pm[
This weekend I finally got my spare steering wheel re-trimmed.
Here's the silver-insert one I've had for a while now - it doesn't match the German-Grey door inserts or my grey seats at all and always bugged me:
I wanted something that matched better so bought a spare steering wheel from MX5 Plus (didn't want to destroy this one, it's too good) and ordered a perforated-medium-grey-inserts steering wheel cover from http://www.redlinegoods.com/Miataleatherwheelcover.php. Unfortunately the medium-grey looked as light in colour as my existing steering wheel so I subsequently ordered a perforated-charcoal-insert steering wheel cover.
This was several months ago, I just didn't have the time to do it. Last weekend I finally had time but after about 15 minutes I realised that sewing just "wasn't my thing"and would look like crap - it needed a professional! Trying to find an auto-trimmer willing to re-trim a steering wheel was one of the hardest tasks I've encountered so far, nobody wanted to do it since it's a time-consuming and fiddly task. I finally got a recommendation from an auto-trimmer and it was completed today. Apparently it was a BIATCH of a job since it was quite tight in places and needed a lot of heat-stretching and cooling - he said that there was no way I could have done it and I believe him.
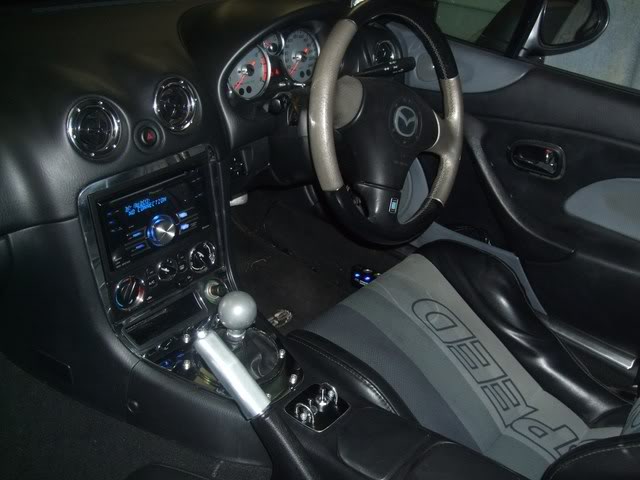
Here's the finished product:
For some reason, all my photos show the steering wheel much lighter than it is in real life.
I'm very happy with it, looks much better than the silver steering wheel and is quite close to the German-Grey door inserts. Now I'm tempted to retrim the door inserts in the same charcoal perforated leather.
For anyone contemplating re-trimming their steering wheel, I'd recommend getting it made locally and fitted by the same person, it will work out cheaper than what I've paid in total.
This weather this weekend here in SE QLD had been magnificent so was a great opportunity for a few photos while testing out the new steering wheel. Here's one I quite like (one nice thing about Ti-Grey is that you can't see the dirt from this distance):
The attachment on the windscreen to the left of the rear-view mirror is a for my new Contour GPS camera - I'll post my thoughts on this later.
Originally posted by PaulF, Mon Jul 02, 2012 12:52 am[
Interested to hear your thoughts on the Contour. I've been thinking for a while about getting either a Contour or a GoPro.
Originally posted by bootz, Mon Jul 02, 2012 1:00 am[
Looks good, ya gotta be pleased.
Originally posted by Lokiel, Mon Jul 02, 2012 2:33 pm[
I started this thread, http://mx5cartalk.com/forum/viewtopic.php?f=19&t=53529, for this since it really needs a dedicated thread - the more input the better.
Originally posted by Tony, Wed Jul 04, 2012 8:53 pm[
It's Tony here; can you please explain the "german-grey" door inserts thing to me? Is that something you've done (I haven't read your entire thread... sorry), or is it some variation in the factory upholstery?
The reason I ask is that my Titanium SE has grey seats and door inserts and I figured they had been retrimmed at some point prior to my ownership.
Many thanks...
Originally posted by Lokiel, Wed Jul 04, 2012 10:51 pm[
I re-coloured my door trim, as detailed in this thread: http://mx5cartalk.com/forum/viewtopic.php?f=28&t=41119&p=532798&hilit=door+trim+german+grey#p532798
While I've never seen grey seats, I assume a previous owner had yours custom-trimmed, you can purchase a silver-trimmed steering wheel like I have (http://www.mx5parts.co.uk have them from time to time) and matching door inserts (I have a set of these too, bought from MX5 Plus - they were available in Japan).
Originally posted by Tony, Thu Jul 05, 2012 7:55 am[
Thanks again...
Originally posted by Lokiel, Sun Jul 01, 2012 7:58 pm[
This weekend I finally got my spare steering wheel re-trimmed.
Here's the silver-insert one I've had for a while now - it doesn't match the German-Grey door inserts or my grey seats at all and always bugged me:
I wanted something that matched better so bought a spare steering wheel from MX5 Plus (didn't want to destroy this one, it's too good) and ordered a perforated-medium-grey-inserts steering wheel cover from http://www.redlinegoods.com/Miataleatherwheelcover.php. Unfortunately the medium-grey looked as light in colour as my existing steering wheel so I subsequently ordered a perforated-charcoal-insert steering wheel cover.
This was several months ago, I just didn't have the time to do it. Last weekend I finally had time but after about 15 minutes I realised that sewing just "wasn't my thing"and would look like crap - it needed a professional! Trying to find an auto-trimmer willing to re-trim a steering wheel was one of the hardest tasks I've encountered so far, nobody wanted to do it since it's a time-consuming and fiddly task. I finally got a recommendation from an auto-trimmer and it was completed today. Apparently it was a BIATCH of a job since it was quite tight in places and needed a lot of heat-stretching and cooling - he said that there was no way I could have done it and I believe him.
Here's the finished product:
For some reason, all my photos show the steering wheel much lighter than it is in real life.
I'm very happy with it, looks much better than the silver steering wheel and is quite close to the German-Grey door inserts. Now I'm tempted to retrim the door inserts in the same charcoal perforated leather.
For anyone contemplating re-trimming their steering wheel, I'd recommend getting it made locally and fitted by the same person, it will work out cheaper than what I've paid in total.
This weather this weekend here in SE QLD had been magnificent so was a great opportunity for a few photos while testing out the new steering wheel. Here's one I quite like (one nice thing about Ti-Grey is that you can't see the dirt from this distance):
The attachment on the windscreen to the left of the rear-view mirror is a for my new Contour GPS camera - I'll post my thoughts on this later.
Originally posted by PaulF, Mon Jul 02, 2012 12:52 am[
Interested to hear your thoughts on the Contour. I've been thinking for a while about getting either a Contour or a GoPro.
Originally posted by bootz, Mon Jul 02, 2012 1:00 am[
Looks good, ya gotta be pleased.
Originally posted by Lokiel, Mon Jul 02, 2012 2:33 pm[
PaulF wrote:Interested to hear your thoughts on the Contour. I've been thinking for a while about getting either a Contour or a GoPro.
I started this thread, http://mx5cartalk.com/forum/viewtopic.php?f=19&t=53529, for this since it really needs a dedicated thread - the more input the better.
Originally posted by Tony, Wed Jul 04, 2012 8:53 pm[
It's Tony here; can you please explain the "german-grey" door inserts thing to me? Is that something you've done (I haven't read your entire thread... sorry), or is it some variation in the factory upholstery?
The reason I ask is that my Titanium SE has grey seats and door inserts and I figured they had been retrimmed at some point prior to my ownership.
Many thanks...
Originally posted by Lokiel, Wed Jul 04, 2012 10:51 pm[
I re-coloured my door trim, as detailed in this thread: http://mx5cartalk.com/forum/viewtopic.php?f=28&t=41119&p=532798&hilit=door+trim+german+grey#p532798
While I've never seen grey seats, I assume a previous owner had yours custom-trimmed, you can purchase a silver-trimmed steering wheel like I have (http://www.mx5parts.co.uk have them from time to time) and matching door inserts (I have a set of these too, bought from MX5 Plus - they were available in Japan).
Originally posted by Tony, Thu Jul 05, 2012 7:55 am[
Thanks again...
Don't worry about dying, worry about not living!
Garage Thread: http://www.mx5cartalk.com/forum/viewtopic.php?f=57&t=76716
- Lokiel
- Forum legend
- Posts: 4126
- Joined: Thu May 28, 2009 2:39 pm
- Vehicle: NB SE
- Location: Brisbania
Re: Lokiel's "Gina" (once a 2004 Titanium SE) Recreated AGAIN
Originally posted by Lokiel, Sun Sep 24, 2017 4:10 pm
Originally posted by Lokiel, Sun Jul 29, 2012 5:13 pm[
I'd previously installed the Miataroadster stock-height Short Shifter Kit (see http://www.miataroadster.com/miataroadster/miataroadster_short_shifter_kits/mrssk6nb2s/i-414422.aspx) since my OEM shifter was crap, it was too easy to get into reverse when 6th was intended and finding reverse when I wanted was always a 1 in 3 chance of actually getting it. The new SSK was much better than the OEM shifter, gear changes were more reliable but reverse occasionally was hard to find (about 1 in 20 times I couldn't get it, but at least based on feel I always knew I hadn't "found it", unlike the OEM shifter where I never knew if it was engaged or not until I hit the accelerator).
I chose the stock-height SSK over the tall-angled shifter (see http://www.miataroadster.com/miataroadster/miataroadster_short_shifter_kits/mrssk6nb2t/i-412196.aspx) since the tall-angled one just looked "silly" - Bill from miataroadster tried to convince me to purchase the tall-angled version instead since it was better for trackwork and had a smoother action.
After hearing the favourable opinions of others who'd switched from the stock-height SSK to the tall-angled version, I decided to try it for the QLD MX5 club's July track day at Lakeside. Unfortunately I'd wrenched my elbow so badly that I couldn't even grip a steering wheel for over a week leading up to the event and had to "nurse it" in order not aggravate it so couldn't install the new SSK
Here's the two miataroadster SSK versions (not my photo - and I think they're from different MX5 models since the "tail" is the same length on my two miataroadster SSKs):
This weekend I finally got around to installing it. A few weeks ago I saw MINX's (aka Stuart) black powder-coated version which I though made it look "less silly" so I painted my chromed SSK black using plasti-dip and ordered a piano-black Voodoo knob and matching handbrake to replace my chrome ones.
Here's what they look like installed:
The long-angled SSK and Voodoo knob in black instead of chrome don't stand out as much IMO and doesn't look anywhere near as ridiculous.
As for driving, here's my thoughts on the differences:
* it doesn't take too many shifts to quickly adapt to the new location of the gear knob
* the stock-height SSK felt more like a rifle-bolt action, you can really feel it slotting into well-defined gates and must do so more deliberately than with the long-angled SSK (it's still nicer than my OEM shifter)
* the tall-angled SSK has a much smoother action, it's almost effortless
* finding reverse is much easier with the long-angled SSK
* the tall-angled SSK is not as comfortable to just leave your hand on the gearknob so you end up returning your hand to the wheel quickly (which is a good thing).
Originally posted by bruce, Sun Jul 29, 2012 5:53 pm[
It looks like you've fitted a Ford 4 speed box!
Originally posted by Lokiel, Sun Aug 19, 2012 6:24 pm[
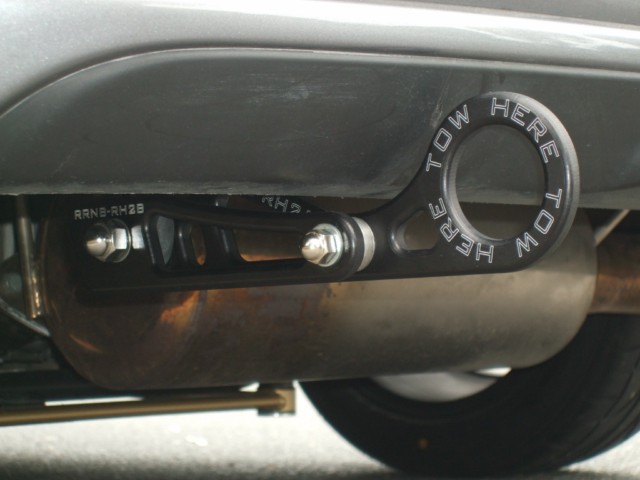
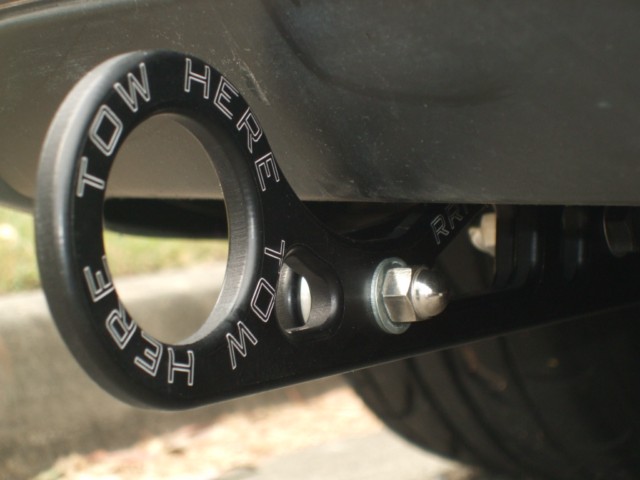
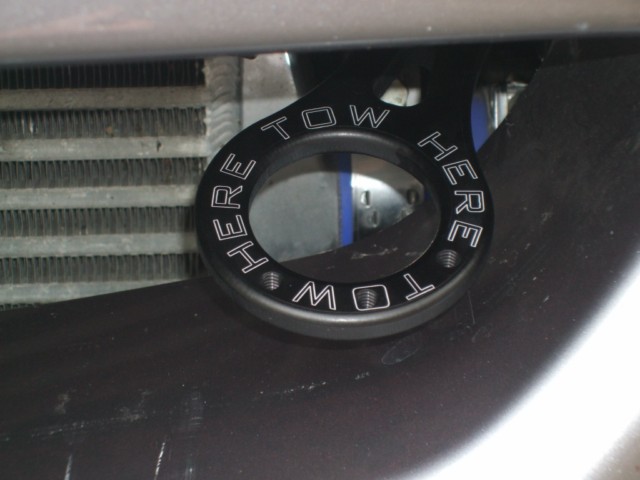
I originally had an un-etched set of Ryokurob tow hooks in black, figuring "stealthy" would look better, but after seeing the etched versions in person I decided they looked better. These tow hooks tend to get produced on an annual basis if there are enough orders so I ordered a black etched set when they were announced earlier this year and they arrived during the week (see http://clubroadster.net/vb_forum/showthread.php?t=61995):
I'm still not sure what the 3 tapped holes in the front tow hook are for.
Originally posted by Lokiel, Sun Sep 16, 2012 8:07 pm[
Been busy the last few weeks with the following modz.
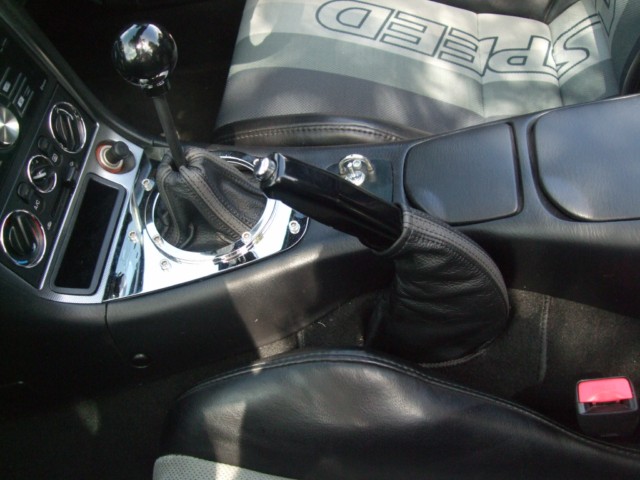
After getting my steering wheel re-trimmed in charcoal grey leather from http://www.redlinegoods.com/Miataleatherwheelcover.php, I decided to match the gearshift gaiter and handbrake with it.
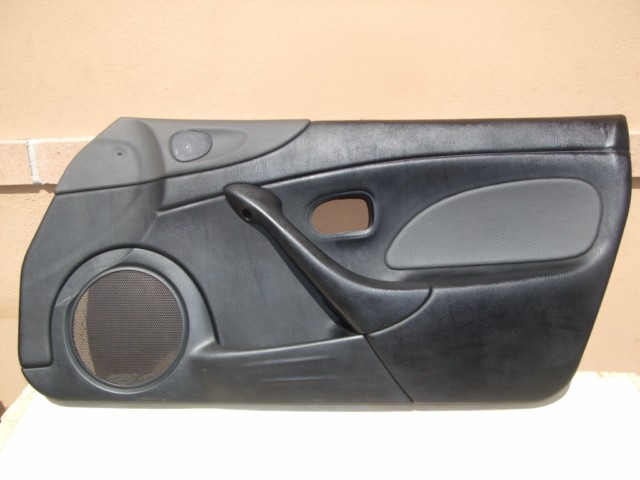
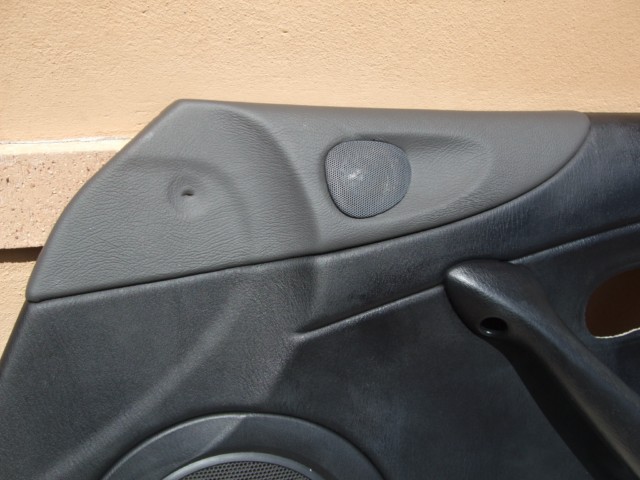
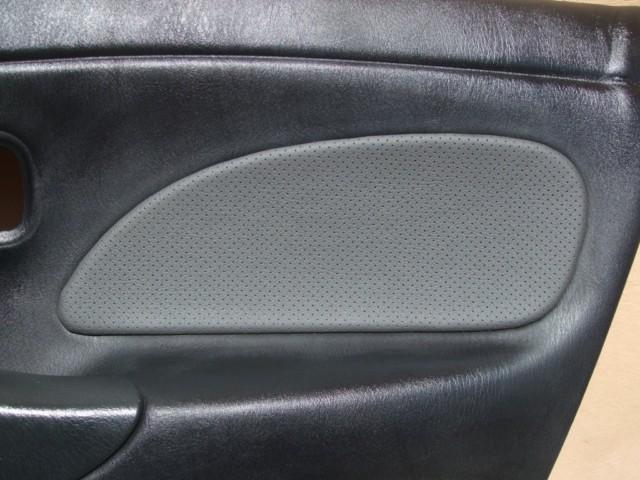
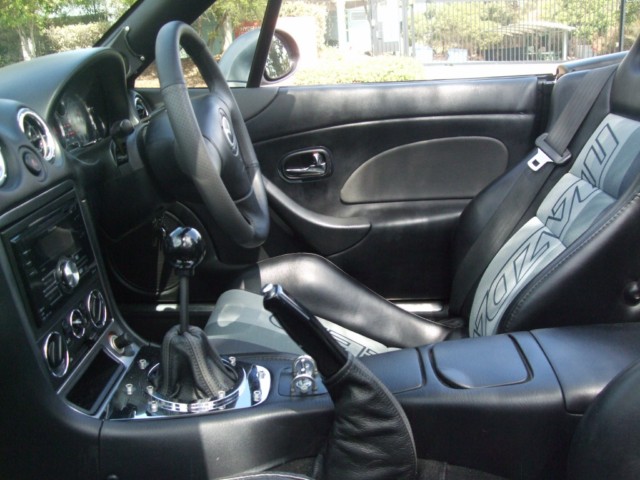
The German-Grey painted door inserts didn't match as well as I wanted so I ordered some matching charcoal leather and trimmed the tweeter housing and door insert with it (I cheated here and used a professional motor trimmer - glad I did, definitely worth getting the professionals for this). I never liked how I continually scuffed the lower speaker door trim with my foot when I got out in tight parking spaces, it scraped through to the black plastic so looked like crap. I replaced my painted main speaker trims with the OEM black ones.
Charcoal leather trimmed door:
Tweeter closeup (Charcoal Leather, unperforated):
Door insert closeup (Charcoal Leather, perforated):
Gaiter and handbrake closeup:
Charcoal leather interior, matched at last:
Yes it cost more than I wanted, but it was just one of those things that really bugged me.
Don't worry about dying, worry about not living!
Garage Thread: http://www.mx5cartalk.com/forum/viewtopic.php?f=57&t=76716
- Lokiel
- Forum legend
- Posts: 4126
- Joined: Thu May 28, 2009 2:39 pm
- Vehicle: NB SE
- Location: Brisbania
Re: Lokiel's "Gina" (once a 2004 Titanium SE) Recreated AGAIN
Originally posted by Lokiel, Sun Sep 24, 2017 4:11 pm
Originally posted by Lokiel, Sun Sep 16, 2012 8:49 pm[
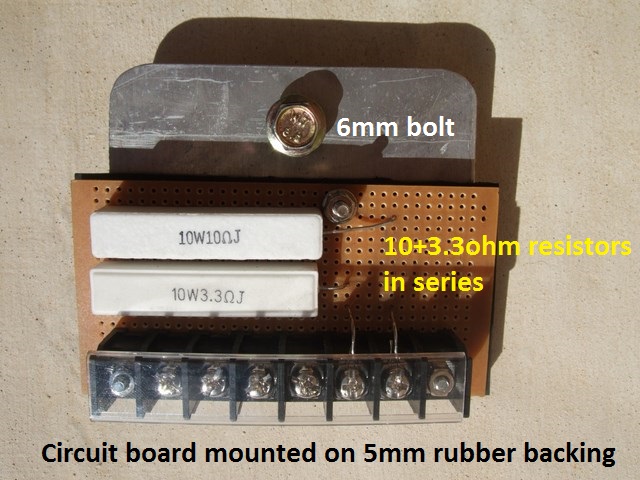
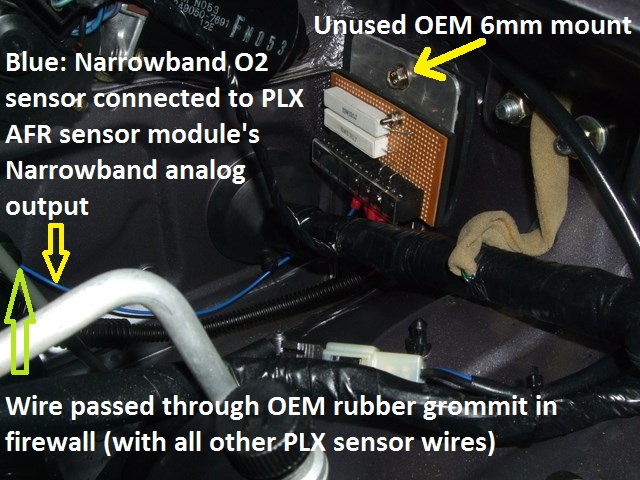
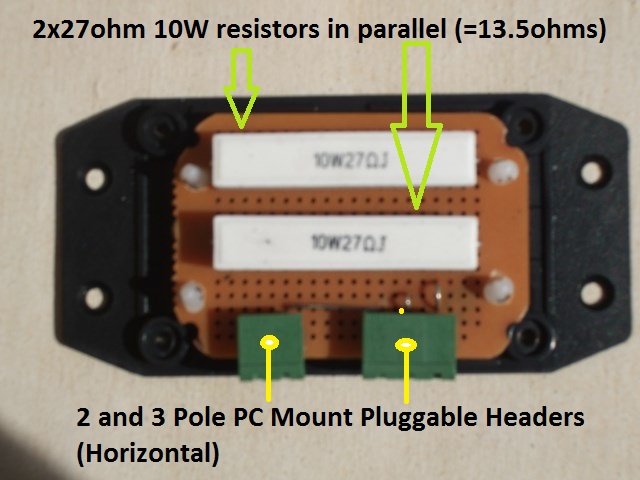
After reading plohl's Garage Thread, I was inspired to re-do my PLX gauge wiring since it was a bit of a "dog's breakfast", the 5x3 molex connector I was using to provide power to the gauge sensor modules and display module wasn't too tidy, I could do better.
I also needed a means of powering my MK802 (see http://www.engadget.com/2012/06/07/mk802-android-4-0-mini-pc-hands-on-impressions/), a mini-PC that I'm using to log my PLX sensor data and, when I get time, to log my Adaptronic ECU data. I've written the code to log the PLX sensor data and hope to use it tomorrow at the QLD Raceway Track day so that I can add the sensor data to my track videos using DashWare (awesome software, I highly recommend it, worth every penny if you want to add gauge/GPS inputs to your track video).
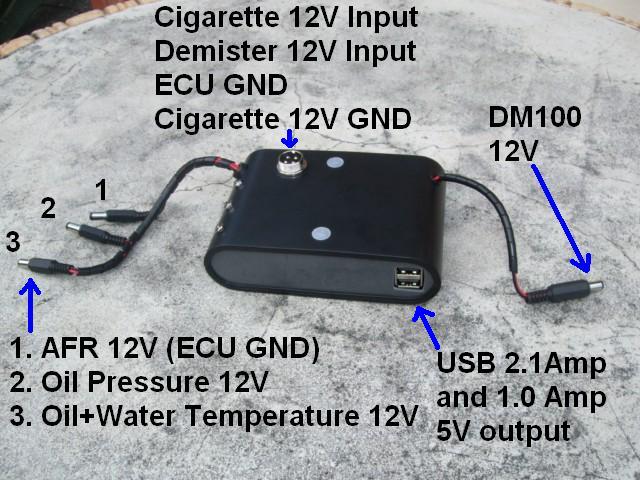
Here's the final product, I'm quite happy with how it turned out:
The AFR sensor module requires 12V input and the Adaptronic ECU's GND. Originally I was using the Demister's 12V input since that's only "live" while the engine is running. Unfortunately the PLX DM-100 display module has issues with this (possibly the after-market car alarm is causing problems too) and the AFR occasionally goes "AWOL" when I start the car, requiring me to "dick-around" with the alarm and turn the engine on and off a few times, so I decided to switch it to the Cigarette lighter's 12V input.
The Display module, oil pressure and oil+water temperature modules are all connected to the cigarette lighter's 12V and GND inputs.
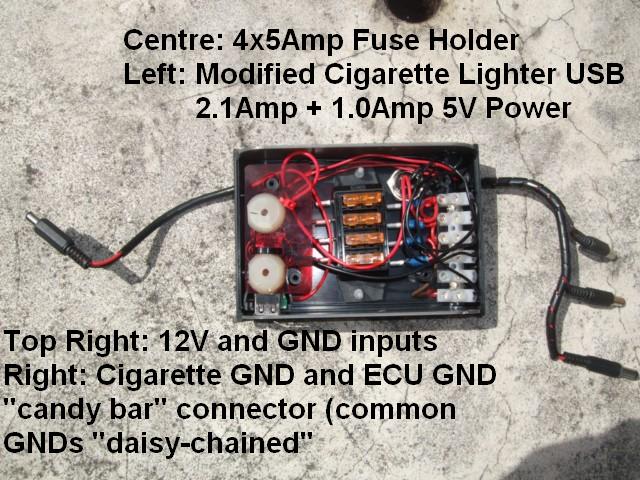
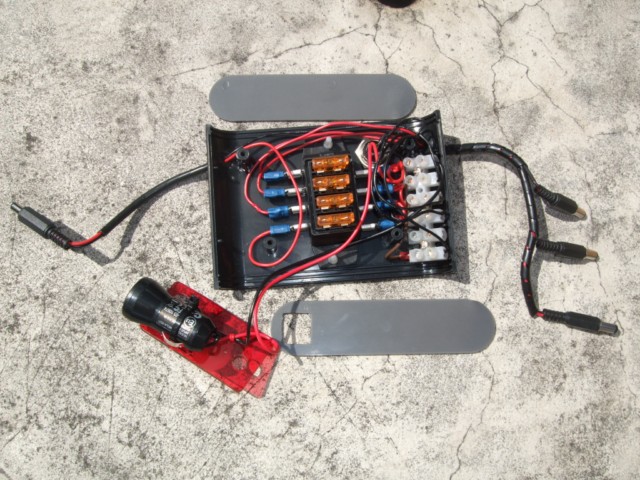
All sensor modules and the display module require 5Amp fuses which were originally tucked away behind the glovebox, even more messy wiring, now they're enclosed tidily within the case.
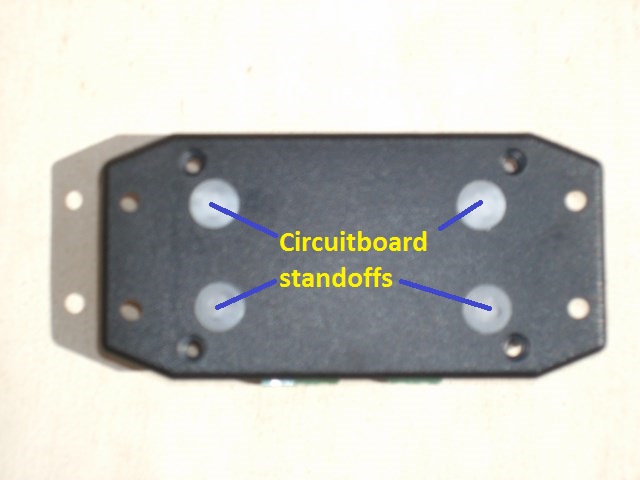
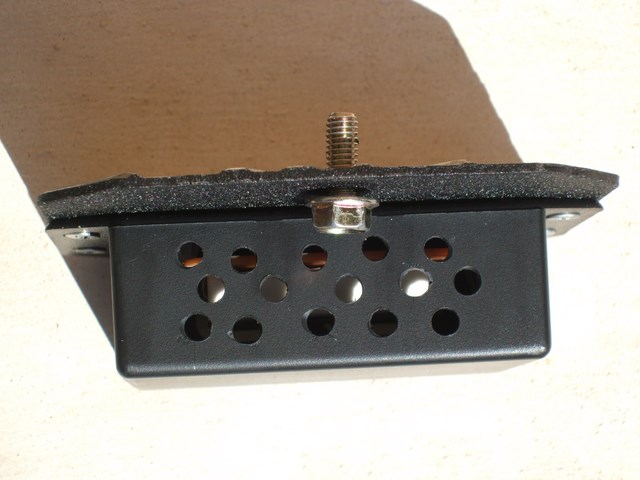
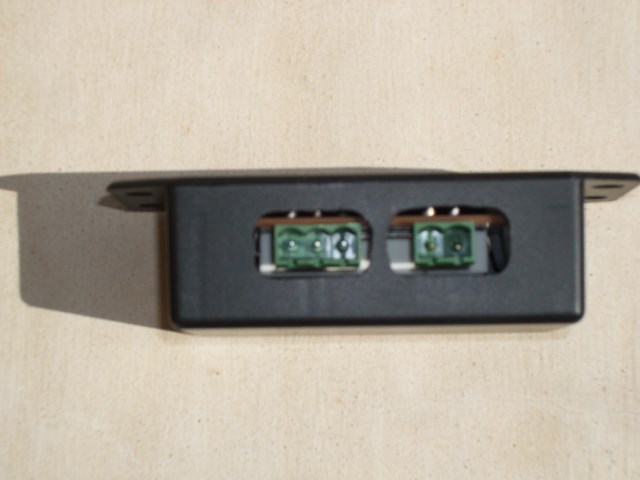
My MK802 mini-PC is powered via USB and requires 2.0 Amps. I found a dual USB cigarette lighter adapter at Jaycar that provides 2.1Amp and 1.0Amp connections. I removed the bottom half of its casing, made a surface mount that fits inside the case, zip-tied the USB adapter to it and wired it up to the cigarette lighter's 12V and GND. Here's what it looks like inside the case:
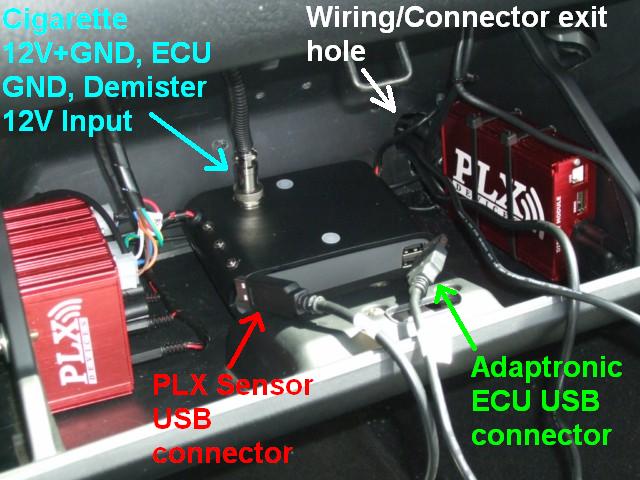
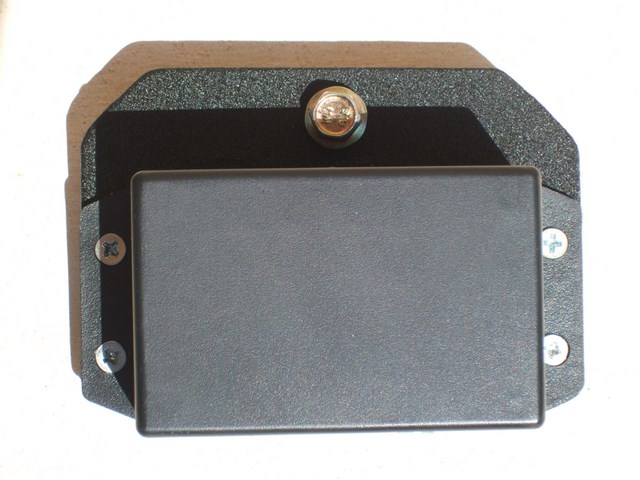
I also cut an entry-hole in the rear of my glovebox to route the Adaptronic ECU's USB I/O cable and PLX USB I/O cable through. Here's the installed product, mounted using velcro:
As you can see, there are still a lot of PLX wires/cables required, but it's a LOT tidier now.
Originally posted by gslender, Sun Sep 16, 2012 10:21 pm[
Looks nice. Will be keen to take a closer look tomorrow... See you at the track!
G
Originally posted by Steveo, Wed Sep 19, 2012 9:08 pm[
Hi, Loving this build, been following it for quite a while now. just wondering how you set up your duty cycles and target MAP values in the wastegate screen of the WARI software? I keep on hitting my boost cut of 14psi way too easily with my setup, how do u set yours up?
Originally posted by Lokiel, Wed Sep 19, 2012 10:54 pm[
^
PM sent.
Originally posted by Lokiel, Tue Sep 25, 2012 8:55 pm[
PLASTI-DIP FAIL!!!
To "tone-down" my chrome long-angled miataroadster SSK (I thought it looked silly since it was so long and angled), I used black plasti-dip and replaced the gearknob with a piano-black Voodoo knob:
Unfortunately the top of the boot rubbed against the SSK shaft and began to scrape through the plasti-dip, causing it to flake.
LESSON LEARNED: Don't use plasti-dip on anything that is prone to rubbing.
After doing a bit of electrical work recently on the car, I realised that there was a MUCH better and cheaper solution - electrical heatshrink! I've got heaps of this stuff and the job only took 10 minutes. Like plasti-dip, if I don't like it I can easily undo it by simply cutting/tearing it off.
Originally posted by monty007, Thu Jan 17, 2013 5:23 pm[
Enjoyed following your journey...as it's been a while what's next ?
Originally posted by Lokiel, Thu Jan 17, 2013 5:25 pm[
Don't worry, something is "in the works" (taking longer than I expected unfortunately).
Originally posted by Lokiel, Sun Jan 20, 2013 8:20 pm[
Removed my A-Pillar PLX DM-6 multi-gauge which was a LOT of work due to my anal work in wiring it up securely with lots of spiral wrap in the first place
Yesterday afternoon I got pulled over for a breathalyzer test. "Mr. Plod" said "nice car" but that I must get rid of the A-Pillar gauge because it's a potential defect item.
I thought mine was mounted low enough since it does not block my road vision at all but the fact that he mentioned it made me not want to tempt fate any further.
I can still see the information on my PLX DM-100 gauge, just not as easily, so it's not a tragedy.
This goes to prove that not all cops are bad - if he wanted to, I could have had a lot more to worry about.
Also re-checked the 949 SuperMiata endlinks I installed last weekend - thank god for Gatorade in this heat/humidity.
Originally posted by james_p93, Sun Jan 20, 2013 8:54 pm[
lookin great! cant wait to see Gina again mate
James
Originally posted by Lokiel, Sun Sep 16, 2012 8:49 pm[
After reading plohl's Garage Thread, I was inspired to re-do my PLX gauge wiring since it was a bit of a "dog's breakfast", the 5x3 molex connector I was using to provide power to the gauge sensor modules and display module wasn't too tidy, I could do better.
I also needed a means of powering my MK802 (see http://www.engadget.com/2012/06/07/mk802-android-4-0-mini-pc-hands-on-impressions/), a mini-PC that I'm using to log my PLX sensor data and, when I get time, to log my Adaptronic ECU data. I've written the code to log the PLX sensor data and hope to use it tomorrow at the QLD Raceway Track day so that I can add the sensor data to my track videos using DashWare (awesome software, I highly recommend it, worth every penny if you want to add gauge/GPS inputs to your track video).
Here's the final product, I'm quite happy with how it turned out:
The AFR sensor module requires 12V input and the Adaptronic ECU's GND. Originally I was using the Demister's 12V input since that's only "live" while the engine is running. Unfortunately the PLX DM-100 display module has issues with this (possibly the after-market car alarm is causing problems too) and the AFR occasionally goes "AWOL" when I start the car, requiring me to "dick-around" with the alarm and turn the engine on and off a few times, so I decided to switch it to the Cigarette lighter's 12V input.
The Display module, oil pressure and oil+water temperature modules are all connected to the cigarette lighter's 12V and GND inputs.
All sensor modules and the display module require 5Amp fuses which were originally tucked away behind the glovebox, even more messy wiring, now they're enclosed tidily within the case.
My MK802 mini-PC is powered via USB and requires 2.0 Amps. I found a dual USB cigarette lighter adapter at Jaycar that provides 2.1Amp and 1.0Amp connections. I removed the bottom half of its casing, made a surface mount that fits inside the case, zip-tied the USB adapter to it and wired it up to the cigarette lighter's 12V and GND. Here's what it looks like inside the case:
I also cut an entry-hole in the rear of my glovebox to route the Adaptronic ECU's USB I/O cable and PLX USB I/O cable through. Here's the installed product, mounted using velcro:
As you can see, there are still a lot of PLX wires/cables required, but it's a LOT tidier now.
Originally posted by gslender, Sun Sep 16, 2012 10:21 pm[
Looks nice. Will be keen to take a closer look tomorrow... See you at the track!
G
Originally posted by Steveo, Wed Sep 19, 2012 9:08 pm[
Hi, Loving this build, been following it for quite a while now. just wondering how you set up your duty cycles and target MAP values in the wastegate screen of the WARI software? I keep on hitting my boost cut of 14psi way too easily with my setup, how do u set yours up?
Originally posted by Lokiel, Wed Sep 19, 2012 10:54 pm[
^
PM sent.
Originally posted by Lokiel, Tue Sep 25, 2012 8:55 pm[
PLASTI-DIP FAIL!!!
To "tone-down" my chrome long-angled miataroadster SSK (I thought it looked silly since it was so long and angled), I used black plasti-dip and replaced the gearknob with a piano-black Voodoo knob:
Unfortunately the top of the boot rubbed against the SSK shaft and began to scrape through the plasti-dip, causing it to flake.
LESSON LEARNED: Don't use plasti-dip on anything that is prone to rubbing.
After doing a bit of electrical work recently on the car, I realised that there was a MUCH better and cheaper solution - electrical heatshrink! I've got heaps of this stuff and the job only took 10 minutes. Like plasti-dip, if I don't like it I can easily undo it by simply cutting/tearing it off.
Originally posted by monty007, Thu Jan 17, 2013 5:23 pm[
Enjoyed following your journey...as it's been a while what's next ?
Originally posted by Lokiel, Thu Jan 17, 2013 5:25 pm[
monty007 wrote:Enjoyed following your journey...as it's been a while what's next ?
Don't worry, something is "in the works" (taking longer than I expected unfortunately).
Originally posted by Lokiel, Sun Jan 20, 2013 8:20 pm[
Removed my A-Pillar PLX DM-6 multi-gauge which was a LOT of work due to my anal work in wiring it up securely with lots of spiral wrap in the first place
Yesterday afternoon I got pulled over for a breathalyzer test. "Mr. Plod" said "nice car" but that I must get rid of the A-Pillar gauge because it's a potential defect item.
I thought mine was mounted low enough since it does not block my road vision at all but the fact that he mentioned it made me not want to tempt fate any further.
I can still see the information on my PLX DM-100 gauge, just not as easily, so it's not a tragedy.
This goes to prove that not all cops are bad - if he wanted to, I could have had a lot more to worry about.
Also re-checked the 949 SuperMiata endlinks I installed last weekend - thank god for Gatorade in this heat/humidity.
Originally posted by james_p93, Sun Jan 20, 2013 8:54 pm[
lookin great! cant wait to see Gina again mate
James
Don't worry about dying, worry about not living!
Garage Thread: http://www.mx5cartalk.com/forum/viewtopic.php?f=57&t=76716
- Lokiel
- Forum legend
- Posts: 4126
- Joined: Thu May 28, 2009 2:39 pm
- Vehicle: NB SE
- Location: Brisbania
Re: Lokiel's "Gina" (once a 2004 Titanium SE) Recreated AGAIN
Originally posted by Lokiel, Sun Sep 24, 2017 4:13 pm
Originally posted by sailaholic, Thu May 30, 2013 10:56 pm[
Hey mate, noticed on the adaptronic forum Andy has made an interface for plx systems..... Not sure which data it will pull out if it will give you extra data over the obd2 data.
Originally posted by Lokiel, Fri May 31, 2013 12:40 am[
^
LOL
You can daisy-chain PLX devices together into the DM-100 module and read all PLX data from there so any PLX sensors you have will supply data. For me that's Oil Pressure+Temperature, Water temperature and AFR.
I've actually written my own PLX data logger to capture this data onto a MK802 (mini-PC running Linux) - it works quite well and is nice and compact. I just plug the MK802's mini-USB port into my USB power socket in the glovebox for power and the serial cable from the PLX DM-100 unit into the Mk802's other USB port. The Mk802 just starts logging the PLX data as soon as it's powered up; there's no display or any feedback at the moment so I only know if it worked by checking that the data was logged when I hook up a display and keyboard later.
The new Kiwi 2 Bluetooth OBDII adapter can be paired with the Kiwi 2 iMFD Adapter to capture the PLX data in addition to the OBDII data and sent to my Android phone, then logged using Torque:
See:
http://www.plxdevices.com/product_info.php?id=GSSTBLUETOOTH
http://www.plxdevices.com/product_info.php?id=GSST2IMFD
I've generated track videos with DashWare using my Contour GPS and the OBDII data logged by Torque (unfortunately the only useful OBDII data is RPM, speed, throttle position, engine load and water temperature).
This new Kiwi combination looks great and I'll probably purchase them and use the Mk802 to log my Adaptronic data instead of the PLX data - that'll allow me lo log boost data too and make for some pretty comprehensive track video data!
Andy (Adaptronic) provided me with an Adaptronic simulator and I've written a Windows application that logs the data generated by it so the next step is to port that to Linux when I get time.
The Mk802 has inbuilt WiFi too so I plan on creating a HTML5 interface to control/observe the data logging by accessing it through a browser on my phone (once again, just need the time).
Originally posted by gslender, Fri May 31, 2013 8:41 am[
Cool. Do you know if that simulator is available publicly? I'm writing an iOS and Android logging app and I'd love to support Adaptronic ECUs.
G
Originally posted by Lokiel, Fri May 31, 2013 9:12 am[
Not sure if it's publicly available so I can't really give you a copy but send him an email, he'll probably send it to you.
I don't mind sending you my source code, it's in C++ and uses the boost libraries (makes porting to Linux trivial).
Originally posted by james_p93, Thu Jun 13, 2013 6:09 pm[
is gina going to be at the trackday?!
James
Originally posted by NitroDann, Thu Jun 13, 2013 6:30 pm[
Sorry, I've still got her in Newcastle.
Dann
Originally posted by timk, Thu Jun 13, 2013 6:41 pm[
Andy from Adaptronic is working on an interface board to output to a PLX DM-6/DM-100 gauge so it displays what the ECU sees. There's also mention of integration of the Innovate SSI-4, to provide four auxiliary 0-5V inputs.
It will be nice to have the ability to log and act on oil temp, oil pressure etc as well as being able to see exactly what the ECU is reading without duplicate senders.
Originally posted by bootz, Thu Jun 13, 2013 7:19 pm[
It's a pity that a performance upgrade also means a course in electrical engineering at the same time. Fun for some I guess.
Originally posted by NitroDann, Tue Jul 30, 2013 11:32 pm[
It goes home thursday. Lots and LOTS of work went into making this as sleeper as they come, With a big 450HP Borg Warner 'Engineered For Racing' series turbo, hidden under stock heatshields, hanging off the end of a wicked tubular manifold and a full 3" straight through V Band system with huge factory quiet mufflers, this is probably my best fabrication achievement to date.
It has hidden cooler piping, hidden staibnless lines and black anodised stealth SpeedFlow everywhere, its the MiataTurbo equivalent of a super clean ClubRoadster IRTB build.
Here is a teaser, the rest, including engine bay shots, are on my Facebook, http://www.facebook.com/NitroDann
Dann
Originally posted by Crapweasel, Tue Jul 30, 2013 11:42 pm[
Saw it, liked it!
Best stealth mode I've seen in a long time Dann, very well done.
Lokiel, you've done a bad thing. Now you have to go internals and show us what Gina is capable of!
Originally posted by Okibi, Wed Jul 31, 2013 12:00 am[
Originally posted by Apu, Wed Jul 31, 2013 7:09 am[
I had the chance to look at this first hand before it was completely installed. The work is really, really good.
Looking at this build and Dann's $2K turbo build, I'm tempted to go FI again!
Originally posted by Juicy HiC, Wed Jul 31, 2013 10:34 am[
Love it!
Originally posted by gslender, Wed Jul 31, 2013 11:15 am[
I'm almost motivated to buy an SE and give it to Dann for him to do his magic on.... very tempted!
G
Originally posted by Sean, Wed Jul 31, 2013 10:37 pm[
For all the crap I'm giving you in the $2k thread...
This thing ended up pretty sweet
Originally posted by mrschlim, Thu Aug 01, 2013 12:45 am[
I like. Very tidy.
What bottom end work was done, or did I miss this earlier in the thread?
Originally posted by Lokiel, Thu Aug 01, 2013 5:35 am[
Still to be done
I pick up the car today and drive it back to Brissie - with the wastegate wired open so NO boost
So far I've got K1 rods, coated CP pistons (still being coated - Grrrrr) and have ordered an OS Giken clutch for it.
Dann's work is VERY impressive, can't wait to see it in person.
Originally posted by Magpie, Thu Aug 01, 2013 8:46 am[
Good luck with the drive back. Will it be on the track at the next club day?
Originally posted by james_p93, Thu Aug 01, 2013 1:55 pm[
So good! Can't wait to see and hear it simon!
Originally posted by sailaholic, Thu May 30, 2013 10:56 pm[
Hey mate, noticed on the adaptronic forum Andy has made an interface for plx systems..... Not sure which data it will pull out if it will give you extra data over the obd2 data.
Originally posted by Lokiel, Fri May 31, 2013 12:40 am[
^
LOL
You can daisy-chain PLX devices together into the DM-100 module and read all PLX data from there so any PLX sensors you have will supply data. For me that's Oil Pressure+Temperature, Water temperature and AFR.
I've actually written my own PLX data logger to capture this data onto a MK802 (mini-PC running Linux) - it works quite well and is nice and compact. I just plug the MK802's mini-USB port into my USB power socket in the glovebox for power and the serial cable from the PLX DM-100 unit into the Mk802's other USB port. The Mk802 just starts logging the PLX data as soon as it's powered up; there's no display or any feedback at the moment so I only know if it worked by checking that the data was logged when I hook up a display and keyboard later.
The new Kiwi 2 Bluetooth OBDII adapter can be paired with the Kiwi 2 iMFD Adapter to capture the PLX data in addition to the OBDII data and sent to my Android phone, then logged using Torque:
See:
http://www.plxdevices.com/product_info.php?id=GSSTBLUETOOTH
http://www.plxdevices.com/product_info.php?id=GSST2IMFD
I've generated track videos with DashWare using my Contour GPS and the OBDII data logged by Torque (unfortunately the only useful OBDII data is RPM, speed, throttle position, engine load and water temperature).
This new Kiwi combination looks great and I'll probably purchase them and use the Mk802 to log my Adaptronic data instead of the PLX data - that'll allow me lo log boost data too and make for some pretty comprehensive track video data!
Andy (Adaptronic) provided me with an Adaptronic simulator and I've written a Windows application that logs the data generated by it so the next step is to port that to Linux when I get time.
The Mk802 has inbuilt WiFi too so I plan on creating a HTML5 interface to control/observe the data logging by accessing it through a browser on my phone (once again, just need the time).
Originally posted by gslender, Fri May 31, 2013 8:41 am[
Lokiel wrote:
Andy (Adaptronic) provided me with an Adaptronic simulator and I've written a Windows application that logs the data generated by it so the next step is to port that to Linux when I get time.
Cool. Do you know if that simulator is available publicly? I'm writing an iOS and Android logging app and I'd love to support Adaptronic ECUs.
G
Originally posted by Lokiel, Fri May 31, 2013 9:12 am[
Not sure if it's publicly available so I can't really give you a copy but send him an email, he'll probably send it to you.
I don't mind sending you my source code, it's in C++ and uses the boost libraries (makes porting to Linux trivial).
Originally posted by james_p93, Thu Jun 13, 2013 6:09 pm[
is gina going to be at the trackday?!
James
Originally posted by NitroDann, Thu Jun 13, 2013 6:30 pm[
Sorry, I've still got her in Newcastle.
Dann
Originally posted by timk, Thu Jun 13, 2013 6:41 pm[
Andy from Adaptronic is working on an interface board to output to a PLX DM-6/DM-100 gauge so it displays what the ECU sees. There's also mention of integration of the Innovate SSI-4, to provide four auxiliary 0-5V inputs.
It will be nice to have the ability to log and act on oil temp, oil pressure etc as well as being able to see exactly what the ECU is reading without duplicate senders.
Originally posted by bootz, Thu Jun 13, 2013 7:19 pm[
It's a pity that a performance upgrade also means a course in electrical engineering at the same time. Fun for some I guess.
Originally posted by NitroDann, Tue Jul 30, 2013 11:32 pm[
It goes home thursday. Lots and LOTS of work went into making this as sleeper as they come, With a big 450HP Borg Warner 'Engineered For Racing' series turbo, hidden under stock heatshields, hanging off the end of a wicked tubular manifold and a full 3" straight through V Band system with huge factory quiet mufflers, this is probably my best fabrication achievement to date.
It has hidden cooler piping, hidden staibnless lines and black anodised stealth SpeedFlow everywhere, its the MiataTurbo equivalent of a super clean ClubRoadster IRTB build.
Here is a teaser, the rest, including engine bay shots, are on my Facebook, http://www.facebook.com/NitroDann
Dann
Originally posted by Crapweasel, Tue Jul 30, 2013 11:42 pm[
Saw it, liked it!
Best stealth mode I've seen in a long time Dann, very well done.
Lokiel, you've done a bad thing. Now you have to go internals and show us what Gina is capable of!
Originally posted by Okibi, Wed Jul 31, 2013 12:00 am[
Originally posted by Apu, Wed Jul 31, 2013 7:09 am[
I had the chance to look at this first hand before it was completely installed. The work is really, really good.
Looking at this build and Dann's $2K turbo build, I'm tempted to go FI again!
Originally posted by Juicy HiC, Wed Jul 31, 2013 10:34 am[
Love it!
Originally posted by gslender, Wed Jul 31, 2013 11:15 am[
I'm almost motivated to buy an SE and give it to Dann for him to do his magic on.... very tempted!
G
Originally posted by Sean, Wed Jul 31, 2013 10:37 pm[
For all the crap I'm giving you in the $2k thread...
This thing ended up pretty sweet
Originally posted by mrschlim, Thu Aug 01, 2013 12:45 am[
I like. Very tidy.
What bottom end work was done, or did I miss this earlier in the thread?
Originally posted by Lokiel, Thu Aug 01, 2013 5:35 am[
mrschlim wrote:I like. Very tidy.
What bottom end work was done, or did I miss this earlier in the thread?
Still to be done
I pick up the car today and drive it back to Brissie - with the wastegate wired open so NO boost
So far I've got K1 rods, coated CP pistons (still being coated - Grrrrr) and have ordered an OS Giken clutch for it.
Dann's work is VERY impressive, can't wait to see it in person.
Originally posted by Magpie, Thu Aug 01, 2013 8:46 am[
Good luck with the drive back. Will it be on the track at the next club day?
Originally posted by james_p93, Thu Aug 01, 2013 1:55 pm[
So good! Can't wait to see and hear it simon!
Don't worry about dying, worry about not living!
Garage Thread: http://www.mx5cartalk.com/forum/viewtopic.php?f=57&t=76716
- Lokiel
- Forum legend
- Posts: 4126
- Joined: Thu May 28, 2009 2:39 pm
- Vehicle: NB SE
- Location: Brisbania
Re: Lokiel's "Gina" (once a 2004 Titanium SE) Recreated AGAIN
Originally posted by Lokiel, Sun Sep 24, 2017 4:14 pm
Originally posted by Lokiel, Fri Aug 02, 2013 3:11 am[
Picked up the car from Dann today and "gabbed on" for way too long, as you do when talking mx5cartalk, then left about 11:30am (the flight arrived at 7:10am).
First impressions were that the the engine bay is cleaned up a lot since Dann managed to fit a low-mount intercooler pipe instead of the over-the-top-and-down SE-style intercooler pipe (this will allow me to duct air directly from the passenger-side foglight to the air filter when I make a cold-air box). I didn't know if there was room to do this and Dann made it work!
The turbo and manifold are beautifully tucked away and it really does look OEM.
I know that I'm going to asked to remove the OEM heatshield a lot because people will want to see the manifold (maybe should consider replacing the nuts with wingnuts to make this easier).
Since the BOV is built into the EFR6258, the BOV barb on the FM TBI elbow has been blocked off with an aluminium bung but that looks like crap so will be something that needs to be addressed - all I need is an elbow with an Air Temperature sensor fitting.
The exhaust is very impressive - after seeing this, I wonder why others have had issues trying to fit 3" exhausts, there seems to be plenty of clearance right along the length of it AND its tucked higher than the frame rails.
The exhaust is very quiet and the tip is just a straight 3" stainless tip which doesn't attract any attention. As for driving, I was worried about droning but I really didn't notice any annoying drones at all.
The wastegate was wired open for the drive home to prevent "juvenile me" from testing out the new turbo "just a little bit" and bending my rods (still has a stock engine). Driving an SE with no boost isn't much fun, you have to accept that it takes forever to get any speed - I've dr ven NA8's and they have MUCH more power and are more fun than a boost-less SE.
Dann couldn't fully charge my battery which SHOULD have rang my warnings bells but it started fine so I set off on the trip.
When I stopped for my 2nd tank of petrol, Gina wouldn't start at all.
A quick call to Dann confirmed that it probably was a flat battery and a jump start was in order so I went into the BP station and asked if I could borrow some jumper leads - they didn't have any - WTF!
"When I was a boy, petrol stations sold car-stuff and were run by car-people and could diagnose and fix car-stuff!"
- these days they're run by clueless morons who's only mechanical knowledge is how to operate the cash register.
Luckily an older couple who were buying petrol had a set of jumper leads and gave me a jump start - I'll be putting in a good word for those two with "The Big Guy".
At this point (Grafton), I figured I wouldn't need to stop again for petrol and would be OK, just as long as I didn't stall the car, or stop it while taking a "Wiz-break".
It's amazing how thinking about not stalling makes you a worse driver when driving through towns since you focus too much on gear changes.
Just when I was thinking how awesome the QLD Pacific Highway is compared to NSW, I got stuck in the the Pacific Highway carpark, we were crawling through multiple sections that were being re-surfaced.
During these crawls, the revs would occasionally drop dangerously low and the Adaptronic would catch them and boost the revs just in time to prevent a stall. I managed to get all the way to Beenleigh, 36km from my house before the fatal stall occurred I managed to drive 750km and "missed" by 36km!
Because the traffic was crawling, I was able to find a guy with jumper leads by walking up and down the motorway, asking along the way; I could cruise MUCH faster than they could - WooHoo!
We tried to jump start the car but no-dice.
I noticed that my battery was incredibly hot so am assuming it's toast now (or could have cooked some if I had any bread) and I've blown a fuse or two.
Since the traffic was crawling I decided to wait until the traffic died down before calling a tow truck; the traffic took over 2 hours and the tow truck then took another 45 minutes. During this period I decided to finish off the last of my road-trip food which made me thirsty so I drank my last can of V which I hadn't intended to drink. I'm still "wired" from the V so wont be able to sleep for a while yet which is why I'm writing this up now at this "ungodly hour" on a "school night".
So in the next few days I'm going to need a new battery and figure out if I just need to replace some fuses OR the alternator (and redo my power window switch wiring to make it more rugged - more on this later).
Originally posted by sailaholic, Fri Aug 02, 2013 7:14 am[
I work in Loganholme, so you may have been sitting pretty much across the road!
Originally posted by Apu, Fri Aug 02, 2013 9:45 am[
Gee Simon...reading that was like talking to Dann, haha!
Don't worry about dying, worry about not living!
Garage Thread: http://www.mx5cartalk.com/forum/viewtopic.php?f=57&t=76716
- Lokiel
- Forum legend
- Posts: 4126
- Joined: Thu May 28, 2009 2:39 pm
- Vehicle: NB SE
- Location: Brisbania
Re: Lokiel's "Gina" (once a 2004 Titanium SE) Recreated AGAIN
Originally posted by Lokiel, Sun Sep 24, 2017 4:15 pm
Originally posted by Lokiel, Sat Aug 10, 2013 9:46 pm[
Last weekend I bought a new SS43M battery from SuperStart Batteries and made sure it was charged to 13.8V but the car still wouldn't start
I triple-checked all fuses which were OK. After doing some Googling, one of the suggestions was to give the starter motor a few whacks since it may be sticking.
I tried that with progressively harder taps using a spanner and it worked on the 4th try. I've since tried around 30 starts since then and it's fine so I'm speculating that the initial jump start I got on the Pacific Highway, where it almost started, left the starter motor in a screwy state.
One hassle I had when I picked up the car from Dann's was getting the power windows to work. My original wiring wasn't robust enough and when my DIY power window switch was being fitted and we stuffed the wires into place, one or more of them would break so we ended up soldering the broken ones directly to the switch terminals
I was using a 6-pin Molex connector since this was the smallest connector I could find (important because it must be stuffed under the centre console trim) and I also had molex-de-pinning tools if ever I needed to undo/redo the connection:
The problem with these connectors is that if you disconnect/reconnect them regularly (I'm a habitual modder so I do this more than the average Joe would), the female connectors splay, making it difficult to reconnect the plug since you need to make sure that all pins line up perfectly. If the pins don't align, you can push the pins out of the connector and/or widen the female socket:
In an ironic timing coincidence, I'd recently PM'ed Juicy HiC NOT to use these round Molex connectors for these very reasons.
The male plug was OK but you can see in this shot that the red 12V power wire has broken from the switch:
When I originally wired the switches, the diagonal terminals of each switch had to be connected so I cheated by stripping a section of the wire, looped it around the terminal's retaining screw and the end with the ring connector was screwed into the diagonal terminal (see top green wire below). This was always a temporary solution that I'd been meaning to ruggedise but it hadn't given me any problems so I hadn't bothered to address it:
As you can see, it makes the wiring a bit messier than it needs to be and that stripped section that is looped around the terminal screw isn't particularly rugged.
I needed to find another solution so here are some of the 6-pin options available:
The 3rd-from-left connector is a blade version of the round molex connector. This is a much better choice since they don't splay like the round molex connector but it's just a bit too wide to be able to stuff undeneath the centre console trim.
The right-most connector is great if you need a waterproof connector but it's way too wide.
I chose to use the left connector since it's the narrowest and is very rugged.
This time I joined the diagonal terminals of the switch via soldered wires which eliminated the need for 2 additional ring connectors and reduced the wire clutter:
Here's the new switch wiring - note that the Red 12V and Black GND wires needed to be split to provide power to each switch:
The Red 12V and Black GND Y-junctions were soldered and sheathed using solder sleeves so they're very rugged now.
The wiring is now longer than before which actually makes it easier to install the power window switch since it gives me more wiggle room to stuff the connector under the centre console trim so I put less strain on the wiring.
The new manifold and turbo sit much closer to my TrackDog Oil Catch can which is plastic and Dann suggested that it may not be able to handle the increased heat level. For the drive home I taped it up using some heatshield tape to protect it:
That looked a bit too ghetto (and "70's Glam") so I replaced it today with a VMS gun-metal aluminium oil catch can that arrived from eBay this week:
It sits a bit higher than I wanted but that was necessary to allow the silicon hose to comfortably clear the heat shield and moves the breather a bit further away from the heat shield too.
If you look to the bottom left of the TrackDog Oil Catch Can photo above, you can see that the silver lining on the A/C line's sheath has started to disappear so I decided that needed some attention too and went nuts with the heatshield tape:
I wish I'd thought of doing this before installing the catch can because there's not much room in there now and it took me forever to wrap it.
This shot shows how close the turbo's exhaust housing sits to the A/C line - I may need to move the A/C line?
Also, just received notification that my CP pistons have been shipped - WooHoo!
Originally posted by NitroDann, Sat Aug 10, 2013 9:51 pm[
F@#$%^&ING window switches
Looks good, much better.
And your camera take 20 times better pics than my phone haha.
Dann
Originally posted by bruce, Sat Aug 10, 2013 10:40 pm[
It's an MX5, you can push start it. You could almost push start it yourself.
Originally posted by NitroDann, Sat Aug 10, 2013 11:57 pm[
Infact I personally push started that car myself, but you need at least reds to get it going.
Dann
Originally posted by Sean, Sun Aug 11, 2013 12:15 am[
DIY power windows?
Did the SE not have power windows as standard?
Originally posted by Crapweasel, Sun Aug 11, 2013 12:40 am[
Yes they did, but because Retro switches.
Nicely done, will be even better now that the weak point has been located.
Originally posted by Lokiel, Sat Aug 10, 2013 9:46 pm[
Last weekend I bought a new SS43M battery from SuperStart Batteries and made sure it was charged to 13.8V but the car still wouldn't start
I triple-checked all fuses which were OK. After doing some Googling, one of the suggestions was to give the starter motor a few whacks since it may be sticking.
I tried that with progressively harder taps using a spanner and it worked on the 4th try. I've since tried around 30 starts since then and it's fine so I'm speculating that the initial jump start I got on the Pacific Highway, where it almost started, left the starter motor in a screwy state.
One hassle I had when I picked up the car from Dann's was getting the power windows to work. My original wiring wasn't robust enough and when my DIY power window switch was being fitted and we stuffed the wires into place, one or more of them would break so we ended up soldering the broken ones directly to the switch terminals
I was using a 6-pin Molex connector since this was the smallest connector I could find (important because it must be stuffed under the centre console trim) and I also had molex-de-pinning tools if ever I needed to undo/redo the connection:
The problem with these connectors is that if you disconnect/reconnect them regularly (I'm a habitual modder so I do this more than the average Joe would), the female connectors splay, making it difficult to reconnect the plug since you need to make sure that all pins line up perfectly. If the pins don't align, you can push the pins out of the connector and/or widen the female socket:
In an ironic timing coincidence, I'd recently PM'ed Juicy HiC NOT to use these round Molex connectors for these very reasons.
The male plug was OK but you can see in this shot that the red 12V power wire has broken from the switch:
When I originally wired the switches, the diagonal terminals of each switch had to be connected so I cheated by stripping a section of the wire, looped it around the terminal's retaining screw and the end with the ring connector was screwed into the diagonal terminal (see top green wire below). This was always a temporary solution that I'd been meaning to ruggedise but it hadn't given me any problems so I hadn't bothered to address it:
As you can see, it makes the wiring a bit messier than it needs to be and that stripped section that is looped around the terminal screw isn't particularly rugged.
I needed to find another solution so here are some of the 6-pin options available:
The 3rd-from-left connector is a blade version of the round molex connector. This is a much better choice since they don't splay like the round molex connector but it's just a bit too wide to be able to stuff undeneath the centre console trim.
The right-most connector is great if you need a waterproof connector but it's way too wide.
I chose to use the left connector since it's the narrowest and is very rugged.
This time I joined the diagonal terminals of the switch via soldered wires which eliminated the need for 2 additional ring connectors and reduced the wire clutter:
Here's the new switch wiring - note that the Red 12V and Black GND wires needed to be split to provide power to each switch:
The Red 12V and Black GND Y-junctions were soldered and sheathed using solder sleeves so they're very rugged now.
The wiring is now longer than before which actually makes it easier to install the power window switch since it gives me more wiggle room to stuff the connector under the centre console trim so I put less strain on the wiring.
The new manifold and turbo sit much closer to my TrackDog Oil Catch can which is plastic and Dann suggested that it may not be able to handle the increased heat level. For the drive home I taped it up using some heatshield tape to protect it:
That looked a bit too ghetto (and "70's Glam") so I replaced it today with a VMS gun-metal aluminium oil catch can that arrived from eBay this week:
It sits a bit higher than I wanted but that was necessary to allow the silicon hose to comfortably clear the heat shield and moves the breather a bit further away from the heat shield too.
If you look to the bottom left of the TrackDog Oil Catch Can photo above, you can see that the silver lining on the A/C line's sheath has started to disappear so I decided that needed some attention too and went nuts with the heatshield tape:
I wish I'd thought of doing this before installing the catch can because there's not much room in there now and it took me forever to wrap it.
This shot shows how close the turbo's exhaust housing sits to the A/C line - I may need to move the A/C line?
Also, just received notification that my CP pistons have been shipped - WooHoo!
Originally posted by NitroDann, Sat Aug 10, 2013 9:51 pm[
F@#$%^&ING window switches
Looks good, much better.
And your camera take 20 times better pics than my phone haha.
Dann
Originally posted by bruce, Sat Aug 10, 2013 10:40 pm[
It's an MX5, you can push start it. You could almost push start it yourself.
Originally posted by NitroDann, Sat Aug 10, 2013 11:57 pm[
Infact I personally push started that car myself, but you need at least reds to get it going.
Dann
Originally posted by Sean, Sun Aug 11, 2013 12:15 am[
DIY power windows?
Did the SE not have power windows as standard?
Originally posted by Crapweasel, Sun Aug 11, 2013 12:40 am[
Sean wrote:DIY power windows?
Did the SE not have power windows as standard?
Yes they did, but because Retro switches.
Nicely done, will be even better now that the weak point has been located.
Don't worry about dying, worry about not living!
Garage Thread: http://www.mx5cartalk.com/forum/viewtopic.php?f=57&t=76716
- Lokiel
- Forum legend
- Posts: 4126
- Joined: Thu May 28, 2009 2:39 pm
- Vehicle: NB SE
- Location: Brisbania
Re: Lokiel's "Gina" (once a 2004 Titanium SE) Recreated AGAIN
Originally posted by Lokiel, Sun Sep 24, 2017 4:15 pm
Originally posted by Lokiel, Mon Aug 12, 2013 10:33 pm[
The CP Pistons finally arrived today, they look pretty schmick:
I ordered 83.5mm pistons (9:1) from JSC Speed in the US with Top Coat option because, according to the site:
"CP offers optional coatings to enhance the effectiveness of your pistons. The top coating is designed to reflect heat into the combustion chamber, thereby increasing exhaust gas velocity and greatly improving scavenging potential.".
I didn't get the skirt coating ("The skirt coating offers additional lubricant in times of extreme heat or heavy wear situations. The coating is designed to reduce friction on the skirt by providing a buffer to the cylinder.") since it wears off anyway.
There was a delay in the top coating process which is why they took so long to arrive (even allowing for the 4-6 week coating delay time).
I was really surprised at how light the pistons were - the wrist pins seems to have more weight.
I'm going to use K1 rods for the build:
- still unopened
I bought these from JSC Speed quite a while ago (when the Aussie $ was US$1.07, those were the days...) because they're lighter than Eagle rods and can handle 600hp - plenty capable for an MX5.
According to the website:
"K1 Technologies connecting rods are quality built from billet 4340 steel for superior strength in high horsepower applications. K1 has also called upon the experts at ARP fasteners to design special K1 proprietary rod bolts with asymmetrical threads to equally load each thread when under pressure. K1 rods are shot peened for improved fatigue life and are finished in the USA using only state of the art Sunnen hones. K1 rod housing bore tolerances of +/- .000050in (50 millionths) match some of the tightest accepted tolerances in the industry. All K1 rod sets are weight-matched to +/- 1 gram and boxed with the individual rotating, reciprocating, and total weights conveniently noted for balancing. A special wrist pin bushing material is also used with these assemblies offering optimal friction reduction."
The purists out there are going to argue that I should be using Carillo rods for this build but after hanging out on MT.net for a while, you realise that 1,000hp Carillo rods that cost 3 times as much as 600hp-rated rods is a waste of money, especially given that there aren't too many MX5's that will ever reach more than 400hp. The Carillo rods may be a tad lighter but is that worth 3 times the price? I don't think so.
I'm not sure how true this is, but I've heard that K1 are actually owned by Carillo anyway.
Originally posted by NitroDann, Mon Aug 12, 2013 10:36 pm[
Yep, theres like... under five total 400whp track miatas in the world.
Dann
Originally posted by Crapweasel, Mon Aug 12, 2013 10:42 pm[
Very smart reasoning Lokiel, and some very nice looking components you have there.
Looking forward to the next stages of this amazing build.
Originally posted by james_p93, Wed Aug 14, 2013 12:22 pm[
yea waw cant wait! getting crazy now
James
Originally posted by little decks, Wed Aug 14, 2013 3:23 pm[
The rods are basically never the problem in engine failures for these sort of cars anyway... they just cop the blame because when they come out the side of the block a rudimentary understanding dives to the conclusion that they must be the culprit... i've seen Carillo H bean rods broken in half but it had nothing to do with the rod being too weak. Carillo A-beams are the gun rods for a BP engine, solo light for the strength.
Originally posted by Sean, Wed Aug 14, 2013 8:57 pm[
As long as you have good rod bolts you shouldn't see any issues.
Originally posted by ASE05, Sun Aug 18, 2013 1:58 am[
Should be a bit of a beast by the time the engines built up!
Looking forward to the results.
Originally posted by Lokiel, Mon Aug 12, 2013 10:33 pm[
The CP Pistons finally arrived today, they look pretty schmick:
I ordered 83.5mm pistons (9:1) from JSC Speed in the US with Top Coat option because, according to the site:
"CP offers optional coatings to enhance the effectiveness of your pistons. The top coating is designed to reflect heat into the combustion chamber, thereby increasing exhaust gas velocity and greatly improving scavenging potential.".
I didn't get the skirt coating ("The skirt coating offers additional lubricant in times of extreme heat or heavy wear situations. The coating is designed to reduce friction on the skirt by providing a buffer to the cylinder.") since it wears off anyway.
There was a delay in the top coating process which is why they took so long to arrive (even allowing for the 4-6 week coating delay time).
I was really surprised at how light the pistons were - the wrist pins seems to have more weight.
I'm going to use K1 rods for the build:
- still unopened
I bought these from JSC Speed quite a while ago (when the Aussie $ was US$1.07, those were the days...) because they're lighter than Eagle rods and can handle 600hp - plenty capable for an MX5.
According to the website:
"K1 Technologies connecting rods are quality built from billet 4340 steel for superior strength in high horsepower applications. K1 has also called upon the experts at ARP fasteners to design special K1 proprietary rod bolts with asymmetrical threads to equally load each thread when under pressure. K1 rods are shot peened for improved fatigue life and are finished in the USA using only state of the art Sunnen hones. K1 rod housing bore tolerances of +/- .000050in (50 millionths) match some of the tightest accepted tolerances in the industry. All K1 rod sets are weight-matched to +/- 1 gram and boxed with the individual rotating, reciprocating, and total weights conveniently noted for balancing. A special wrist pin bushing material is also used with these assemblies offering optimal friction reduction."
The purists out there are going to argue that I should be using Carillo rods for this build but after hanging out on MT.net for a while, you realise that 1,000hp Carillo rods that cost 3 times as much as 600hp-rated rods is a waste of money, especially given that there aren't too many MX5's that will ever reach more than 400hp. The Carillo rods may be a tad lighter but is that worth 3 times the price? I don't think so.
I'm not sure how true this is, but I've heard that K1 are actually owned by Carillo anyway.
Originally posted by NitroDann, Mon Aug 12, 2013 10:36 pm[
Yep, theres like... under five total 400whp track miatas in the world.
Dann
Originally posted by Crapweasel, Mon Aug 12, 2013 10:42 pm[
Lokiel wrote:The purists out there are going to argue that I should be using Carillo rods for this build but after hanging out on MT.net for a while, you realise that 1,000hp Carillo rods that cost 3 times as much as 600hp-rated rods is a waste of money, especially given that there aren't too many MX5's that will ever reach more than 400hp. The Carillo rods may be a tad lighter but is that worth 3 times the price? I don't think so.
Very smart reasoning Lokiel, and some very nice looking components you have there.
Looking forward to the next stages of this amazing build.
Originally posted by james_p93, Wed Aug 14, 2013 12:22 pm[
yea waw cant wait! getting crazy now
James
Originally posted by little decks, Wed Aug 14, 2013 3:23 pm[
The rods are basically never the problem in engine failures for these sort of cars anyway... they just cop the blame because when they come out the side of the block a rudimentary understanding dives to the conclusion that they must be the culprit... i've seen Carillo H bean rods broken in half but it had nothing to do with the rod being too weak. Carillo A-beams are the gun rods for a BP engine, solo light for the strength.
Originally posted by Sean, Wed Aug 14, 2013 8:57 pm[
As long as you have good rod bolts you shouldn't see any issues.
Originally posted by ASE05, Sun Aug 18, 2013 1:58 am[
Should be a bit of a beast by the time the engines built up!
Looking forward to the results.
Don't worry about dying, worry about not living!
Garage Thread: http://www.mx5cartalk.com/forum/viewtopic.php?f=57&t=76716
- Lokiel
- Forum legend
- Posts: 4126
- Joined: Thu May 28, 2009 2:39 pm
- Vehicle: NB SE
- Location: Brisbania
Re: Lokiel's "Gina" (once a 2004 Titanium SE) Recreated AGAIN
Originally posted by Lokiel, Sun Sep 24, 2017 4:16 pm
Originally posted by Lokiel, Sun Aug 18, 2013 11:58 pm[
My new exhaust doesn't have a Narrowband O2 sensor bung; it's not really needed since I have a Wideband O2 sensor which is used by the Adaptronic ECU. This left the socket at the rear of the engine bay unused and generates a couple of CEL errors since the OEM ECU detects that the sensor and its heated element are not connected.
After scanning through the wiring diagrams, I realised that I could simulate the sensor's heater element with a 10 watt resistor (it needs to be at least 10 watts since it must handle a lot of heat). The front heated oxygen sensor specification is 4-20 ohms; Rod Grainger's manual indicates a healthy sensor should be 13 ohms which is right in the middle of the range so I used a 10 ohm and 3.3 ohm resistor in series.
My PLX AFR sensor module outputs an analog narrowband signal so I could use that in place of the OEM sensor signal.
I needed a place to install the resistors and connect the Narrowband harness to that wasn't too close to the manifold and found a spot at the rear of the engine bay on the passenger side that had an existing unused 6mm mount (see 2nd photo below).
Steps:
1. Pass a wire through the firewall to hook the PLX AFR sensor module's Narrowband output to the Narrowband harness (this took many, many, many attempts and swear words since that rubber grommit is already full of my other PLX sensor wires - I have no idea where the wire was ending up)
2. Mount the resistors and terminal block on a circuit board (I really only needed 3 terminals but all I had was a 6 terminal block - may be useful in future when I need another 3 terminals?)
3. Make an aluminium bracket using the 6mm bolt hole to mount the circuit board onto (bolting the circuit board directly to the car isn't rugged enough and will introduce shorts)
4. Sandwich the aluminium bracket between two 5mm rubber pads, the rear one to prevent rubbing directly against the car and the front one to prevent shorts on the circuit board
5. Connect ring connectors to the Narrowband harness (I didn't bother connecting the Sensor GND wire). I butchered a 2nd hand harness from MX5 Plus for this.
6. Connect the ring connectors to the terminal block
7. Bolt the bracket onto the car
I plan on tucking that blue sensor wire into the split loom below it that it being used to house the Narrowband harness wires.
8. Plug in the Narrowband harness
9. Fire up the car and use Android Torque to verify that the offending CEL errors are gone - CHECK!
Note: The OEM ECU and Adapronic ECU actually share the Narrowband signal (not sure what the Adaptronic does with it, probably a fallback if the Wideband sensor fails). I didn't want to rip back the passenger-side carpet and ECU plate again and hack into the OEM harness since it's a pain in the arse to work under there so I figured it was simpler to just connect the PLX AFR sensor module's Narrowband signal to the Narrowband harness in the engine bay through the firewall. In hindsight, it would have been easier since threading the wire through the firewall probably took about 50% of this little project.
Originally posted by Okibi, Mon Aug 19, 2013 1:48 am[
Very cool!
Originally posted by Magpie, Mon Aug 19, 2013 8:36 am[
So that is why you were at Mx5 Plus on Saturday with your bonnet part the way up
Don't worry about dying, worry about not living!
Garage Thread: http://www.mx5cartalk.com/forum/viewtopic.php?f=57&t=76716
- Lokiel
- Forum legend
- Posts: 4126
- Joined: Thu May 28, 2009 2:39 pm
- Vehicle: NB SE
- Location: Brisbania
Re: Lokiel's "Gina" (once a 2004 Titanium SE) Recreated AGAIN
Originally posted by Lokiel, Sun Sep 24, 2017 4:17 pm
Originally posted by Lokiel, Sun Aug 25, 2013 7:22 pm[
I wasn't overly happy with my Narrowband sensor mod, it was very solid but it looked too dodgy and needed to be made look more OEM.
After visiting Jaycar, I found a case that would be large and rugged enough to house the resistors and decided to use 2 and 3 pole PC mount pluggable headers instead of the terminal block since these are smaller and easier to connect/disconnect the wiring than a terminal block that uses ring connectors (not that I should need to do this much but it;s nice to have).
This time I decided to use 2x27ohm 10W resistors in parallel since they should be cooler than the 10 and 3.3 ohm resistors in series (the 10ohm resistor got very hot):
Underside (the white "things" are the circuitboard standoffs):
Top view with vent holes added (probably went overboard here):
Underside showing connectors:
The 3 pin connector on the left is connected to the Narrowband Harness.
One of the pins on the 2-pin connector is connected to the PLX AFR module's analog Narrowband output (connected to the harness' Sensor signal via a circuitboard connection).
All housed and mounted on an aluminium backplate ("stealthed" in Wrinkle Black):
Final stealthy installation:
- That looks much better, so much so that I had to circle it in yellow so that you can see it.
Originally posted by Lokiel, Sun Aug 25, 2013 7:56 pm[
During the week I was playing around with fitting my Turbosmart wastegate onto my EFR6258 and realised that there wouldn't be enough room with my new Oil Catch Can - it was in the way:
I decided to move the catch can to the opposite side of the bracket since there was enough room (emptying it will now be a pain though) and the added benefit would be that the bracket could also serve as a heat shield. Unfortunately it was too tight and rubbed against the strut tower so the bracket needed to be remade to allow for more room.
- made from aluminium checkerplate because it's strong enough when bent and I have lots of offcuts from previous projects.
The left side is the base - the offset holes allow the bracket, when bent 90*, to line up with the engine-bay shelf when using the existing/OEM threaded mounts.
The bottom right section is a heatshield wing to shield-off the turbo's exhaust chamber (see topdown picture below).
Originally posted by Apu, Sun Aug 25, 2013 8:02 pm[
Can't you unscrew the top off the catch can? I've got the drain plug underneath but it's easier to just unscrew the top and drop a paper towel in there!
Originally posted by Lokiel, Sun Aug 25, 2013 8:14 pm[
Unfortunately the VMS catch can has a double baffle which prevents this:
- if you have any more ideas like this though, keep 'em coming
Originally posted by Juicy HiC, Sun Aug 25, 2013 8:53 pm[
really impressed!
Originally posted by Apu, Sun Aug 25, 2013 9:15 pm[
Hmmm...that's a simple but very effective way of doing it. Never thought of it that way...the others I have seen have this ridiculously complex honeycomb.
Originally posted by ASE05, Tue Aug 27, 2013 5:56 am[
Got a link from where ya got the catch can?
Originally posted by Lokiel, Tue Aug 27, 2013 1:09 pm[
^
I got mine on eBay, just type "vms catch can" into the search criteria.
Originally posted by sailaholic, Tue Aug 27, 2013 2:49 pm[
Would be best if you coated the aluminium. Aluminium is highly heat conductive.
Originally posted by bootz, Tue Aug 27, 2013 7:02 pm[
Seriously shouldn't have much oil in the can anyway would you ? Also, who cares how hot it gets, not going to explode?
Originally posted by sailaholic, Tue Aug 27, 2013 7:12 pm[
True, dosent matter to the oil. It was just stated that the bracket would double as a heat shield.
Originally posted by Lokiel, Tue Aug 27, 2013 10:37 pm[
^
Agreed that the bracket could be clad to improve its heat shielding ability, but even as it stands, it's serving to shield the oil catch can from the heat radiated directly from the turbine exhaust (ie. instead of getting heated directly, the catch can is only getting conductive heat from the bracket it's attached to, and that's only at the points it's connected to the bracket, not over its entire surface that faces the turbo).
Originally posted by NitroDann, Tue Sep 17, 2013 9:00 pm[
The latest EFR turbocharged BP.
Dann
Originally posted by 16bit, Tue Sep 17, 2013 9:21 pm[
very nice, it almost doubles torque from 3500 to 4000 rpm.
Originally posted by Okibi, Wed Sep 18, 2013 12:16 am[
How much boost is that running?
Originally posted by NitroDann, Wed Sep 18, 2013 12:24 am[
30 Pound.
Dann
Originally posted by Lokiel, Wed Sep 18, 2013 9:05 am[
Who's car is that? Details please.
Originally posted by MINX, Wed Sep 18, 2013 9:53 am[
Come on Simon - wind yours up to 30psi and show us how it goes!
Originally posted by Lokiel, Wed Sep 18, 2013 12:44 pm[
You have no idea how frustrated I am that I can't tap into the EFR6258 while I still have stock internals.
The "common sense" angel on one shoulder is telling me to bide my time and save like crazy to complete the engine build as soon as possible whereas the "evil" angel on the other shoulder is telling me to fit my Turbosmart wastegate actuator with a 5psi spring (which I have) and get that tuned for the time being. The latter will cost me around $600 for a short-term issue.
Depending on which way the wind's blowing, I listen to one angel more than the other but the car really sucks to drive in it's un-boosted form
FYI: Unboosted (wastegate wired open), the SE doesn't have the same torque/power as a N/A 1.8L MX5, it feels more like my sister's original automatic 1978 1200cc Toyota Corolla (ie. no torque and takes forever to build up speed).
Originally posted by A.Chen89, Wed Sep 18, 2013 2:10 pm[
Build it and run all-of-it boost wise!
Originally posted by NitroDann, Wed Sep 18, 2013 2:18 pm[
It's soviet's car over at MT.net.
Basically a stock engine with forgies, tubular manifold and 3" exhaust. ID1000, E85, and a 6758 at 30psi.
Dann
Originally posted by Magpie, Wed Sep 18, 2013 2:55 pm[
Hence why I am having everything done at once, no need to save pennies plus it will be useable (after it is run in) with no limitations, however it is just a natural aspirated so will be no match for a SE.
Originally posted by NitroDann, Wed Sep 18, 2013 2:58 pm[
The turbo setup on Lokiels car gives him about four hundred and fifty reasons to stress about it on stock internals.
Dann
Originally posted by plohl, Wed Sep 18, 2013 3:18 pm[
So is this going to be another 60s lakeside car?
Originally posted by NitroDann, Wed Sep 18, 2013 3:27 pm[
Depends what rubber he puts on and if he can steer I guess?
Dann
Originally posted by plohl, Wed Sep 18, 2013 3:31 pm[
Lets hope so!
Originally posted by Lokiel, Wed Sep 18, 2013 4:10 pm[
That last part will be the big problem - this is my only car and I intend to keep it for a long time so I doubt that I'll ever be in the "Drive it like you stole it!" mindset. I also don't intend to turn it into a track-only car so will not have the aero add-ons needed to do low times.
timk, about his Track Pig car, mentioned something along the lines of "I can drive it as hard as I want since I don't need to worry about damaging it, it's just a track car." That really made me aware that I was definitely driving more conservatively than I should but each track session I learn more about the car and push harder since it's far more capable than my driving ability. More track time and coaching is definitely on the cards, currently the conservative gorilla behind the wheel is the biggest handicap.
Realistically, I'd be happy if I could attain MINX's times, his is a DD car too and have a lot to do with his driving ability.
Originally posted by Magpie, Wed Sep 18, 2013 4:23 pm[
Well mine will be a daily drive when they move me back to Brisbane once this project winds down, however I could always use the stock NA6 or the X19 as daily's if Blue NA6 gets too difficult in peak hour M1 traffic. Then again I may just drive it to the train station and avoid the M1 car park.
Originally posted by MattR, Wed Sep 18, 2013 4:55 pm[
Braver man than me.......
I used to buy $300 shiters for the station run when I was a commuter in Sydney, old banged up XB falcons and Valiants didn't get stolen, broken into or vandalised by the locals.....
Originally posted by Lokiel, Wed Sep 18, 2013 6:39 pm[
+1
No way do you want to leave your car all day Magpie in a public car lot.
Originally posted by sailaholic, Wed Sep 18, 2013 7:36 pm[
Just let me know where you park it and I'll make sure it's safe :grin:
Originally posted by Lokiel, Sun Aug 25, 2013 7:22 pm[
I wasn't overly happy with my Narrowband sensor mod, it was very solid but it looked too dodgy and needed to be made look more OEM.
After visiting Jaycar, I found a case that would be large and rugged enough to house the resistors and decided to use 2 and 3 pole PC mount pluggable headers instead of the terminal block since these are smaller and easier to connect/disconnect the wiring than a terminal block that uses ring connectors (not that I should need to do this much but it;s nice to have).
This time I decided to use 2x27ohm 10W resistors in parallel since they should be cooler than the 10 and 3.3 ohm resistors in series (the 10ohm resistor got very hot):
Underside (the white "things" are the circuitboard standoffs):
Top view with vent holes added (probably went overboard here):
Underside showing connectors:
The 3 pin connector on the left is connected to the Narrowband Harness.
One of the pins on the 2-pin connector is connected to the PLX AFR module's analog Narrowband output (connected to the harness' Sensor signal via a circuitboard connection).
All housed and mounted on an aluminium backplate ("stealthed" in Wrinkle Black):
Final stealthy installation:
- That looks much better, so much so that I had to circle it in yellow so that you can see it.
Originally posted by Lokiel, Sun Aug 25, 2013 7:56 pm[
During the week I was playing around with fitting my Turbosmart wastegate onto my EFR6258 and realised that there wouldn't be enough room with my new Oil Catch Can - it was in the way:
I decided to move the catch can to the opposite side of the bracket since there was enough room (emptying it will now be a pain though) and the added benefit would be that the bracket could also serve as a heat shield. Unfortunately it was too tight and rubbed against the strut tower so the bracket needed to be remade to allow for more room.
- made from aluminium checkerplate because it's strong enough when bent and I have lots of offcuts from previous projects.
The left side is the base - the offset holes allow the bracket, when bent 90*, to line up with the engine-bay shelf when using the existing/OEM threaded mounts.
The bottom right section is a heatshield wing to shield-off the turbo's exhaust chamber (see topdown picture below).
Originally posted by Apu, Sun Aug 25, 2013 8:02 pm[
Can't you unscrew the top off the catch can? I've got the drain plug underneath but it's easier to just unscrew the top and drop a paper towel in there!
Originally posted by Lokiel, Sun Aug 25, 2013 8:14 pm[
Apu wrote:Can't you unscrew the top off the catch can? I've got the drain plug underneath but it's easier to just unscrew the top and drop a paper towel in there!
Unfortunately the VMS catch can has a double baffle which prevents this:
- if you have any more ideas like this though, keep 'em coming
Originally posted by Juicy HiC, Sun Aug 25, 2013 8:53 pm[
really impressed!
Originally posted by Apu, Sun Aug 25, 2013 9:15 pm[
Hmmm...that's a simple but very effective way of doing it. Never thought of it that way...the others I have seen have this ridiculously complex honeycomb.
Originally posted by ASE05, Tue Aug 27, 2013 5:56 am[
Got a link from where ya got the catch can?
Originally posted by Lokiel, Tue Aug 27, 2013 1:09 pm[
^
I got mine on eBay, just type "vms catch can" into the search criteria.
Originally posted by sailaholic, Tue Aug 27, 2013 2:49 pm[
Would be best if you coated the aluminium. Aluminium is highly heat conductive.
Originally posted by bootz, Tue Aug 27, 2013 7:02 pm[
sailaholic wrote:Would be best if you coated the aluminium. Aluminium is highly heat conductive.
Seriously shouldn't have much oil in the can anyway would you ? Also, who cares how hot it gets, not going to explode?
Originally posted by sailaholic, Tue Aug 27, 2013 7:12 pm[
bootz wrote:sailaholic wrote:Would be best if you coated the aluminium. Aluminium is highly heat conductive.
Seriously shouldn't have much oil in the can anyway would you ? Also, who cares how hot it gets, not going to explode?
True, dosent matter to the oil. It was just stated that the bracket would double as a heat shield.
Originally posted by Lokiel, Tue Aug 27, 2013 10:37 pm[
^
Agreed that the bracket could be clad to improve its heat shielding ability, but even as it stands, it's serving to shield the oil catch can from the heat radiated directly from the turbine exhaust (ie. instead of getting heated directly, the catch can is only getting conductive heat from the bracket it's attached to, and that's only at the points it's connected to the bracket, not over its entire surface that faces the turbo).
Originally posted by NitroDann, Tue Sep 17, 2013 9:00 pm[
The latest EFR turbocharged BP.
Dann
Originally posted by 16bit, Tue Sep 17, 2013 9:21 pm[
very nice, it almost doubles torque from 3500 to 4000 rpm.
Originally posted by Okibi, Wed Sep 18, 2013 12:16 am[
How much boost is that running?
Originally posted by NitroDann, Wed Sep 18, 2013 12:24 am[
30 Pound.
Dann
Originally posted by Lokiel, Wed Sep 18, 2013 9:05 am[
NitroDann wrote:The latest EFR turbocharged BP
Dann
Who's car is that? Details please.
Originally posted by MINX, Wed Sep 18, 2013 9:53 am[
Come on Simon - wind yours up to 30psi and show us how it goes!
Originally posted by Lokiel, Wed Sep 18, 2013 12:44 pm[
MINX wrote:Come on Simon - wind yours up to 30psi and show us how it goes!
You have no idea how frustrated I am that I can't tap into the EFR6258 while I still have stock internals.
The "common sense" angel on one shoulder is telling me to bide my time and save like crazy to complete the engine build as soon as possible whereas the "evil" angel on the other shoulder is telling me to fit my Turbosmart wastegate actuator with a 5psi spring (which I have) and get that tuned for the time being. The latter will cost me around $600 for a short-term issue.
Depending on which way the wind's blowing, I listen to one angel more than the other but the car really sucks to drive in it's un-boosted form
FYI: Unboosted (wastegate wired open), the SE doesn't have the same torque/power as a N/A 1.8L MX5, it feels more like my sister's original automatic 1978 1200cc Toyota Corolla (ie. no torque and takes forever to build up speed).
Originally posted by A.Chen89, Wed Sep 18, 2013 2:10 pm[
Build it and run all-of-it boost wise!
Originally posted by NitroDann, Wed Sep 18, 2013 2:18 pm[
It's soviet's car over at MT.net.
Basically a stock engine with forgies, tubular manifold and 3" exhaust. ID1000, E85, and a 6758 at 30psi.
Dann
Originally posted by Magpie, Wed Sep 18, 2013 2:55 pm[
Lokiel wrote: You have no idea how frustrated I am that I can't tap into the EFR6258 while I still have stock internals.
Hence why I am having everything done at once, no need to save pennies plus it will be useable (after it is run in) with no limitations, however it is just a natural aspirated so will be no match for a SE.
Originally posted by NitroDann, Wed Sep 18, 2013 2:58 pm[
The turbo setup on Lokiels car gives him about four hundred and fifty reasons to stress about it on stock internals.
Dann
Originally posted by plohl, Wed Sep 18, 2013 3:18 pm[
So is this going to be another 60s lakeside car?
Originally posted by NitroDann, Wed Sep 18, 2013 3:27 pm[
Depends what rubber he puts on and if he can steer I guess?
Dann
Originally posted by plohl, Wed Sep 18, 2013 3:31 pm[
NitroDann wrote:Depends what rubber he puts on and if he can steer I guess?
Dann
Lets hope so!
Originally posted by Lokiel, Wed Sep 18, 2013 4:10 pm[
NitroDann wrote:Depends what rubber he puts on and if he can steer I guess?
Dann
That last part will be the big problem - this is my only car and I intend to keep it for a long time so I doubt that I'll ever be in the "Drive it like you stole it!" mindset. I also don't intend to turn it into a track-only car so will not have the aero add-ons needed to do low times.
timk, about his Track Pig car, mentioned something along the lines of "I can drive it as hard as I want since I don't need to worry about damaging it, it's just a track car." That really made me aware that I was definitely driving more conservatively than I should but each track session I learn more about the car and push harder since it's far more capable than my driving ability. More track time and coaching is definitely on the cards, currently the conservative gorilla behind the wheel is the biggest handicap.
Realistically, I'd be happy if I could attain MINX's times, his is a DD car too and have a lot to do with his driving ability.
Originally posted by Magpie, Wed Sep 18, 2013 4:23 pm[
Lokiel wrote:...- this is my only car and I intend to keep it for a long time ...
Well mine will be a daily drive when they move me back to Brisbane once this project winds down, however I could always use the stock NA6 or the X19 as daily's if Blue NA6 gets too difficult in peak hour M1 traffic. Then again I may just drive it to the train station and avoid the M1 car park.
Originally posted by MattR, Wed Sep 18, 2013 4:55 pm[
Magpie wrote: Then again I may just drive it to the train station and avoid the M1 car park.
Braver man than me.......
I used to buy $300 shiters for the station run when I was a commuter in Sydney, old banged up XB falcons and Valiants didn't get stolen, broken into or vandalised by the locals.....
Originally posted by Lokiel, Wed Sep 18, 2013 6:39 pm[
MattR wrote:Magpie wrote: Then again I may just drive it to the train station and avoid the M1 car park.
Braver man than me.......
I used to buy $300 shiters for the station run when I was a commuter in Sydney, old banged up XB falcons and Valiants didn't get stolen, broken into or vandalised by the locals.....
+1
No way do you want to leave your car all day Magpie in a public car lot.
Originally posted by sailaholic, Wed Sep 18, 2013 7:36 pm[
Magpie wrote:Lokiel wrote:...- this is my only car and I intend to keep it for a long time ...
Well mine will be a daily drive when they move me back to Brisbane once this project winds down, however I could always use the stock NA6 or the X19 as daily's if Blue NA6 gets too difficult in peak hour M1 traffic. Then again I may just drive it to the train station and avoid the M1 car park.
Just let me know where you park it and I'll make sure it's safe :grin:
Don't worry about dying, worry about not living!
Garage Thread: http://www.mx5cartalk.com/forum/viewtopic.php?f=57&t=76716
Who is online
Users browsing this forum: No registered users and 129 guests