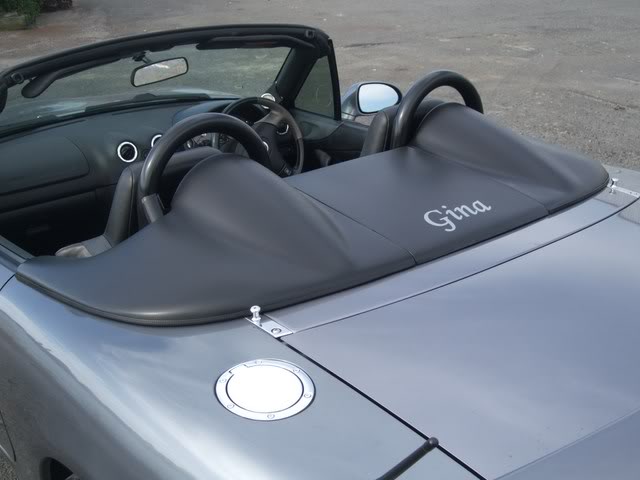
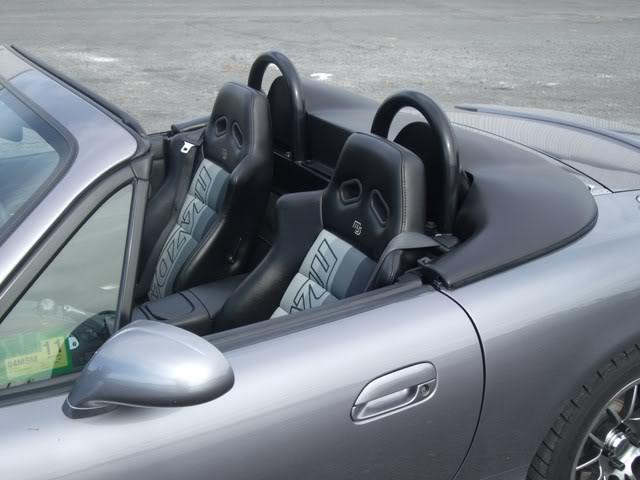
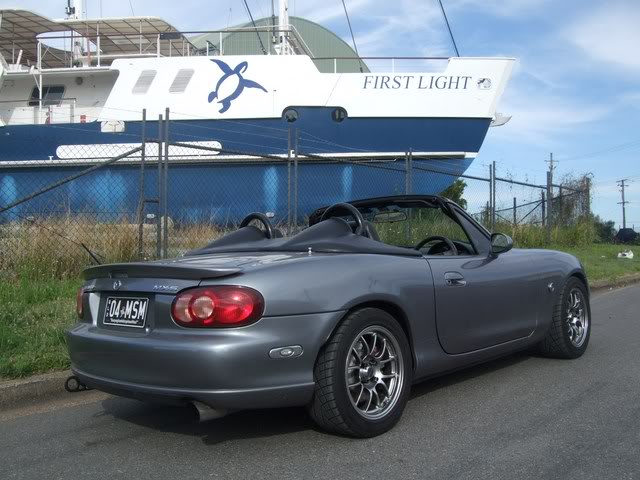
Lokiel's "Gina" (2004 Titanium SE)

Chat to do with your MX5/Miata/Eunos Garage Ride(s).

Moderators: timk, Stu, zombie, Andrew, The American, Lokiel, -alex, miata, StanTheMan, greenMachine, ManiacLachy, Daffy

User avatar
Lokiel
Forum legend
Posts: 4126
Joined: Thu May 28, 2009 2:39 pm
Vehicle: NB SE
Location: Brisbania

Re: Lokiel's "Gina" (once a 2004 Titanium SE) Recreated AGAIN

Postby Lokiel » Tue Jun 05, 2018 7:43 pm

Originally posted by Lokiel, Sun Sep 24, 2017 3:44 pm

Originally posted by Lokiel, Sun May 29, 2011 9:37 pm[

I did a couple of modz this weekend.

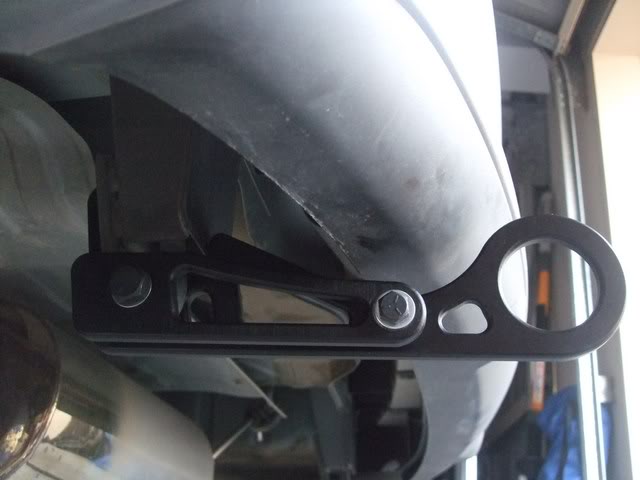
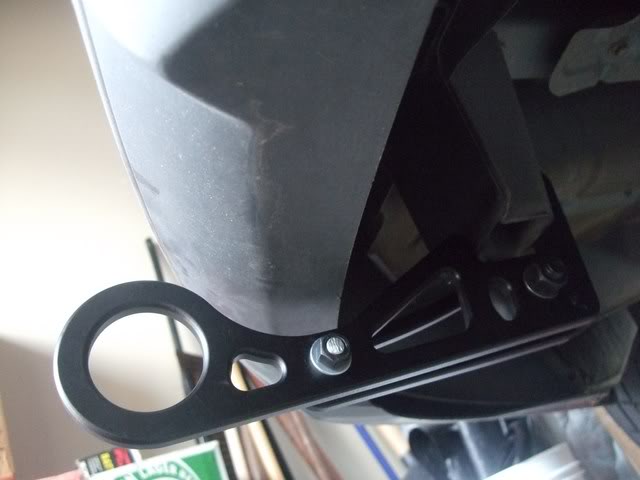
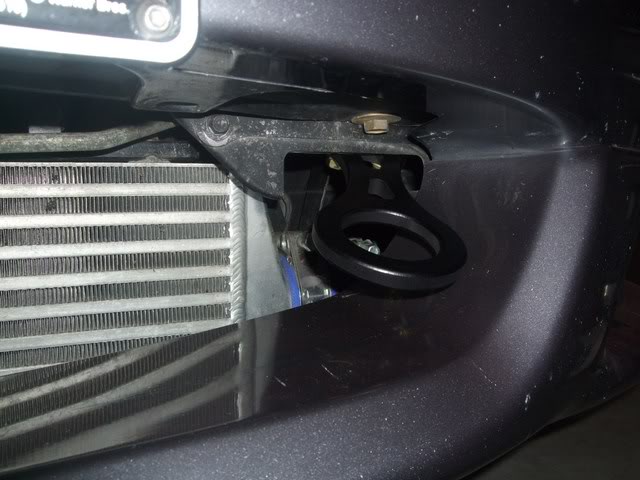
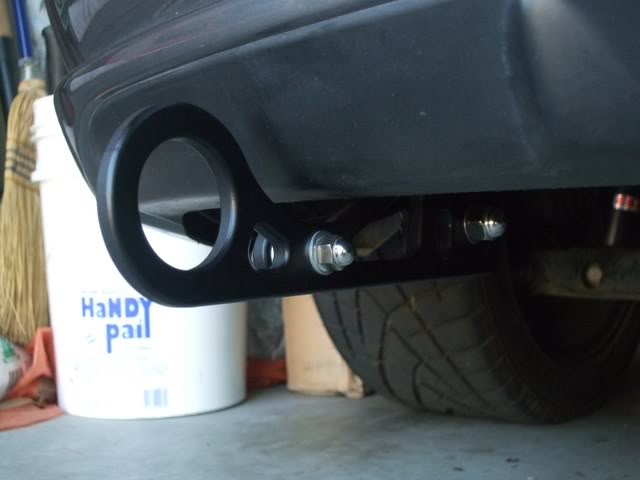
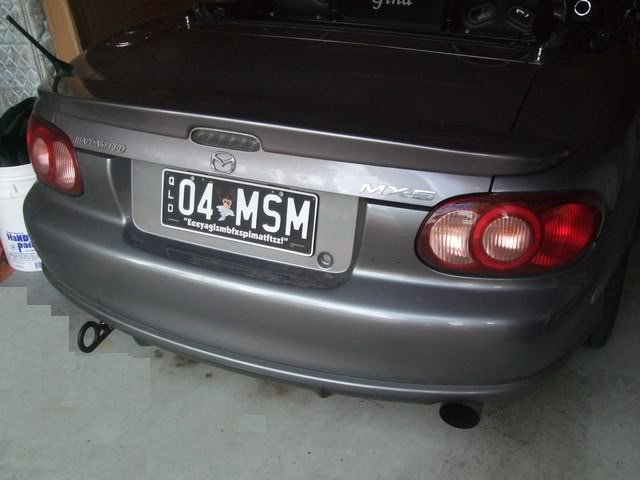
The first mod was installing the Ryokurob Tow Hooks that Mitchell organised in the Group Buy.

Image

Image

Image


Image

This one is really stealthy, you can't see it in photos taken from further away.

Unfortunately the supplied rear bolts weren't metric and the supplied large 1/2" bolt wasn't quite long enough so I had to buy a 1/2"x2" bolt. I got a matching 3/8"x2" bolt as well but had to cut that down since it was a little long (the supplied 3/8" bolt was the right length but didn't match the new 1/2" bolt). The large rear bolt would need to be 12-13mm which isn't a common size and I suspect why the imperial bolt was provided.

Apologies for the dirty car (it was supposed to rain today!).


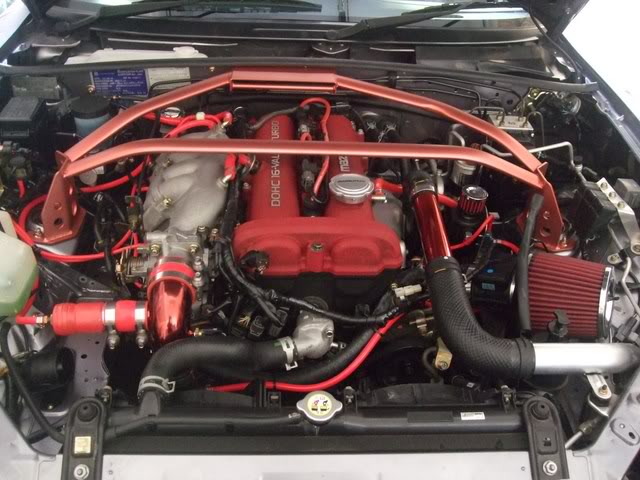
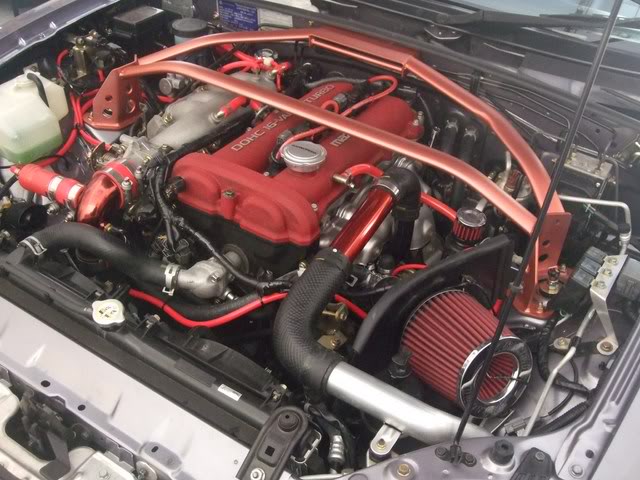
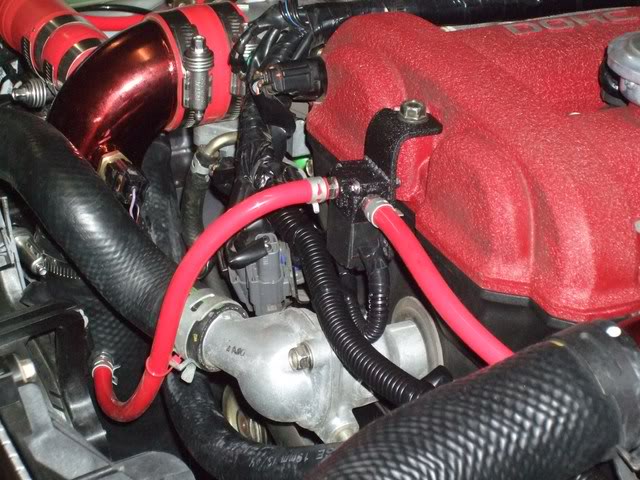
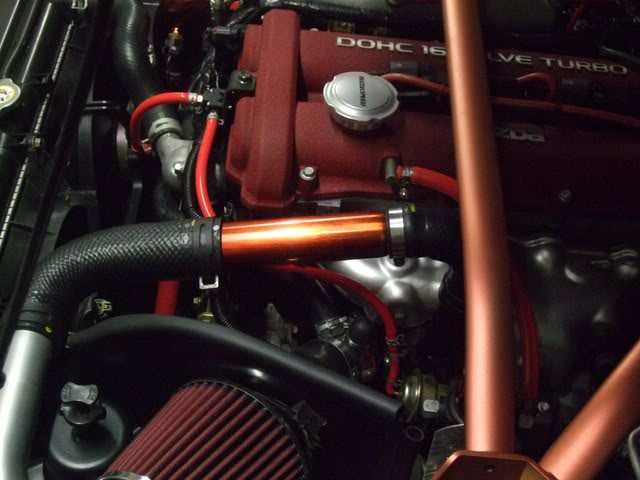
The 2nd mod was an update to my red engine bay theme (I blame/thank Crapweasel for this after I saw a picture of his red AEM CAI pipe). I decided to paint my chrome AEM intake pipe and chrome FM TBI elbow red, using VHT's Red Anodised Colour Coat:

Image

Image


This is the colour I actually wanted for the Carbing brace so I plan on re-doing it later in this colour too.


Originally posted by Crapweasel, Mon May 30, 2011 8:06 pm[

Lokiel wrote:The 2nd mod was an update to my red engine bay theme (I blame/thank Crapweasel for this after I saw a picture of his red AEM CAI pipe). I decided to paint my chrome AEM intake pipe and chrome FM TBI elbow red, using VHT's Red Anodised Colour Coat:

Image


This is the colour I actually wanted for the Carbing brace so I plan on re-doing it later in this colour too.


That looks better!! :mrgreen: Congratulations - You've now picked up an additional random number of KW just by changing the CAI colour!!


Originally posted by MINX, Mon May 30, 2011 8:23 pm[

At least 12.7rwkw i reckon.
Especially while in the garage!

be great if you can get the strut brace the same colour.
Don't worry about dying, worry about not living!
Garage Thread: http://www.mx5cartalk.com/forum/viewtopic.php?f=57&t=76716

User avatar
Lokiel
Forum legend
Posts: 4126
Joined: Thu May 28, 2009 2:39 pm
Vehicle: NB SE
Location: Brisbania

Re: Lokiel's "Gina" (once a 2004 Titanium SE) Recreated AGAIN

Postby Lokiel » Tue Jun 05, 2018 7:44 pm

Originally posted by Lokiel, Sun Sep 24, 2017 3:45 pm

Originally posted by Lokiel, Sat Jun 18, 2011 5:12 pm[

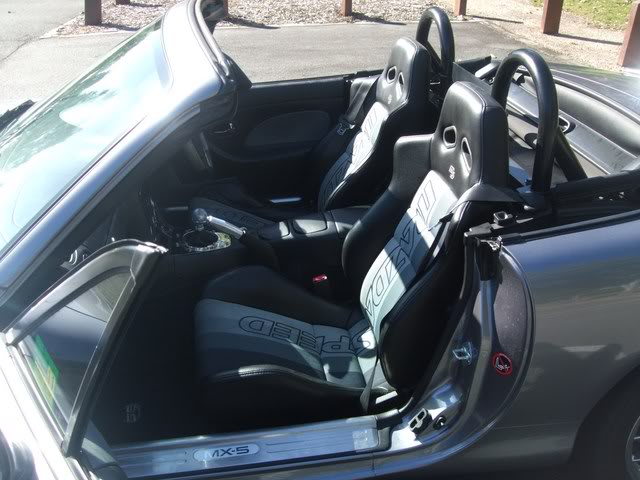
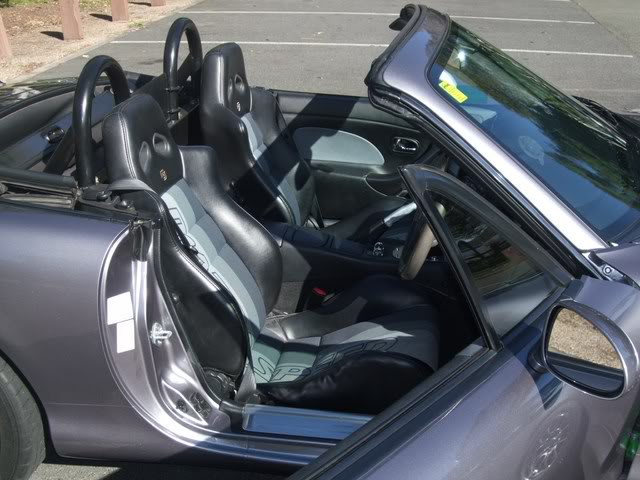
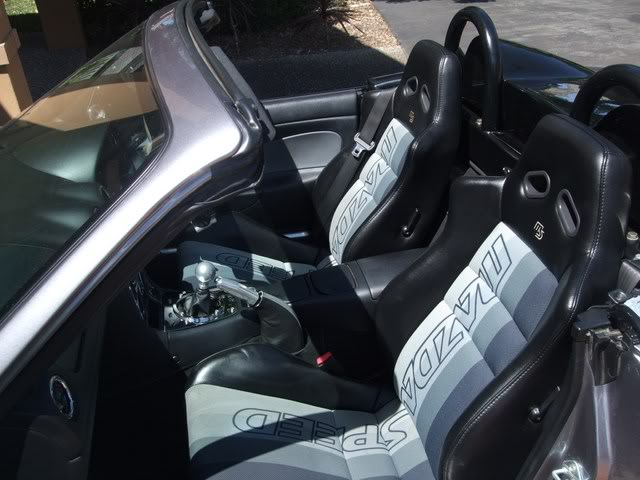
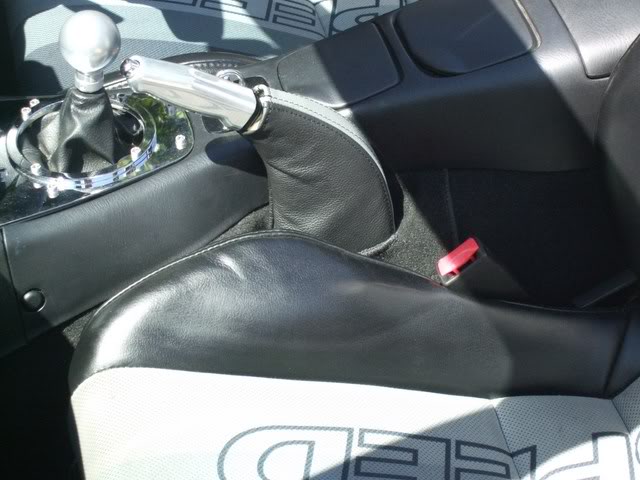
I installed a passenger-side MAZDASPEED seat a few weeks ago and have finally gotten around to taking some photos of it now that the weather has improved:

Image

Image


The mis-matched seats used to really bug me - balance has now been restored!

I had problems getting the rear port-side OEM seat bolt to fit since the OEM bolts have a very large head on them and the MAZDASPEED bracket on that side wouldn't allow it to fit. I replaced it with a high-tensity bolt and large washer that was filed flat on the bracket-edge so it's nice and secure now. I didn't have this same issue with the driver-side seat so they can't be symmetrical brackets.

I'm a big fan of these seats since they're not too narrow across the hips and shoulders, they hold you in snugly and have great lateral and lumbar support - something the OEM NB Mk2 seats don't have at all.

The Bad: They do contact the seat belt tower so cannot go back as far as the OEM seats and you do sit a little higher.


Originally posted by Old Dude, Sat Jun 18, 2011 5:26 pm[

It looked awesome last night when you showed us, and I was going to take you up on that offer and try the seats, but time just got away :D great looking car

Cheers
Dale 8)


Originally posted by Lokiel, Sat Jun 25, 2011 7:12 pm[

I finally found the acorn nuts for my Ryokurob rear towhook!

Since Australia has been using the metric system since the 60's, finding 3/8" and 1/2" acorn nuts for the rear towhook bolts in typical hardware/auto stores proved impossible since there's no demand for them at all. I actually found them in a boating store:

Image


They do look much better, and the heads were metric 14mm and 19mm respectively.
Don't worry about dying, worry about not living!
Garage Thread: http://www.mx5cartalk.com/forum/viewtopic.php?f=57&t=76716

User avatar
Lokiel
Forum legend
Posts: 4126
Joined: Thu May 28, 2009 2:39 pm
Vehicle: NB SE
Location: Brisbania

Re: Lokiel's "Gina" (once a 2004 Titanium SE) Recreated AGAIN

Postby Lokiel » Tue Jun 05, 2018 7:44 pm

Originally posted by Lokiel, Sun Sep 24, 2017 3:45 pm

Originally posted by Lokiel, Sun Jun 26, 2011 10:22 pm[

I decided to redo my wastegate+solenoid hoses since they should be as short as possible and mine were a little long and convoluted:
Image


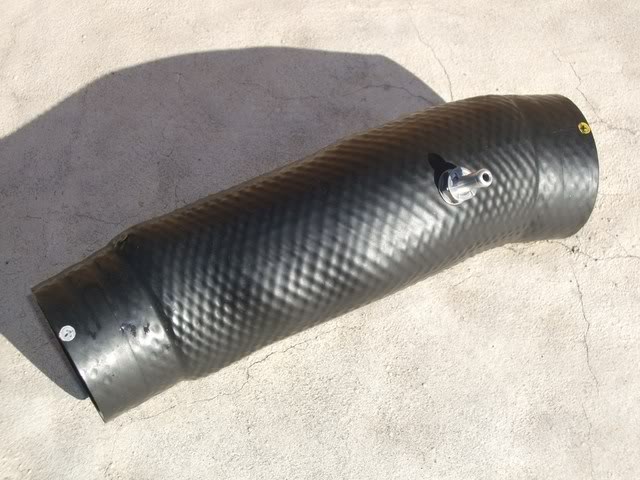
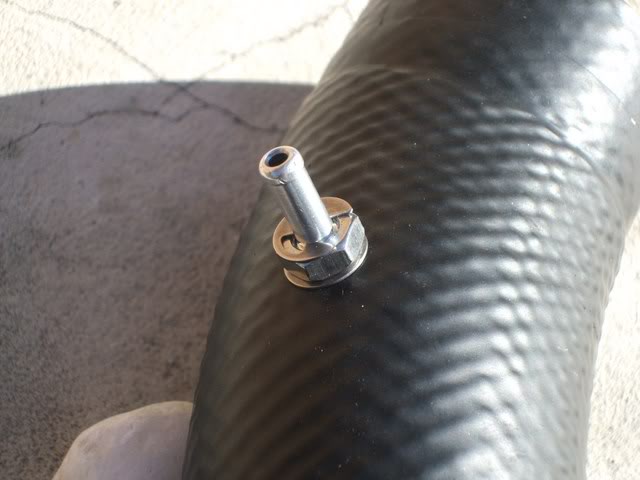
About a month ago, billybunter sent me his QuickTap connector that he wasn't using since he knew that I was interested in one and S&H from Canada is hideously expensive compared to the price of the connector itself. The Quicktap connector is used to add a barb to a hose (http://www.atpturbo.com/mm5/merchant.mvc?Screen=PROD&Store_Code=TP&Product_Code=ATP-FTG-010&Category_Code=) which is a LOT easier than adding a barb to a metal pipe.
I needed the QuickTap connector to tap the hose after the intercooler to use as a boost pressure source for the wastegate solenoid since the best place for this is between the intercooler and the TB, as close to the TB as possible. The OEM rubber TB elbow had a barb for this but the FM stainless steel elbow I now have does not since FM believe that the boost pressure source for the wastegate should be between the turbo and intercooler, as close to the turbo as possible - this does not take into account the pressure drop through the intercooler.
I forgot to take pictures of this at the time I originally installed it so took them today:
Image

Image

In hindsight, I would have preferred to install the connector a little closer to the TB elbow (ie. higher up the hose).

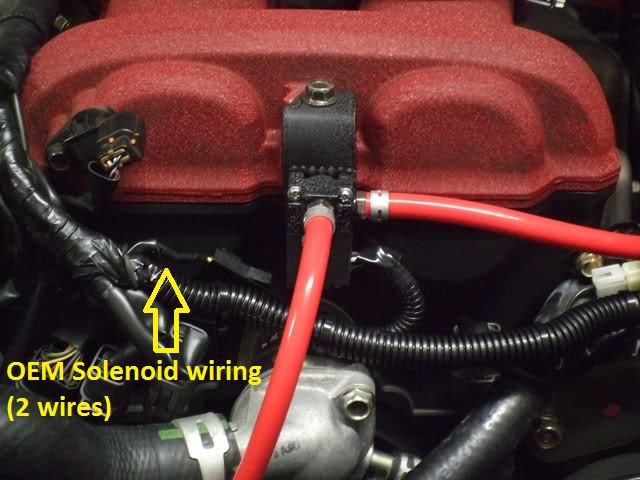
To shorten the hoses, I decided to move the solenoid to the OEM location, the front of the rocker cover. The other advantage of this location is that the OEM solenoid wires are right there so I could get rid of the additional wiring I needed to add for my initial aftermarket solenoid location.
I made an aluminium bracket for the solenoid and mounted it.
The blue/black aftermarket solenoid mounted in front of the engine on the aluminium bracket looked out of place so I decided to paint the blue solenoid section using my old favourite, Wrinkle Red!
Unfortunately that looked crap too so I decided to do something radical - WRINKLE BLACK! I painted both the bracket and blue section of the aftermarket solenoid - looks MUCH better. For good measure, I used some split loom to clean up the front wiring harness:
Image

I also used some vinyl dye to re-colour the solenoid's white plastic connectors to black (see right of arrow) - I should do this to the OEM plastic connector on the far right too!

This photo shows the connection to the QuickTap connector on the intercooler hose:
Image


Side View:
Image


I shortened the hoses by about 30cm and tidied up the hoses/harness so am happy with the result.


Originally posted by davidau, Mon Jun 27, 2011 3:52 pm[

Lokiel wrote:I installed a passenger-side MAZDASPEED seat a few weeks ago and have finally gotten around to taking some photos of it now that the weather has improved:

Image

Image


The mis-matched seats used to really bug me - balance has now been restored!

I had problems getting the rear port-side OEM seat bolt to fit since the OEM bolts have a very large head on them and the MAZDASPEED bracket on that side wouldn't allow it to fit. I replaced it with a high-tensity bolt and large washer that was filed flat on the bracket-edge so it's nice and secure now. I didn't have this same issue with the driver-side seat so they can't be symmetrical brackets.

I'm a big fan of these seats since they're not too narrow across the hips and shoulders, they hold you in snugly and have great lateral and lumbar support - something the OEM NB Mk2 seats don't have at all.

The Bad: They do contact the seat belt tower so cannot go back as far as the OEM seats and you do sit a little higher.

looks amazing....keep up the good works mate


Originally posted by bootz, Mon Jun 27, 2011 4:09 pm[

Lokiel wrote:I decided to redo my wastegate+solenoid hoses since they should be as short as possible and mine were a little long and convoluted:
Image


Too pretty for words. I think the seats are excellent with the rollbar.

I note you are using a filter over the catch can. In non turbo cars the line goes in the intake crossover tube so the MAF measures it. I guess the Adaptronic takes this into account?


Originally posted by Lokiel, Mon Jun 27, 2011 5:11 pm[

I'm very happy with the seats but intend to re-clad the pleather with black leather when I can afford it and get the driver-side bolster fixed+lowered at the same time. They certainly hold you in nice and tight, especially compared to the stock seats which have little lateral supportl and no lumbar support. For me, the perfect seat would be the OEM base (since it has low side bolsters and OEM mounts) and the MAZDASPEED backs which have great lateral and lumbar support.


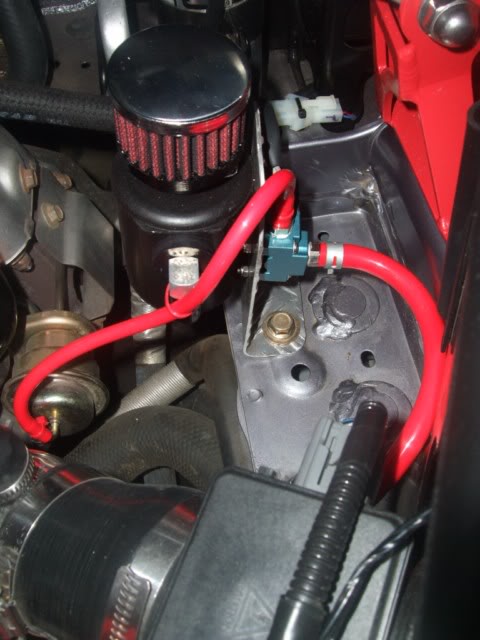
On the stock SE, the rocker's hose is connected to a barb on the strut brace which contains a hose that feeds it into the oil catch can on the opposite side of the strut brace, it then comes back across the brace, via a parallel hose, and feeds into the air intaker.

Why do this oil catch can mod?
When the SE's boost reaches around 12psi, oil can be fed back into the air intake and subsequently gets flushed through the turbo inlet, intercooler and intake manifold. The catch can configuration I have prevents this since there is no feedback into the air intake; it needs the ventilation filter to prevent pressure build up in the oil catch can.

The Adaptronic e440 ECU configuration I'm using makes use of the MAP sensor only and ignores the MAF sensor (I do have the option of setting up the MAF sensor as a failover input though) so MAF metering doesn't matter. I actually had this Oil Catch Can Configuration set up before the Adaptronic install with no apparent ill effects.


Originally posted by bootz, Mon Jun 27, 2011 5:18 pm[

Lokiel wrote:I actually had this Oil Catch Can Configuration set up before the Adaptronic install with no apparent ill effects.


That seems to be the prevailing attitude, I can't see too much air being sucked into the rocker, not on a non turbo car, so does not make much of a difference.


Originally posted by Lokiel, Mon Jun 27, 2011 5:46 pm[

I'm a little confused about your response bootz. Air is actually expelled from the rocker cover, not the other way round.
ie. there is positive pressure from the rocker .

On a non-turbo MX5, many people simply put an air filter on the rocker cover and remove the hose altogether.
Don't worry about dying, worry about not living!
Garage Thread: http://www.mx5cartalk.com/forum/viewtopic.php?f=57&t=76716

User avatar
Lokiel
Forum legend
Posts: 4126
Joined: Thu May 28, 2009 2:39 pm
Vehicle: NB SE
Location: Brisbania

Re: Lokiel's "Gina" (once a 2004 Titanium SE) Recreated AGAIN

Postby Lokiel » Tue Jun 05, 2018 7:45 pm

Originally posted by Lokiel, Sun Sep 24, 2017 3:46 pm

Originally posted by Lokiel, Sun Jun 26, 2011 10:22 pm[

I decided to redo my wastegate+solenoid hoses since they should be as short as possible and mine were a little long and convoluted:
Image


About a month ago, billybunter sent me his QuickTap connector that he wasn't using since he knew that I was interested in one and S&H from Canada is hideously expensive compared to the price of the connector itself. The Quicktap connector is used to add a barb to a hose (http://www.atpturbo.com/mm5/merchant.mvc?Screen=PROD&Store_Code=TP&Product_Code=ATP-FTG-010&Category_Code=) which is a LOT easier than adding a barb to a metal pipe.
I needed the QuickTap connector to tap the hose after the intercooler to use as a boost pressure source for the wastegate solenoid since the best place for this is between the intercooler and the TB, as close to the TB as possible. The OEM rubber TB elbow had a barb for this but the FM stainless steel elbow I now have does not since FM believe that the boost pressure source for the wastegate should be between the turbo and intercooler, as close to the turbo as possible - this does not take into account the pressure drop through the intercooler.
I forgot to take pictures of this at the time I originally installed it so took them today:
Image

Image

In hindsight, I would have preferred to install the connector a little closer to the TB elbow (ie. higher up the hose).

To shorten the hoses, I decided to move the solenoid to the OEM location, the front of the rocker cover. The other advantage of this location is that the OEM solenoid wires are right there so I could get rid of the additional wiring I needed to add for my initial aftermarket solenoid location.
I made an aluminium bracket for the solenoid and mounted it.
The blue/black aftermarket solenoid mounted in front of the engine on the aluminium bracket looked out of place so I decided to paint the blue solenoid section using my old favourite, Wrinkle Red!
Unfortunately that looked crap too so I decided to do something radical - WRINKLE BLACK! I painted both the bracket and blue section of the aftermarket solenoid - looks MUCH better. For good measure, I used some split loom to clean up the front wiring harness:
Image

I also used some vinyl dye to re-colour the solenoid's white plastic connectors to black (see right of arrow) - I should do this to the OEM plastic connector on the far right too!

This photo shows the connection to the QuickTap connector on the intercooler hose:
Image


Side View:
Image


I shortened the hoses by about 30cm and tidied up the hoses/harness so am happy with the result.


Originally posted by davidau, Mon Jun 27, 2011 3:52 pm[

Lokiel wrote:I installed a passenger-side MAZDASPEED seat a few weeks ago and have finally gotten around to taking some photos of it now that the weather has improved:

Image

Image


The mis-matched seats used to really bug me - balance has now been restored!

I had problems getting the rear port-side OEM seat bolt to fit since the OEM bolts have a very large head on them and the MAZDASPEED bracket on that side wouldn't allow it to fit. I replaced it with a high-tensity bolt and large washer that was filed flat on the bracket-edge so it's nice and secure now. I didn't have this same issue with the driver-side seat so they can't be symmetrical brackets.

I'm a big fan of these seats since they're not too narrow across the hips and shoulders, they hold you in snugly and have great lateral and lumbar support - something the OEM NB Mk2 seats don't have at all.

The Bad: They do contact the seat belt tower so cannot go back as far as the OEM seats and you do sit a little higher.

looks amazing....keep up the good works mate


Originally posted by bootz, Mon Jun 27, 2011 4:09 pm[

Lokiel wrote:I decided to redo my wastegate+solenoid hoses since they should be as short as possible and mine were a little long and convoluted:
Image


Too pretty for words. I think the seats are excellent with the rollbar.

I note you are using a filter over the catch can. In non turbo cars the line goes in the intake crossover tube so the MAF measures it. I guess the Adaptronic takes this into account?


Originally posted by Lokiel, Mon Jun 27, 2011 5:11 pm[

I'm very happy with the seats but intend to re-clad the pleather with black leather when I can afford it and get the driver-side bolster fixed+lowered at the same time. They certainly hold you in nice and tight, especially compared to the stock seats which have little lateral supportl and no lumbar support. For me, the perfect seat would be the OEM base (since it has low side bolsters and OEM mounts) and the MAZDASPEED backs which have great lateral and lumbar support.


On the stock SE, the rocker's hose is connected to a barb on the strut brace which contains a hose that feeds it into the oil catch can on the opposite side of the strut brace, it then comes back across the brace, via a parallel hose, and feeds into the air intaker.

Why do this oil catch can mod?
When the SE's boost reaches around 12psi, oil can be fed back into the air intake and subsequently gets flushed through the turbo inlet, intercooler and intake manifold. The catch can configuration I have prevents this since there is no feedback into the air intake; it needs the ventilation filter to prevent pressure build up in the oil catch can.

The Adaptronic e440 ECU configuration I'm using makes use of the MAP sensor only and ignores the MAF sensor (I do have the option of setting up the MAF sensor as a failover input though) so MAF metering doesn't matter. I actually had this Oil Catch Can Configuration set up before the Adaptronic install with no apparent ill effects.


Originally posted by bootz, Mon Jun 27, 2011 5:18 pm[

Lokiel wrote:I actually had this Oil Catch Can Configuration set up before the Adaptronic install with no apparent ill effects.


That seems to be the prevailing attitude, I can't see too much air being sucked into the rocker, not on a non turbo car, so does not make much of a difference.


Originally posted by Lokiel, Mon Jun 27, 2011 5:46 pm[

I'm a little confused about your response bootz. Air is actually expelled from the rocker cover, not the other way round.
ie. there is positive pressure from the rocker .

On a non-turbo MX5, many people simply put an air filter on the rocker cover and remove the hose altogether.
Don't worry about dying, worry about not living!
Garage Thread: http://www.mx5cartalk.com/forum/viewtopic.php?f=57&t=76716

User avatar
Lokiel
Forum legend
Posts: 4126
Joined: Thu May 28, 2009 2:39 pm
Vehicle: NB SE
Location: Brisbania

Re: Lokiel's "Gina" (once a 2004 Titanium SE) Recreated AGAIN

Postby Lokiel » Tue Jun 05, 2018 7:45 pm

Originally posted by Lokiel, Sun Sep 24, 2017 3:47 pm

Originally posted by Dandaman, Thu Jun 30, 2011 2:03 am[

Hey Lokiel, nice car and great thread. Can we have your overall thoughts on the bracing and suspension mods you've made so far? I have similar plans in the near future for my SE and any guidance would be appreciated. Especially loving the 3 point strut brace and the thought of getting rid of that funny factory thing with the breather lines all over the place!

Regards,

Dan.


Originally posted by Lokiel, Thu Jun 30, 2011 10:50 am[

The OEM Bilstein shocks are too firm/harsh for DD IMO. On a dedicated track car, they'd be OK though. I chose the BC Racing BR Series coilovers because they're good value for money; they have 33 dampening settings which are easily adjustable via a turnable knob at the top of the shock assembly (some shocks have the knob mounted on the shaft which can be a hassle to get to; in some cases, the car must be jacked up to get at them). For DD, I have them set to "10 from Hard" up font and "12 from Hard" on the rear. For track driving, obviously they would be set harder.

As for the bracing modz, here's the order I rank them in:

1. MX5 Plus Twin Hoop Roll Bar with built-in torque box
Easily the biggest "difference-maker", I noticed the stiffer chassis as soon as I turned onto the road from MX5 Plus and that was only around 5-10kph. The NA/NBs have no twist-bracing built into the chassis (the NC addressed this issue) and require additional bracing to prevent it. The roll bar should be your first stiffening/bracing mod. As far as I'm concerned, the roll bar as a safety measure is its secondary function.

2. Boss Frog Frog Arms
These made the front of the car feel firmer when turning sharply and definitely reduced cowl shake when going over rough surfaces. When you look at the front of the car from the driver's position, it doesn't shake as much either (I could be imagining that though). I installed these after the FM Frame Rails and noticed the difference so it's possible the difference may be more noticeable without the FM Frame Rails.

3. FM Frame Rails
I didn't really notice the difference with these but they must be doing something because when I jack up one corner of the car, the other wheel on that side lifts much earlier and higher than it used to. I recommend these over the Boss Frog rails because theyre stainless steel (Boss Frog rails are powder coated steel so rust will be an issue).

4. Front Strut Brace
I only rank this last because I didn't really notice the difference either. I had the OEM brace on originally, then the Beatrush brace with the built-in Brake Master Cylinder stopper (helps to firm the brake pedal); both are very good which probably explains why I didn't notice much difference. Keith Tanner from FM says that the stock SE brace is very good so there's no need to rush to change it. If you just want to get rid of the OEM catch can and plumbing, you can simply cut the two welded brackets that attach the extra catch-can stuff to the brace. My 3pt brace doesn't have the brake master cylinder stopper and I plan to add one to it at some stage. The MAZDASPEED 3-pt brace includes this and is lighter than the Carbing brace but they're hard to find these days (and expensive, around $500+). The Carbing 3-pt brace is a bit lighter than the OEM 3pt brace - the towers of the OEM brace are very heavy, they're made of reinforced steel I reckon.

With the Roll Bar, FM Frame Rails, Frog Arms and 3pt front strut brace, I've completed the "chassis brace box" and improved the twist-bracing on the car massively. There is no penalty to adding chassis stiffening, other than weight.


Originally posted by bootz, Thu Jun 30, 2011 5:08 pm[

Lokiel wrote:I'm a little confused about your response bootz. Air is actually expelled from the rocker cover, not the other way round.
ie. there is positive pressure from the rocker .

On a non-turbo MX5, many people simply put an air filter on the rocker cover and remove the hose altogether.


Other way round, I thought that as well initially because of the catch can thing but there is not much point in a filter if it is blowing instead of sucking. It must suck and blow, as said the actress...

Billy Joe Bob explains it like this:

The breather side is sucking in air, however small, as a function of how much the PCV (connected to the intake manifold with the short tube) is opening. In other words, the blowby air from the crankcase being positively vented to the intake manifold when the PCV opens and the breather side is letting in fresh air which also gets in the mix to the intake manifold. So the net air coming into the breather equals the net air going into the intake manifold. When the breather was hooked up normally, post MAF, this would mean that the air that goes into the breather is being measured, just like the rest of the air going through the crossover pipe to the throttle body. With it no longer being metered, like on your setup, this would mean that the small extra amount of air that would go through the breather is not being metered and thus the ECU would run it leaner at WOT (open loop). However, during normal driving, there is a feedback loop anyway so it would still run stoich then. Just would mean the ECU would have a bit of positive fuel trim.


Originally posted by bootz, Thu Jun 30, 2011 5:23 pm[

I was hoping that you would comment on the beefy front sway bar you have. I am thinking of putting in a front sway bar and tossing up between standard SE, whiteline or racing beat. I am tending to think of not changing the rear.

As my baby is NB8B I think the standard SE is only a mm or two thicker than mine anyway, so I am interested in SE owners who have upgraded and if it is overwhelmingly positive. For a couple of hundred dollars, seems like a (relatively) cheap upgrade.

The other thing is what a difference going from 17s to 15s makes. Okay it may sound a bit lame but the ride quality now is great, obviously at the expense of some road holding (I did notice but my bum appreciates the difference). A set of Mazdaspeeds now up for grabs for someone in WA. :lol:


Originally posted by Lokiel, Thu Jun 30, 2011 6:50 pm[

bootz wrote:I was hoping that you would comment on the beefy front sway bar you have. I am thinking of putting in a front sway bar and tossing up between standard SE, whiteline or racing beat. I am tending to think of not changing the rear.

As my baby is NB8B I think the standard SE is only a mm or two thicker than mine anyway, so I am interested in SE owners who have upgraded and if it is overwhelmingly positive. For a couple of hundred dollars, seems like a (relatively) cheap upgrade.

The other thing is what a difference going from 17s to 15s makes. Okay it may sound a bit lame but the ride quality now is great, obviously at the expense of some road holding (I did notice but my bum appreciates the difference). A set of Mazdaspeeds now up for grabs for someone in WA. :lol:


Forgot to mention the "beefy" front 1.25" Racing Beat Tubular Sway Bar:
This made a big difference since it really keeps the wheels planted when cornering hard. I have an acute corner junction that I approach from downhill and LOVE to attack it at 60kph without braking when I can see that the coast is clear to do so (I can usually only tell when I'm almost on top of it unfortunately so often end up braking to a stop). With the OEM SE sway bar, I could never hit it that hard. Definitely worth the upgrade. Keith Tanner from FM recommends sway bar upgrades as the best bang-for-buck handling mod you can do. I'm sticking with the rear SE sway bar.

Going from 17" rims to 15" rims was something that most SE/MSM owners, including myself, do with no regrets. The ride is less harsh, you don't feel like you've dented your rims every time you hit a pothole, tyres are cheaper, the wheel/tyre combination weight is lowered at each corner and they handle MUCH better (the fastest MX5 track cars in the US use either 15 or 16" rims - none use 17" rims). 17" rims were standard on the SE to differentiate the SE as a "sportier" NB - a marketing gimmick only.


Originally posted by Dandaman, Thu Jun 30, 2011 11:09 pm[

Cheers thanks for that, the first mod i'm planning is a brown davis cage with supersprints in mind in the future. I don't find the factory ride unpleasant but i agree that it can be harsh at times. I think my plan includes importing PSS9's before the end of the year. The frog arms sound promising.

Regards,

Dan.
Don't worry about dying, worry about not living!
Garage Thread: http://www.mx5cartalk.com/forum/viewtopic.php?f=57&t=76716

User avatar
Lokiel
Forum legend
Posts: 4126
Joined: Thu May 28, 2009 2:39 pm
Vehicle: NB SE
Location: Brisbania

Re: Lokiel's "Gina" (once a 2004 Titanium SE) Recreated AGAIN

Postby Lokiel » Tue Jun 05, 2018 7:46 pm

Originally posted by Lokiel, Sun Sep 24, 2017 3:48 pm

Originally posted by Lokiel, Sat Jul 02, 2011 6:41 pm[

The NB's 6-speed gearbox is known for its ambiguous reverse gear selection and sloppy feel when compared to earlier NA 5-speed gearboxes. I've never been really happy with my SE's gearbox, especially when compared to my previous car, a 1982 Mitsubishi JA Starion. About 30% of the time I need to re-select reverse gear when I don't move or get the dreaded gear crunching and occasionally I select the wrong gear which makes me second-guess each subsequent gear change.

Miataroadster has recently created a Short Throw Shifter for the MX-5 6-speed gear box that has been getting rave reviews on the web so I thought I'd give it a go.
See:
http://www.mazda-speed.com/forum2/index.php/topic,23486.0.html
http://www.mazda-speed.com/forum2/index.php/topic,23531.0.html

Here's the 2 versions offered (standard height and long version) and a comparison of the long version against the OEM shifter:
Image
Image

Summarised comments from the manufacturer:
*Because of the better design (use of the NA factory shifter's "crescent" bushings on both sides of the fulcrum ball vs. the NB factory shifter's crude metal-on-metal contact with the dowel pins in the turret) and superior manufacturing quality over the factory shifter, with either the tall/angled or stock height version MiataRoadster shifter, shifting will be more precise and predictable (rather than having to "find" the desired gear).
*The stock height version will be harder to shift than a stock shifter, but with a shorter motion.
*The tall version takes the same effort to shift as a stock shifter, but with a slightly longer arm motion.
*We had been using the JDM brass tube angled extensions with a Mazdaspeed JDM short shifter in our race car and snapped off two of them.
*For liability reasons, I stopped selling them and pursued offering a one-piece shaft with the angle built in.
*The benefits of the tall version having the shift knob closer to the steering wheel alone outweigh every other feature, that's the main reason why I got into the short shifter business.

I ordered 3 standard height SSK kits (one for me, MINX and Davex3) and they arrived from the US within 7 days - this also included the actual manufacturing of the shifter. Everything was included except the heavy duty grease for the shifter's pivot ball and selector ball.

Installation was painless, taking only 30 minutes or so in total per kit and the instructions are comprehensive with lots of pictures to make everything idiot proof.

As expected, the SSK throws are much shorter. Gear selection takes a little more effort and is now much "notchier", selecting a gear is very distinct; before my gearbox felt quite sloppy at times. Reverse is much better because of this, I now know that I've selected reverse because you can feel it locking into the notch; before I really never knew.

So far I'm liking this mod a lot and wonder why the OEM shifter was so sloppy/vague, especially given that early 5-speed NA gearboxes were praised for their precision (ie. How can Mazda have accepted a gearbox in the NB that was much worse than the NAs?)

If you're at all unhappy with your 6-speed gear selection, this is a "MUST DO" mod IMO.


Originally posted by bootz, Sat Jul 02, 2011 8:01 pm[

Really Simon, you overstate your case. :lol:

Six speed reverse is excelllent. I took about a year to get the 5-6 change down pat. A diff change helped.

I can punch any gear I want at any RPM. i.e 2nd to first in 5000 no problem. This is a seriously tough box. :D


Originally posted by bootz, Sat Jul 02, 2011 8:10 pm[

Sorry, re reading I think your box may not be performing like mine. Perhaps manufacturing variations. :?:

I have NO isssues with the 6 speed. Perfect change all the time. I think 5-6 is a little ambiguous, but a firm hand fixes.

Would happily abuse this box anywhere. Now the NB8B clutch is another story strong but shudders, you need to hit it with a stick. Not perfect for a light car.

Love what your doing. :!:


Originally posted by Lokiel, Sat Jul 02, 2011 11:19 pm[

bootz wrote:Really Simon, you overstate your case. :lol:

Six speed reverse is excelllent. I took about a year to get the 5-6 change down pat. A diff change helped.
:


You my friend have one of the "blessed" 6-speed gearboxes if your reverse is excellent, a LOT of people have issues with reverse on their NB 6-speeds.

Check out this link for other people's problems with the 6-speed gearbox: http://www.google.com.au/search?hl=en&biw=1138&bih=1053&q=+site:forum.miata.net+%2Bmiata+%2Bnb+%2Breverse+%2Bshift

Consider yourself lucky with your shifter/gearbox and know that it's better than most.

I actually found it embarassing when I ground the gears trying to reverse in public places - MX5 owners knew what was going on but everyone else probably thought I was a noob.

I agree with your "firm hand" approach though and that's OK on the road but a track is different. The problem is that you have to think about gear changes too much; once you've missed a gearshift, shifting stops becoming automatic and you focus on them too much rather than other driving aspects.

I'm hoping to get back to not even thinking about gear changes with this SSK. So far, so good.


Originally posted by Hellmun, Sat Jul 02, 2011 11:30 pm[

The NB8B and SE gearboxes are not the same Bootz. Travel distances are very different between the SE and normal box, I found the SE box a little notchier but the distance between 3rd and 4th is MUCH shorter (maybe 1" total travel). I personally find the NB8B 6 speed a bit vague from 3rd to 5th on the track and have been looking at making a guide plate it make it much harder to get into the reverse gate for track work. Would love to know if the short-shifter helps in this regard. In high-G corners with the engine cantered like getting onto the main straight at Phillip Island it's a real pain getting into 5th quickly.

In regards to crunchy reverse, I find tapping the 1st gate, dropping to neutral and pumping the clutch twice seems to ease entry when the car is dead cold and remove the crunch. I used to think my stock clutch was sticking when cold but even my new Exedy HDB does it as well. Same solution still works though.


Originally posted by bootz, Mon Jul 04, 2011 1:20 pm[

Hellmun wrote:The NB8B and SE gearboxes are not the same Bootz. Travel distances are very different between the SE and normal box, I found the SE box a little notchier but the distance between 3rd and 4th is MUCH shorter (maybe 1" total travel).


Thanks Lokiel and Hellmun. Big news to me. :shock:

Hellmun wrote: I personally find the NB8B 6 speed a bit vague from 3rd to 5th on the track and have been looking at making a guide plate it make it much harder to get into the reverse gate for track work.


Your comment parallels mine perfectly. If you have to think about it you are taking too much time. That saying, with the same diff as yours I now get to use the 6th gear on a regular basis.

It is a bit curious actually. :? This same box is used in the RX-7 and Toyota Lexus. Only top quality equipment would be used in the Lexus, ditto RX-7.
Don't worry about dying, worry about not living!
Garage Thread: http://www.mx5cartalk.com/forum/viewtopic.php?f=57&t=76716

User avatar
Lokiel
Forum legend
Posts: 4126
Joined: Thu May 28, 2009 2:39 pm
Vehicle: NB SE
Location: Brisbania

Re: Lokiel's "Gina" (once a 2004 Titanium SE) Recreated AGAIN

Postby Lokiel » Tue Jun 05, 2018 7:46 pm

Originally posted by Lokiel, Sun Sep 24, 2017 3:48 pm

Originally posted by bootz, Mon Jul 11, 2011 5:15 pm[

Now that you have got me interested in my suspension again. I would like to check with you some curious omissions to your swaybar setup.
I would of thought (being the thorough person that you are) that you would have ordered the Racing Beat bracing and reinforcement.

http://www.racingbeat.com/Miata-1990-2005/Suspension/54111.html

and

http://www.racingbeat.com/Miata-1990-2005/Sway-Bars/54120.html?id=vZntzxks

Also I take your points about the RB endlinks, but really how often would anyone adjust them?


Originally posted by dave2221, Mon Jul 11, 2011 5:28 pm[

My 6 speed in my SE has been flawless since i got the car.

I was unaware that reverse had any issues, as i never crunch.

Also, i can smash it through all the gears at any time, and always find them easily (i.e i dont have to go through the shift range, and occasionally skip gears, 3rd to 5th ect or 3rd to 6th......


Originally posted by Lokiel, Mon Jul 11, 2011 6:16 pm[

bootz wrote:Now that you have got me interested in my suspension again. I would like to check with you some curious omissions to your swaybar setup.

I would of thought (being the thorough person that you are) that you would have ordered the Racing Beat bracing and reinforcement.

http://www.racingbeat.com/Miata-1990-2005/Suspension/54111.html

and

http://www.racingbeat.com/Miata-1990-2005/Sway-Bars/54120.html?id=vZntzxks

Also I take your points about the RB endlinks, but really how often would anyone adjust them?


I asked Brian Goodwin what he would recommend for additional sway bar bracing and he suggested that the AL blocks and bolts would be sufficient - you really need to be pushing your car hard to snap the single bracket and I'm definitely not there yet. If I was handy with a welder I would have bought the Lower Control Arm Reinforcement Flanges though just for added security - I'm surprised Mazda didn't put the twin braces on later model NBs (cheap buggers) since that was standard on NAs.

My problem with the RB endlinks was that I couldn't adjust them to get a zero load on the sway bar. I was almost at the desired point on the front but needed to spin one end 180* to get there. When I took the endlink off the sway bar and spun the end 180*, I couldn't get it back on the sway bar (I probably could have if I yanked the hell out of the swaybar and used the appropriate curse words). If the RB endlinks were reverse threaded at one end it would be easy. The current Goodwin endlinks I have are dead easy to adjust, I can lie under the centre of the car and reach both of them at once and spin the shaft until I'm happy with the load, then tighten the locking nuts. RB need to change this flaw in their endlinks.


Originally posted by bootz, Mon Jul 11, 2011 8:52 pm[

Lokiel wrote:
bootz wrote:Now that you have got me interested in my suspension again. I would like to check with you some curious omissions to your swaybar setup.

I would of thought (being the thorough person that you are) that you would have ordered the Racing Beat bracing and reinforcement.

http://www.racingbeat.com/Miata-1990-2005/Suspension/54111.html

and

http://www.racingbeat.com/Miata-1990-2005/Sway-Bars/54120.html?id=vZntzxks

Also I take your points about the RB endlinks, but really how often would anyone adjust them?


I asked Brian Goodwin what he would recommend for additional sway bar bracing and he suggested that the AL blocks and bolts would be sufficient - you really need to be pushing your car hard to snap the single bracket and I'm definitely not there yet. If I was handy with a welder I would have bought the Lower Control Arm Reinforcement Flanges though just for added security - I'm surprised Mazda didn't put the twin braces on later model NBs (cheap buggers) since that was standard on NAs.

My problem with the RB endlinks was that I couldn't adjust them to get a zero load on the sway bar. I was almost at the desired point on the front but needed to spin one end 180* to get there. When I took the endlink off the sway bar and spun the end 180*, I couldn't get it back on the sway bar (I probably could have if I yanked the hell out of the swaybar and used the appropriate curse words). If the RB endlinks were reverse threaded at one end it would be easy. The current Goodwin endlinks I have are dead easy to adjust, I can lie under the centre of the car and reach both of them at once and spin the shaft until I'm happy with the load, then tighten the locking nuts. RB need to change this flaw in their endlinks.


Excellent response as usual, such a great garage thread. Keep it up. Lots of people interested.

For the extra $100 I think I would go for the bracing and reinforcement. It can only help the chassis :evil:
Don't worry about dying, worry about not living!
Garage Thread: http://www.mx5cartalk.com/forum/viewtopic.php?f=57&t=76716

User avatar
Lokiel
Forum legend
Posts: 4126
Joined: Thu May 28, 2009 2:39 pm
Vehicle: NB SE
Location: Brisbania

Re: Lokiel's "Gina" (once a 2004 Titanium SE) Recreated AGAIN

Postby Lokiel » Tue Jun 05, 2018 7:46 pm

Originally posted by Lokiel, Sun Sep 24, 2017 3:49 pm

Originally posted by Lokiel, Wed Jul 13, 2011 10:37 pm[

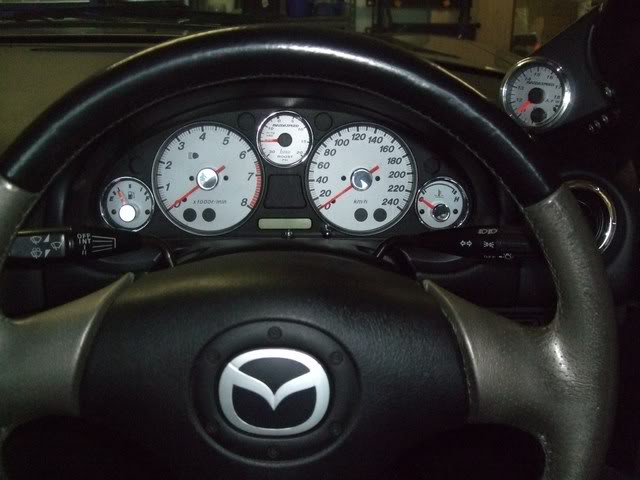
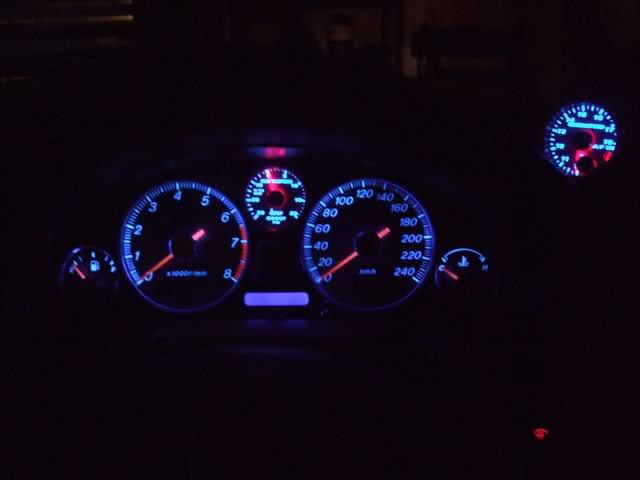
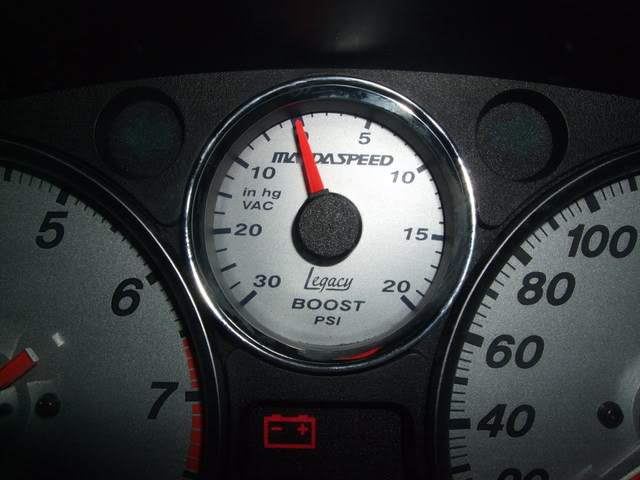
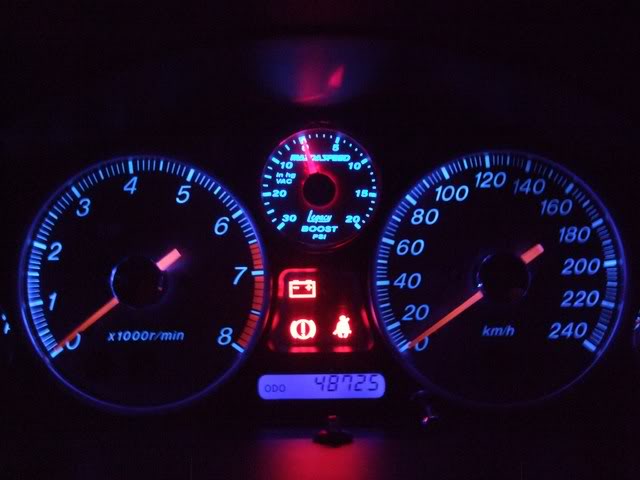
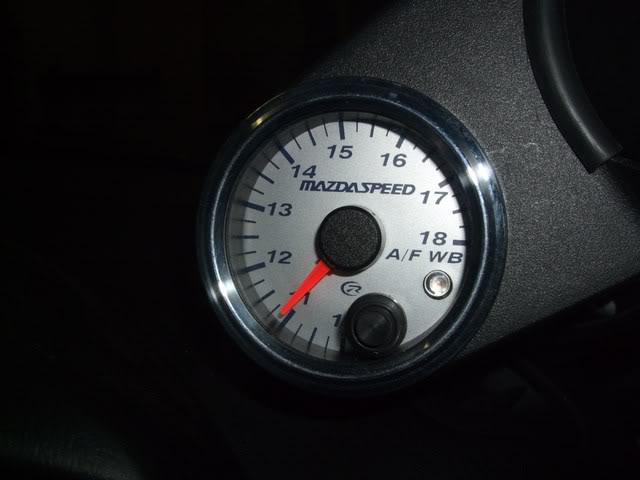
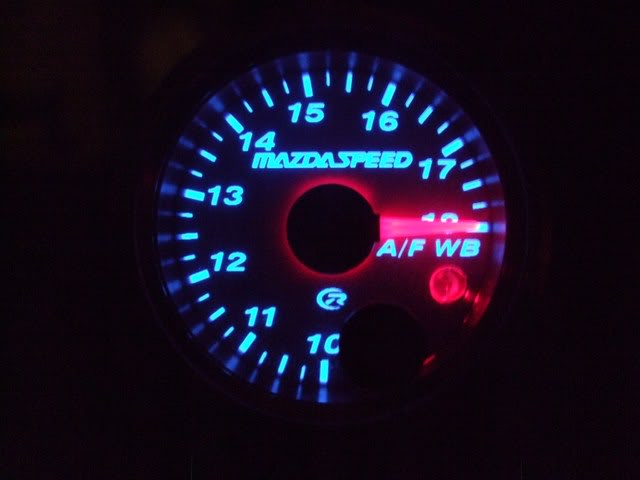
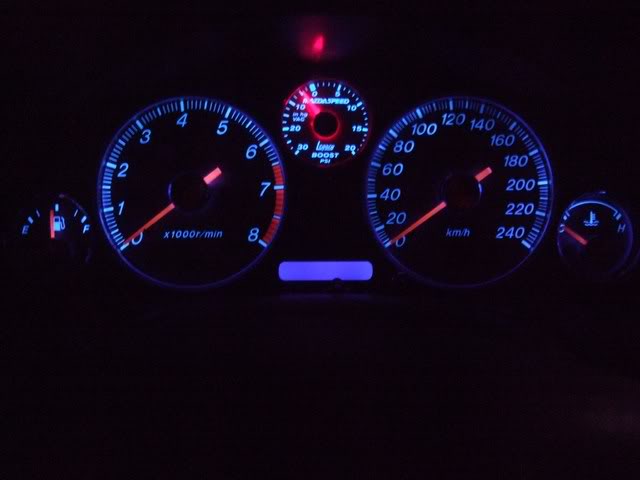
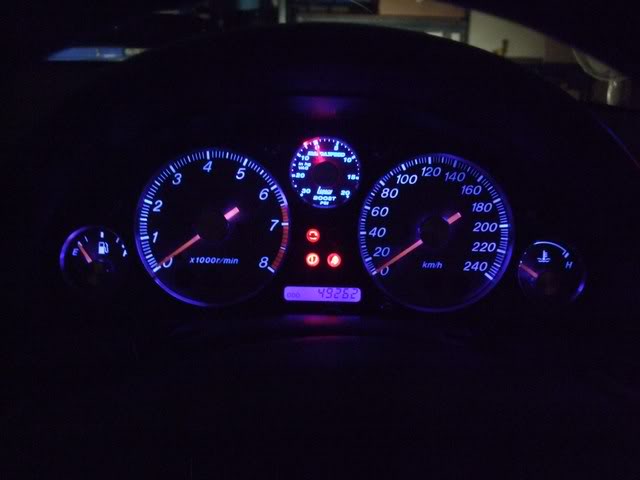
On the weekend I fixed my SpeedHut boost gauge to "zero" correctly and replaced my Innovate G2 Wideband O2 gauge with a matching SpeedHut AFR gauge. Here's the photos by day and night. I had the dimmer switch lights "maxed out" and the SpeedHut gauges are brighter than the OEM gauges so the SpeedHut gauges bled a lot in these shots. They look good at night though.

Instrument Cluster:
Image

Image


SpeedHut Boost Gauge (now "zeroed" correctly):
Image

Image


SpeedHut AFR Gauge:
Image

Image


The SpeedHut Wideband O2 gauge is a lot more reactive than the Innovate G2 gauge - I preferred the dampened Innovate gauge action.


Originally posted by Lokiel, Sat Aug 06, 2011 1:17 pm[

I saw your question in the mazda-speed forum and responded to it there (http://www.mazda-speed.com/forum2/index.php/topic,13678.45.html).

You additionally queried above about the 45mm prosportgauge and would it fit. Standard gauges are 52mm. Since I needed to do some work on the SpeedHut gauge to make it fit in the OEM oil pressure gauge location (ie. file down the ribbed plastic housing in 3 places), the 45mm gauge will probably be easier to fit diameter-wise. If it's too small, you can easily make it wider with black electrical tape or rubber padding (I suspect that a couple of layers of black electrical tape around the diameter would be sufficient). The problem with most gauges, as I responded on the mazda-speed thread, is gauge depth and if they have a barb on the rear (you DON't want that). The SpeedHut gauge has a separate pressure sensor and sends the signal via a wire to the gauge. The prosportgauge you referenced doesn't mention gauge depth so query them about this. It does mention in the "Includes" section "Tubing kit, T-Adaptor,[b] Electric Sender[/b], quick connect pigtail wiring, Decal and Instructions" so I assume that it probably does have a separate pressure sender like the SpeedHut gauge. If you can, try and find a picture of the contents of the gauge to confirm this).

Based on what I've assumed from your link, this gauge looks like it would be a good alternative to the SpeedHut gauge (if you have OEM red instrument lighting).

If you do decide to pursue this, please post your resutls (good or bad) in the mazda-speed forum for others to read.

- it's definitely the best location for the boost gauge and MAZDASPEED should have installed it there in the first place!


Originally posted by Novice1, Mon Aug 22, 2011 5:31 pm[

If there is a better looking mx5 out there I am yet to see it.

Cheer novice1


Originally posted by MINX, Mon Aug 22, 2011 5:40 pm[

Novice1 wrote:If there is a better looking mx5 out there I am yet to see it.

Cheer novice1


You should get out more! :wink:


Originally posted by Lokiel, Mon Aug 22, 2011 6:07 pm[

Novice1 wrote:If there is a better looking mx5 out there I am yet to see it.

Cheer novice1


Thanks.

MINX is definitely the cleanest though, you can even see your reflection in the radiator hoses!
Don't worry about dying, worry about not living!
Garage Thread: http://www.mx5cartalk.com/forum/viewtopic.php?f=57&t=76716

User avatar
Lokiel
Forum legend
Posts: 4126
Joined: Thu May 28, 2009 2:39 pm
Vehicle: NB SE
Location: Brisbania

Re: Lokiel's "Gina" (once a 2004 Titanium SE) Recreated AGAIN

Postby Lokiel » Tue Jun 05, 2018 7:47 pm

Originally posted by Lokiel, Sun Sep 24, 2017 3:50 pm

Originally posted by Lokiel, Sun Aug 28, 2011 4:44 pm[

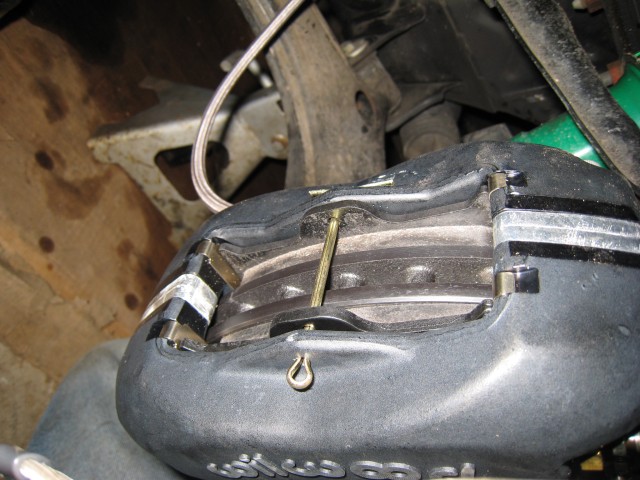
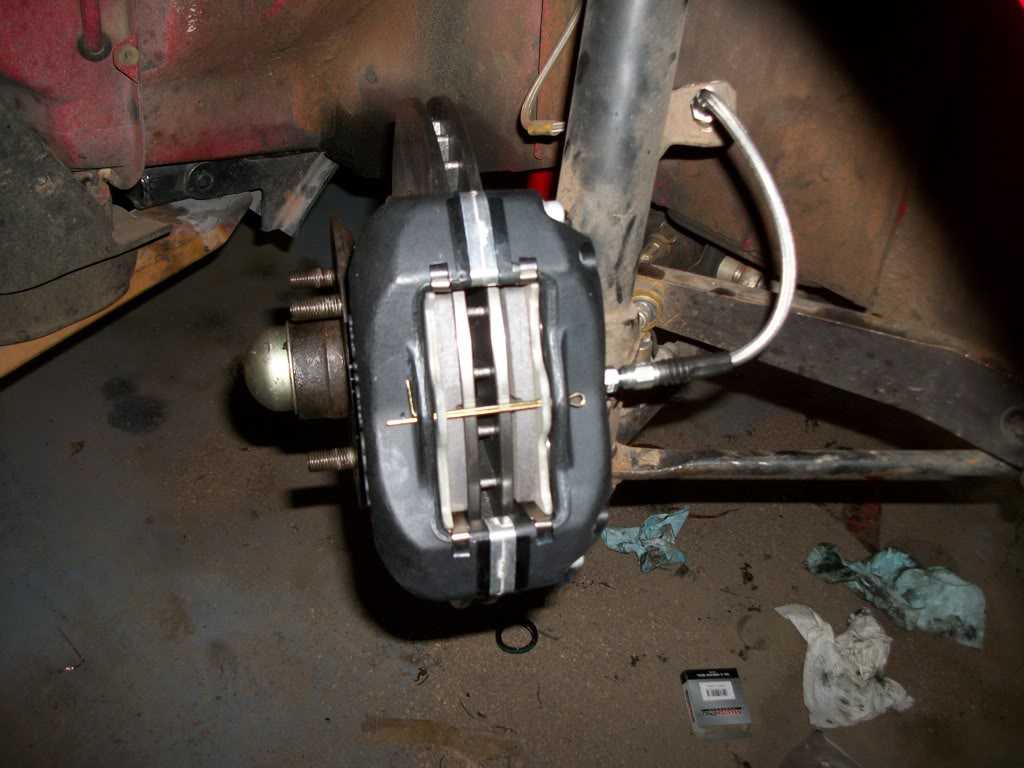
I had my 949 Racing Wilwood BBK, stainless steel brake lines and diff. bushings fitted by MIDAS during the week. The bushings are a hassle to fit and you really need 2 people to bleed the brakes so I figured I'd get it all done at once by professionals. All up it cost $495 which reinforced to me why DIYing where possible is definitely worth it.

Image
Image

I've had the BBK a while now but had to wait for the EBC RedStuff pads since I wanted to fit these instead of the Carbotech XP-10 pads that came with the kit because the XP-10s generate a lot of brake dust and brake dust shows up amazingly well on my Ni 6UL rims.

I picked the car up and drove it back to work during the end-of-day rush hour and it scared the hell out of me since there was a LOT of travel in the brake pedal and I just didn't trust the brakes at all.

On Saturday I pulled the wheels off and gave everything a good look-over to see if something was wrong (especially leakage). Nothing was amiss so I took the car out today to really bed in the pads (it rained all day Saturday so that wasn't an option). MINX mentioned that his brake pedal travel was initially longer than normal after his BBK install until he did this. I can now report that the brakes are behaving as expected and that the pedal travel has reverted back to normal. Being located in Woolloongabba, I guess MIDAS really didn't have the ability to really bed in the brake pads.

One of the bonuses of the Wilwood kit is how easy it is to change the brake pads, you don't need to remove the caliper. All you need to do is remove the cotter pin, slide out the old pads, slide in the new pads, and re-insert the cotter pin (images not mine, stolen from "the internets"):

Image
Image


I've gotten the installation of the rear pads on the OEM calipers down to 15 minutes per side, if I remember to dis-engage the handbrake, so I reckon I can replace all pads within an hour now. Swapping DD pads to Track pads wont be as daunting in future and I plan to use YellowStuff pads for the track when I eventually get back there.


Originally posted by timk, Tue Aug 30, 2011 7:26 pm[

Getting that pin in and out on the oversized Carbotech backing plate can be a royal PITA! Changing the fronts on a stock setup isn't too bad with a good quality piston pusher.


Originally posted by Lokiel, Tue Aug 30, 2011 9:58 pm[

Would these Wilwood caliper clips be easier than the Wilwood cotter pins?

Image

http://www.good-win-racing.com/Mazda-Performance-Part/13-1051.html

They'd certainly be more reusable than the cotter pins which will eventually need to be replaced - after a few brake pad swaps, the bends would be too weak and break.


Originally posted by timk, Wed Aug 31, 2011 12:44 am[

Actually I can't comment on the original Wilwood pins as I bought those Goodwin pins with mine.
Don't worry about dying, worry about not living!
Garage Thread: http://www.mx5cartalk.com/forum/viewtopic.php?f=57&t=76716

User avatar
Lokiel
Forum legend
Posts: 4126
Joined: Thu May 28, 2009 2:39 pm
Vehicle: NB SE
Location: Brisbania

Re: Lokiel's "Gina" (once a 2004 Titanium SE) Recreated AGAIN

Postby Lokiel » Tue Jun 05, 2018 7:47 pm

Originally posted by Lokiel, Sun Sep 24, 2017 3:50 pm

Originally posted by bootz, Sat Sep 24, 2011 10:25 pm[

Hi there,

Your fame spreads far and wide. Gina's dash is now being displayed on Ebay.

http://www.ebay.com.au/itm/ZPE-Blue-dash-LED-kit-Mazda-MX5-Miata-1989-2005-/270822127270?pt=AU_Car_Parts_Accessories&hash=item3f0e41b6a6


Originally posted by Lokiel, Mon Sep 26, 2011 10:56 pm[

Yeah, the seller took the picture from Page 1 on this thread and cut it down a bit after wondering why he had a sudden rush for blue LEDs not long after I posted pictures of my dash on miata.net. He found the photo by "Googling it". You can see the grey trim on the steering wheel and the odometer reading is the same so I knew it was my dash.

I e-mailed the seller when I noticed it and gave him the OK to use it since his original photo looked crap.

I got a kick out of it but it still would have been nice if he actually asked me first.
Don't worry about dying, worry about not living!
Garage Thread: http://www.mx5cartalk.com/forum/viewtopic.php?f=57&t=76716

User avatar
Lokiel
Forum legend
Posts: 4126
Joined: Thu May 28, 2009 2:39 pm
Vehicle: NB SE
Location: Brisbania

Re: Lokiel's "Gina" (once a 2004 Titanium SE) Recreated AGAIN

Postby Lokiel » Tue Jun 05, 2018 7:48 pm

Originally posted by Lokiel, Sun Sep 24, 2017 3:51 pm

Originally posted by Lokiel, Sun Oct 02, 2011 7:15 pm[

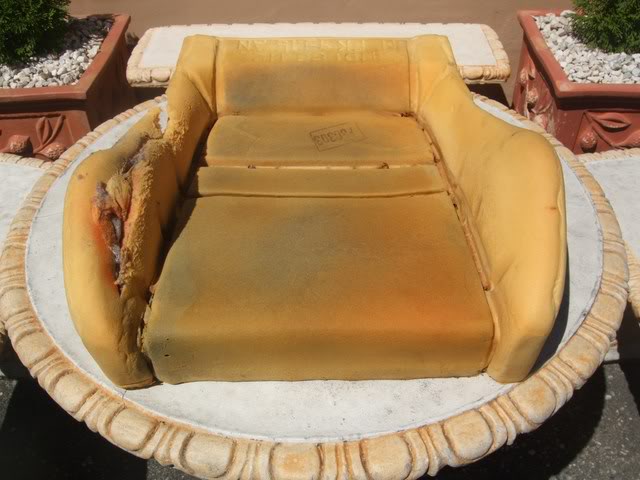
My MAZDASPEED driver-side right hand bolster was quite beat up when I bought it and forced my right leg further in than it was designed to. After taking a trip in the passenger-seat, I realised how much more comfortable it was so I decided to swap the passenger-side seat base to the driver-side (old photo, before I had the MAZDASPEED passenger seat):
Image


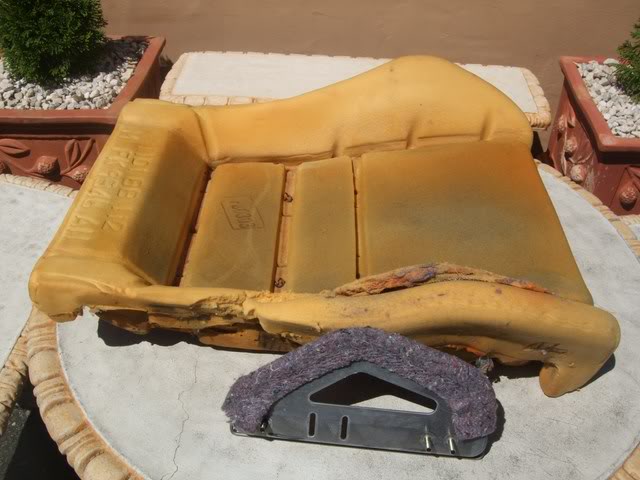
Since I actually have 3 MAZDASPEED seats (I originally bought one, loved it, then bought another 2, hoping to mix and match them to get 2 good seats), I decided to use the unused seat base which had several cigarette burns in it and my original seat cover which was good.

Here's what the original seat base looked like and why:
Image

Image

Image

That metal bracket bolts onto the seat rails and had cut right through the foam.

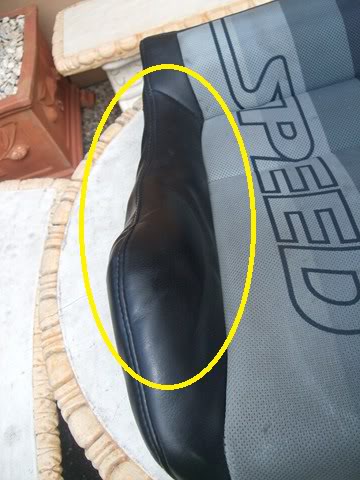
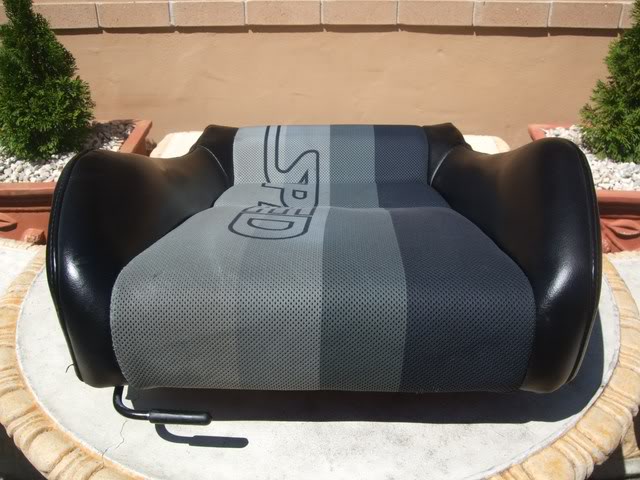
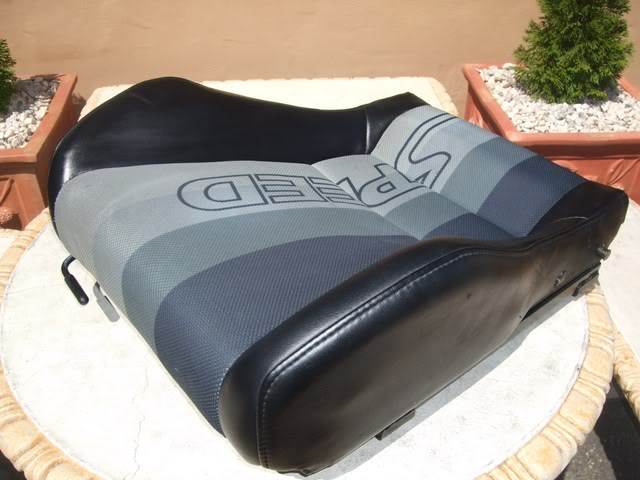
I took the two seat bases to a trimmer and he fitted the original cover onto the other/good seat base. I thought he would replace the damaged side bolster cover completely but he said that since it was "pleather", the creases would eventually stretch out. I sprayed some Mr. Sheen on it to soften it up (years ago when I got my Starion's seats re-trimmed the guy told me that Mr Sheen works just as good as any expensive leather softeners/moisturisers) and left it in the QLD sun for a couple of hours. The trimmer was right, the creases reduced significantly to what I consider being acceptable:
Image

Image


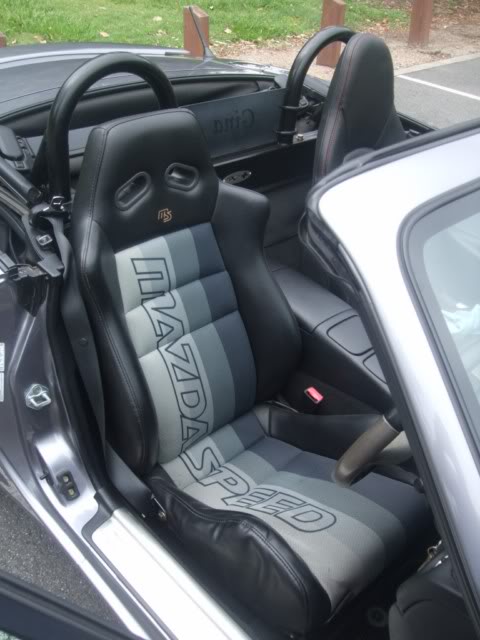
Installation was straightforward (more on this later) and I'm MUCH happier with the seats now:
Image

Image


TIPS ON INSTALLING MAZDASPEED SEATS:

1. The right rear driver-side bracket and left rear passenger-side brackets will not accomodate the OEM seat bolts since their heads are too big - if you try and bolt it in, you will damage the thread and find it extremely hard to fit the other bolts. Use a high tensile bolt instead, M10x1.25x2.5 (middle number is the thread size) - this bolt has a 17mm head size which just fits and is big enough to secure the bracket.

2. Re-tap and thread your seat mounts and their bolts. The seat mounts are extremely easy to thread-strip so make sure that you can screw in the bolts by hand - it's MUCH harder if you don't and you WILL strip the threads.

3. If you have time, it's worth taking the base off the seat and doing test fits. I found that I needed to bend the brackets a bit and enlarge the bracket holes slightly at the front using my trusty Dremel - this is REALLY hard to do if the complete seat is used and you'll get sick of putting the seat in and pulling it out again.

4. Start from the rear, fit the outermost bolt first since this has the smallest hole (ie. no play), then the inner-most bolt. You can't get a ring spanner or socket on that 17mm bolt I referred to in step 1 so it's MUCH easier if you can hand tighten it, then finish it off with an open-ended spanner.


Originally posted by davidau, Sun Oct 02, 2011 9:00 pm[

thanks for the tips and wow on fixing the seat. I have the same mazdaspeed seats too in black and they looks great in the SE when I got time I will share mine.
Don't worry about dying, worry about not living!
Garage Thread: http://www.mx5cartalk.com/forum/viewtopic.php?f=57&t=76716

User avatar
Lokiel
Forum legend
Posts: 4126
Joined: Thu May 28, 2009 2:39 pm
Vehicle: NB SE
Location: Brisbania

Re: Lokiel's "Gina" (once a 2004 Titanium SE) Recreated AGAIN

Postby Lokiel » Tue Jun 05, 2018 7:48 pm

Originally posted by Lokiel, Sun Sep 24, 2017 3:51 pm

Originally posted by Lokiel, Sun Oct 02, 2011 9:25 pm[

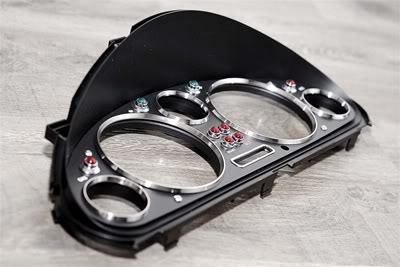
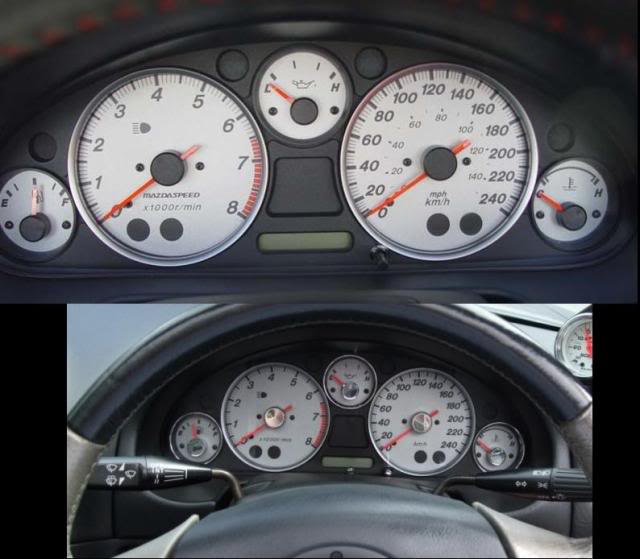
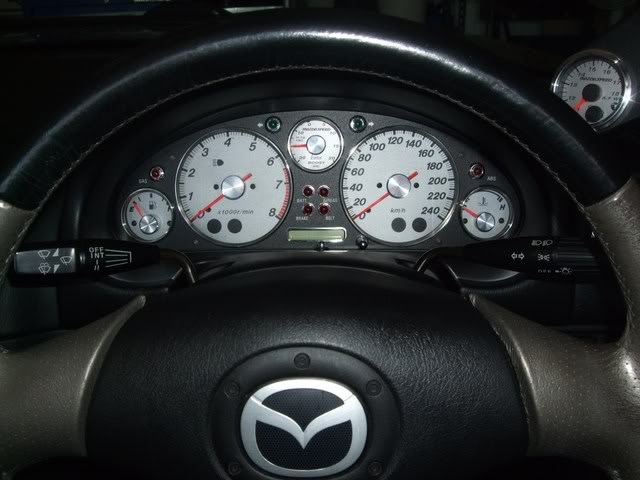
I was meant to look at my overheating issue this weekend (may have a leaky radiator :( - hopefully it's just a hose) but the AFL Grand Final meant I pretty much lost all Saturday afternoon so I thought I'd install my new KG Works instrument cluster since that would be a quick job - after seeing slug_dubs' (see bottom of http://mx5cartalk.com/forum/viewtopic.php?f=57&t=37654&start=105), I decided I needed to upgrade my cluster. I decided to go with the black face since my gauges are silver. Unfortunately the NB cluster does not have the individual glass instrument covers like the NA model so I had to keep the plastic gauge cover :(

Image


I also ordered the AWD needle caps since these Billet-cut aluminium needle caps look much better than the plastic chrome caps I already have.

Day view, OEM vs old vs new:
Image

Image
Image


Night view, old vs new:
Image
Image


Getting the plastic chrome needle caps off was a bit daunting since I needed to remove the needles completely. To do this you need 2 jewellers screwdrivers placed either side underneath the needles. I put 2 rubber pads either side of the needle and used them with the screwdrivers to simultaneously pry off the needle caps. I soaked the needle caps in boiling water to loosen the cap sticky pads and removed them prior to fitting the new AWD caps.

The centre SpeedHut boost gauge's needle cap is much shallower than the OEM needle caps so I had to file the AWD needle cap down significantly. Now all gauges look the same - during the day at least.
Don't worry about dying, worry about not living!
Garage Thread: http://www.mx5cartalk.com/forum/viewtopic.php?f=57&t=76716

User avatar
Lokiel
Forum legend
Posts: 4126
Joined: Thu May 28, 2009 2:39 pm
Vehicle: NB SE
Location: Brisbania

Re: Lokiel's "Gina" (once a 2004 Titanium SE) Recreated AGAIN

Postby Lokiel » Tue Jun 05, 2018 7:48 pm

Originally posted by Lokiel, Sun Sep 24, 2017 3:52 pm

Originally posted by Lokiel, Sun Oct 23, 2011 6:17 pm[

Andy from Adaptronic sent me a new harness for my e440 to fix the battery light that remained on permanently. I originally assumed that I'd screwed something up since the battery always measured approx. 13.8 volts so I never worried about it until another user in the US reported the same issue and said Andy had a fix for it. I fitted the harness and the battery light "went away" so I was happy.

I also decided to calibrate my IAT and IAT2 sensors with the Adaptronic since I knew that they weren't too accurate - I got my Adaptronic ee40 almost as soon as it became available and Andy warned me the base map he'd sent was done in a rush and would need work. The ECT graph was fairly accurate so I decided to stick with it and removing the ECT to calibrate it is a pain in the arse (to do it properly requires emptying the coolant and removing the ECT sensor at the rear of the engine which is awkward to access).

I have access to the MAZDASPEED technical manuals that define the thermistor behaviour of the IAT, IAT2 and ECT sensors and used the formula provided by Andy in his Adaptronic user guide to map the resistance/temperature values to those required by the Adaptronic ECU. Unfortunately this formula does not apply to the e440 Select ECU I have for my MSM and the values were totally screwed so I had to calibrate the sensors manually.

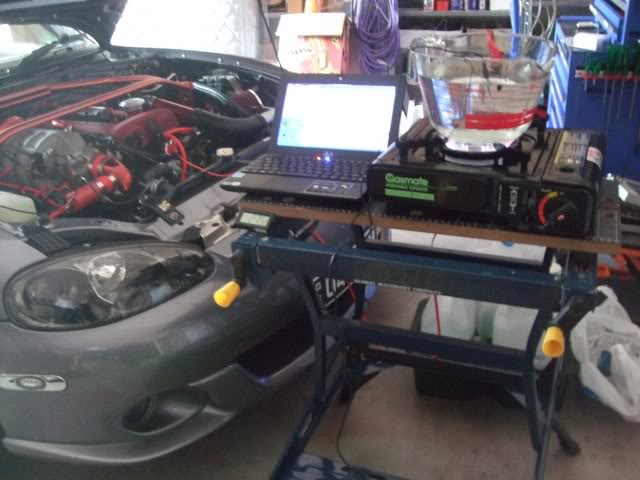
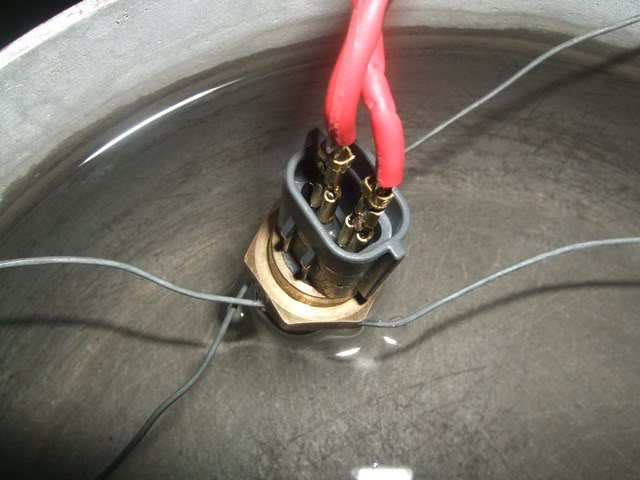
To calibrate the sensors with the Adaptronic, the sensor must be boiled to the required temperatures and the corresponding "Adaptronic ADC count" from the sensor must be entered into the sensor's Adaptronic calibration graph.

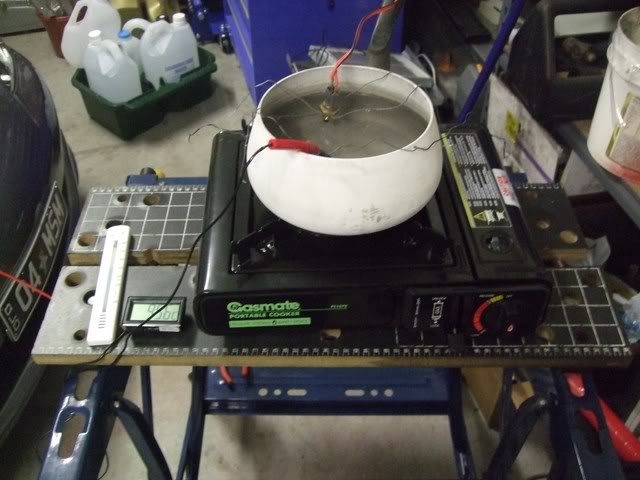
Here's the original setup I used to calibrate the IAT2 sensor, including the new Pyrex jug I bought for the job:
Image

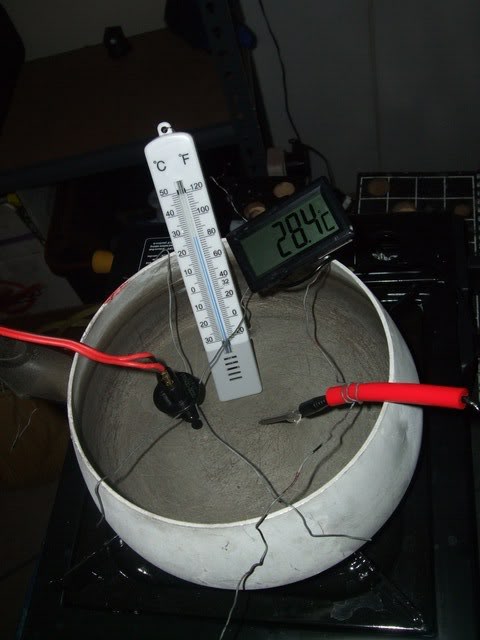
I used a portable gas cooker, electronic thermometer, pyrex jug and held the IAT/IAT2 thermistors and thermometer in place via some scrap wire. Everything went fine as I boiled the IAT2 sensor up to 100C, can't go higher when only using water, I turned the gas off and went into the house to wait for it to cool down a bit. Not long after leaving the garage, there was a massive explosion and I rushed back in to find that the Pyrex jug had exploded! It was lucky I wasn't in there because there was glass and hot water everywhere - so much for the quality of Pyrex from Big W, DON'T USE IT! The netbook was no longer working so I had to pull it apart and give a thorough wipe down; it's amazing how much water got in there. Thankfully the netbook started again.

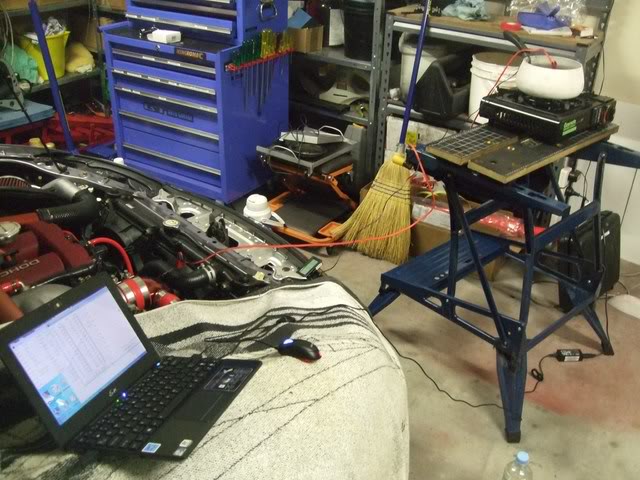
After cleaning up (see broom below), I resorted to using an old saucepan, which I should have used in the first place, and moved the netbook safely out of the way.
Image

Image

Image


Thermometer Calibration Check:
Image


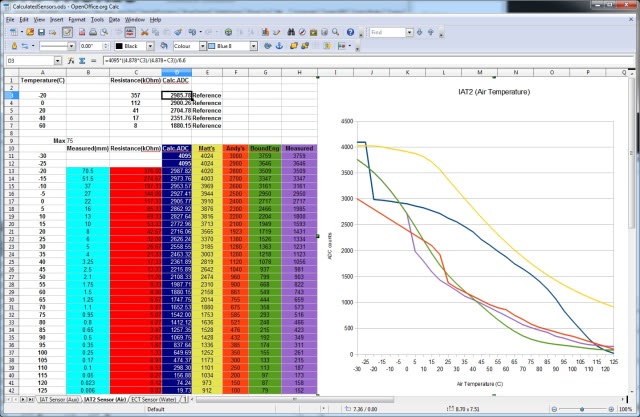
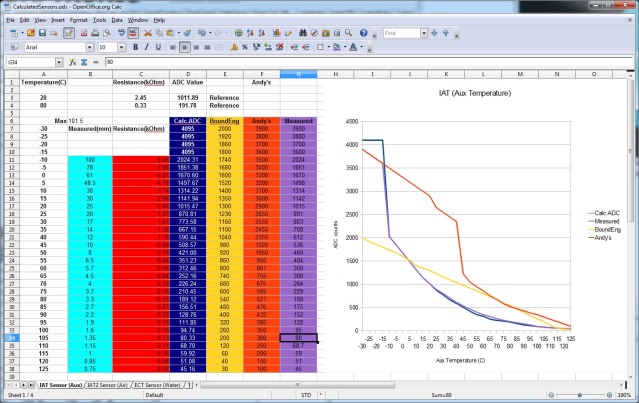
Below I've graphed various IAT2 and IAT values that I've used "along the way".
The "Calc.ADC" values are based on the MAZDASPEED thermistor values and the Adaptronic conversion formula.
"Andy's" values are the original values provided by Andy from Adaptronic.
"BoundaryEng" values were sourced from Boundary Engineering who are Adaptronic agents in the US - I suspect these are e420C values though.
"Matt's" are provided by Matt/bitrusty and are e420C values
"Measured" values are those I've measured. Only the values between 5C and 100C are actually measured.

IAT2 (Manifold temperature sensor)
Image

You can see here that after 25C, Andy's IAT2 values are actually quite close to my measured values so it wasn't as "rough" as I expected.
The "CalculatedADC" values are totally screwed.

IAT (Air Filter Sensor)
Image

The value of this sensor is not actually used by the Adaptronic, it merely reports the value in one of its sensor windows so Andy didn't put much effort into this.
Surprisingly, my measured values fitted very well against the Calculated ADC values - probably BECAUSE the Adaptronic does nothing with it.

Hopefully these corrections will go a long way to overcoming so minor niggles I occasionally have at the moment.
Don't worry about dying, worry about not living!
Garage Thread: http://www.mx5cartalk.com/forum/viewtopic.php?f=57&t=76716

User avatar
Lokiel
Forum legend
Posts: 4126
Joined: Thu May 28, 2009 2:39 pm
Vehicle: NB SE
Location: Brisbania

Re: Lokiel's "Gina" (once a 2004 Titanium SE) Recreated AGAIN

Postby Lokiel » Tue Jun 05, 2018 7:49 pm

Originally posted by Lokiel, Sun Sep 24, 2017 3:53 pm

Originally posted by MINX, Sun Oct 23, 2011 6:39 pm[

I admire your perseverance with that Adaptronic setup.
I am so glad, however, that i went with the Haltech, had it tuned professionally(although it took a couple of weeks) and now a year later, havent touched it since. And car gets dr ven every day.

Hope you get the car back on the road soon.


Originally posted by Lokiel, Sun Oct 23, 2011 10:02 pm[

^
I'm happy with the Adaptronic e440 and bought it so that I can tweak it myself - I'm a "tragic tinkerer" and DIYer. The e440 is a new ECU so I expected a few teething problems.

I had an issue with my radiator boiling (the radiator cap actually popped off at one point - the radiator was effectively a pressure cooker) which turned out to be caused because I was using the e420C ECT calibrations which were about 25-30C too low so the cooling fans never activated. I originally suspected it was either a stuck thermostat, leaking radiator or fan problem. I replaced the thermostat with a Maruha 78 thermostat but the overheating problem persisted and the radiator was definitely not leaking - turning the A/C on reverted the temperatures back to normal. Tim (aka saboteur), who's used the e420C before, suggested I test the fans by inverting the thermofan activation logic and they turned on which proved that it was in fact the Adaptronic's water temperature calibration. Reverting back to Andy's original ECT calibration solved this overheating issue.

In hindsight, I SHOULD have calibrated the ECT and IAT2 sensors myself before getting the car tuned. Given how "off" the temperature calibrations I used when I had the car tuned were, I'm surprised that GT Auto did such a good job tuning it. There were only a few minor hiccups which I wanted to fix.

I've learned a hell of a lot through these experiences and the Adaptronic still has more features that I'm keen to explore - if I ever get time.

I really need to stop tinkering though and do more driving :P


Originally posted by timk, Sun Oct 23, 2011 10:42 pm[

These are the values I am going to use when I set up the Select in the track pig:

Intake temp sensor (called IAT2 on the SE)
Temperature / Resistance In Ohms
-20 16150
40 1150
80 330

Coolant temp sensor
Temperature / Resistance In Ohms
-10 9000
20 2500
80 320

All the measurements I have done agree with the numbers stolen from here:
http://www.diyautotune.com/diypnp/apps/n76/usdm-mazda-miata-9900-18bp-mt.html

The remaining temp/resistance pairs can be plotted with the Steinhart-Hart equation:
http://en.wikipedia.org/wiki/Thermistor#Steinhart-Hart_equation

Can you post up the resistance values you found and what temps they were measured at?

Cheers


Originally posted by Lokiel, Sun Oct 23, 2011 11:53 pm[

>Can you post up the resistance values you found and what temps they were measured at?

I didn't bother measuring the resistance since all I cared about was the Adaptronic ADC counts.

Given that the measured IAT values almost matched the calculated IAT values (which were calculated based on the Adaptronic formula and MAZDASPEED resistance/temperature values for the IAT), I believe that you can trust the MAZDASPEED ECT and IAT values too.


Originally posted by bootz, Sun Oct 30, 2011 4:47 pm[

Sorry if I missed this.

Advantages of the Adaptronic over the ubiquitous Megasquirt?.

It certainly isn't ease of setup :evil:


Originally posted by sailaholic, Sun Oct 30, 2011 5:16 pm[

Set up is just as easy as a mega squirt, lok has just documentrd some of the niggle stuff you can check with any ecu.

Advantages depends on the MS your referencing against. The pnp, is pretty basic as an ecu. Map table is fairly limited in its size and doesn't support seq injection or direct fire ignition.

Ms3 is better, but then you need to find tuner support. Adaptronic has better tuner support as far as I've found.


Originally posted by bootz, Sun Oct 30, 2011 9:11 pm[

sailaholic wrote:Set up is just as easy as a mega squirt, lok has just documentrd some of the niggle stuff you can check with any ecu.

Advantages depends on the MS your referencing against. The pnp, is pretty basic as an ecu. Map table is fairly limited in its size and doesn't support seq injection or direct fire ignition.

Ms3 is better, but then you need to find tuner support. Adaptronic has better tuner support as far as I've found.


PNP not available for Lokiel's SE, NB8Bs etc. Nitro Dann might have something to say about tuner support for MS as it seems to be the DIY engine mgt soln. Gina has an owner who is commited to the DIY ethos.


Originally posted by sailaholic, Sun Oct 30, 2011 9:35 pm[

Depends on of you want to dyno or road tune. Most dyno operators don't like dealing with ms.

Dann road tunes, but pretty hard to full tune on a road.

Adaptronic is also fully diy useable, so not sure what you're getting at with that.


Originally posted by Lokiel, Sun Oct 30, 2011 10:24 pm[

bootz wrote:Sorry if I missed this.

Advantages of the Adaptronic over the ubiquitous Megasquirt?.

It certainly isn't ease of setup :evil:


There is no such thing as "ease of setup" on any newly released ECU, they all require tuning specific to the car's configuration however once the ECU has been tuned, the map should be transferrable to another car with a similar configuration. Unfortunately when you live on the "bleeding edge", there aren't too many existing maps around so there's a bit of pioneering to do.

The Adaptronic e440 is a fully-fledged ECU with a lot more features than I'll probably ever get around to fully utilising, including E85 support. The e420c has a lot of happy MX5 users and the e440 is an evolution of it, which is why I chose it. I can continue to tweak the ECU which may not be an option on some other ECUs (eg. Haltech).

The rule of thumb regarding ECUs is "find a specialist tuner first, then buy their preferred ECU". At some stage, I may get it tuned by an Adaptronic specialist but in the meantime, I'm learning a lot from the process.


Originally posted by bootz, Sun Oct 30, 2011 10:46 pm[

Spoken like a true pioneer. I like the advice, find the tuner you like then pick the ECU mgt, obviously you have faith in yr tuner. Good Luck, eventually post your dyno for kudos, 200 rwkw would be nice.
Don't worry about dying, worry about not living!
Garage Thread: http://www.mx5cartalk.com/forum/viewtopic.php?f=57&t=76716

User avatar
Lokiel
Forum legend
Posts: 4126
Joined: Thu May 28, 2009 2:39 pm
Vehicle: NB SE
Location: Brisbania

Re: Lokiel's "Gina" (once a 2004 Titanium SE) Recreated AGAIN

Postby Lokiel » Tue Jun 05, 2018 7:49 pm

Originally posted by Lokiel, Sun Sep 24, 2017 3:53 pm

Originally posted by Lokiel, Sun Nov 06, 2011 6:25 pm[

I've always loved MINX's rear decklid and first saw one on Andrew's (1red5) NA8 not long after I first bought my car and was visiting MX5-Plus for a few bits & pieces. Apparently there were only 5 of these made and Andrew's was the first one produced.

Luckily for me, sailaholic who bought Andrew's car, decided to part with it so I snapped it up immediately knowing how rare they were.

The hardest part of the install was drilling the two holes into the MX5-Plus Twin Hoop roll bar required to hold the decklid in place. The roll bar is made of incredibly hardened steel which I was warned about so I bought two drill bits for the job and it took both bits to get the job done.

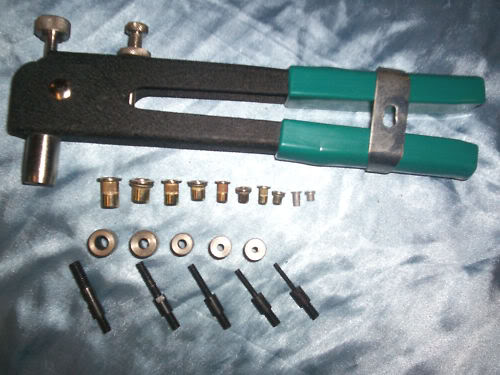
I also bought a rivnut tool and rivnuts for the job - if you haven't got one of these tools in your arsenal and mod your own car, get one, they're incredibly useful. Rivnuts are similar to pot rivets and have an internal thread so you can screw bolts into them - you don't need to use a nut.

Image


The rear decklid was in need of re-painting with a few scratches, minor bubbling of the gelcoat and a brownish tinge in places. After seeing billybunter's efforts in repainting an entire car (see http://mx5cartalk.com/forum/viewtopic.php?f=57&t=46454) , I decided that I should at least be able to re-paint a decklid which could be separated into 3 parts.

I picked up a LOT of tips from billybunter's thread and spent a couple of broken-up weekends sanding back the decklid to a smooth finish, knowing that better preparation would lead to a better result. The rounded humps meant it took a lot longer to sand back than I would have liked :(

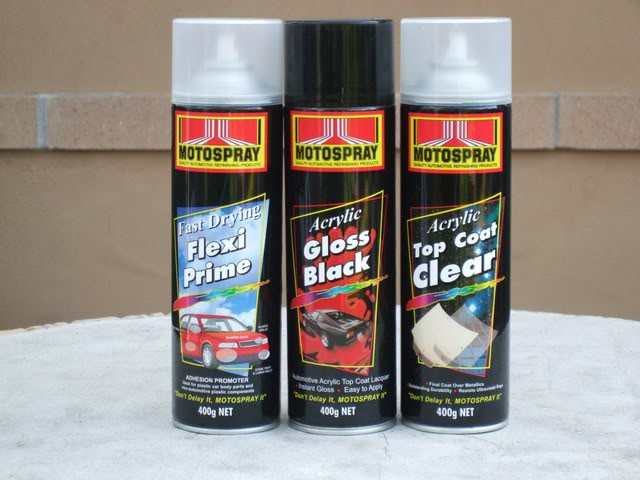
I used 300, 600 and even 1200 grit wet & dry sandpaper for the job and the following paint and topcoat:

Image


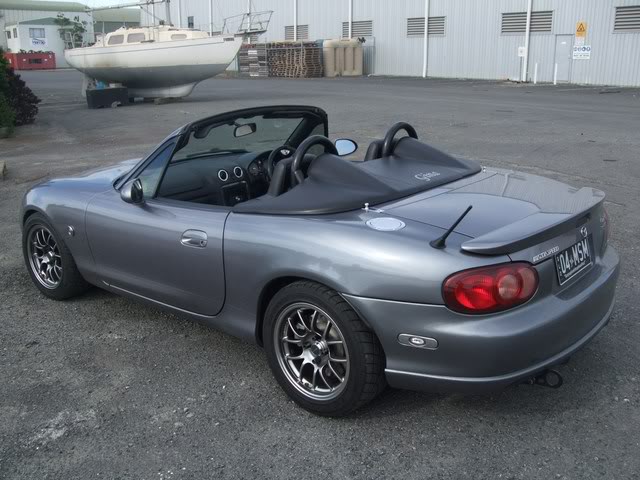
And here's the final results - looks great (if I do say so myself):

Image

Image

Image

Image


I haven't sanded back/cut the topcoat since I quite like the textured finish it has at the moment - I can always do that later if I decide I no longer like it.


Originally posted by billybunter, Sun Nov 06, 2011 6:49 pm[

really nice job - next time you can paint mine :beer:


Originally posted by timk, Sun Nov 06, 2011 7:13 pm[

I like the finish - I prefer it over something glossy!


Originally posted by Novice1, Sun Nov 06, 2011 7:28 pm[

I agree like the matte flat black look rather than the standard plasticky look.
Cheers Novice1


Originally posted by Steampunk, Sun Nov 06, 2011 7:47 pm[

Lokiel wrote:The rear decklid was in need of re-painting with a few scratches, minor bubbling of the gelcoat and a brownish tinge in places.

Due to the fact that it was the first one out of the mold, it had these imperfections which Misha was half-expecting to occur.
He offered to sand, paint and gelcoat it, but I rather liked it because it was different than the rest, and the bubbles could only be seen if you pointed them out and stared at them up close for a few seconds.


Originally posted by Lokiel, Sun Nov 06, 2011 8:02 pm[

billybunter wrote:really nice job - next time you can paint mine :beer:


NO WAY!!!

It seemed to take forever to sand it back smooth to a point I was happy with - kudos to you doing your whole car, that's EXTREME dedication!


Originally posted by Novice1, Sun Nov 06, 2011 11:05 pm[

I know this is a moot point. But I have looked at the back of the decklid with the torque bar and always thought it would look so much better if the torque bar was chromed.

:( Novice1


Originally posted by sailaholic, Sun Nov 06, 2011 11:21 pm[

pimp! almost wish I didn't sell it now. Good to see it in use though, good job on the paint too.


Originally posted by PaulF, Mon Nov 07, 2011 3:30 am[

I'm not totally sold on any of the individual items but I must admit that the seats, rollbar and deck lid look really good together.
Don't worry about dying, worry about not living!
Garage Thread: http://www.mx5cartalk.com/forum/viewtopic.php?f=57&t=76716


Return to “MX5 Garage Chat”

Who is online

Users browsing this forum: No registered users and 63 guests