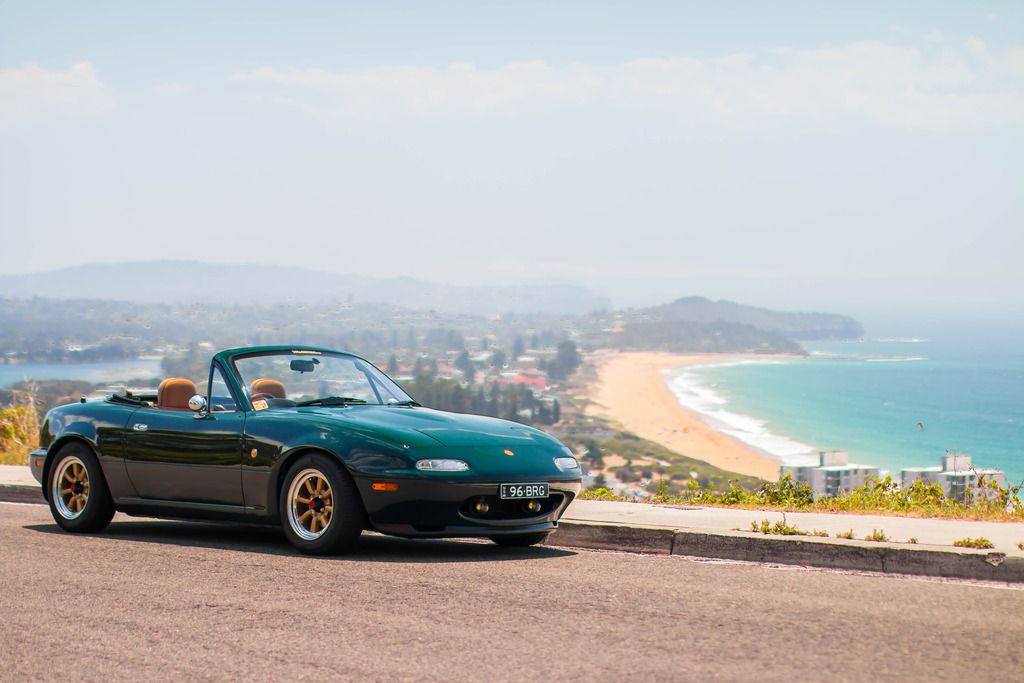
1996 BRG NA8C Build Thread

Chat to do with your MX5/Miata/Eunos Garage Ride(s).

Moderators: timk, Stu, zombie, Andrew, The American, Lokiel, -alex, miata, StanTheMan, greenMachine, ManiacLachy, Daffy

User avatar
smy0003
Racing Driver
Posts: 1870
Joined: Mon Dec 30, 2013 12:35 pm
Vehicle: NA8
Location: Melbourne

Re: 1996 BRG NA8C Build Thread

Postby smy0003 » Sun Jan 08, 2017 1:19 am

BRG.NA8 wrote:
smy0003 wrote:Yes, can't run Wats without the proper (red) centrecaps.


Thanks Rohan :) Yes, I love the centrecaps myself personally. I understand though that it might not be for everyone but I love it! Goes well with the rest of the Watanabe hardware the wheel has

When I think of an old school Japanese wheel I think of a Wat with the type 1 cap. An absolute classic.
[b]Then: Sunlight Silver NB8B
Now: Chaste White NA8

laurie
Driver
Posts: 27
Joined: Wed Aug 29, 2012 7:57 pm
Vehicle: NA6
Location: Central Coast, NSW

Re: 1996 BRG NA8C Build Thread

Postby laurie » Sun Jan 08, 2017 6:58 pm

Hey mate, your car looks great and I enjoyed reading through this thread.

Just wondering, where did you get the spare wheel extension bracket from?

BRG.NA8
Fast Driver
Posts: 196
Joined: Sat Dec 12, 2015 10:32 pm
Vehicle: NA8

Re: 1996 BRG NA8C Build Thread

Postby BRG.NA8 » Sun Jan 08, 2017 11:10 pm

laurie wrote:Hey mate, your car looks great and I enjoyed reading through this thread.

Just wondering, where did you get the spare wheel extension bracket from?


Cheers mate

It came with my Beatrush rear strut bar. They knew that once the rear strut brace goes in the spare wheel wont fit in the original location so it came with a extension

BRG.NA8
Fast Driver
Posts: 196
Joined: Sat Dec 12, 2015 10:32 pm
Vehicle: NA8

Re: 1996 BRG NA8C Build Thread

Postby BRG.NA8 » Fri Jan 13, 2017 3:15 pm

12/01/2017

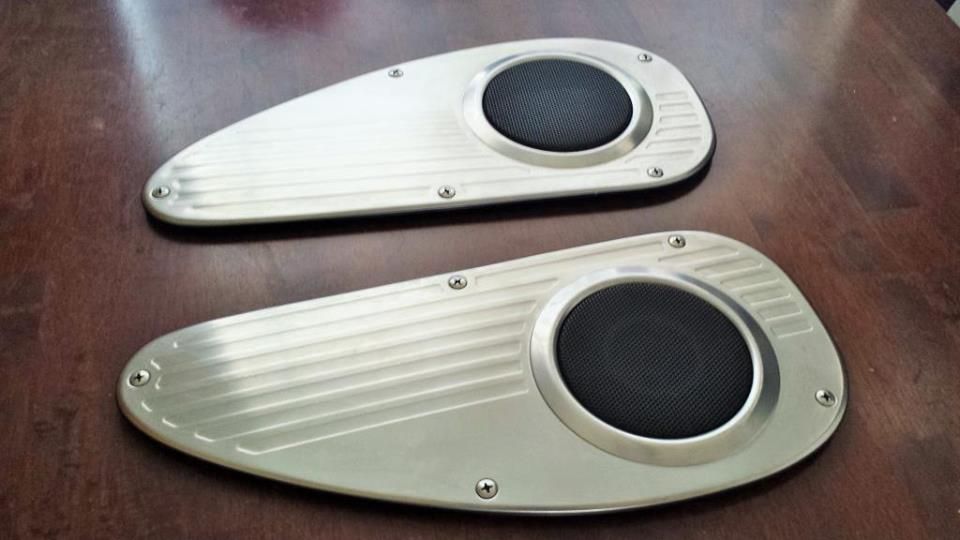
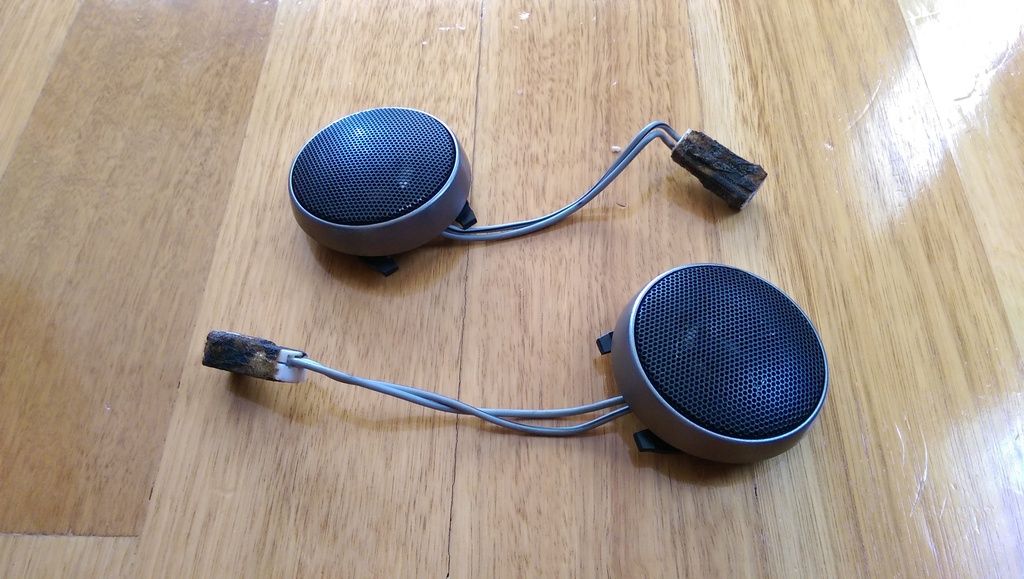
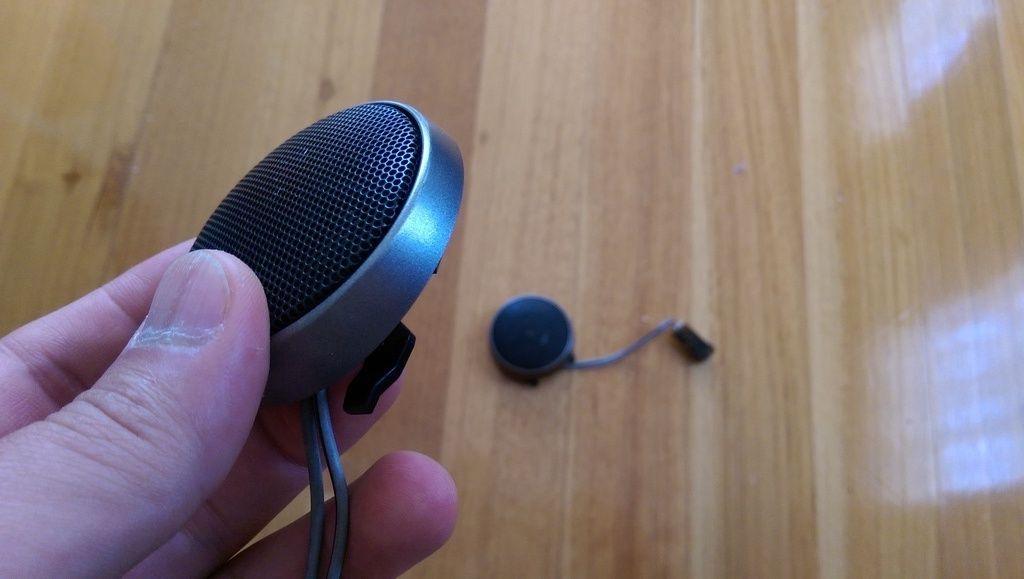
Nakamichi CD400 Headunit + OEM Mazda Silver Twitters + OEM Mazda 93LE Speaker Grilles
The NA6 came with speakers in the seats headrest, but in the NA8 the speakers were replaced with a tweeter on each side of the door. To be honest, it wasn't an effective replacement and later on, I will be looking to put in some aftermarket speakers in the headrest to improve sound quality while driving with the top down. To match the theme of the interior I have in mind, I knew that some of the Japanese Eunos Roadsters came with tweeters which had a silver plastic ring whereas the Australian delivered NA8 MX-5's had just plain black. I wanted these as it would match the overall colour scheme I had in mind for the interior which is tan, black and silver. I had asked on a US-based Miata forum where I could source one but it seems like the answer was Japan.

That's when MikeA contacted me. He saw on the forum that I was after a pair of these tweeters and he sent me a message letting me know that he saw a set on YJA and whether I still wanted them. I did. He offered to purchase it for me and after a few messages exchanged, we agreed and I would send him the money. Mike and I have never met before. He lives in New Zealand and so there's no chance he and I would meet at a local gathering here or anything. But it was his kindness and willingness of wanting to do something for someone who was basically a stranger to him was what really got to me. It's fantastic and amazing being part of the MX-5 community with a group of motoring enthusiasts who share the same passion as you do and that everyone looks out for one another like this, regardless of where in the world you may be. Thanks again Mike! Much appreciated! Let me know if there is anything you're after for your MX-5 and I'll be sure to keep an eye out myself.

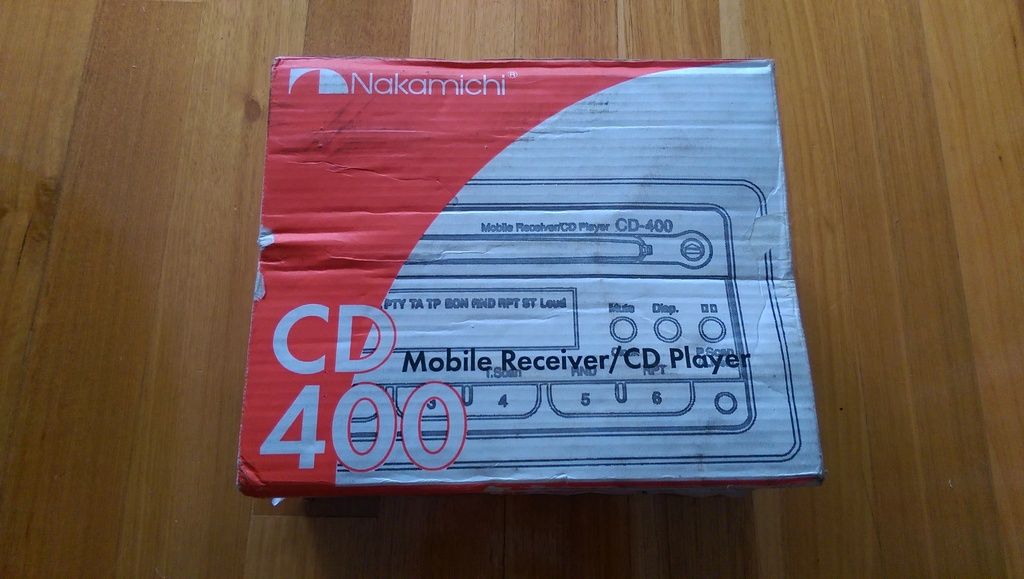
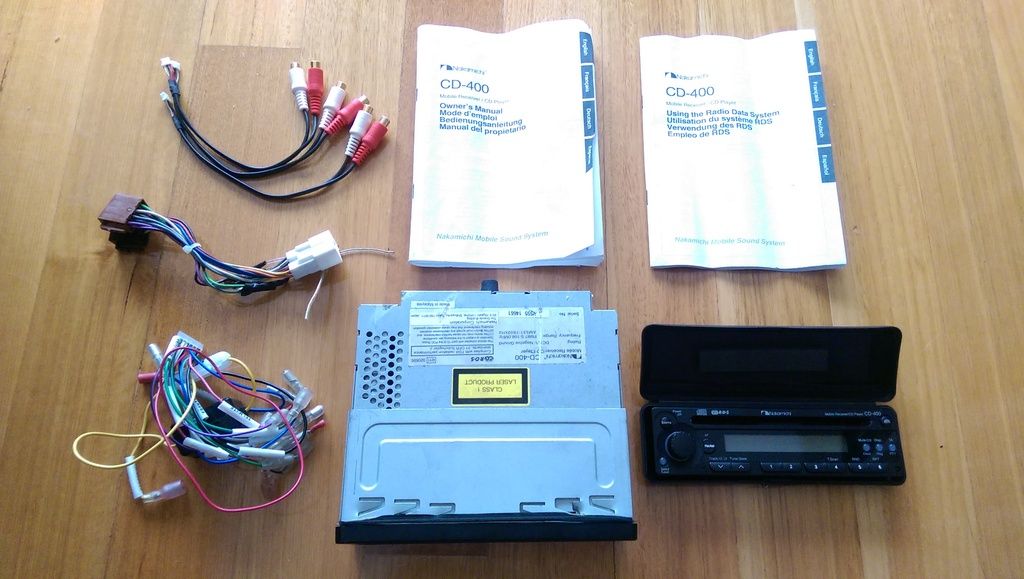
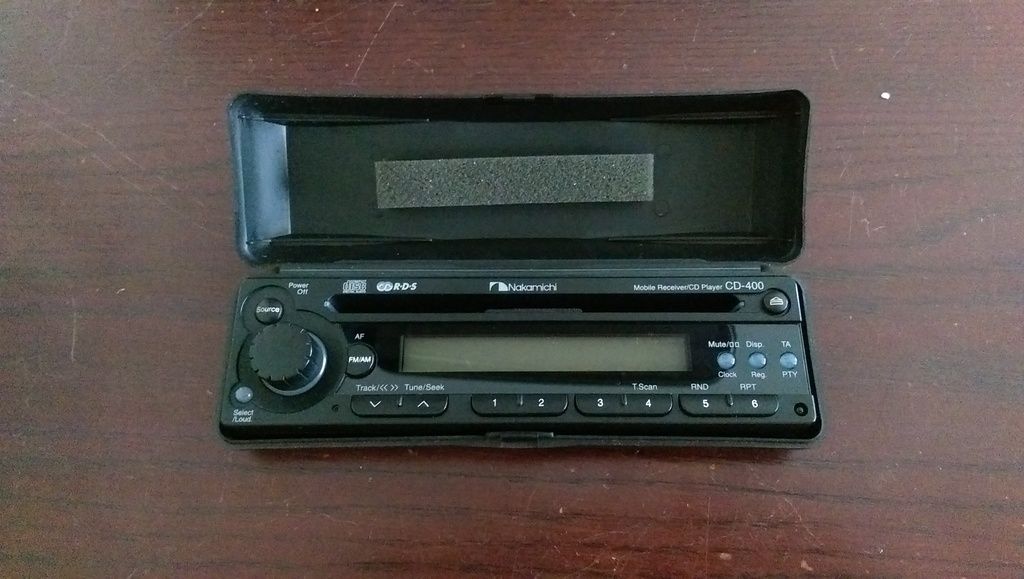
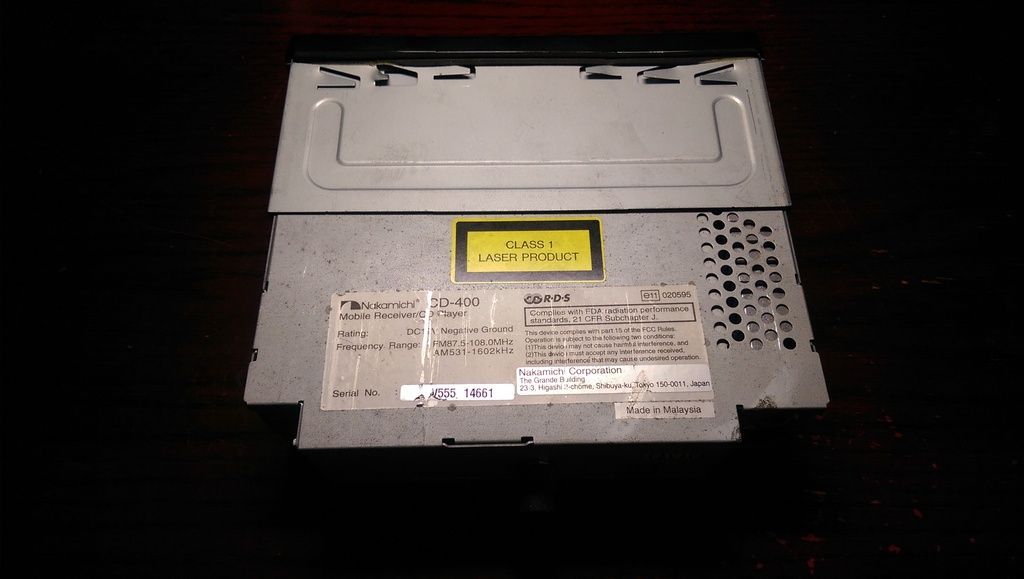
I also received my Nakamichi CD400 headunit to replace the Sony one that my car came with. This is one the last of the true Japanese designed Nakamichi headunits with an emphasis on audio and sound quality. In early 2012, a new range of chinese made Nakamichi branded units became available and both the build and sound quality of these headunits dropped significantly. These don't come up often and this one was purchased on eBay for roughly $130.00 including delivery from London, England, which was pretty good. Even though it was second hand, it was very clean and almost brand new. Luckily, the FM frequency is the same as Australia's (87.5 - 108.0 MHz) and this means it will pick up all the FM radio channels here. I have known friends who purchased headunits from Japan and since the FM frequency in Japan is different (76.0 - 90.0MHz), you would need an FM frequency converter for the headunit to be able to be used here and it won't pick up all the channels.

With the majority of the exterior and engine mods somewhat complete for now (it's never finished, let's be honest), I decided that this year I'll be focusing on suspension, interior and cleaning/refreshing parts of the car not seen by the naked eye.

Nakamichi CD400 Headunit.

Image

Image

Image

Image

93LE Speaker Grilles.

Image

OEM Mazda Silver Tweeters. Thanks Mike!

Image

Image

BRG.NA8
Fast Driver
Posts: 196
Joined: Sat Dec 12, 2015 10:32 pm
Vehicle: NA8

Re: 1996 BRG NA8C Build Thread

Postby BRG.NA8 » Sat Jan 21, 2017 11:09 pm

21/01/2017

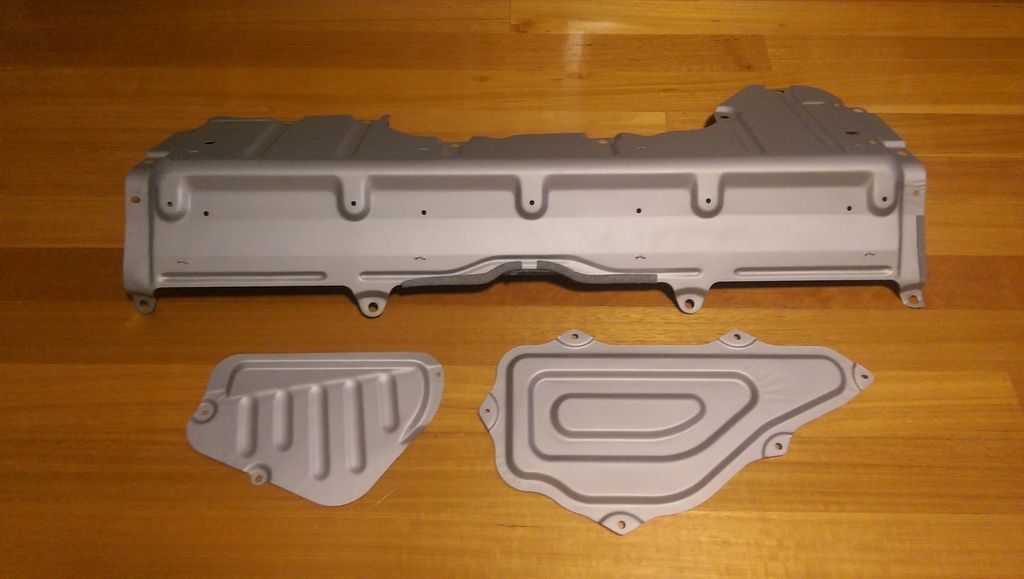
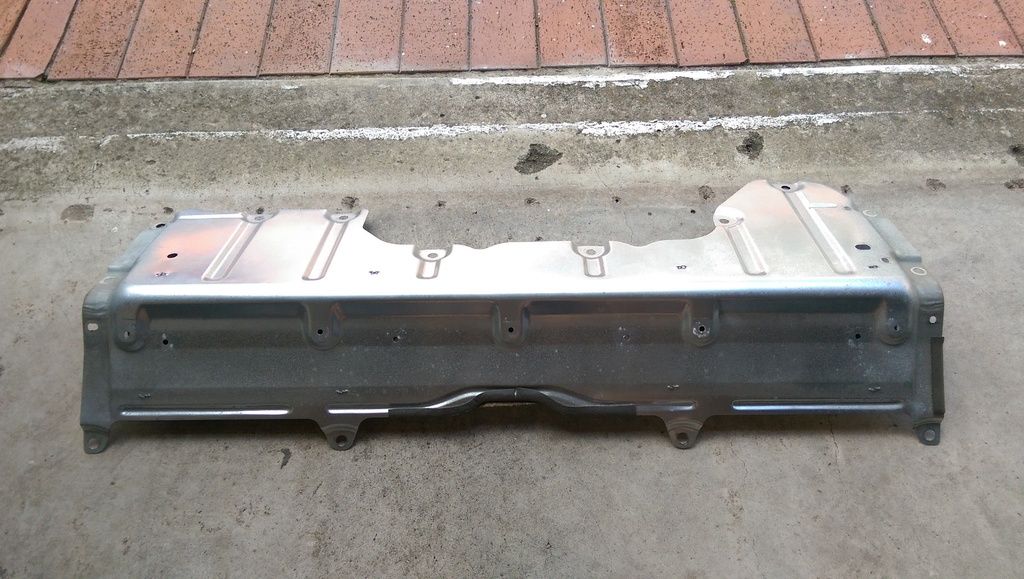
OEM Mazda Rear Parcel Shelf + Fuel Line Cover + Fuel Pump Cover
Today was the One Millionth Mazda MX-5 FanFest day at Sandown Raceway in Melbourne. I was so bummed out that I couldn't make this event even though I was personally invited to go as it seems like it was a really awesome day. So, given the fact that I couldn't be with my friends who drove down to MX-5 FanFest and got the opportunity to drive on some amazing roads on the way, I decided to ease my sorrow by working on the car. I mentioned in my previous post that this year I'll be focusing a lot on cleaning and refreshing/restoring different parts of the car, even the parts that you can't see, and get it factory fresh and as close to how it would have looked when it rolled off the assembly line some 21 years ago.

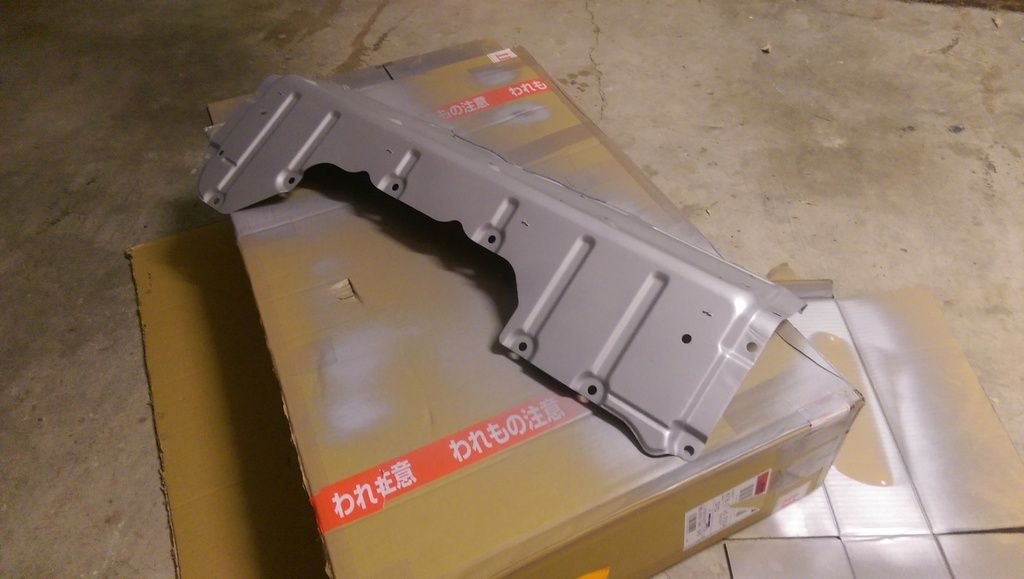
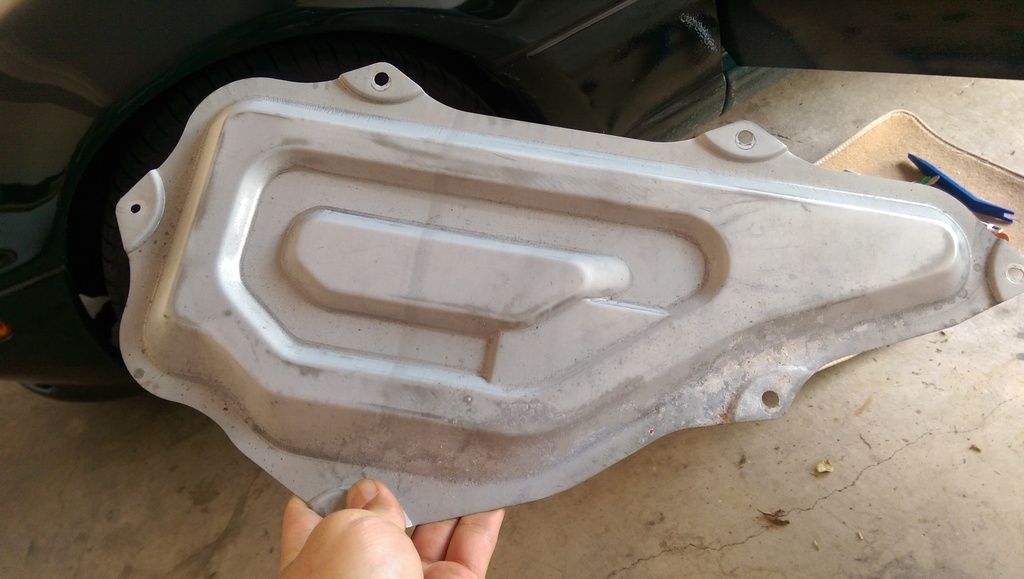
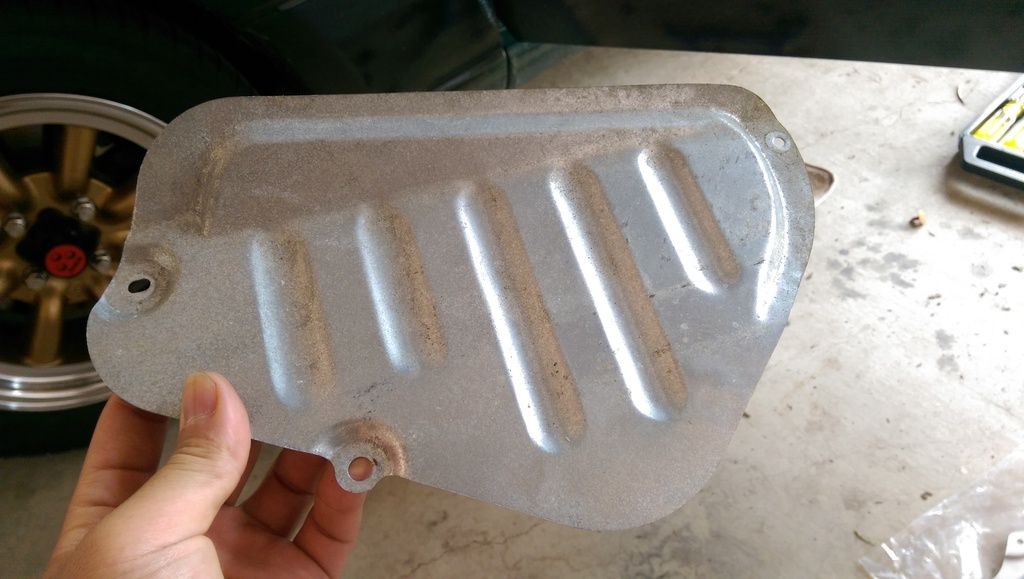
My first step towards the refresh/resto was to replace the metal fuel pump and fuel line cover, the ECU cover and the metal lower bulkhead parcel shelf. Now, this is all underneath the rear carpet and the ECU cover is under the carpet on the passenger side so you will never see it but it is something which can be prone to rust and oxidisation overtime, especially since the MX-5 is 21 years old. I was actually inspired by my lolmx5 when I came across his build thread. He owns a very neat and tidy red NA8 and is also looking to clean up his MX-5 by refreshing a lot of parts and restoring it back to its former glory as well as preventative measures along the way; all traits that I can fully appreciate and respect.

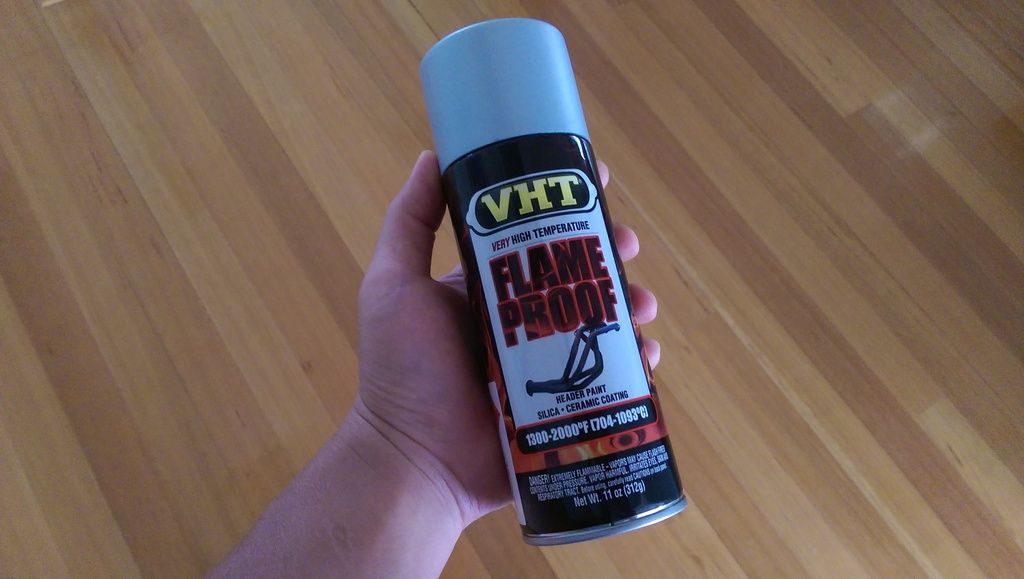
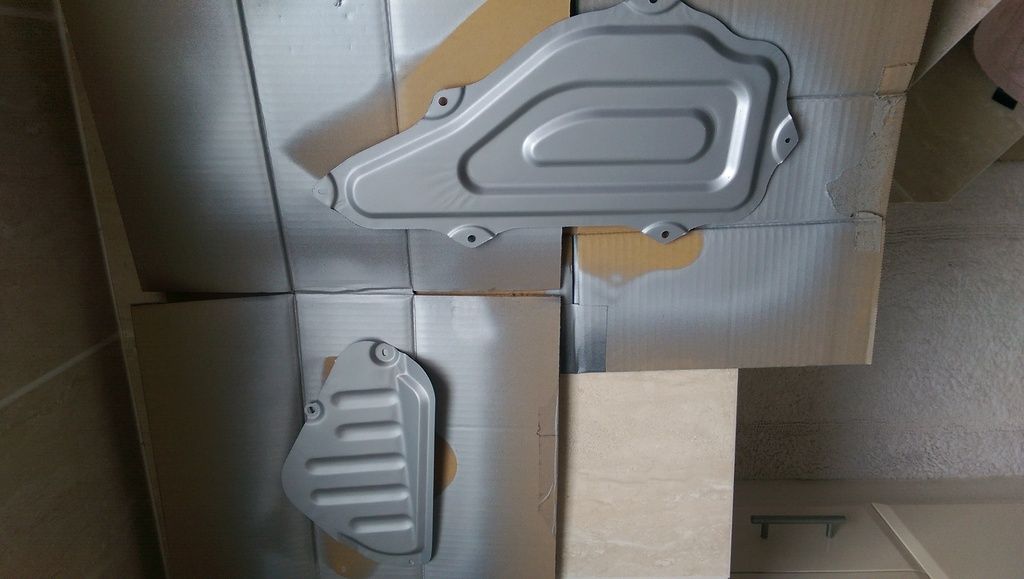
I haven't yet checked the status of my covers but regardless, I ordered the required parts from Amayama. If my stock ones are still fine, I'll still be replacing them but I'll probably just give them a clean and either keep them as spare parts or sell them off. Either way, I find it's somewhat therapeutic putting in fresh new parts. To prevent any possible rusting in future, I also gave it a few coats of VHT silver flameproof enamel paint. This was also inspired from lolmx5's build thread. He recently restored his covers as he found that his were in less than acceptable condition. I have also done the ECU cover but it just isn't pictured here. All in all, it came out great and can't wait to get these on and replace the old stuff.

Metal rear bulkhead parcel shelf, fuel pump cover and fuel line cover.

Image

Giving it a few coats of VHT silver flameproof engine enamel paint.

Image

Image

Image

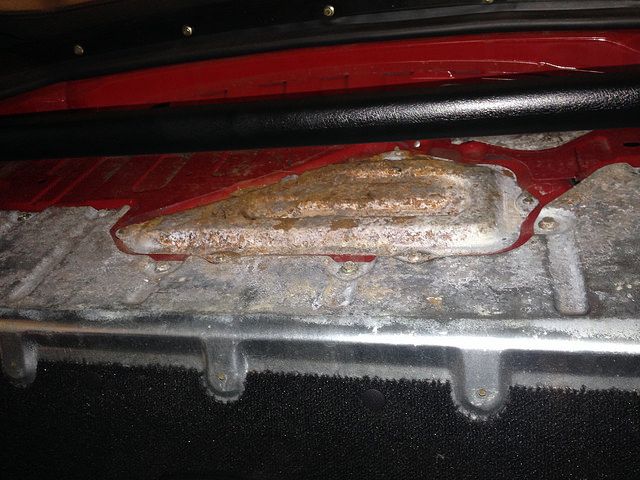
This is what can happen overtime. Not a pretty sight. Photo by lolmx5

Image

BRG.NA8
Fast Driver
Posts: 196
Joined: Sat Dec 12, 2015 10:32 pm
Vehicle: NA8

Re: 1996 BRG NA8C Build Thread

Postby BRG.NA8 » Thu Jan 26, 2017 5:19 pm

26/01/2017

JDM Eunos Fog Lights
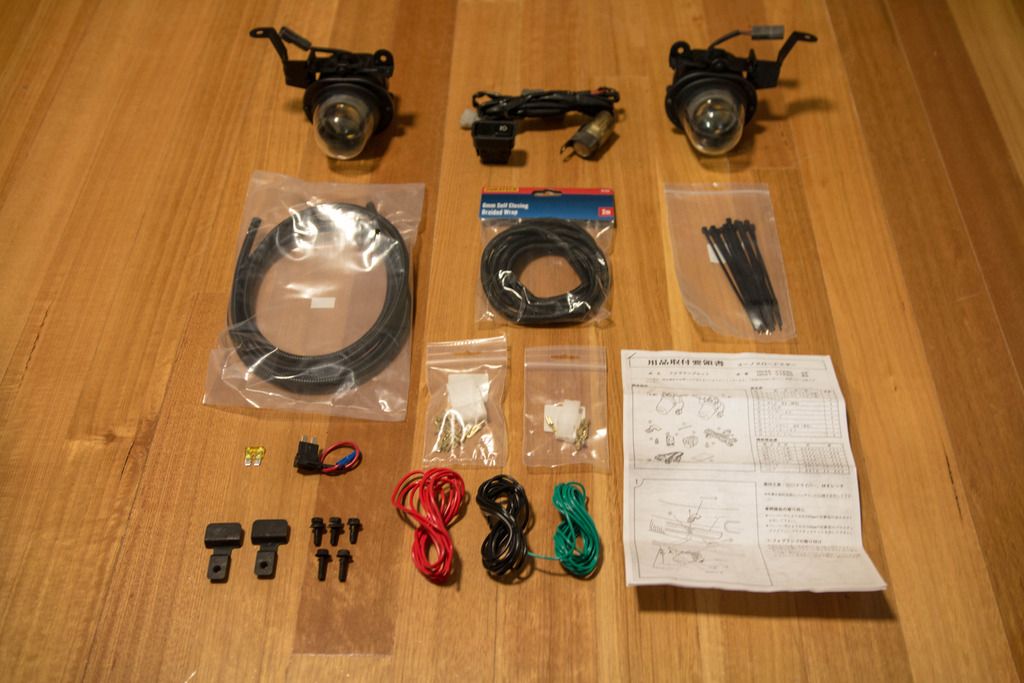
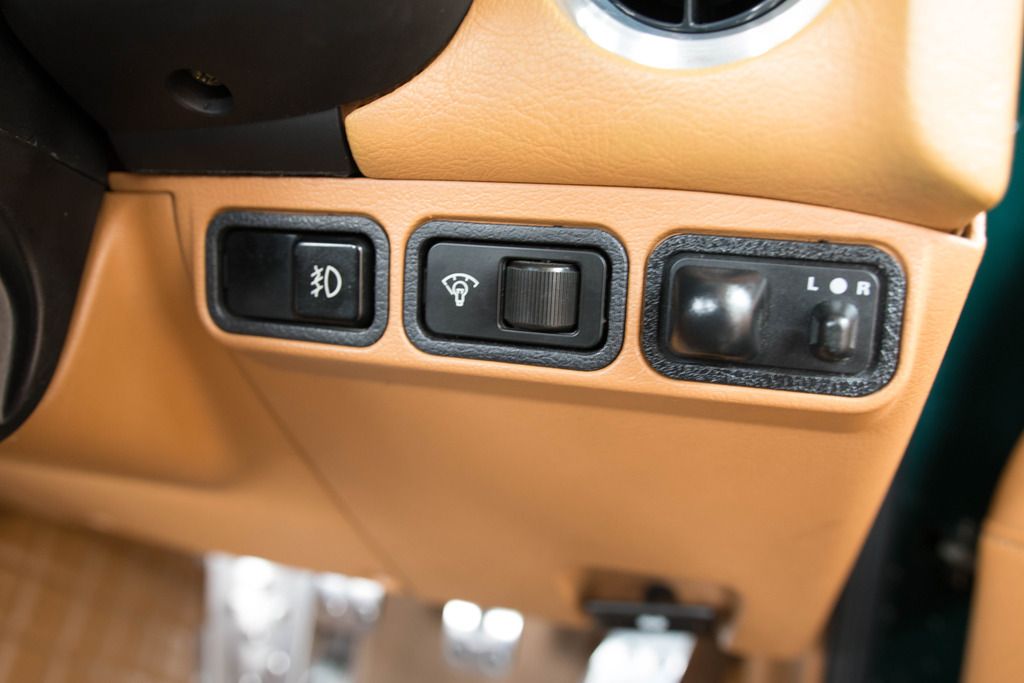
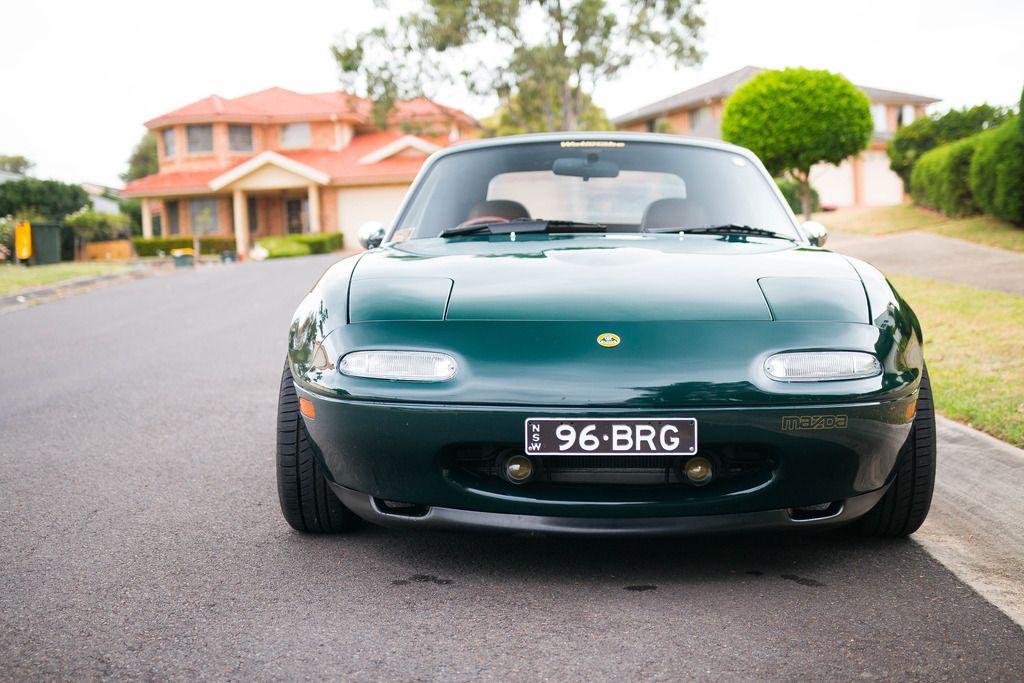
What better way to spend a public holiday than to get some stuff done to the car. Finally fitted the JDM Eunos fog lights. I'm not sure if the Australian delivered MX-5's had these but in Japan, some Eunos Roadster were fitted with these as a factory option. The fogs came with the wiring harness and the OEM fog light switch for the interior which made things a lot easier. To be honest it was pretty much all plug and play but there were a few extra things needed such as some 15 gauge wires (red, black and green to keep it consistent with the factory wiring), a 2-way and 6-way plug socket, blade fuse wire tap adaptor, a 20A yellow fuse, some zip ties, wire stripper, soldering iron and heatshrink, black electric tape and some wire shroud to keep it all neat and factory looking in the engine bay.

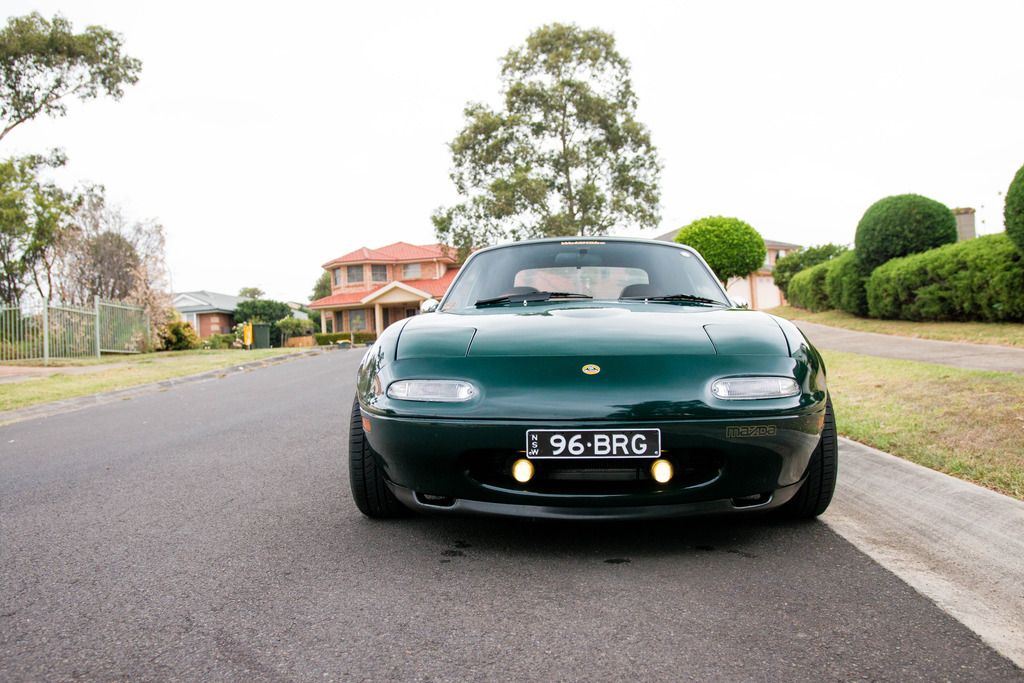
The fog lights only turn on when both the car and the headlights are on. Normally you can turn the parkers and headlights on with the car off but the fogs won't operate unless the car is up and running. Took about 3-4 hours for the install. Massive thanks to Gabriel who helped me get some parts from Jaycar and to Sari (lolmx5) for helping me install these. If it wasn't for him I think it would have taken a lot longer since my electrical knowledge and know how is extremely limited and he's actually installed a set himself thus he knew exactly what to do so thanks again mate!

JDM Eunos Fog Lights + other stuff you will need. It came with Japanese instructions which were useless for me since I couldn't read.

Image

Fog Light switch.

Image

Installed!

Image

On and operational!

Image

BRG.NA8
Fast Driver
Posts: 196
Joined: Sat Dec 12, 2015 10:32 pm
Vehicle: NA8

Re: 1996 BRG NA8C Build Thread

Postby BRG.NA8 » Mon Jan 30, 2017 1:54 am

Nothing better than going for a drive on a Sunday...

Image

BRG.NA8
Fast Driver
Posts: 196
Joined: Sat Dec 12, 2015 10:32 pm
Vehicle: NA8

Re: 1996 BRG NA8C Build Thread

Postby BRG.NA8 » Sun Feb 05, 2017 2:55 pm

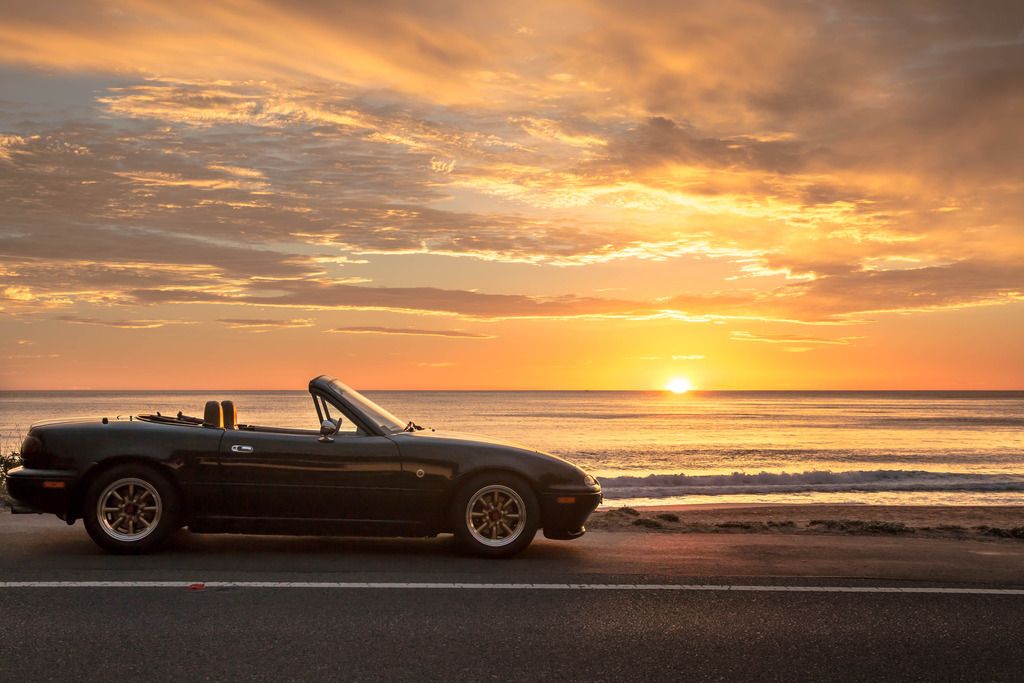
Sunday sunrise over Palm Beach.

Image

BRG.NA8
Fast Driver
Posts: 196
Joined: Sat Dec 12, 2015 10:32 pm
Vehicle: NA8

Re: 1996 BRG NA8C Build Thread

Postby BRG.NA8 » Fri Feb 10, 2017 7:23 pm

Update on a few parts which came through :)

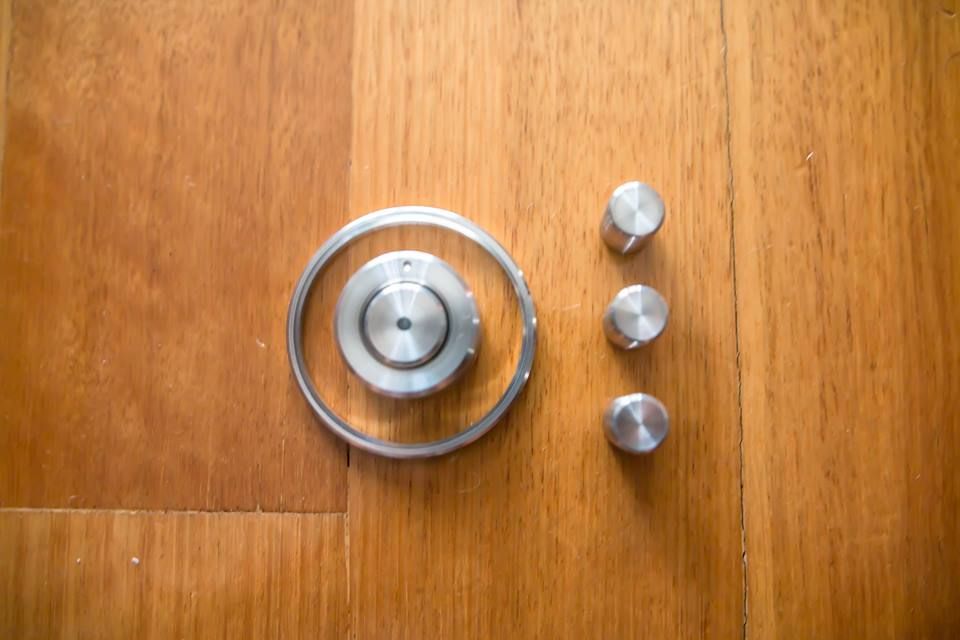
Received a set of billet aluminium HVAC A/C button, knob dial, trim ring and selector covers made by RS-Products Japan. I bought these because it compliments the interior with other parts the car currently has at the moment, such as the rings on my KG Works cluster, the Garage5 vent rings and it will also tie in when I fit the Nakamae door cards and fit the polished LE speaker panels as well as the Nakamae door handles. These pieces will go nicely with the custom HVAC panels I will be ordering soon from Adam from Revlimiter.net. I haven't yet decided on a HVAC panel design but I do know that I want the font for the numbers on the fan speed dial to be matching my gauge faces and the illumination on the panel to be green, thus keeping everything consistent.

Image

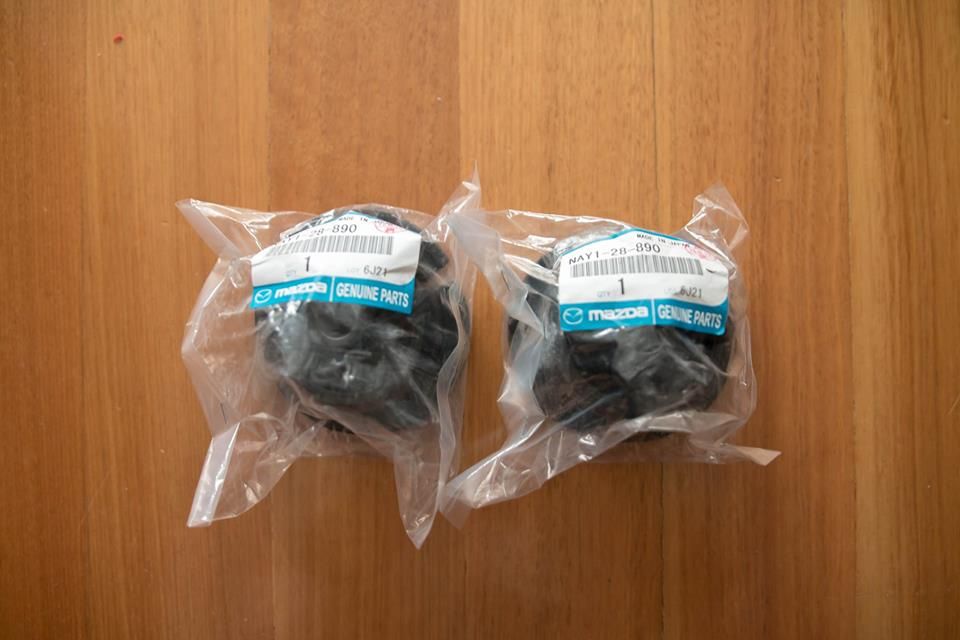
I also received my Mazdaspeed competition diff mounts. These provide about 40% stiffness over the OEM rubber mounts. I'm planning on upgrading my diff to a Torsen 4.1 unit as well as refreshing all suspension bushings to Mazdaspeed, therefore I also wanted to refresh the diff mounts. I didn't go with polyurethane or delrin mounts for fears of increased NVH so hopefully this will be a good happy medium.

Image

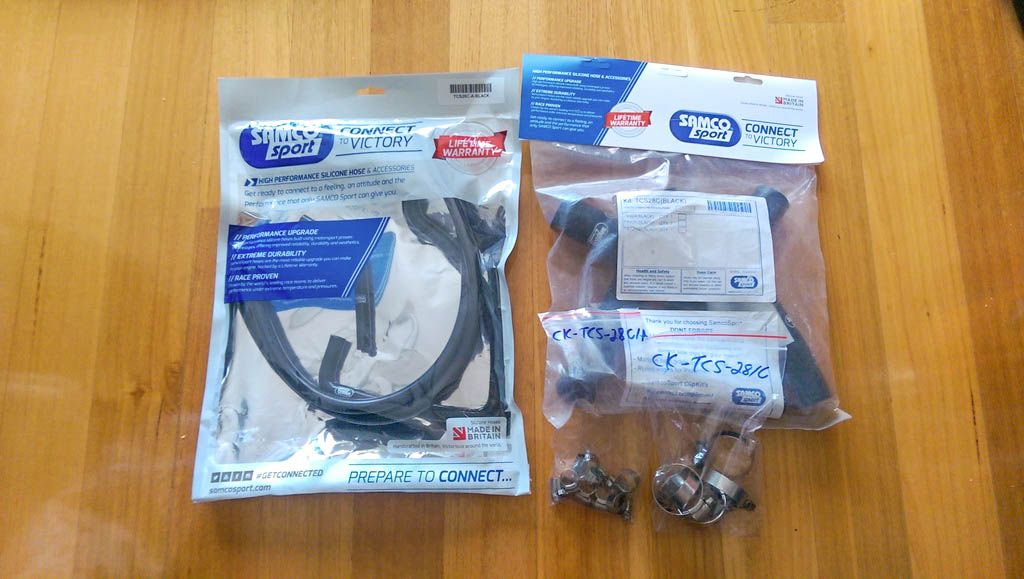
After backlogs, christmas and new years holiday periods and waiting for about 4 months, I finally received my order of Samco Silicone hoses from Williams Race Services (WRS) who are the official Australian distributors for Samco Sport. These are my cooling hoses which will replace my failing hoses that I purchased from Carbon Miata. About 5 months after I installed the Carbon Miata hoses, the coolant seem to seep through the inner walls of the hoses and not only that, they started to discolour. I could even smell coolant after a drive. I didn't know it at the time but these were a cheap chinese made knockoff set which probably wasn't made from high grade silicone. Now I'm not saying that all of their hoses will result in what happened to me and it could just be I got a bad batch, but either way it left me not wanting to buy anything from them in the future. Never again.

Image

BRG.NA8
Fast Driver
Posts: 196
Joined: Sat Dec 12, 2015 10:32 pm
Vehicle: NA8

Re: 1996 BRG NA8C Build Thread

Postby BRG.NA8 » Fri Feb 17, 2017 10:57 pm

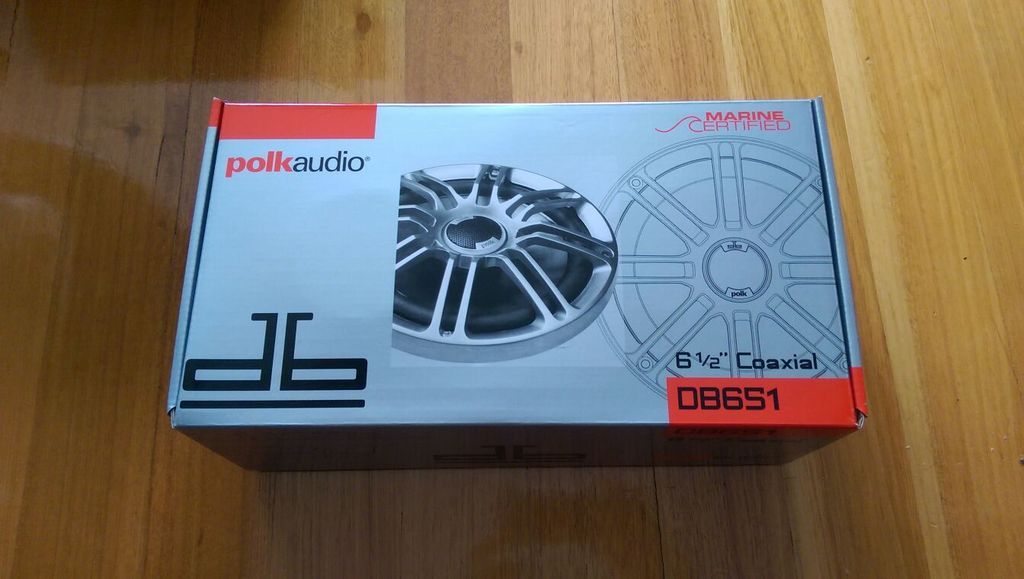
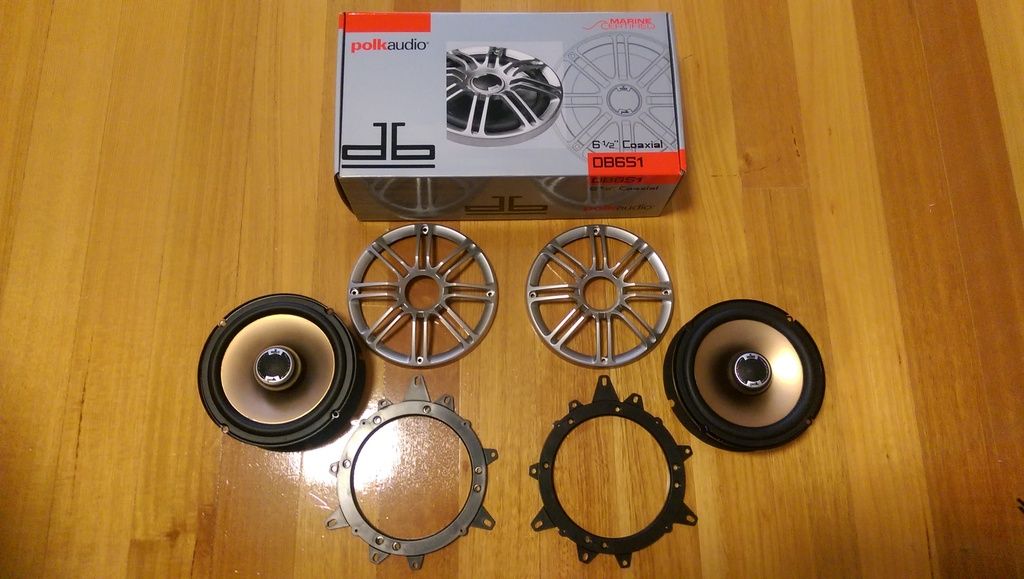
The OEM speakers and sound system in the MX-5 aren't the best. The sound isn't as crisp or as clear as other factory systems I've heard. Not only that, Mazda decided it was a good idea to remove the speakers from the headrests and instead substitute it with tweeters on the door cards instead.

I'm not a huge audio guy but I do like listening to music on drives so I wanted to upgrade the factory speakers to something which was quality and that would give me the crisp sound I was after but wasn't overly expensive. After a bit of research, I opted for these Polk Audio DB651 6.5" 2-way coaxial speakers. This should be a pretty decent upgrade over the factory units and should pair nicely with the Nakamichi headunit.

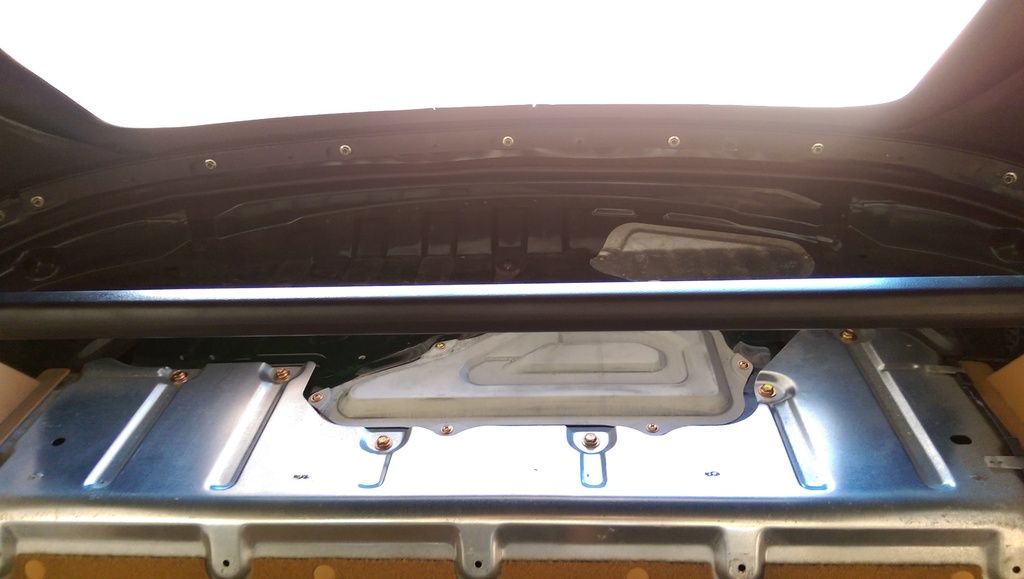
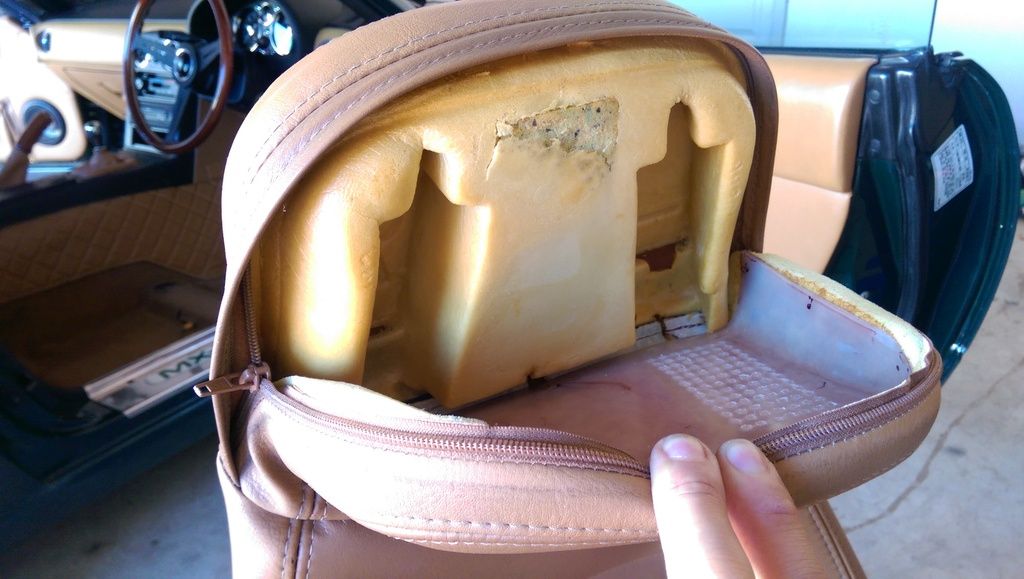
The later model NA8 did not come factory with headrest speakers like the NA6 but from what I'm told, the cutouts for the speakers are there. It's just that there's nothing in them except foam, so the option of putting aftermarket speakers in is definitely a viable option. I'm planning to install speakers in there and keeping with the same brand, I've decided to get the Polk Audio DB351 3.5" coaxial speakers. Since the sound will have to travel out from the headrests once installed, the Nakamae seat covers I plan on getting will also need headrest speaker perforations.

Hopefully these upgrades will make driving even more of an experience, listening to my favourite tunes while tackling the twisty stuff on the blacktop.

Image

Image

BRG.NA8
Fast Driver
Posts: 196
Joined: Sat Dec 12, 2015 10:32 pm
Vehicle: NA8

Re: 1996 BRG NA8C Build Thread

Postby BRG.NA8 » Sun Mar 12, 2017 1:08 pm

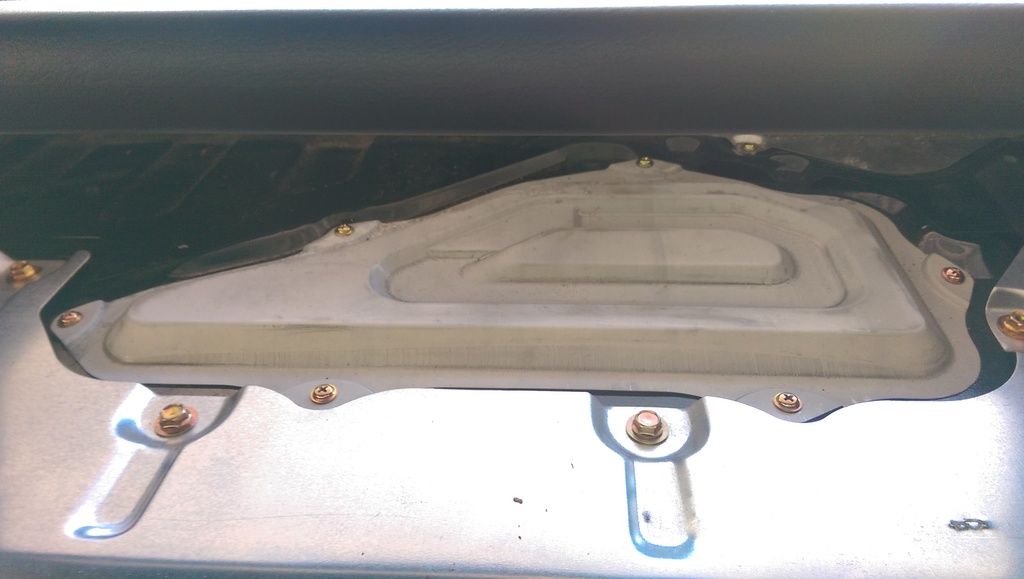
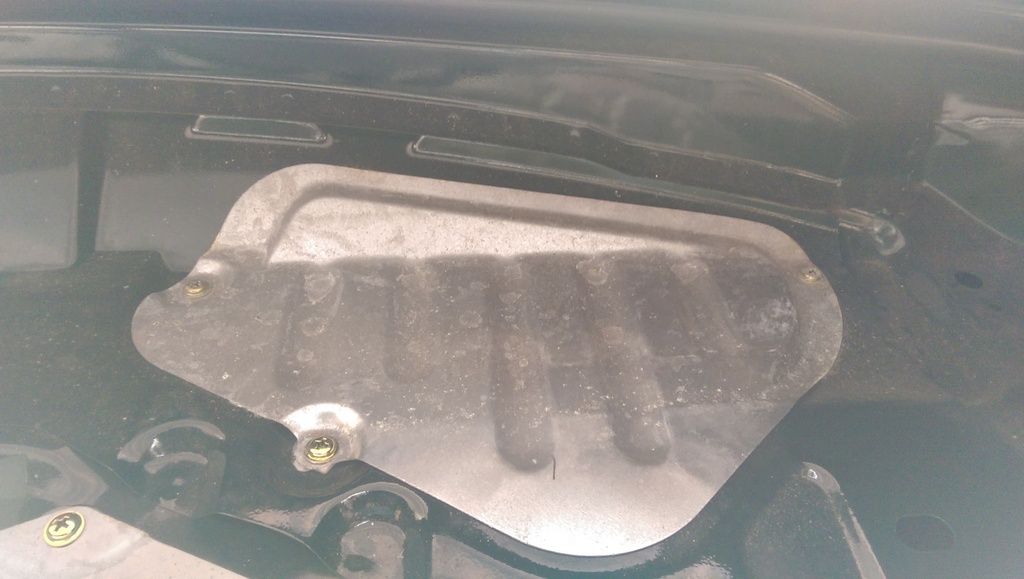
Absolutely glorious day today in Sydney which was rare because for the past few weeks it's been miserable with rain and thunderstorms, so seeing the sun was a welcome change indeed. Perfect day to go for a bit of a drive but instead I decided to do some DIY, namely replacing the fuel pump and fuel line cover as well as the metal lower bulkhead parcel shelf.

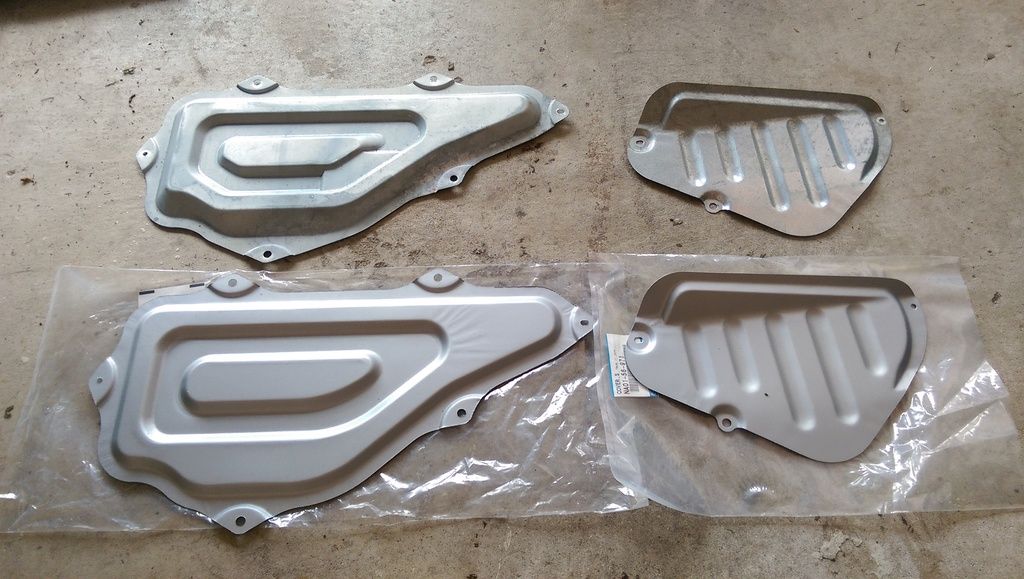
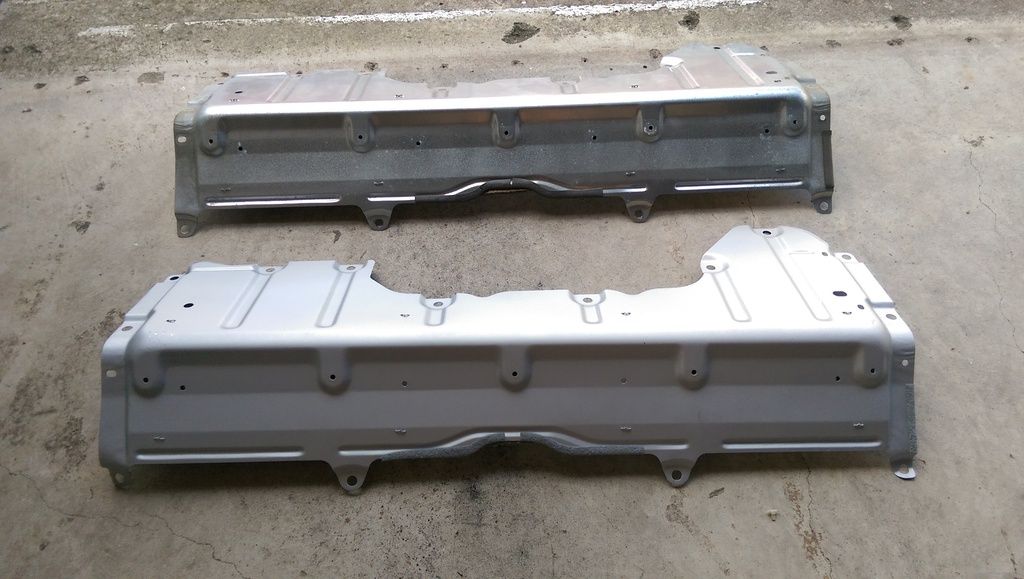
In a previous post, I mentioned that this year I was going to focus on refreshing and restoring the things on the car you can't see with the naked eye. First step towards accomplishing that goal was to replace these covers. Now a bit of a recap: I ordered these parts from Amayama and since these covers were metal, I gave it a few coats of VHT silver flameproof enamel paint to prevent any possible rusting in future. They were ready to be installed.

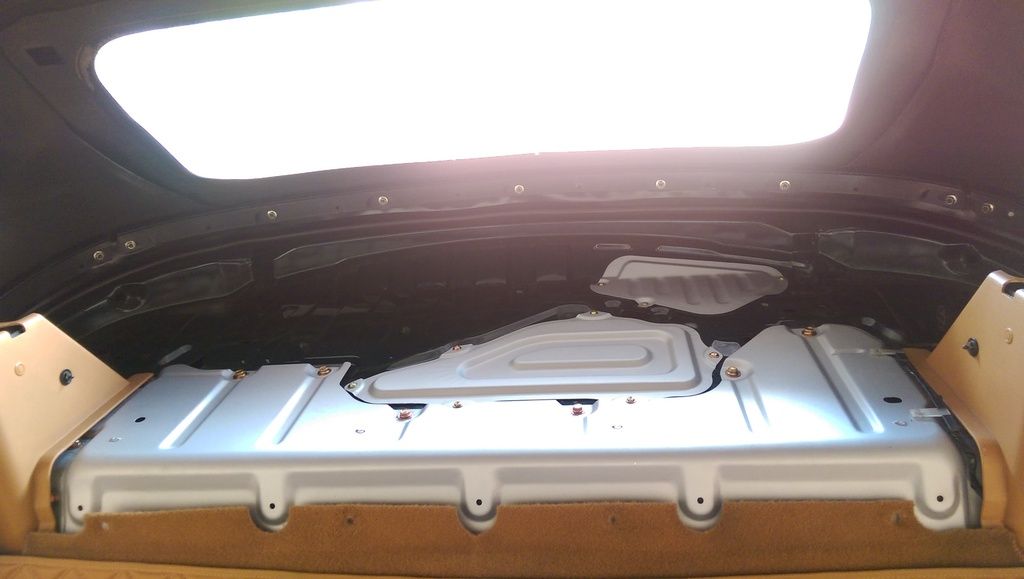
Much to my surprise and amazement, when I took the rear parcel shelf carpet off to access the covers, they were still in excellent condition. Slightly oxidised but zero rust! Not bad for a 21 year old car! I had seen other peoples covers which had rusted to bits and gone very bad but mine were still minty fresh. Even the bolts were still shiny! I could have left the covers as they were to be totally honest with you but I had the parts out ready to install so I decided to go ahead with it anyway. It was also a great opportunity to inspect the soft top rain rails as well as cleaning the grime/dirt/dust which had accumulated on the parcel throughout its lifetime. There's something therapeutic about cleaning that I enjoy and it's a great feeling knowing that after a good clean, given the proper treatment and maintenance it should last for at least another 21 years.

Original covers. Still in amazing condition! Zero rust!

Image

Fuel pump cover.

Image

Fuel lines cover.

Image

Closeup of fuel pump cover. Slightly oxidised and very tiny bit of rust but nothing too crazy.

Image

Closeup of the fuel lines cover. Oxidised but otherwise in excellent condition.

Image

Rear bulkhead parcel shelf. Looks brand new!

Image

Old covers at the top, new covers on the bottom.

Image

Image

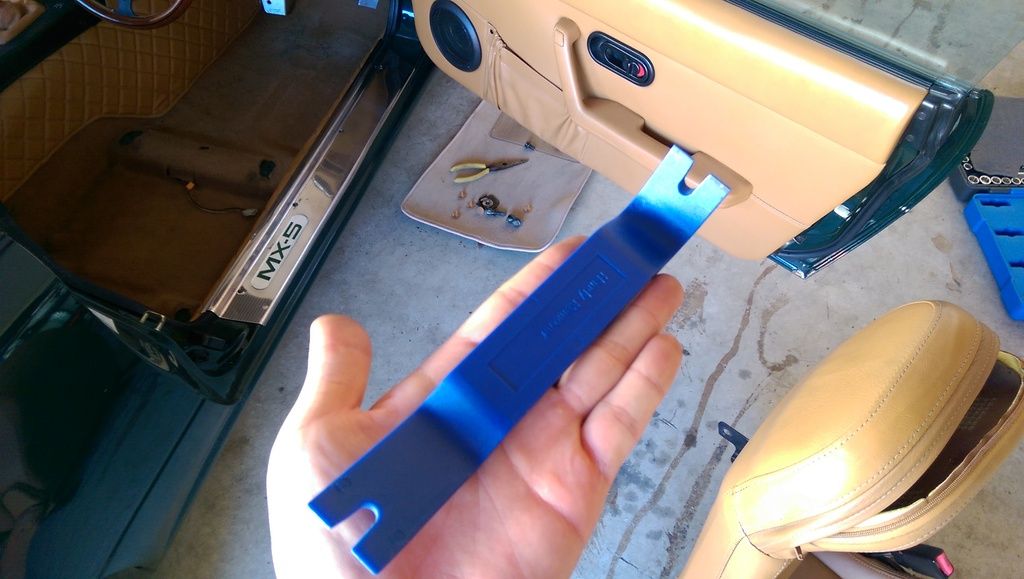
Always use a trim removal tool to get to the plastic clips.

Image

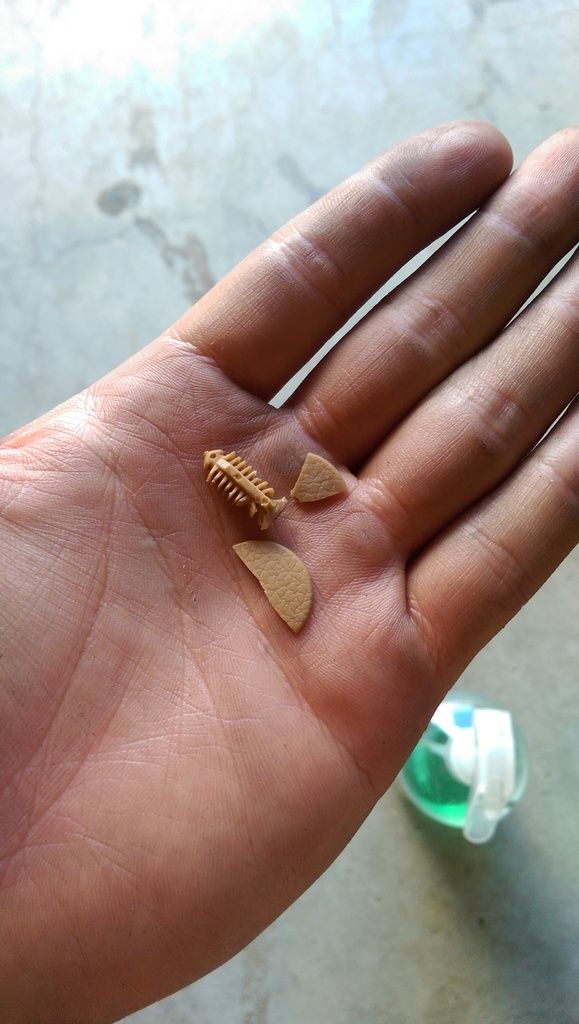
Out of the 20+ plastic clips, only one broke. It was already half broken when I pried with the trim removal tool.

Image

NA8 seat with holes in the foam for headrest speakers. I will be putting some speakers in there and doing a DIY but thats for another day...

Image

New covers installed and rear parcel shelf cleaned. No more grime/dirt/muck.

Image

Carpet vacuumed and cleaned before putting the seats back in.

Image

Overall, this wasn't really a hard DIY to do as all it involves are to remove some plastic clips, remove the rear parcel shelf carpet, unbolt the old covers from the car, pop the new one on, bolt them back down and you're done. Just need to take your time and be patient with it, especially with the rear bulkhead parcel.

BRG.NA8
Fast Driver
Posts: 196
Joined: Sat Dec 12, 2015 10:32 pm
Vehicle: NA8

Re: 1996 BRG NA8C Build Thread

Postby BRG.NA8 » Sun Mar 12, 2017 8:47 pm

Sunrise vibes...

Image

BRG.NA8
Fast Driver
Posts: 196
Joined: Sat Dec 12, 2015 10:32 pm
Vehicle: NA8

Re: 1996 BRG NA8C Build Thread

Postby BRG.NA8 » Sun Mar 26, 2017 5:42 pm

When I took delivery of my MX-5, I considered myself extremely lucky to have purchased one which was straight, unmodified, original and very clean. In fact, it was probably the cleanest one I had seen in person. However, given that the car is now 21 years old, things will naturally start to wear and will eventually need replacing no matter how clean the car may seem. One of these things would be the HVAC system.

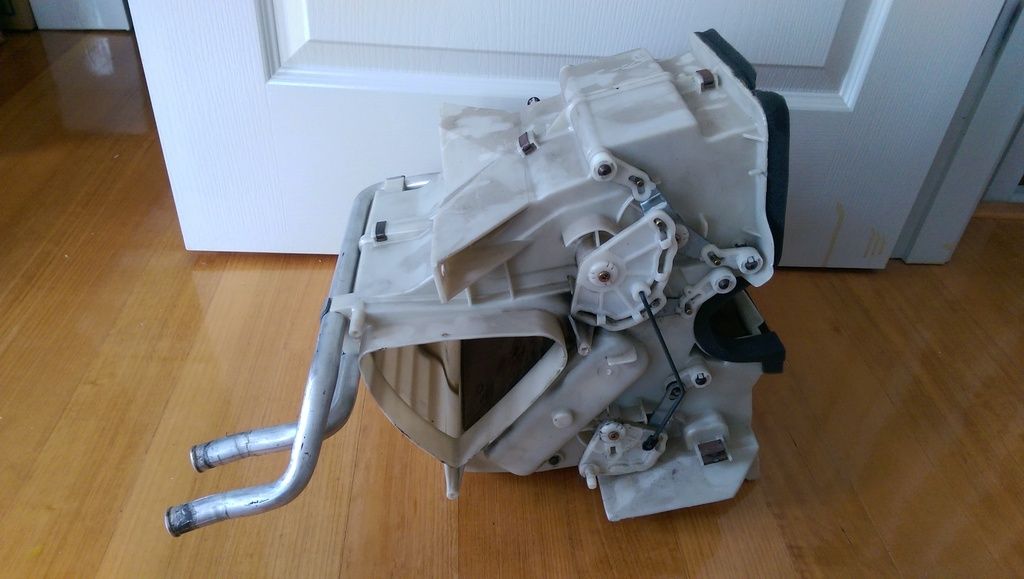
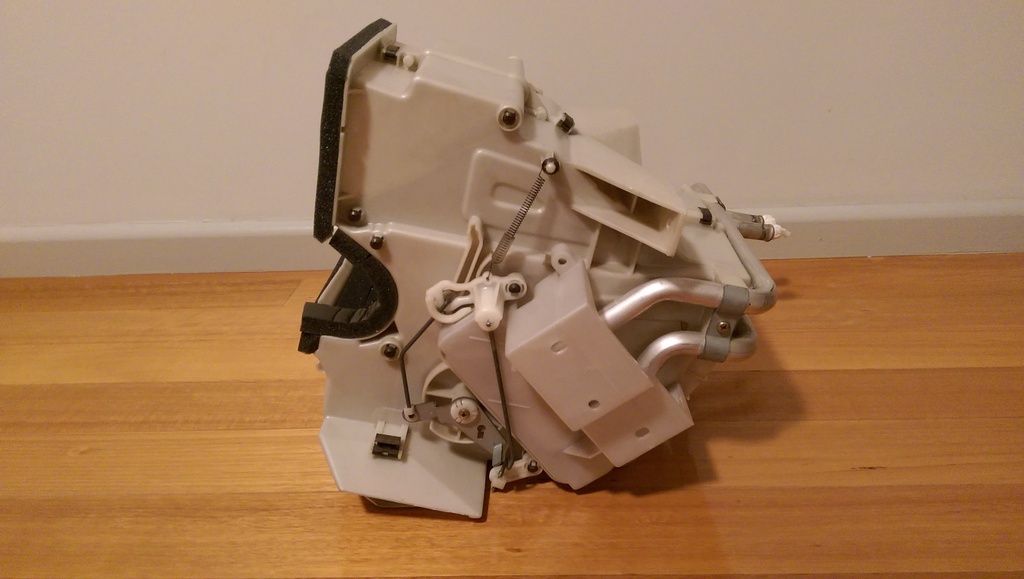
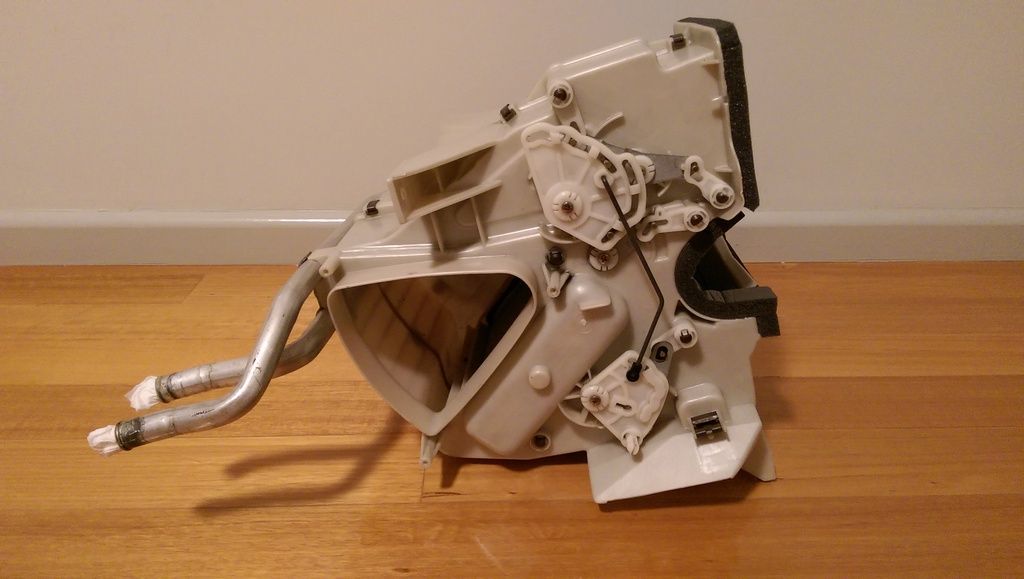
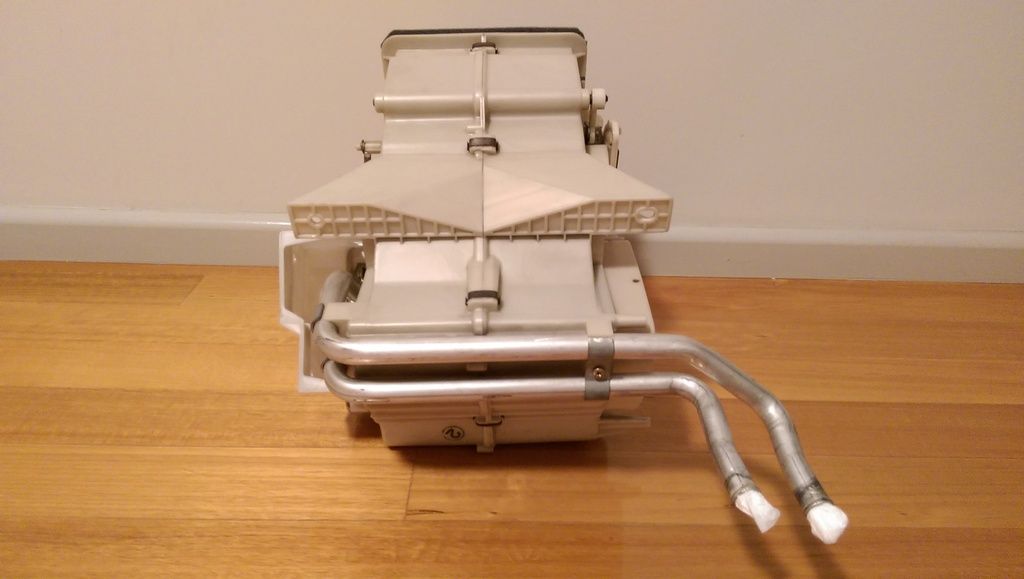
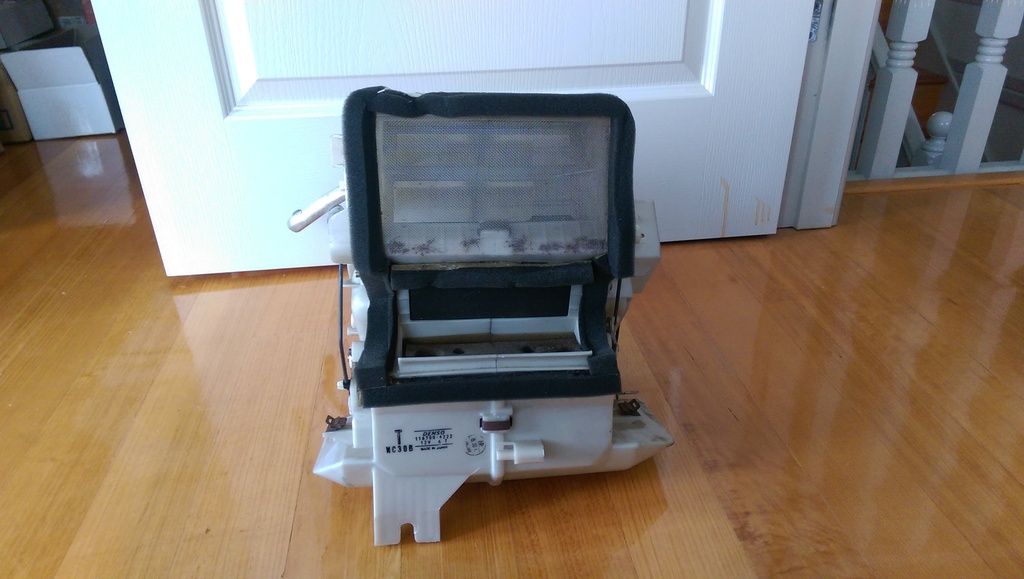
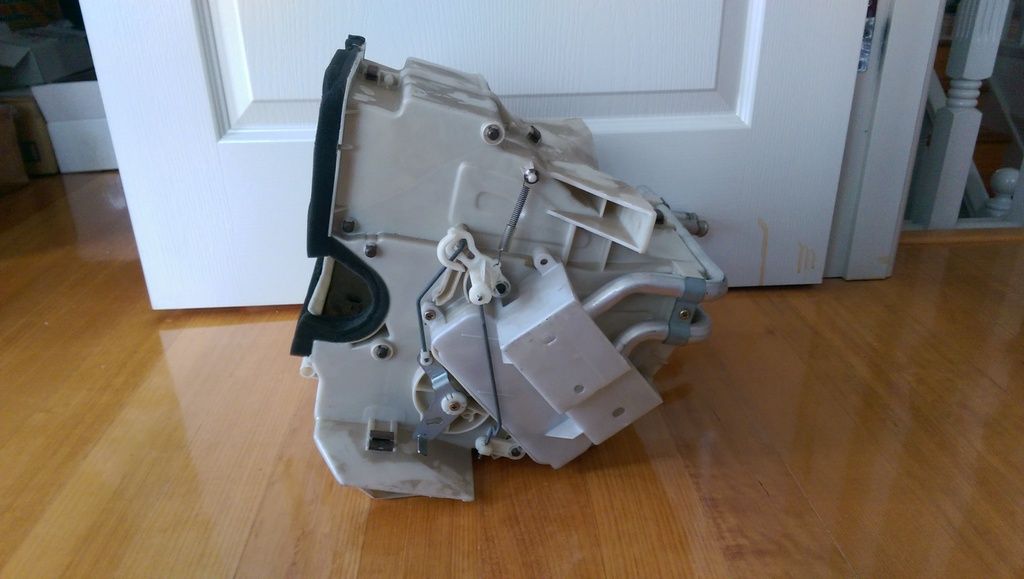
Recently purchased a good second hand NB heater core and the heater core housing assembly from MX-5 Mania. It was a little dusty and dirty but overall in great condition. The housing assembly is the same for both the NA and NB and is a direct bolt on affair but the NB MX-5's had the aluminium heater cores compared to the copper ones that the NA's received. A few benefits of the NB aluminium heater core are that they have removable, stronger metal hoses as they detach at the base of the heater core itself whereas the NA's copper heater cores were one unit, pipes and all. This means that theoretically you wouldn't need to remove your dash to change the heater core should it fail later on as you can just take the core out from the housing assembly, replace it with a new aluminium core and just re-use the pipes (however, I'd still probably take it all out just to be sure even if it may be a pain in the ass to do. Good opportunity for a clean). Also, the ends of the NA heater core pipes are copper and are quite soft, which means they can bend easily and get damaged which may result in coolant leaks.

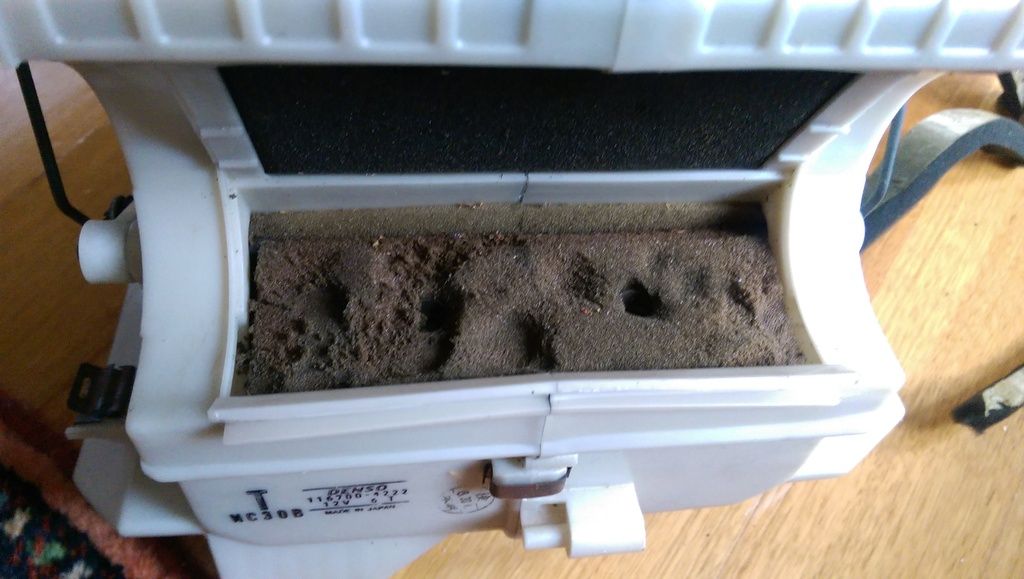
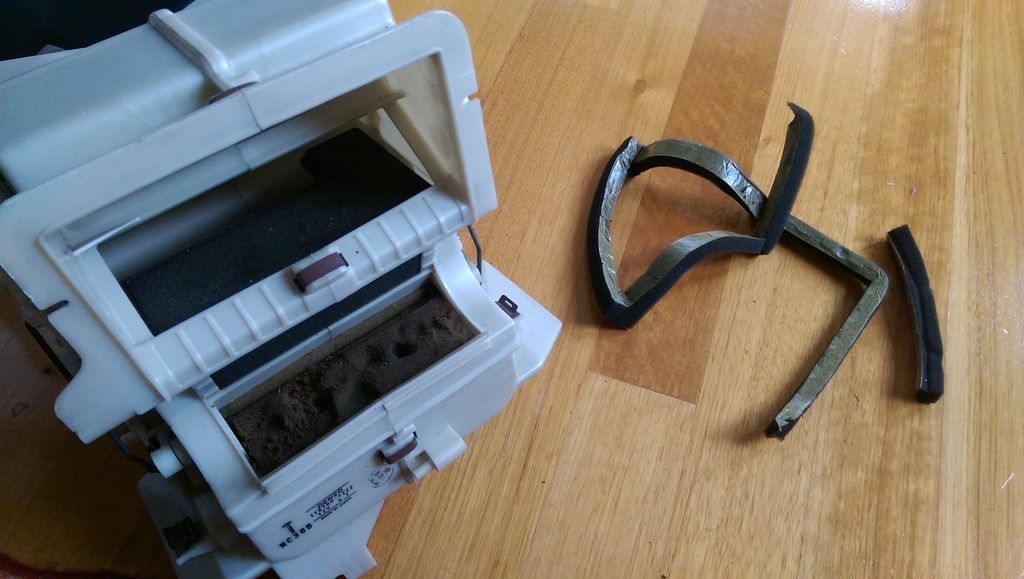
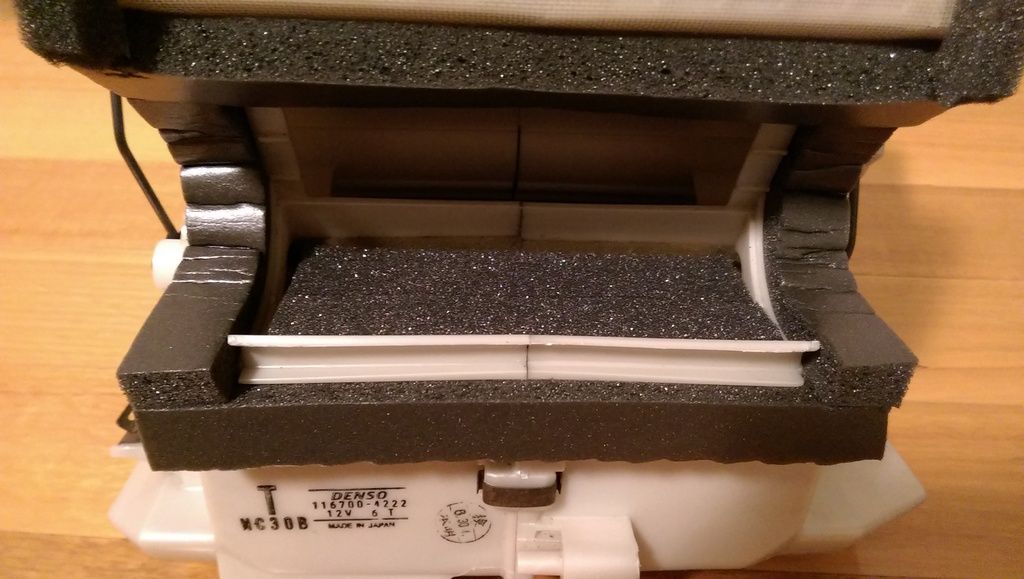
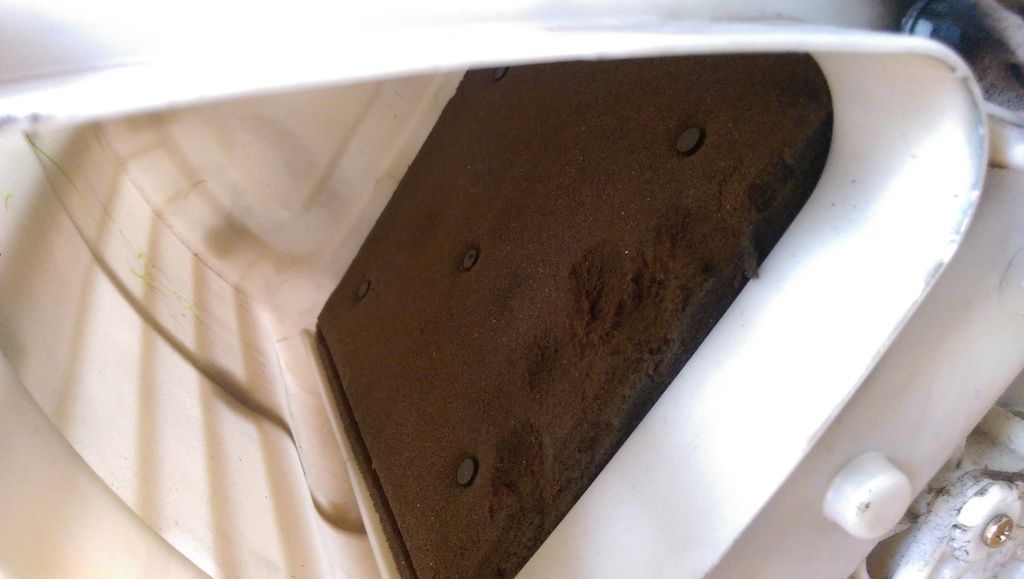
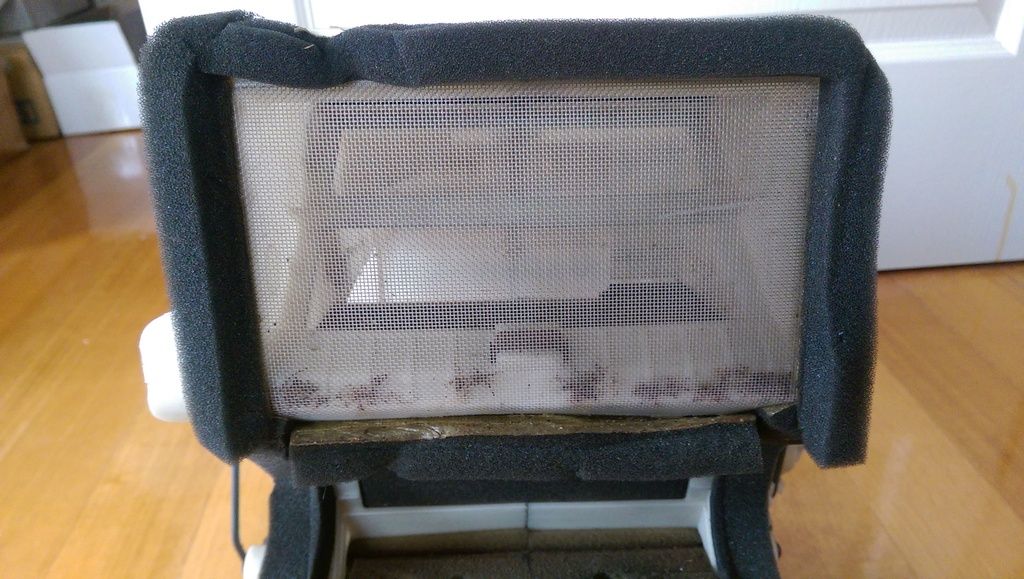
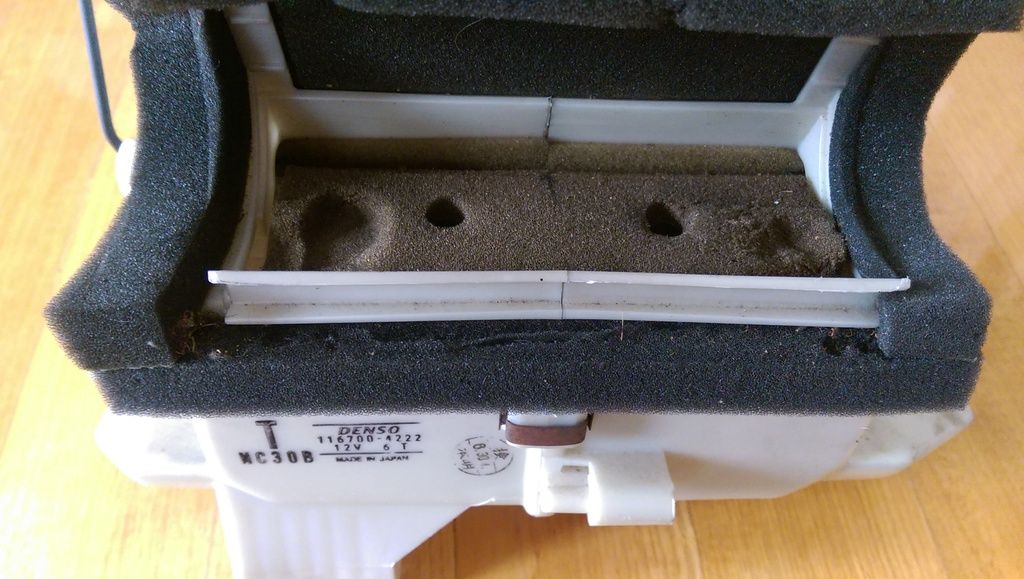
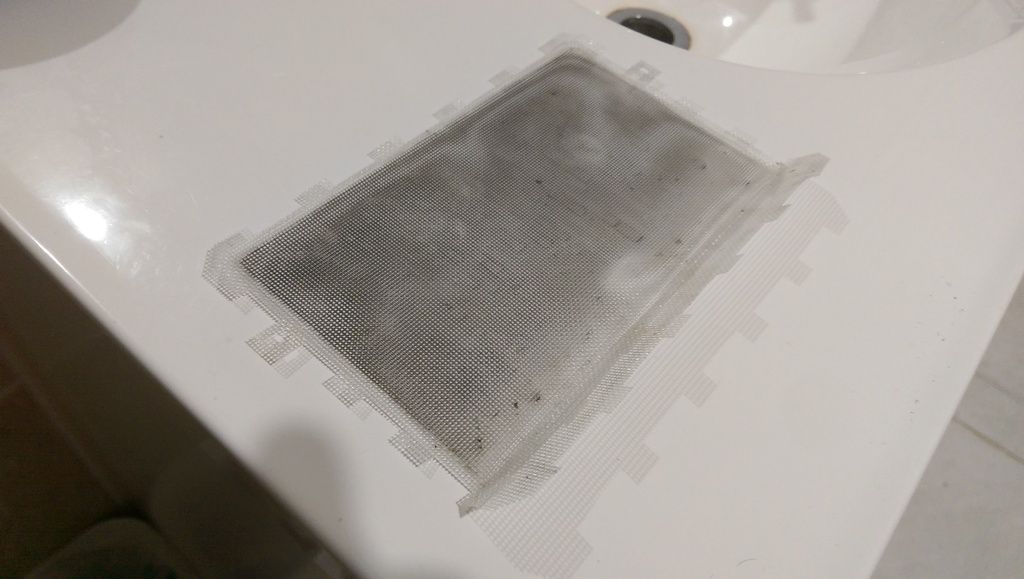
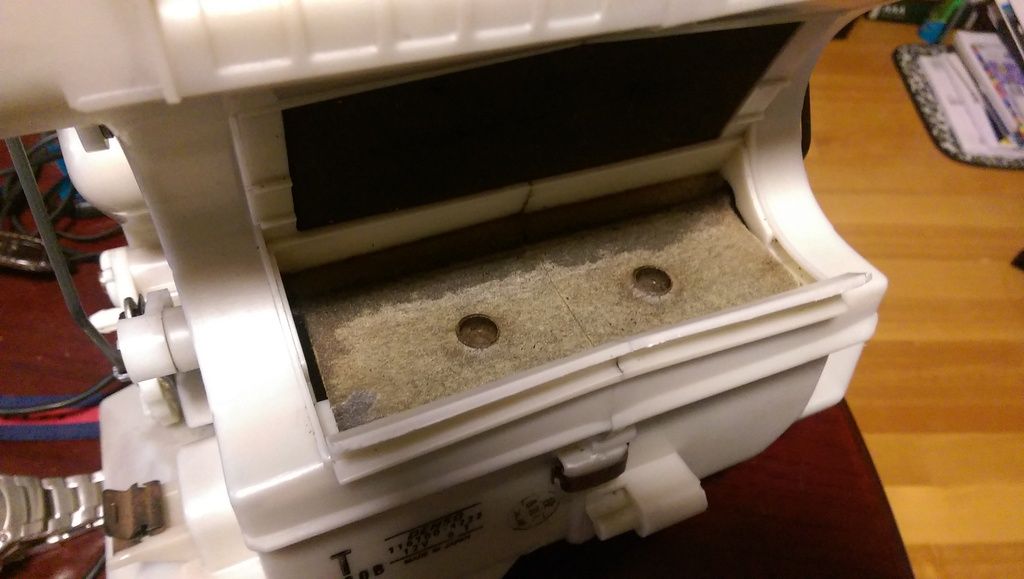
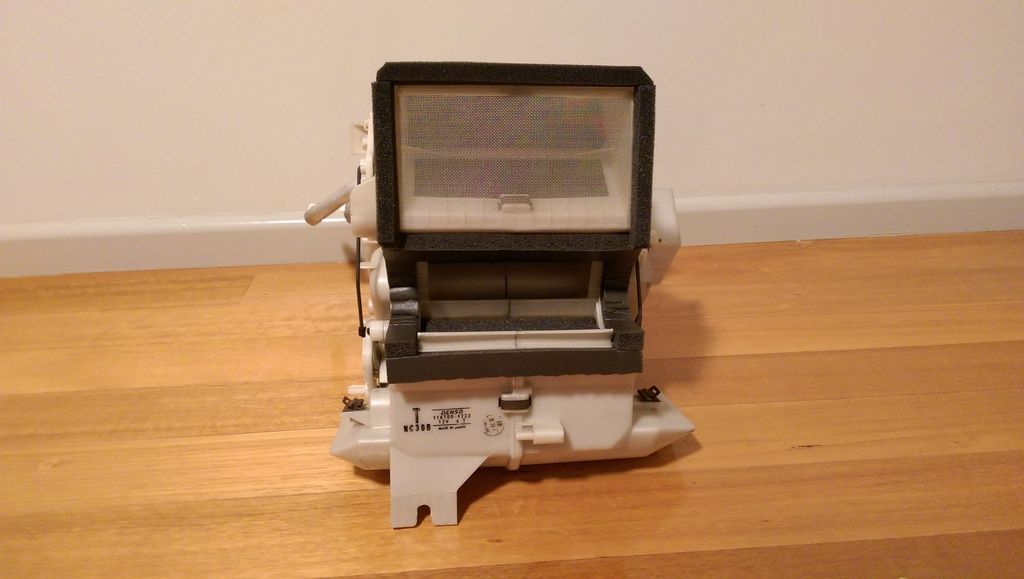
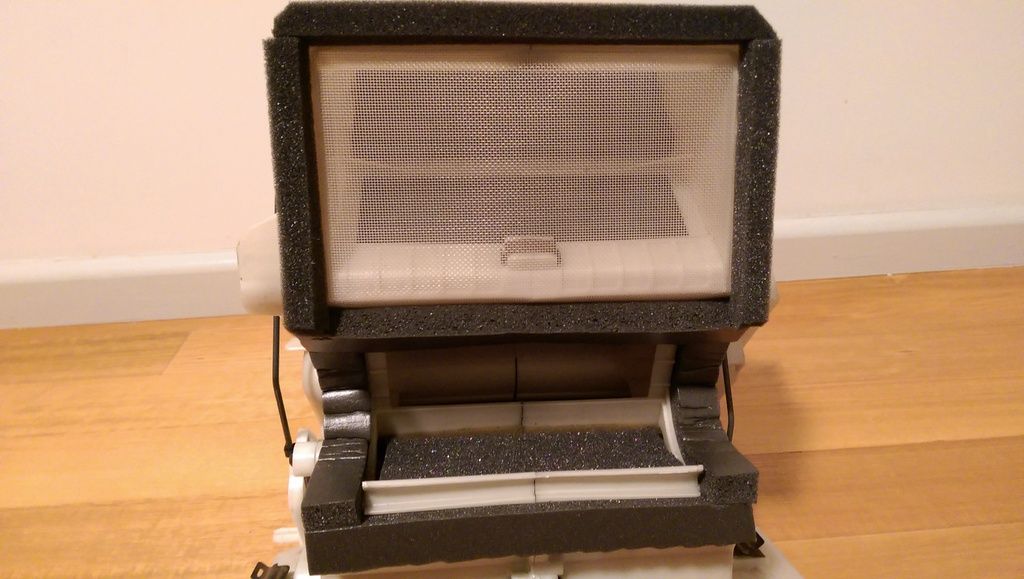
I took this opportunity to give the housing assembly a good clean, wiping off all the dust, dirt and bits of nature it had accumulated during its time. I also got rid of the brittle old foam from the flaps and the assembly surround, cleaned the adhesive residue it left behind and replaced it with brand new foam. It came up very nicely if I do say so myself. Looking at how dirty this was, I can only imagine just how filthy the current one is. Although it's currently working fine and nothing is leaking, for the time being I might circulate some water through my existing heater core to flush out any grime and gunk.

The dash will have to come out for me to install this full assembly with the new NB heater core but I will be installing it together with my A/C retrofit when the time comes. Since the dash is going to come out, it will also give rise to other things which I will be doing at the same time such as thermal insulation/sound deadening in the chassis, giving the carpets some treatment, fixing and cleaning up any loose wiring and sanding and painting the metal dash bar as it will most likely have surface rust.

NB Heater core and housing assembly. Notice the amount of crap accumulated behind the mesh.
Image

NB heater core metal pipes.

Image

Image

Foam inside the assembly. You can see that it has started to deteriorate. When you run your fingers through the foam it flakes off. Time to replace it!
Image

Closeup of the mesh and the bits of leaves and other crap.
Image

The brown foam needs replacing. The surrounding foam could also do with a refresh.
Image

Image

Surrounding foam removed.

Image

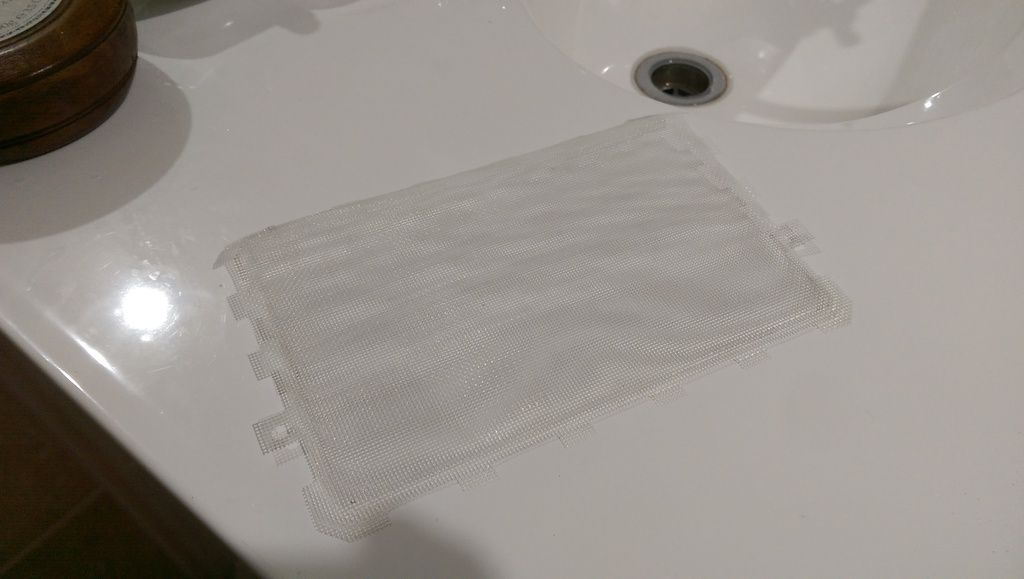
Dirty mesh filter. Some hot soapy water was needed to clean this. Before...
Image

...and after. Much better!

Image

Old foam removed and ready for the new foam.
Image

Surrounds and flaps re-foamed. Mesh filter and housing assembly all cleaned.
Image

Close up of new foam for the flaps and surrounds.
Image

Image

Image

Ready to install.

Image

Image

Image

BRG.NA8
Fast Driver
Posts: 196
Joined: Sat Dec 12, 2015 10:32 pm
Vehicle: NA8

Re: 1996 BRG NA8C Build Thread

Postby BRG.NA8 » Fri Apr 07, 2017 2:39 am

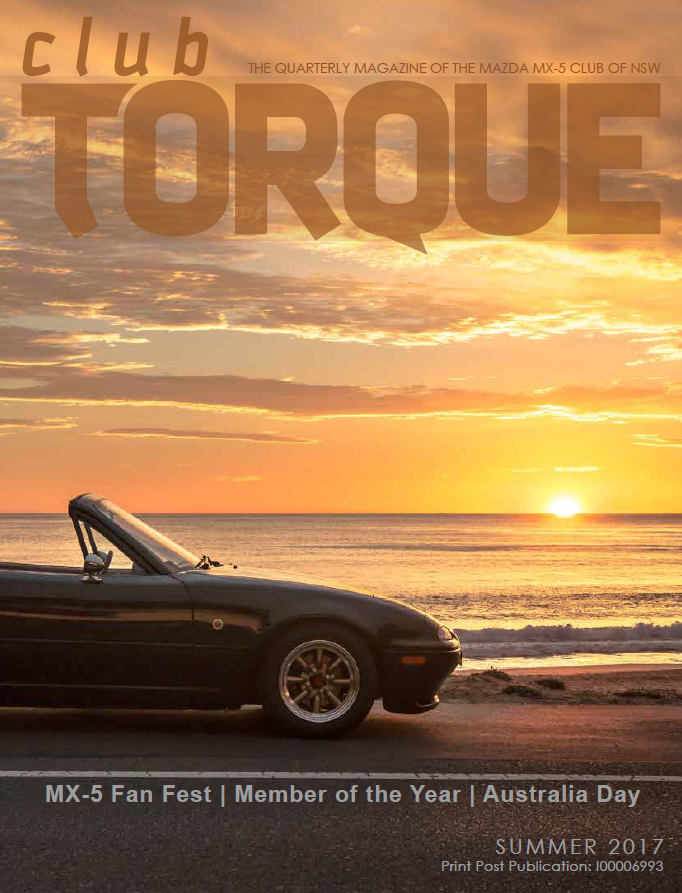
Recently, I was asked by "Club Torque" (a quarterly magazine of the Mazda MX-5 Club of NSW) if they could use the sunrise photo I took last month at Palm Beach as the cover for their 2017 summer edition. I happily obliged and I think it came out great!

The magazine is both printed on high quality gloss paper and available online in PDF format and it has the latest reports on club events such as meets, drive days, social events, motorsports as well as media releases, tech tips, etc. The online version can be found here :
http://nsw.mx5.com.au/club-zone/magazine

Many thanks to Mel Keller, editor of the magazine.

Image

BRG.NA8
Fast Driver
Posts: 196
Joined: Sat Dec 12, 2015 10:32 pm
Vehicle: NA8

Re: 1996 BRG NA8C Build Thread

Postby BRG.NA8 » Fri Apr 07, 2017 2:39 am

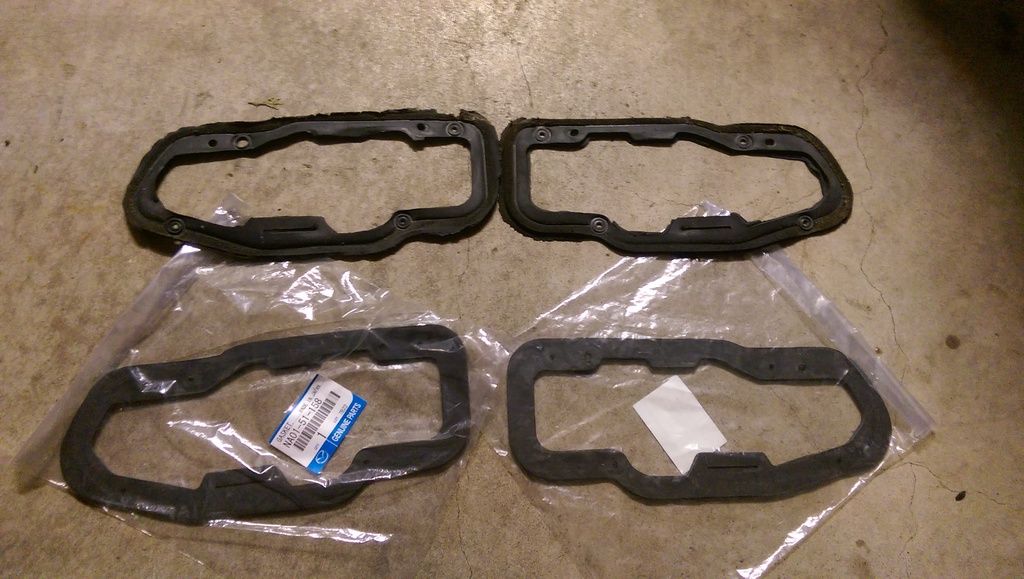
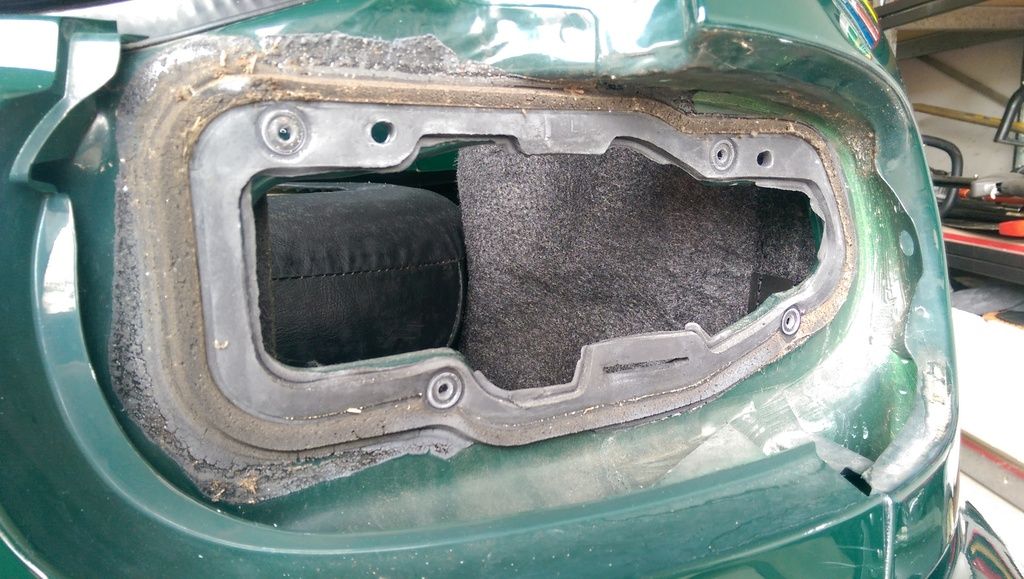
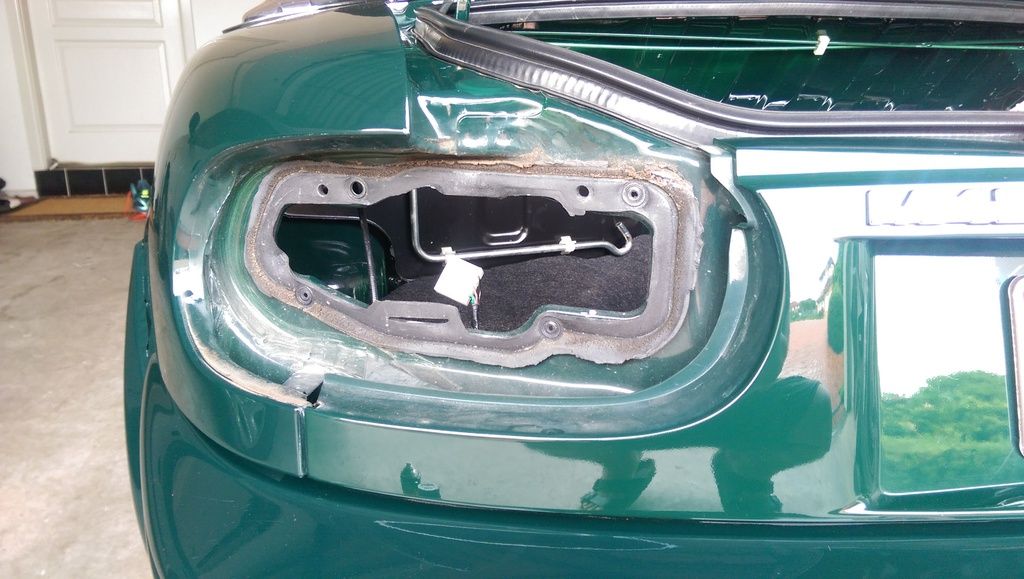
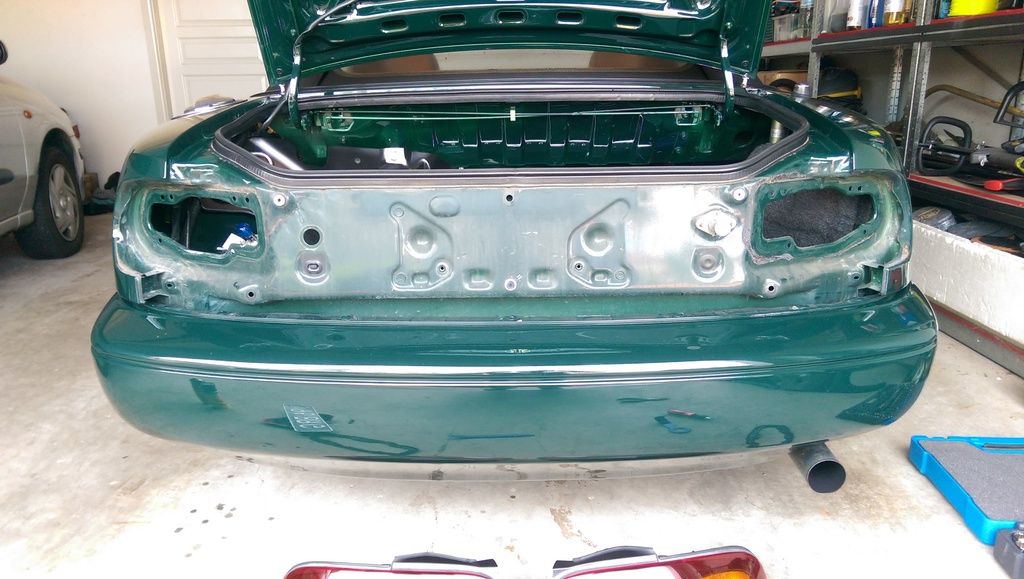
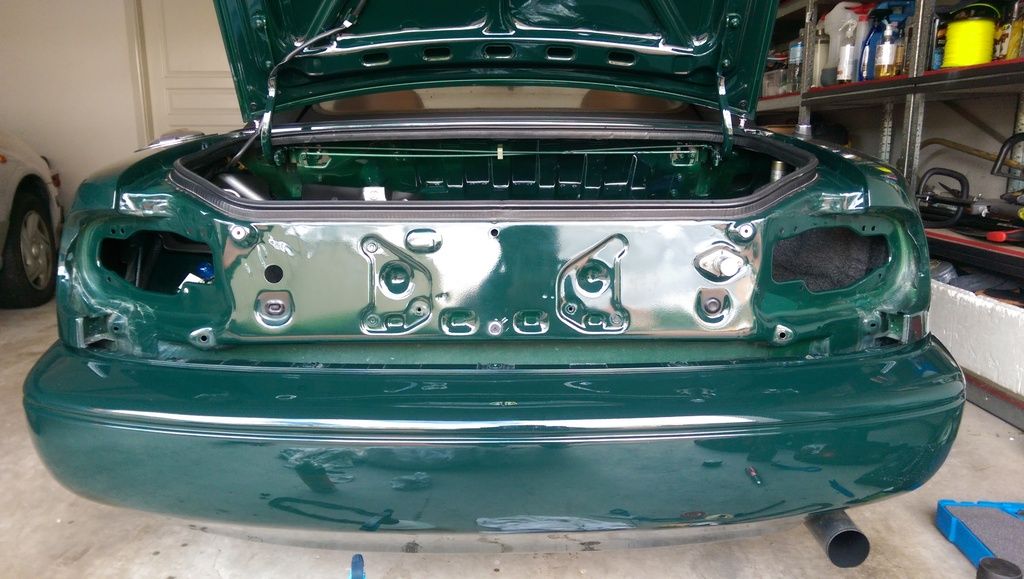
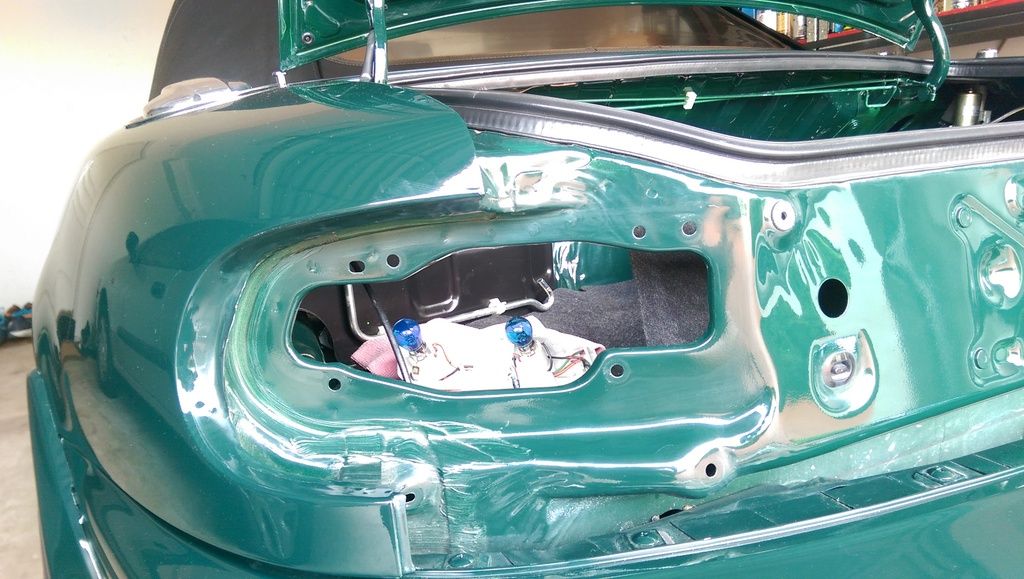
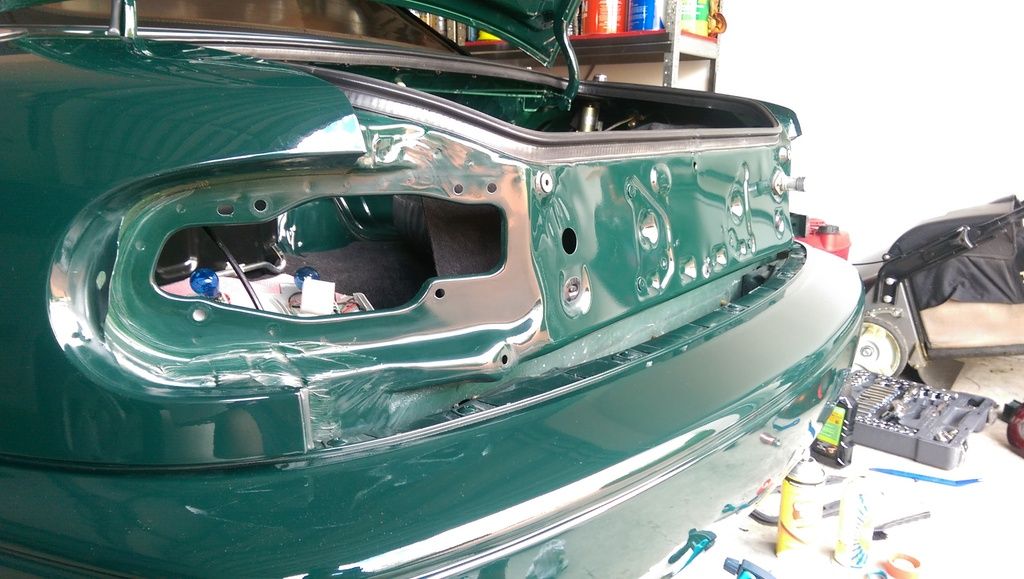
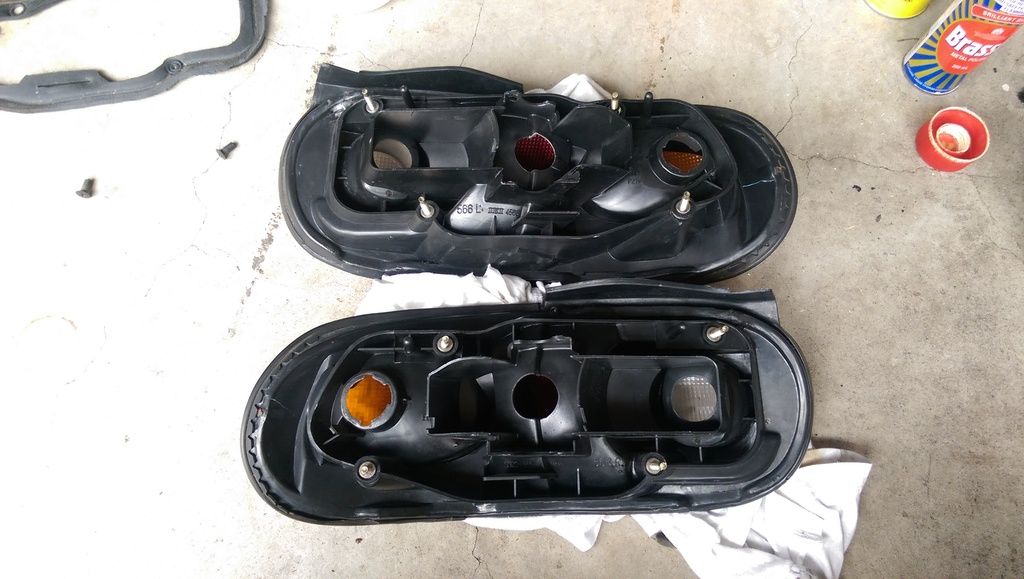
I decided to replace the rear tail lamp gaskets. The gaskets for these tail lamps become brittle and can fail over time simply due to age which would compromise the seal and a failed gasket which isn't sealed properly can mean that water could make its way into the boot, which would then be a breeding ground for rust. Sure enough, the gaskets were old and crusty but it didn't look all that bad. They held up quite well as I've seen far worse. I replaced with OEM parts and it's now good as new for at least the next 20 years.

Decided to remove the centre number plate garnish as well and give everything a good clean behind there as there would have been a lot of dirt and dust accumulated behind the garnish over time. Removing it was pretty straight forward. Just a couple of 10mm nuts to unscrew and a couple of plastic clips holding the garnish in place. Some warm soapy water, all purpose cleaner and degreaser along with some elbow grease and it came up looking awesome.

Old OEM gaskets VS new OEM gaskets.

Image

As you can see, the gasket is still in pretty good condition but it has started to become old and brittle on the left side of the gasket.
Image

Old passenger side gasket.

Image

Centre number plate garnish and tail lamps removed. Pretty filthy.

Image

Some rags, warm soapy water, all purpose cleaner and degreaser and a plastic scraper was used to bring it back to factory fresh condition.

Image

Fresh and clean, ready for the new gasket.

Image

Image

Tail lamps were also given a good clean.
Image


Return to “MX5 Garage Chat”

Who is online

Users browsing this forum: Bing [Bot] and 156 guests