Jetstream Flush Lights
Moderators: timk, Stu, zombie, Andrew, -alex, miata
-
- Speed Racer
- Posts: 7468
- Joined: Fri Feb 11, 2011 12:49 pm
- Vehicle: NA6
- Location: Purga, QLD
Jetstream Flush Lights
Pulled the pin on these during the REV9 group buy. The main purpose is to duct/ram air into the ITB's and it was impossible with the OEM popup lights.
The OEM setup (with FRP covers) weight in at 4.587kg each side, the Jetstream weigh in at 1.040kg.
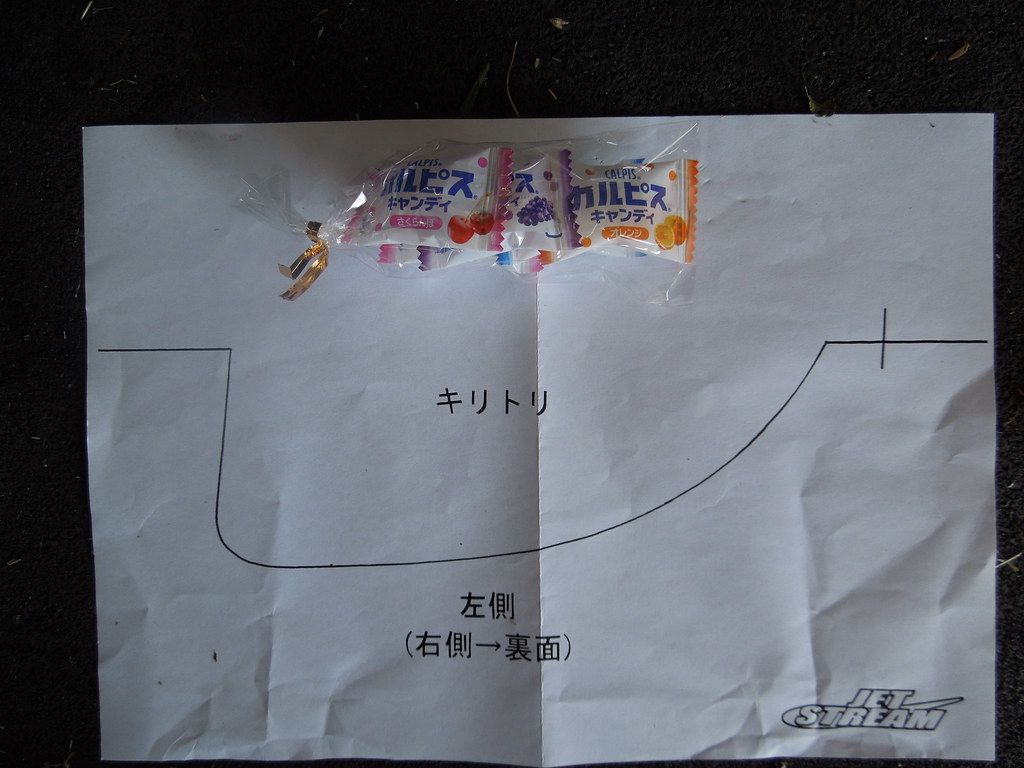
What you get! Whilst the instructions are for non English readers they were not really needed. I ran a few copies of the template off so as to not destroy the one included. The kit does require you to reuse your existing H4 bulbs. I made the decision to not reuse the HID projector bulbs and go back to 'normal' lights. The Dapper lighting kit has already been put aside for a forum member...
DSCN2746 by Eipeip, on Flickr
DSCN2749 by Eipeip, on Flickr
DSCN2747 by Eipeip, on Flickr
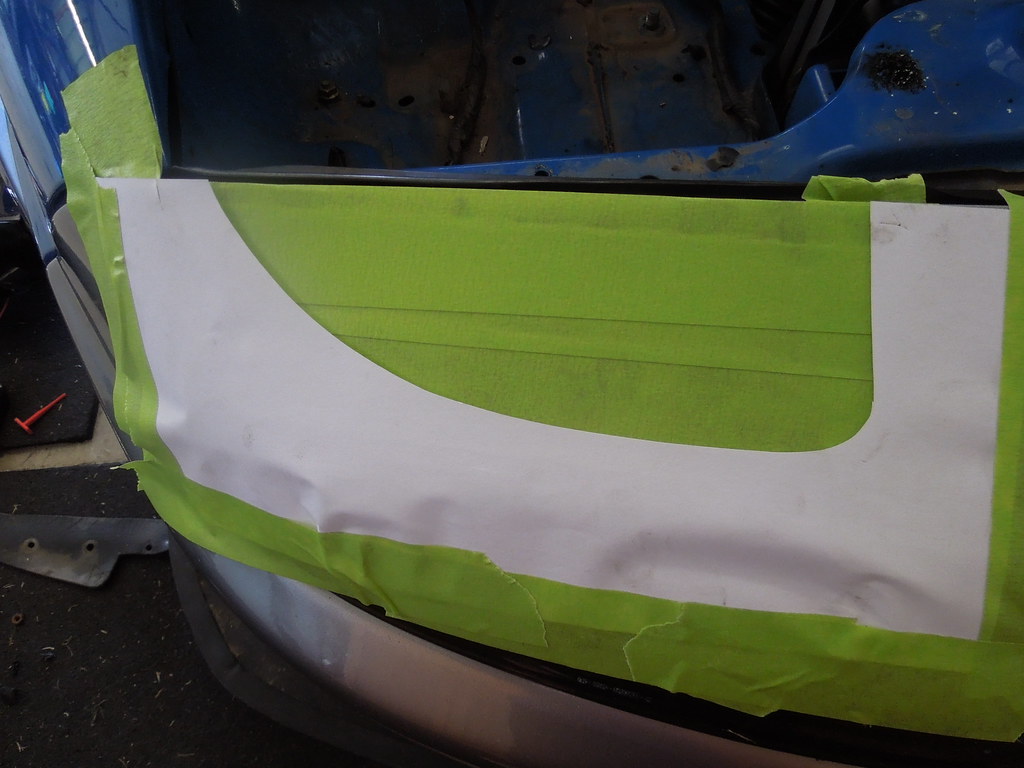
The marking out.. Is this going to be like my air vent in the hard top, will I regret this...
DSCN2750 by Eipeip, on Flickr
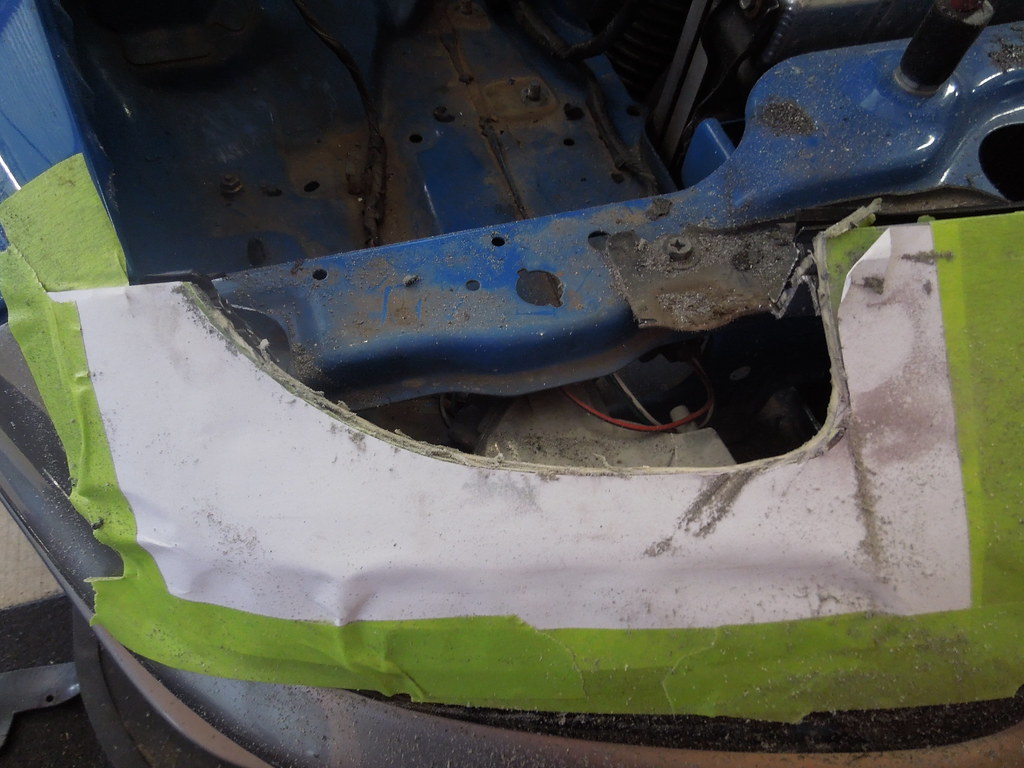
The first cut is the deepest. For the first side I used a dremel with cutting disc. However I ended out using the air body saw to finish it off and it was so much easier!
DSCN2751 by Eipeip, on Flickr
Installed
DSCN2756 by Eipeip, on Flickr
DSCN2755 by Eipeip, on Flickr
View with 1 installed (not screwed down) and the existing
DSCN2752 by Eipeip, on Flickr
DSCN2753 by Eipeip, on Flickr
Both sides installed and wired in (plug and play)
DSCN2764 by Eipeip, on Flickr
This was at about 1300 inside the shed
DSCN2763 by Eipeip, on Flickr
Now the issues found.
1. Can't use the OEM bonnet prop, need to find an alternative.
2. Coolant bottle fouls drivers side plug.
DSCN2757 by Eipeip, on Flickr
DSCN2758 by Eipeip, on Flickr
I have not had a chance to align the lights and take them for a night time ride as the car is back at Plus getting a pre WTAC service. Also need to mount the coolant overflow bottle so as to not rely upon cable ties.
All up it was a mornings work and it was very simple, the template was accurate and it saves me having to loose some weight so off to McDonalds for a coffee and ice cream.
-
- Speed Racer
- Posts: 2189
- Joined: Fri Nov 29, 2013 8:51 am
- Vehicle: ND - RF
- Location: Sydney
Re: Jetstream Flush Lights
Magpie wrote:Now the issues found.
1. Can't use the OEM bonnet prop, need to find an alternative.
I use these gas struts.
http://www.mx5parts.co.uk/chrome-bonnet ... p-144.html
They weigh next to nothing.
Removes the prop from the front giving better access to the front of the engine bay.
Have almost nil intrusion into your side access to the engine bay, unlike longer units like the Rspeed ones Lokiel has.
They also open the bonnet slightly higher than the prop does.
Only down side is the bonnet will flap around a little in a strong wind.
Note: Only use double sided props, single sided versions will twist the bonnet out of shape!
You can just see them in the top of this photo.....
"A Convertible has a top you can put down when the weather's nice...... A Roadster has a top you can put up when the weather's bad."
- fastfreddygassit
- Waitin' for a mate
- Posts: 1773
- Joined: Sat Jun 25, 2005 8:00 pm
- Vehicle: NB SE
- Location: Waitin' for a mate in Melbourne somewhere
- Contact:
Re: Jetstream Flush Lights
They look fantastic!
Great work
Great work
-
- Speed Racer
- Posts: 7468
- Joined: Fri Feb 11, 2011 12:49 pm
- Vehicle: NA6
- Location: Purga, QLD
Re: Jetstream Flush Lights
My other half even likes the look of them and wants them left black. She still does not like the roof scoop.
-
- Speed Racer
- Posts: 3471
- Joined: Sun Jan 19, 2014 9:52 am
- Vehicle: NA6
- Location: Lugarno, Sydney
Re: Jetstream Flush Lights
×2 re the IL Motorsport bonnet struts. Have them in my na6 too ;)
NA6 turbo - 140kw atw - not the most powerful but so much fun
-
- Speed Racer
- Posts: 3471
- Joined: Sun Jan 19, 2014 9:52 am
- Vehicle: NA6
- Location: Lugarno, Sydney
Re: Jetstream Flush Lights
Nevyn72 wrote:Magpie wrote:
I've been thinking my bay is quite full now, then I saw yours again! Not that full.
NA6 turbo - 140kw atw - not the most powerful but so much fun
-
- Fast Driver
- Posts: 241
- Joined: Sat Mar 21, 2015 11:24 pm
- Vehicle: NB8B
- Location: Brisbane (southside), QLD
Re: Jetstream Flush Lights
Looks good
I have the IL motorsport hood struts too, just haven't had a chance to install them yet
I recommend buying from the IL Motorsport website in Germany directly. You can browse the site in English and the prices I have found to be better than the UK (They remove the tax once you say you are in Aus at checkout). The shipping charges are in like 2kg increments from memory, so a good excuse to order up on a few things
P.S. If you don't want to wait the 2-3 weeks for an order from overseas and you just want the struts, you can have my ones here (new in box) for the cost of getting new ones here from IL and I'll just put in a new order when I'm ready to put them on mine.
Last edited by joshuam on Mon Sep 28, 2015 2:44 pm, edited 1 time in total.
-
- Speed Racer
- Posts: 7468
- Joined: Fri Feb 11, 2011 12:49 pm
- Vehicle: NA6
- Location: Purga, QLD
Re: Jetstream Flush Lights
In my garage thread there was a comment about using a broom stick in place of the bonnet prop to save weight, this now appears to be a good suggestion
Actually my engine bay look empty especially on the exhaust side, wonder what would fit there...
May just get something like this (three-piece, telescoping hood prop) as it can be used on the boot as well.
joshuam if you are not going to install let me know.
Actually my engine bay look empty especially on the exhaust side, wonder what would fit there...
May just get something like this (three-piece, telescoping hood prop) as it can be used on the boot as well.
joshuam if you are not going to install let me know.
-
- Fast Driver
- Posts: 241
- Joined: Sat Mar 21, 2015 11:24 pm
- Vehicle: NB8B
- Location: Brisbane (southside), QLD
Re: Jetstream Flush Lights
Magpie wrote:joshuam if you are not going to install let me know.
Telescopic prop looks good for saving weight.
I just edited my post as you wrote that. I'm still going to install mine (best mod on my old car ), but probably not soon. So if you are happy to pay what it will cost for me to order a replacement set then you can grab the ones I have here.
-
- Speed Racer
- Posts: 7468
- Joined: Fri Feb 11, 2011 12:49 pm
- Vehicle: NA6
- Location: Purga, QLD
Re: Jetstream Flush Lights
joshuam if She Who Must Be Obeyed finds out I have made anymore car expenditure I'll need something soft and cool to sit on as your bonnet props will probably be used to keep something a little more personal open
I'll go the telescopic prop thingy as it will have more than one use in the car, maybe get 2 and have them clip into the boot somewhere for convenience. The boot with the wing on the back really needs a decent support.
- bruce
- Speed Racer
- Posts: 7706
- Joined: Fri Apr 25, 2003 11:00 am
- Vehicle: NA8 - Turbo
- Location: Victoria
- Contact:
Re: Jetstream Flush Lights
They look nice.
How are you going to ram air to your ITBs? Open up the side of the light cutout? Is there space?
-
- Speed Racer
- Posts: 7468
- Joined: Fri Feb 11, 2011 12:49 pm
- Vehicle: NA6
- Location: Purga, QLD
Re: Jetstream Flush Lights
2 X possibilities.
1. Track only setup where a headlight is removed and a duct installed.
2. A duct from the 'floor' of the light then into the ITB airbox. This would be the street version.
Looking at option 2, but more than likely a 2016 project!
1. Track only setup where a headlight is removed and a duct installed.
2. A duct from the 'floor' of the light then into the ITB airbox. This would be the street version.
Looking at option 2, but more than likely a 2016 project!
-
- Speed Racer
- Posts: 3471
- Joined: Sun Jan 19, 2014 9:52 am
- Vehicle: NA6
- Location: Lugarno, Sydney
Re: Jetstream Flush Lights
Magpie, my comment about the full engine bay was directed at Nevyn72. That's just how the factory turbos are, nothing he's done
NA6 turbo - 140kw atw - not the most powerful but so much fun
-
- Speed Racer
- Posts: 7468
- Joined: Fri Feb 11, 2011 12:49 pm
- Vehicle: NA6
- Location: Purga, QLD
Re: Jetstream Flush Lights
Jason at Plus came up with a simple, elegant solution using a NB coolant bottle and custom brackets (they have done this before).
DSCN2778 by Eipeip, on Flickr
Heaps of room for the plug now
DSCN2779 by Eipeip, on Flickr
DSCN2782 by Eipeip, on Flickr
DSCN2783 by Eipeip, on Flickr
Now to remove the popup motor harness...
DSCN2778 by Eipeip, on Flickr
Heaps of room for the plug now
DSCN2779 by Eipeip, on Flickr
DSCN2782 by Eipeip, on Flickr
DSCN2783 by Eipeip, on Flickr
Now to remove the popup motor harness...
-
- Speed Racer
- Posts: 7468
- Joined: Fri Feb 11, 2011 12:49 pm
- Vehicle: NA6
- Location: Purga, QLD
Re: Jetstream Flush Lights
Many thanks to Apu for a PM with a solution made by Works Engineering for a hood support. Picked up 2 as I need one for the boot as well.
Return to “MX5 Audio, Electronics & Lighting”
Who is online
Users browsing this forum: No registered users and 93 guests