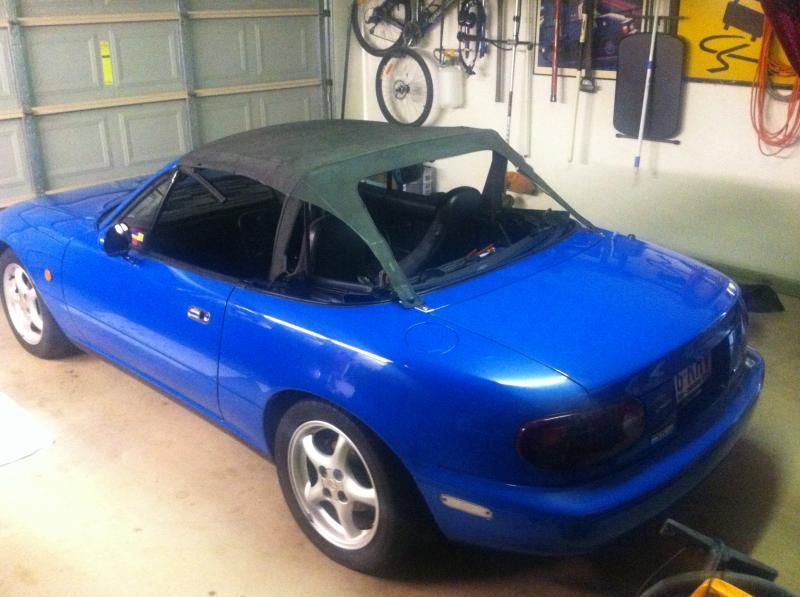
Rolley - It's A Boy! (NA6)

Chat to do with your MX5/Miata/Eunos Garage Ride(s).

Moderators: timk, Stu, zombie, Andrew, The American, Lokiel, -alex, miata, StanTheMan, greenMachine, ManiacLachy, Daffy

Veloce
Fast Driver
Posts: 430
Joined: Wed Aug 16, 2006 8:24 am
Vehicle: NA6
Location: Brisbane

Re: Rolley - It's A Boy! (NA6)

Postby Veloce » Sat Oct 04, 2014 8:01 am

Thanks for that, did the job yesterday! Took about 3 hours including the repair. I ended up welding a web across the back to stiffen it as well but forgot to take the accelerator pedal bushes and burned them .... Doh! Ended up using some nylon lying around.
Result? Is that the angle and height the pedal is meant to be? :oops: :)
Hmmm!!!! Scratches galore. :(
Make something idiot-proof, and somebody will make a better idiot.
2007 Limited Edition (back in the saddle again)

User avatar
zero00
Speed Racer
Posts: 3248
Joined: Mon Apr 12, 2010 6:54 pm
Vehicle: NB8A
Location: Sunshine Coast Queensland

Re: Rolley - It's A Boy! (NA6)

Postby zero00 » Sat Oct 04, 2014 10:11 am

We'll excuse you if not in an MX5 for coffee tomorrow!!
Roger D-SUNSHINE COAST
2000 NB8A-LP 69.1248|QR Clubman 71.9235|QR Sprint 68.1412
1989 NA6 B-SPEC #77|Toyota GTS86 MT

User avatar
zero00
Speed Racer
Posts: 3248
Joined: Mon Apr 12, 2010 6:54 pm
Vehicle: NB8A
Location: Sunshine Coast Queensland

Re: Rolley - It's A Boy! (NA6)

Postby zero00 » Sat Oct 04, 2014 11:14 am

Luke

Give them a ring, Dave is normally there Saturday mornings - 3863-5858
Roger D-SUNSHINE COAST
2000 NB8A-LP 69.1248|QR Clubman 71.9235|QR Sprint 68.1412
1989 NA6 B-SPEC #77|Toyota GTS86 MT

User avatar
Rolley
Racing Driver
Posts: 564
Joined: Fri Nov 15, 2013 6:59 am
Vehicle: NA6
Location: Brisbane

Re: Rolley - It's A Boy! (NA6)

Postby Rolley » Sat Oct 04, 2014 7:12 pm

Cheers Roger,
I only saw your post as I got to work this arvo.. I'm on nights over the weekend so I'm just picking away at it.
I'd guess there will be a few more pieces to add to the list before Tuesday so I'll just wait it out and get everything from them then.

Next two weekends I'm off so I'd say I'll be there bright and early both Sundays.

User avatar
zero00
Speed Racer
Posts: 3248
Joined: Mon Apr 12, 2010 6:54 pm
Vehicle: NB8A
Location: Sunshine Coast Queensland

Re: Rolley - It's A Boy! (NA6)

Postby zero00 » Sat Oct 04, 2014 8:10 pm

Good show! we will excuse you even if you show up in a Lada! Maybe push Sonke's rilling chassis along?

See you there :MOCHA_LES: :MOCHA_LES:
Roger D-SUNSHINE COAST
2000 NB8A-LP 69.1248|QR Clubman 71.9235|QR Sprint 68.1412
1989 NA6 B-SPEC #77|Toyota GTS86 MT

User avatar
Rolley
Racing Driver
Posts: 564
Joined: Fri Nov 15, 2013 6:59 am
Vehicle: NA6
Location: Brisbane

Re: Rolley - It's A Boy! (NA6)

Postby Rolley » Thu Oct 09, 2014 3:38 pm

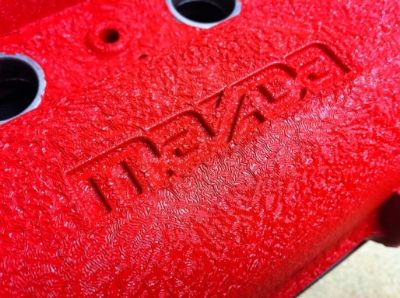
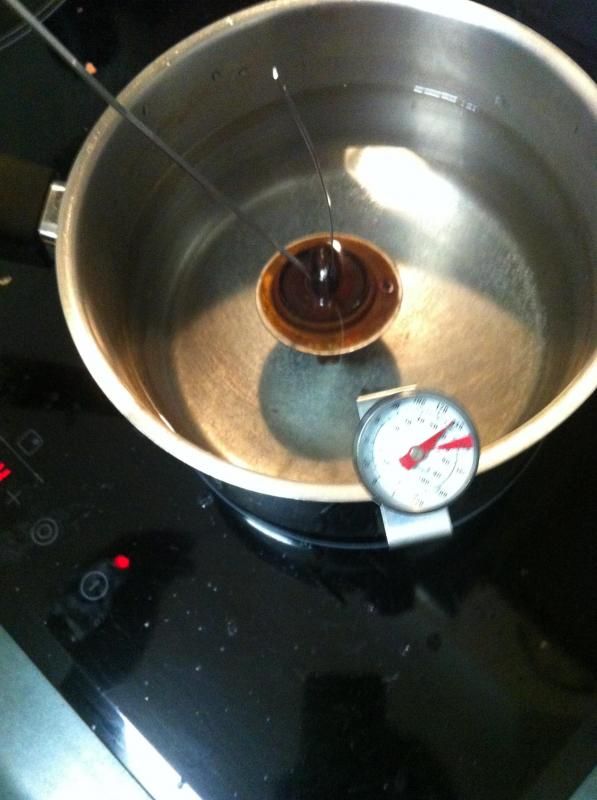
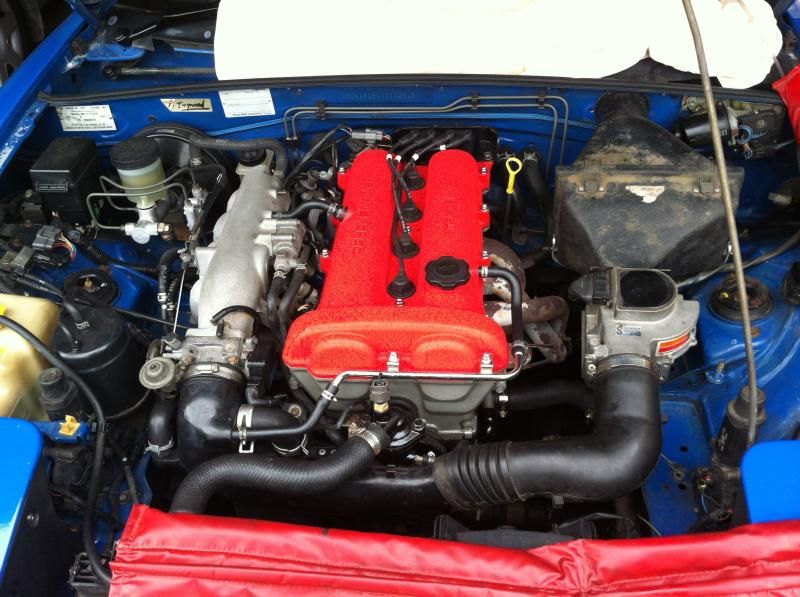
For all the work I have done in the last week cleaning up, sealing leaks replacing water pump, bearings and belts I had to have something you could actually see for all the effort.
So this happened. I'll finish curing it tonight in the oven and wait for the backlash.
Image

Image

Now I just have to slap the slave cylinder back on, bleed the cooling system and set the idle and timing.

Luke.

User avatar
ManiacLachy
Forum Guru
Posts: 3266
Joined: Mon Jan 13, 2014 2:35 pm
Vehicle: NB SE
Location: Brisbane

Re: Rolley - It's A Boy! (NA6)

Postby ManiacLachy » Thu Oct 09, 2014 3:56 pm

Going for that SE look :wink:

User avatar
Rolley
Racing Driver
Posts: 564
Joined: Fri Nov 15, 2013 6:59 am
Vehicle: NA6
Location: Brisbane

Re: Rolley - It's A Boy! (NA6)

Postby Rolley » Fri Oct 17, 2014 9:44 am

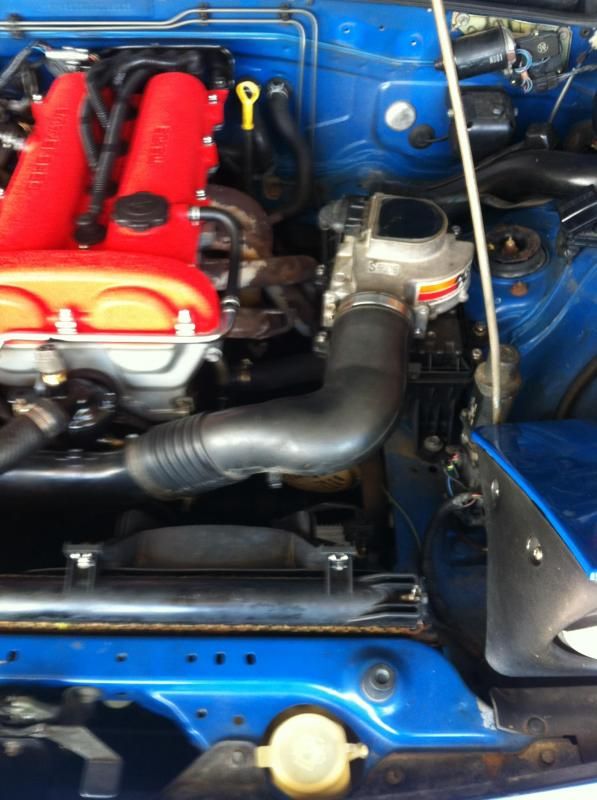
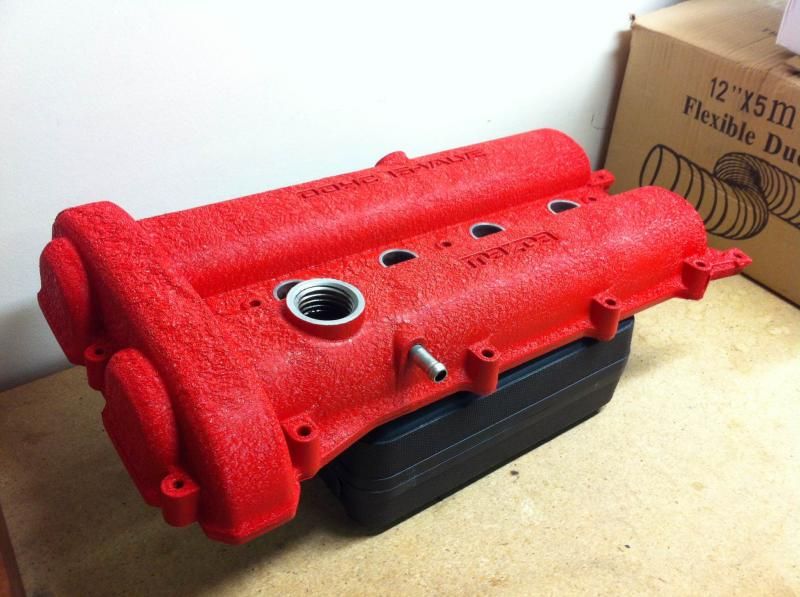
Just wanting to Liven it up a bit under there, all the old dull alloy and rubber. This was cheaper than replacing Everything...

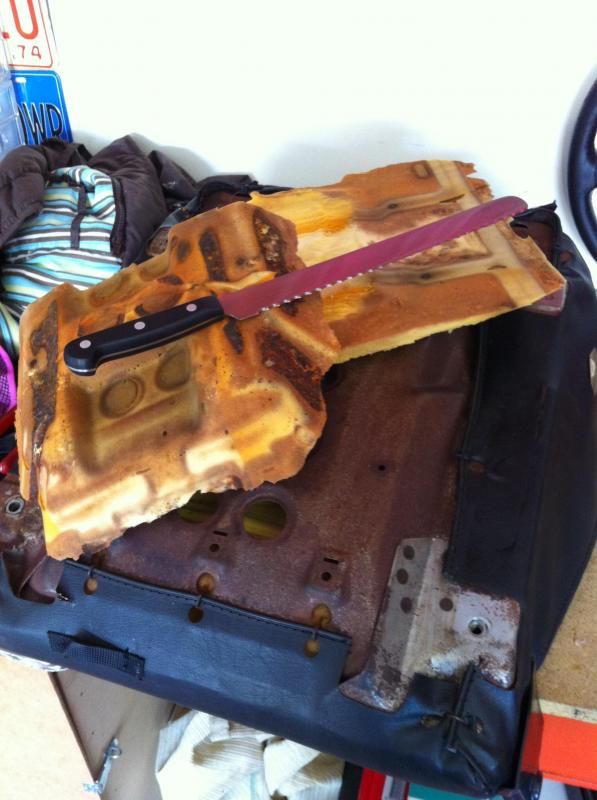
Carried out a foamectomy this week. I'm still not sure weather I'm happy with it or not. I am definitely lower by about 25mm but it feels like my arse is over a bucket now. Thinking I may pull it out again and try panel beating the seat pan out a bit so the sharp drop in the centre is a bit wider/ gentler.
Photos of Big F'ing Hammer adjustment will be taken...

Image
Because every post needs a photo.

User avatar
Rolley
Racing Driver
Posts: 564
Joined: Fri Nov 15, 2013 6:59 am
Vehicle: NA6
Location: Brisbane

Re: Rolley - It's A Boy! (NA6)

Postby Rolley » Sun Nov 16, 2014 10:20 pm

There's a bit of a list...
And it's all happened since Thursday lunchtime. The wife and kids were away for the weekend so I went a bit crazy.

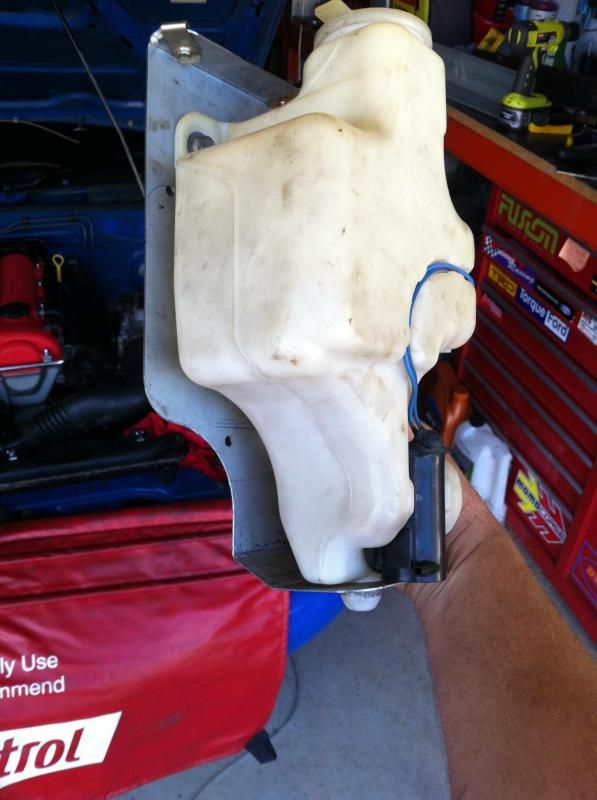
Thursday I started moving the washer bottle from the fire wall to behind the front bumper. The filler now pops up through the hole on the passenger side of the radiator support. I fabbed up a bracket that picks up on the top rad support and a leg that kicks back onto the condenser mounting studs. It's tucked way over to the far left and cant be seen through the bumper opening. I'm really happy with the result, this opens things up for me to sort out an intake.
Image
Image

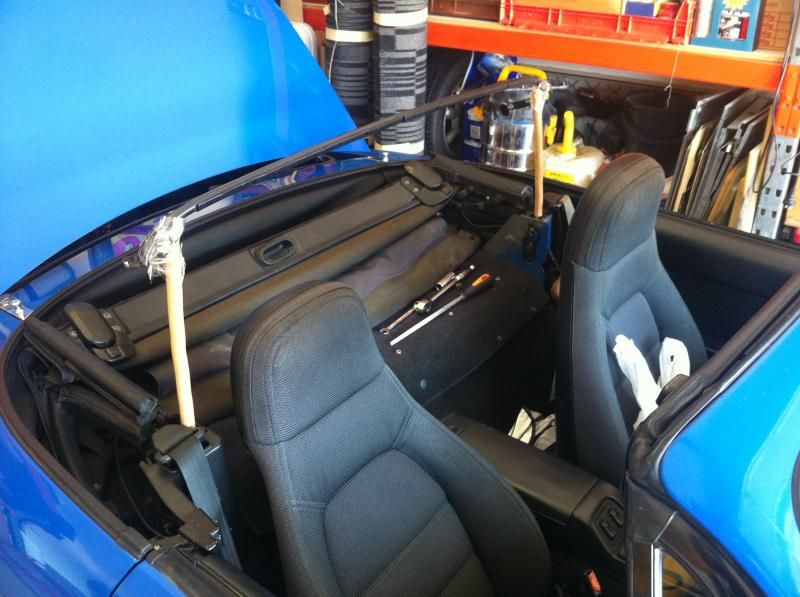
Friday Morning I finished off the wiring and replaced all of the washer hose and fittings to neaten things up a bit. Friday arvo I started work on a bikini top like the Project G one. I've butchered down my old roof frame for the header and one of the bows.
Image


Friday night I headed out over Glorious and on the way back met up with Shane. He is very impressive to watch on the mountain. The car is solid.
Mine just keeps surprising me I am finally starting to trust/understand the steering and suspension meaning I can push that little bit more.

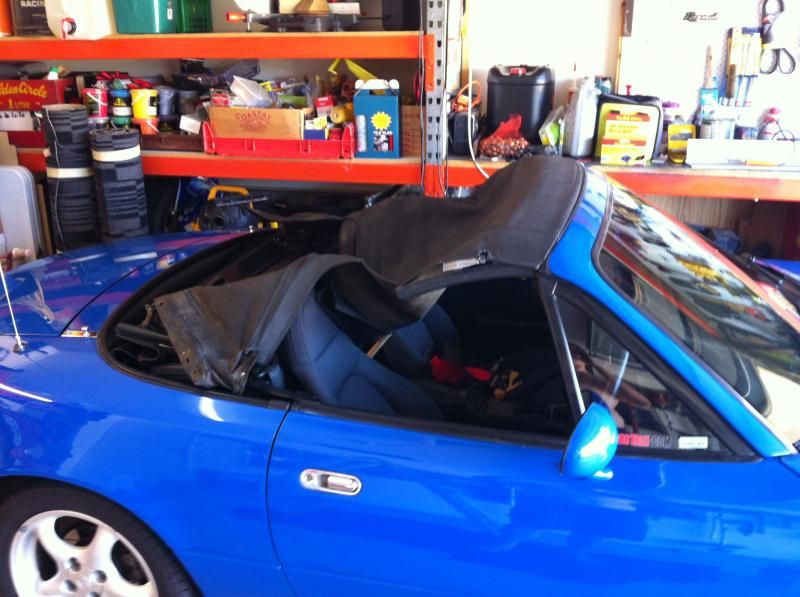
Saturday Morning I fiddled round with the Bikini a bit more I have started mocking out a frame and it's in the process of being welded up by my old man. To get the roof line I wanted my head was going to be touching the canvass again so out came the seat for another inch of foam to be removed. I'm now sitting 2in below the soft top when it's up and I will be about an inch below the bikini. Stay tuned...
Image
Image

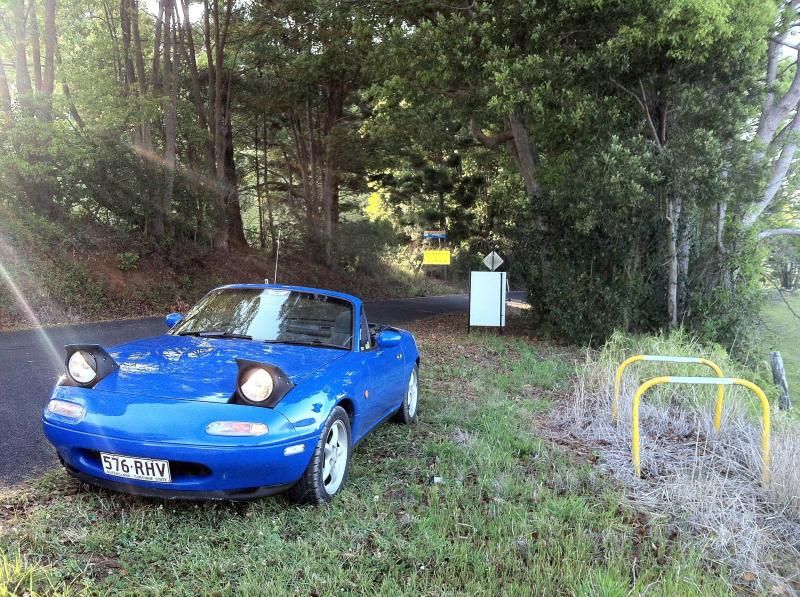
Sunday morning was a quiet little Mt Mee run on the way to weekend coffee with Zero. I missed Lachy and Pezchops at the Caltex I was early for a change but thought I'd missed them... Snapped this little beauty on a side road lachy showed me last week.
Image

On the way home I pulled into Jaycar and topped up my supplies. Here's where things get interesting. I did a mod to my Daily X-Trail not long after I got it to allow the windows to work for a couple of minutes once the ignition was off and the keys removed. One thing that really shits me about electric windows are ones that shut off immediately.
So I bought the missing bits and pieces and headed home to get started.

Problem though. It was 40* here today and the cooling system was boiling when I pulled up at home. Not for long though and the gauge never creeped, the boiling was contained by the overflow bottle and there are no leaks at all and the level was good. I figured it must be a stuck thermostat or a weak cap that the excessive heat from the day pushed too far. There were no such problems on Friday night when I was sitting well over 4000RPM for most of the night so I am not worried that the washer bottle is interfering with airflow over the rad.
So I left him to cool down and then pulled the thermostat and tested it. Spot on, started to open at 80* fully open by 85* and the marking on the unit was 82*. Coolant looked a little diluted and still a bit rusty even after all the flushes so tomorrow I'll grab a new cap, some more Green and some water wetter and do it again.
Image

To be continued...

User avatar
ManiacLachy
Forum Guru
Posts: 3266
Joined: Mon Jan 13, 2014 2:35 pm
Vehicle: NB SE
Location: Brisbane

Re: Rolley - It's A Boy! (NA6)

Postby ManiacLachy » Sun Nov 16, 2014 10:32 pm

Epic post! Great photo, and the bikini top looks promising!

User avatar
Rolley
Racing Driver
Posts: 564
Joined: Fri Nov 15, 2013 6:59 am
Vehicle: NA6
Location: Brisbane

Re: Rolley - It's A Boy! (NA6)

Postby Rolley » Wed Nov 19, 2014 1:45 pm

Next project was an electric window timer.

I really hate that the windows shut off with the ignition in most cars. I figured if Ford can let the windows work in a Falcon for 5 mins after the IGN is off then I can do it in my cars.
I first built one of these timers for my X-Trail from a circuit posted on the Australian forums. It has worked flawlessly for 4 years now. It works out to about $30 if you have to buy wire and all crimp connections.

FULL DISCLOSURE:
I take NO responsibility for your attempt. Any damage you do to your car is your fault. This is how I did it and it works for me. I worked as a mechanic for Ford for close to 10 years.

Full credit goes to Revhead Kev and Naff for the original circuit design found here,

http://baustralianxtrail.runboard.com/t124815,offset=40

So go ahead and follow their write up to build the board. Once you have it to that point things change a bit to get it to work in a 5. I used a larger case for the timer as I wanted the relay mounted inside the case to keep things neater up under the dash.
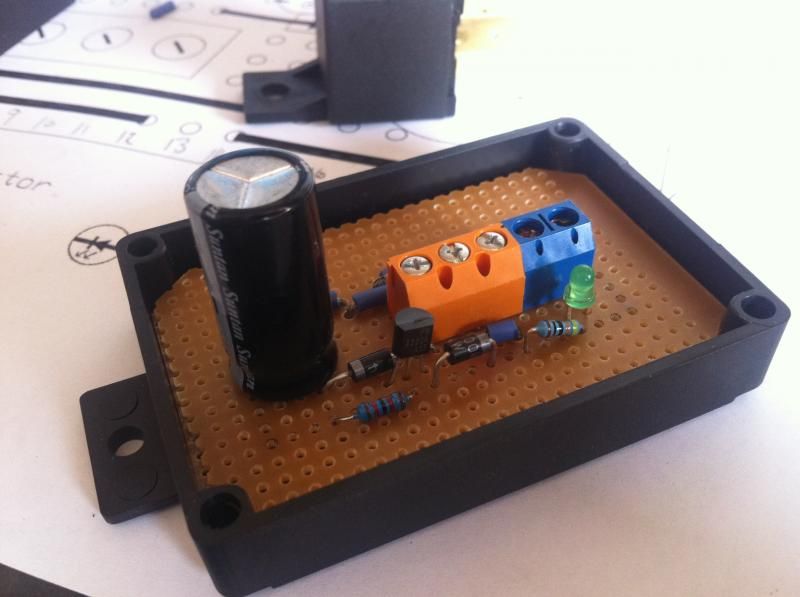
Image
You will also need 2 blade fuse holders, a couple of 30A fuses and a 4 or 5 pin relay in addition to the parts list in the link. Depending on the relay you use you can forget about the 4.5mm male and female connectors.
Wire colours make life easier but aren’t that important so long as you label everything properly. I just used up wire I had laying around in the shed.
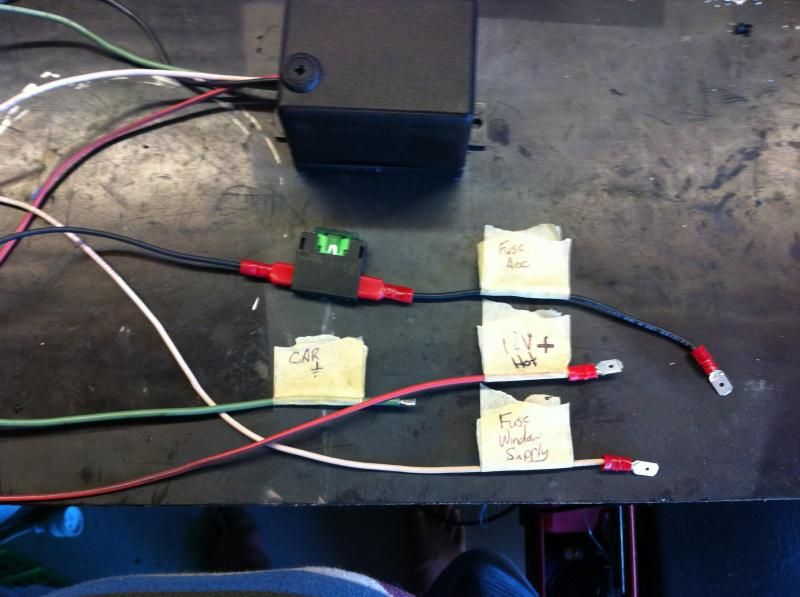
So from left (the blue slots) to right (orange). The wires on the board need to go to the relay or be given tails and labelled like this.
1. 10cm wire with a female terminal onto relay post 85
2. 30cm wire terminates with an eyelet terminal. Label this wire as vehicle earth.
3. 10cm wire and a 30cm wire into a female terminal onto relay post 30 the longer end terminates with a female terminal. Label it Battery 12v.
4. 10cm wire with a female terminal onto relay post 86
5. 30cm wire terminates in a male spade terminal. Label it window fuse Acc hot.
6. 30cm wire terminates in a male spade terminal. Label it fuse window supply.
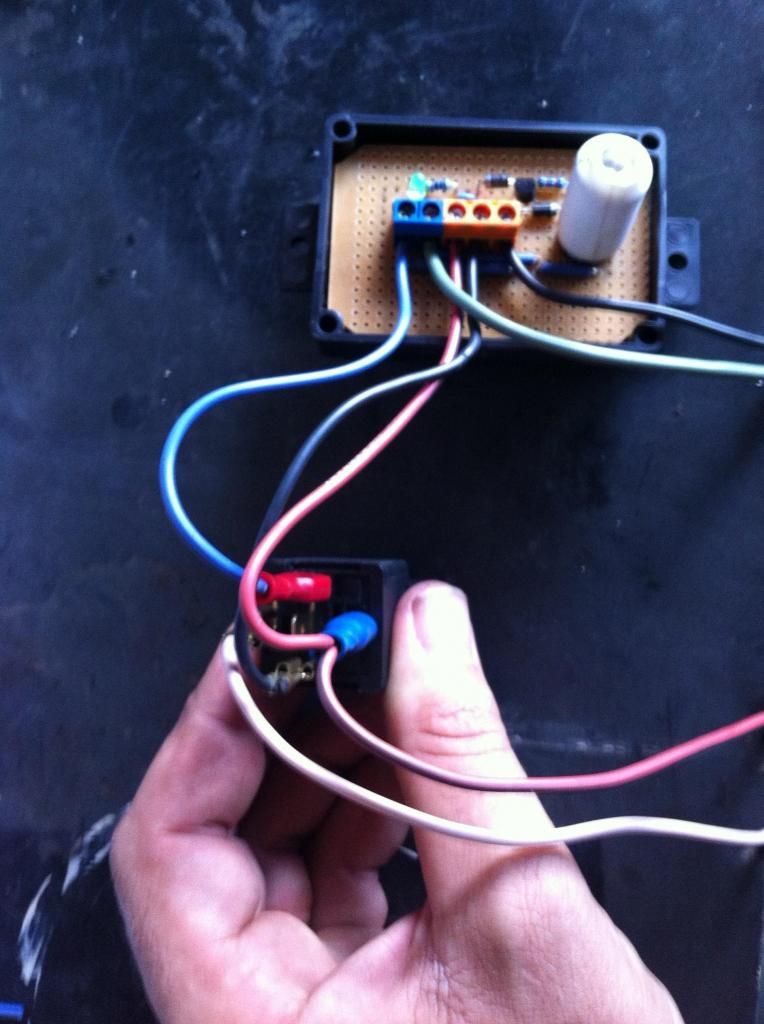
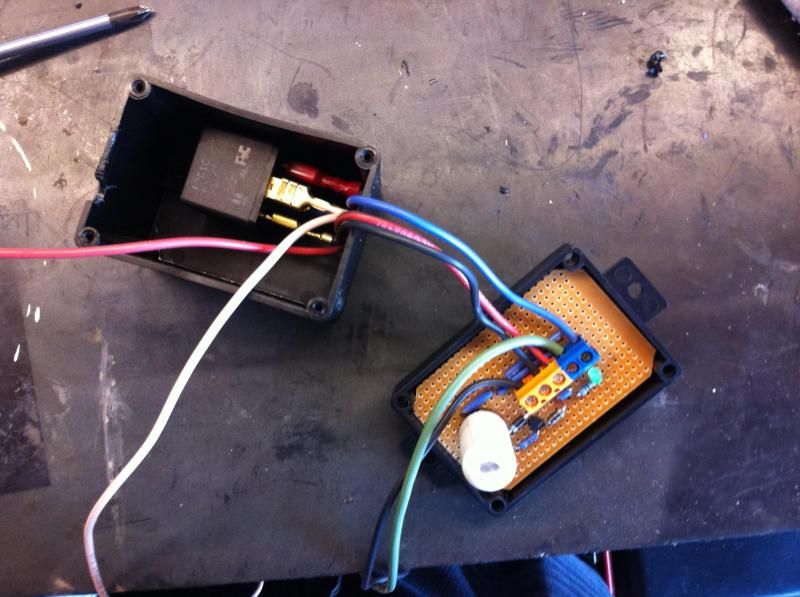
Image
Image
Image

Now tuck the relay into the case and hang your 4 tails out one end. You will have to cut a relief in the box for the wires.
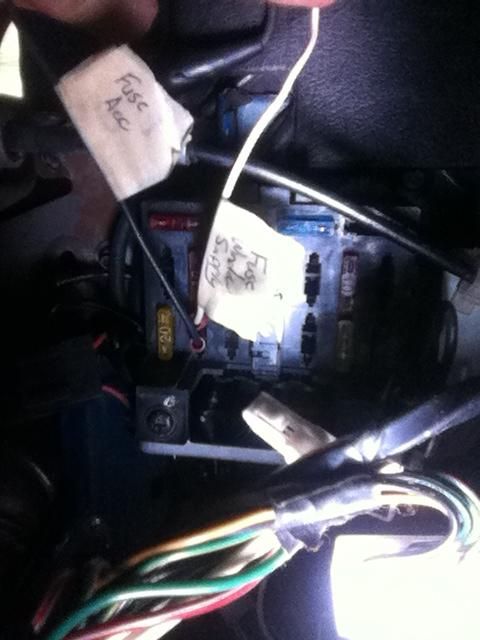
Climb under the dash and have a look at the fuse panel. Just above and to the left of the panel there is a weld nut in the body of the car. This is where I bolted the box to secure it. I also attached the wire labelled vehicle earth to this bolt.
Image

The green 30 amp fuse top row second in from the right is for the electric windows. Pull the fuse and confirm with a test light which pin is live with the key in the ACC position. In my case this was the top pin. Grab one of your fuse holders and add it to the end of the wire marked ACC 12V and then push it into this pin.

Into the other empty pin in the window fuse insert the wire labelled fuse window supply.

The final wire marked 12V hot will get the remaining fuse holder attached to it and then run a wire from this fuse along the sill up and into the boot attaching it to the “+” battery terminal.

And that’s all there is to it. Turn the ignition on and then off and test your handy work.

Note: The LED on the board stays lit while the circuit has power available so if you want you can solder tails onto the led and mount it outside the box through one of the blank switches for example to let you know if the windows are still live.

I did this the first time but if the LED is too bright it will drive you nuts…
User avatar
Rolley
Racing Driver
Posts: 564
Joined: Fri Nov 15, 2013 6:59 am
Vehicle: NA6
Location: Brisbane

Re: Rolley - It's A Boy! (NA6)

Postby Rolley » Sun Dec 07, 2014 12:31 pm

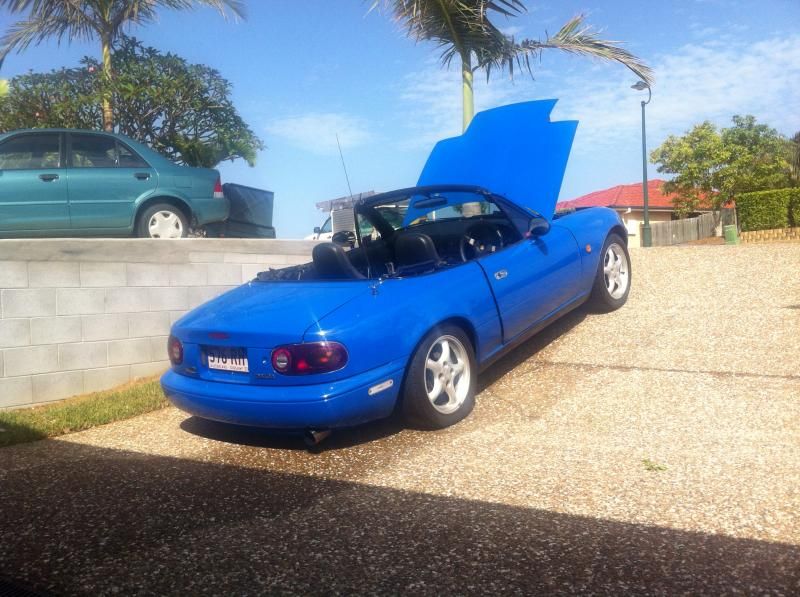
More time with the bonnet up than the throttle down lately...
Not Rolley's fault at all, ham fisted owner is more to blame... And Family takes priority over garage time.

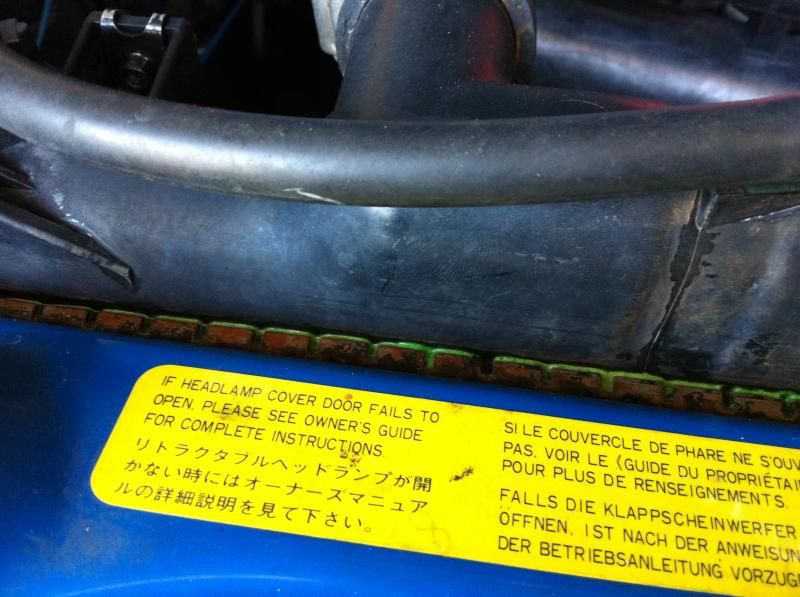
So, While wrestling the washer bottle into place I had the radiator unbolted and was just tilting it backward to get my hands down behind the front bar. Turns out this was not ideal... The top tank started to weep out around the edges so in with a new (second hand) radiator thanks to Captain Nate. No idea if or how long it will last but it will keep me out of trouble while I save for an alloy ebay special.
Image

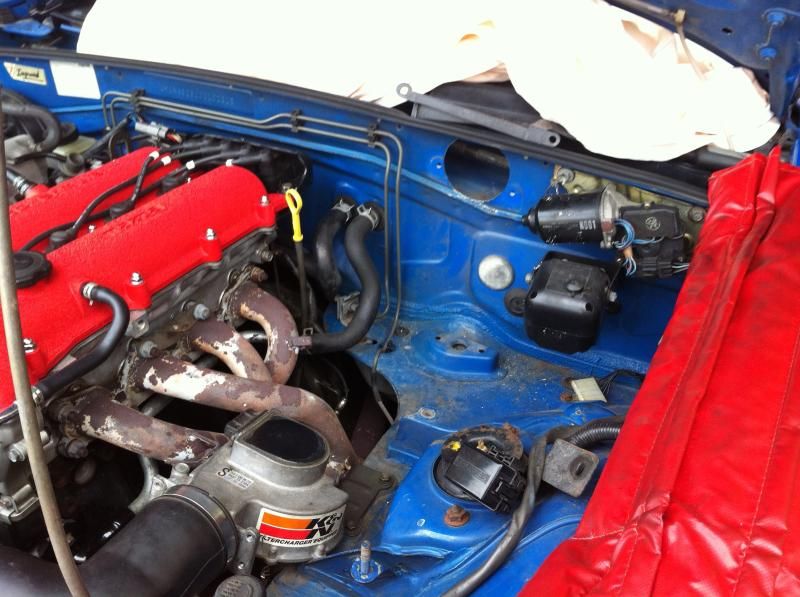
Of course I noticed the leak after I committed to more parts... I scored a Loch Stewart intake from Gladiator and Magpies' stellar buy on that little Red NA6 they picked up before the last dodgy day. Time to cut me some firewall.
Image

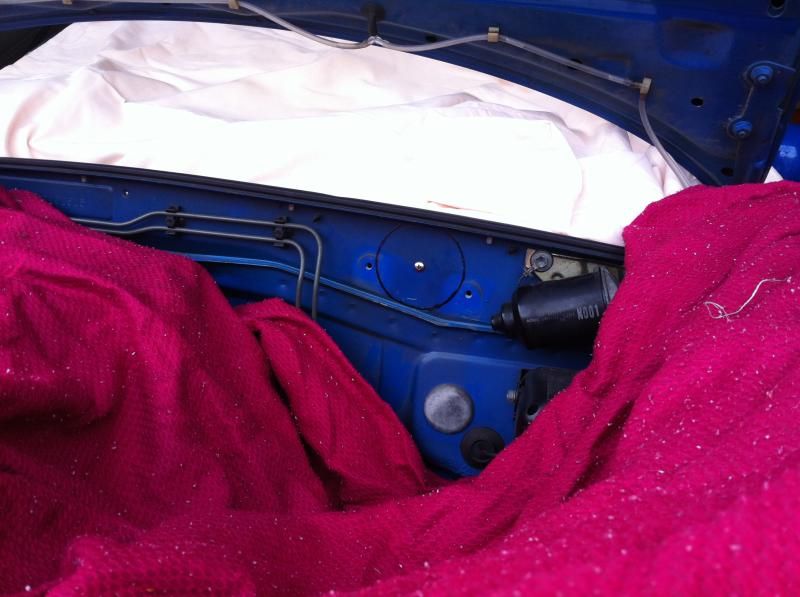
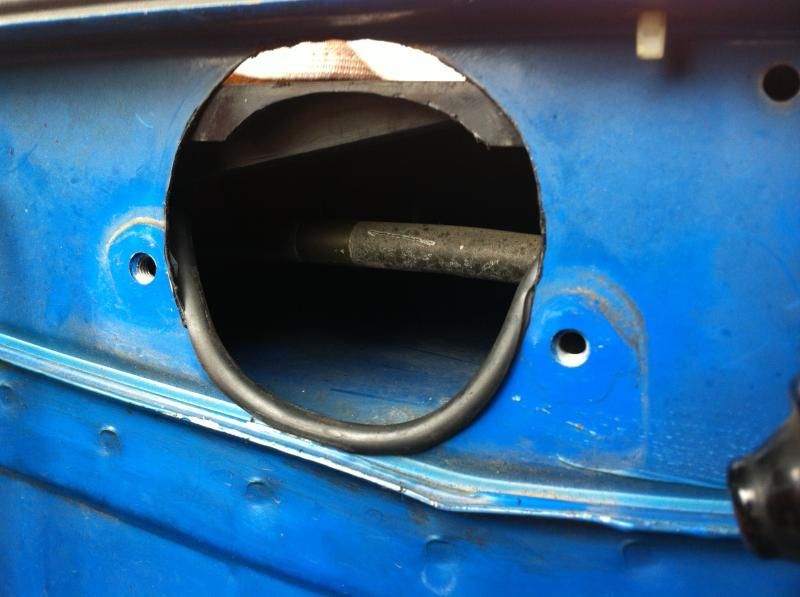
Using my old high school graphics compass an 83mm circle was marked out using the factory hole between the washer bottle mounting holes as a center point. If you are going to be using and sticking with the factory intake piping I'd suggest centering it 15mmto the drivers side as the intake is on a bit of an angle but I intend on fabbing up a ARC style cross pipe one day so I can square things up then. Also directly behind is a plastic shield that covers the wiper motor pivot and interior air intake, remove the two plastic rivets that secure it and lift it up out of the way or you will mangle it when you start drilling.
I covered up as much as I could with drop sheets to stop the metal fillings from falling into spots I couldnt clean them out of as they will rust up almost instantly...
Next I drilled a bunch of 6mm holes around the edge of my marked out circle and trimmed out the joining points with some tin snips. Using a air die grinder I tidied up the rough/sharp edges. My beautiful drop sheet was cactus after all the cutting and grinding, too much metal in it to salvage it. Bye pink drop sheet It's been fun.
Image

Cleaned up all the metal I could with a shop vac a magnet and then gave up getting the rest and just hit it with compressed air and blew the rest away. That crap gets everywhere and then applied some stop rust paint to the raw steel edge of the hole and got a length of vacuum line and split it down the middle to protect the end of the intake from the hard steel edge. You can also see I took a bit out of the plastic shield. This just helped it sit flush when it all went back together.
Image

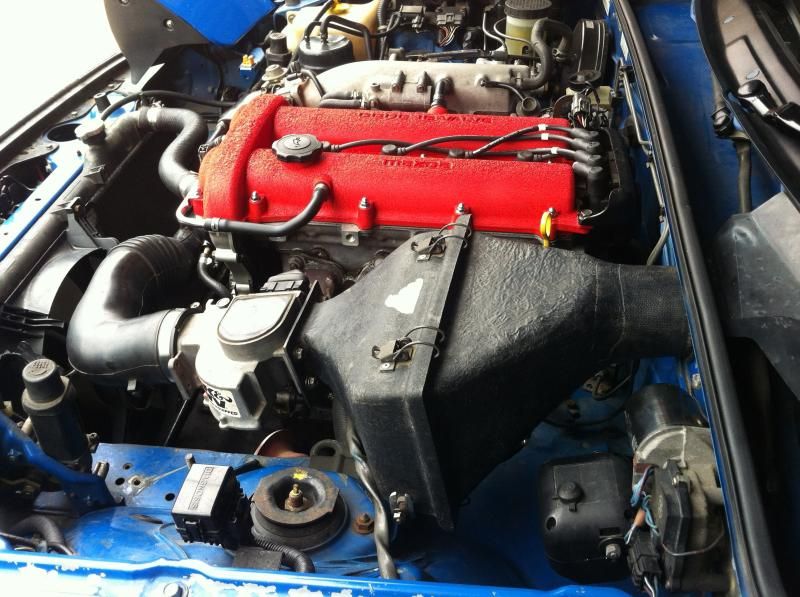
I mounted everything up using the brackets pulled from the original car but for some reason it sat the box too high at it contacted the bonnet frame. So some bending and filing got it down low enough but I still want to make some fresh brackets from scratch just so it's a little more firmly held and to tidy up the AFM mount as it's a bit sketchy.
So it's been started and driveway tested but I haven't had the time to get her on the road to see what difference it makes in the cabin at WOT. If nothing else it's a really cool authentic retro intake!
Image
Image

I've also done a bit more trimming work somewhere in the gap from my last post. A dash mat thanks to Gladiators excellent template and a parcel shelf mat. The dashmat is held in place with snap clips in the factory tonneau cover mounts on the dash. Ill get a better photo for the next update...
Image

User avatar
Rolley
Racing Driver
Posts: 564
Joined: Fri Nov 15, 2013 6:59 am
Vehicle: NA6
Location: Brisbane

Re: Rolley - It's A Boy! (NA6)

Postby Rolley » Fri Jan 16, 2015 4:20 pm

So over a month since my last update.
I have been putting some good km’s on Rolley, spent very little on him and I’m slowly gathering ideas and coin to get the ball rolling for this year’s projects.
Image
A couple of things have been done though. The number plate was a concern for me as it sat right in the mouth of the bumper and I think it may have been contributing to the overheating as well. So I took to the shed and built a stronger factory style bracket to lift the plate up in front of the bar out of the way again. The back of the bracket is covered in 5mm neoprene (wetsuit material) to protect the paint. (can confirm my driveway makes bleeding the cooling system a piece of cake!
Image
Eventually I will make up a low mount offset bracket but I am not a fan of the ones that mount off the tow hook as they seem to get loose pretty easily from what I have seen and you also snag them moving past the car while washing or working in the engine bay.
Last thing I want to do is damage the bar …
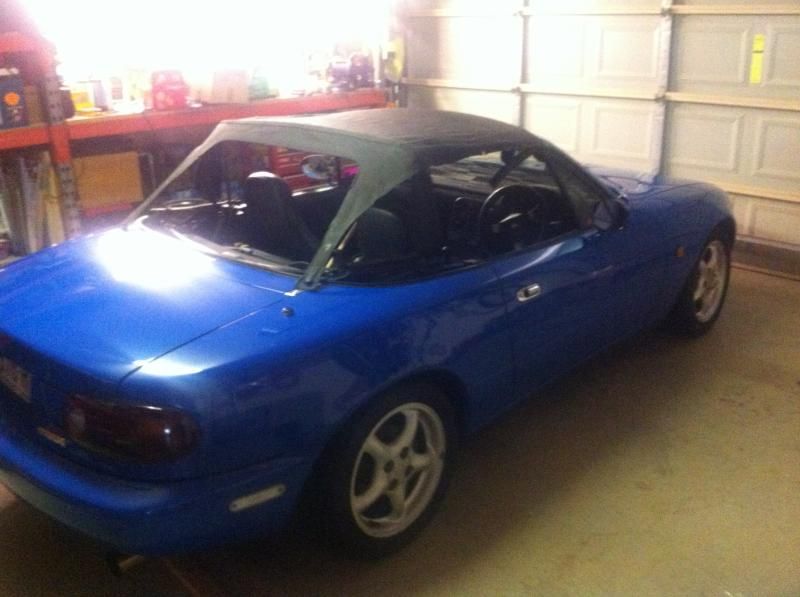
Stage 2 of my bikini top project is complete. A working prototype!
Image
Image

Without a roll bar this will have to do. The hoop to support the back of the top flexes too much to support the front bow from falling down so a second prop from the rear bulk head to the front bow is required. But it is worth the mess around. The air flow is so much better than just windows down and it goes on/off in less than 3mins and all fits in the boot with plenty of space to spare!

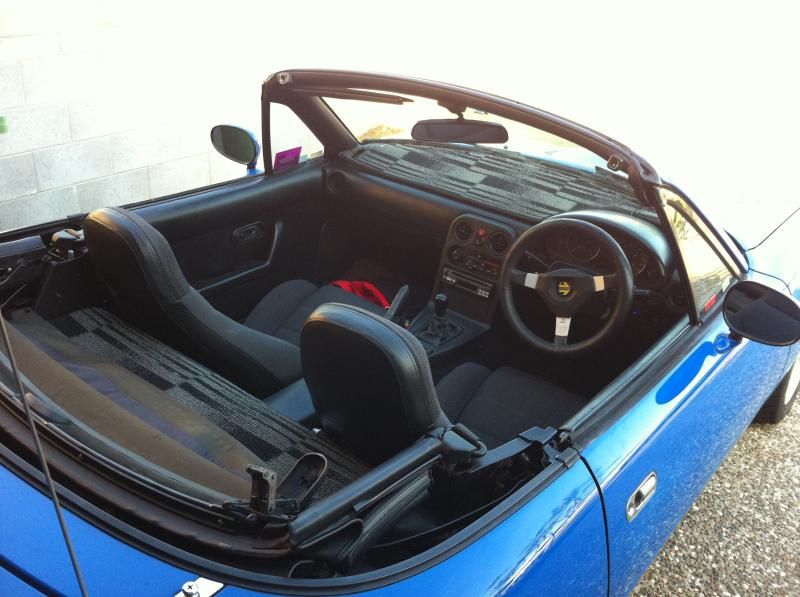
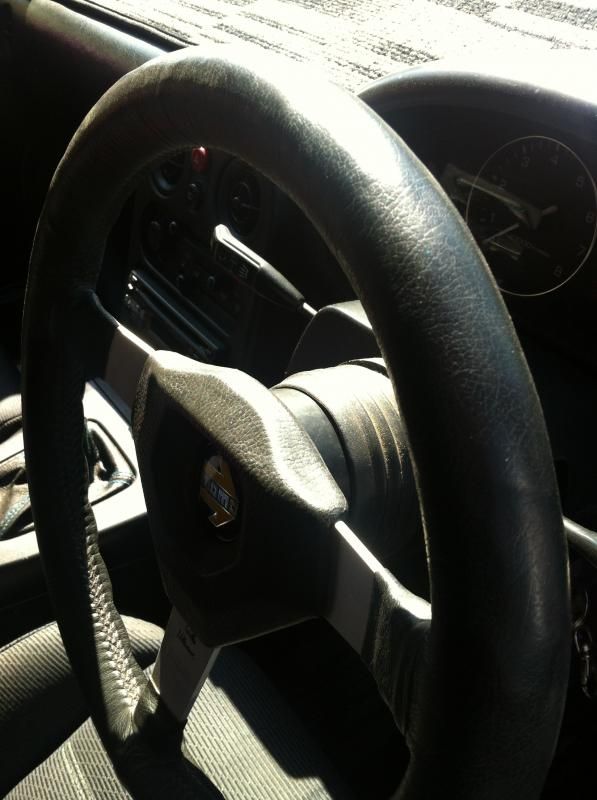
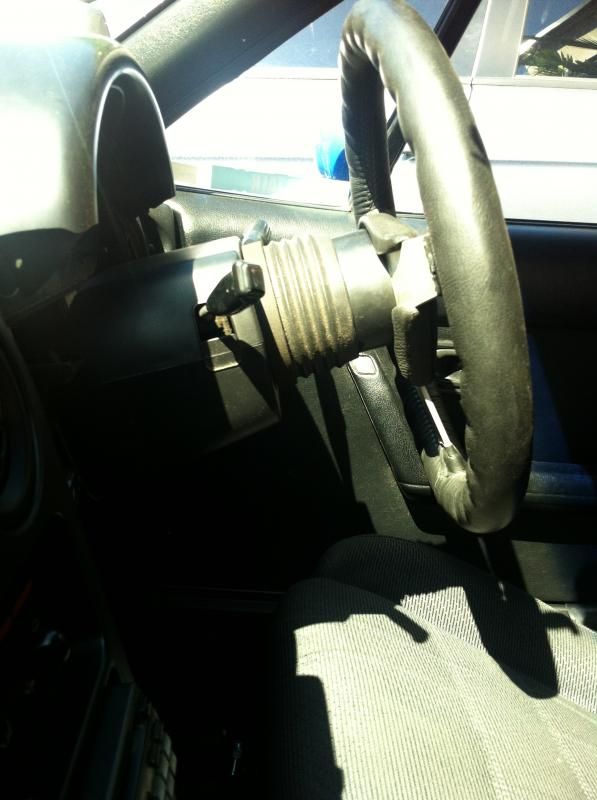
In my quest for seating position I mentioned at the weekend coffee meet that I wanted to get my hands on a 30-50mm spacer for the steering wheel. This weekend just gone pezchops showed up with a 3omm spacer. I’ve only racked up 60km since fitting it but it has changed the cockpit feel completely.
Image
Image

I can now set the seat so I get full clutch travel with a close to strait knee, a relatively comfortable throttle leg and the right rake on the seat that my wrists hang on the wheel and all gauges can be seen through my smaller MOMO. And it looks like it’s meant to be there so Mr PoPo should leave me alone.
Love it, thanks Pete.

User avatar
ManiacLachy
Forum Guru
Posts: 3266
Joined: Mon Jan 13, 2014 2:35 pm
Vehicle: NB SE
Location: Brisbane

Re: Rolley - It's A Boy! (NA6)

Postby ManiacLachy » Fri Jan 16, 2015 5:01 pm

Nice work, Rolley. The bikini top is awesome! You have come up with unique projects for your car, always interesting.

How do you find reach for the stalks (indicators/wipers) with the hub in place?

User avatar
Lokiel
Forum legend
Posts: 4126
Joined: Thu May 28, 2009 2:39 pm
Vehicle: NB SE
Location: Brisbania

Re: Rolley - It's A Boy! (NA6)

Postby Lokiel » Fri Jan 16, 2015 5:08 pm

Rolley wrote::
I covered up as much as I could with drop sheets to stop the metal fillings from falling into spots I couldnt clean them out of as they will rust up almost instantly...
Next I drilled a bunch of 6mm holes around the edge of my marked out circle and trimmed out the joining points with some tin snips. Using a air die grinder I tidied up the rough/sharp edges. My beautiful drop sheet was cactus after all the cutting and grinding, too much metal in it to salvage it. Bye pink drop sheet It's been fun.
:

Tip: When drilling/cutting inside the engine bay I place magnets I've ripped out of old hard drives (they're incredibly strong) around the area I'm cutting/drilling to capture any filings - works great.
Don't worry about dying, worry about not living!
Garage Thread: http://www.mx5cartalk.com/forum/viewtopic.php?f=57&t=76716


Return to “MX5 Garage Chat”

Who is online

Users browsing this forum: No registered users and 170 guests