How to rebuild your alternator (54K unfriendly)

Audio, Electronics and Lighting questions and answers

Moderators: timk, Stu, zombie, Andrew, -alex, miata

spikes
Fast Driver
Posts: 495
Joined: Fri Apr 08, 2011 3:12 pm
Vehicle: NA6
Location: Sydney

How to rebuild your alternator (54K unfriendly)

Postby spikes » Thu Nov 28, 2013 9:44 pm

Hey guys, thought I'd write this up. It all started with me just wanting to clean the two alloy case halves up, nek minute I'm ordering new bushes and bearings.

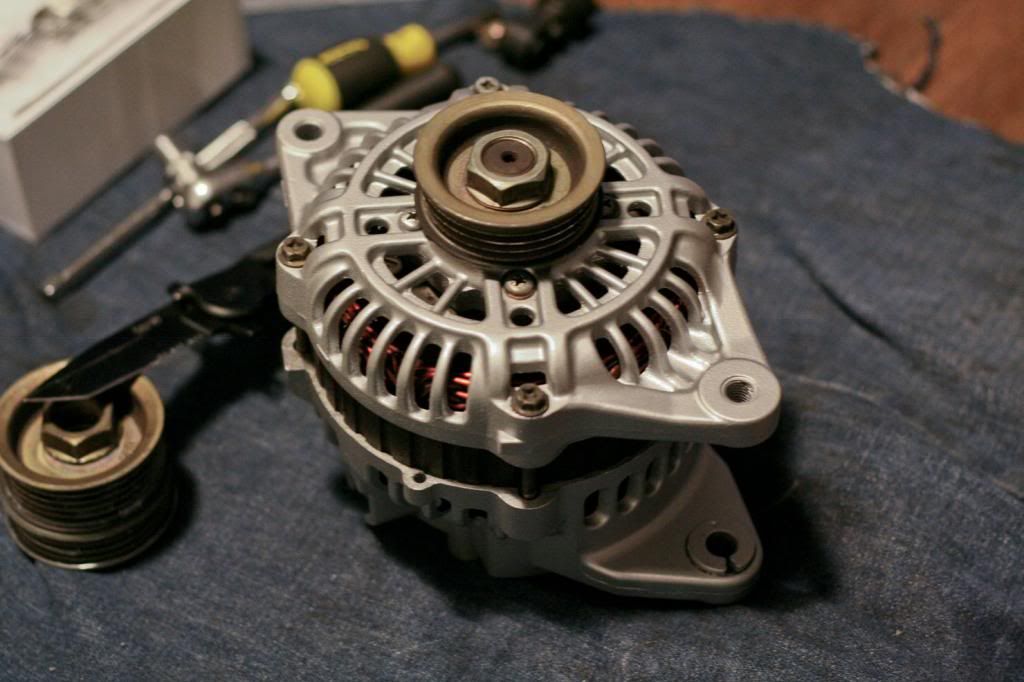
Okay lets start off, this is a NA8 alternator, its a Mitsubishi A2T80391.

I ordered the brushes off eBay, and bearings I got from a local bearing store.

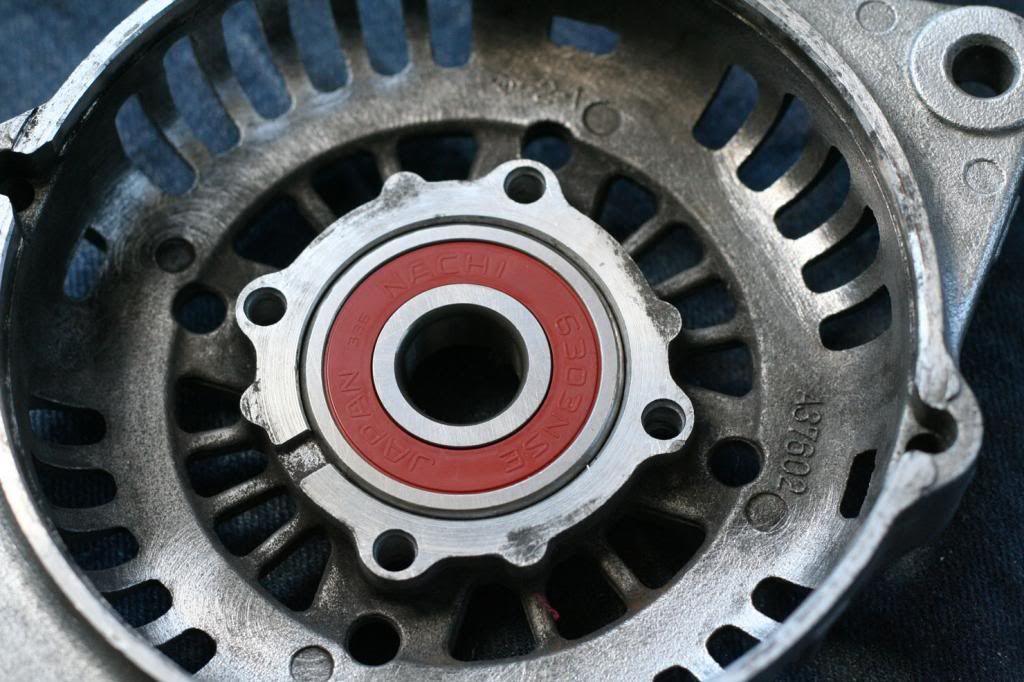
The front bearing is a quite a common size, the 6303. Dimensions are 17mm I.D x 47mm O.D x 14mm height

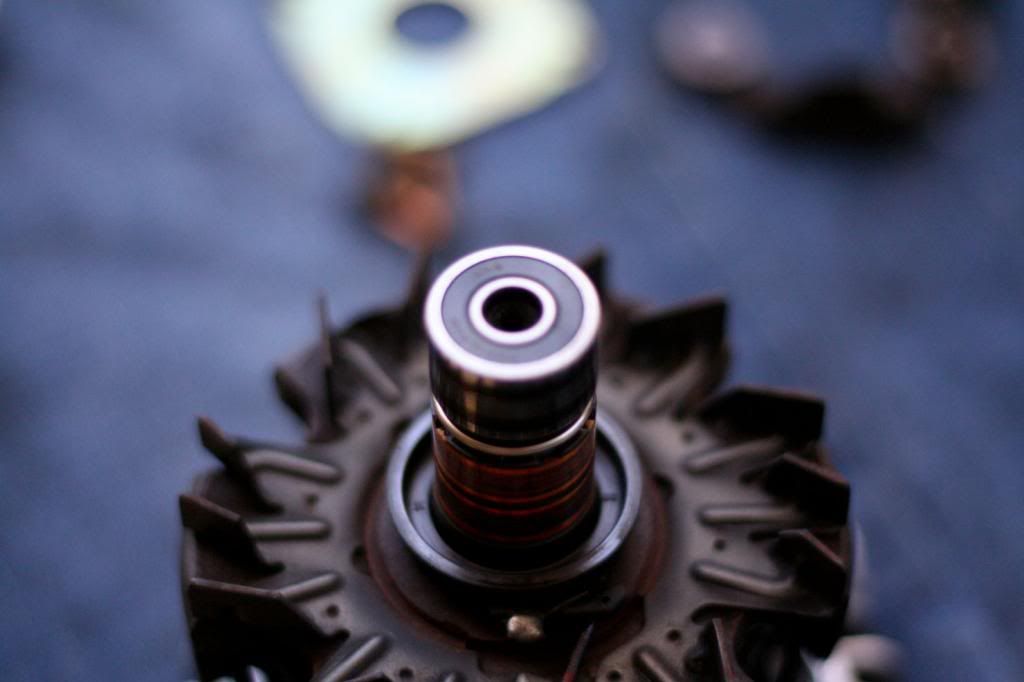
The rear bearing is a 140419, 8mm I.D x 23mm O.D x 14mm height.

I didn't get any pics, but the easiest way to get your alternator pulley off is to wrap an old belt around it or grip it with mechanic gloves, and zap it the nut off with a rattle gun.

Then mark the outer casings so you can line it up again when you put it back together.
Image

Remove these 4x 8mm bolts holding the two halves together

Image

Give the mounting arms a tap with a hammer and the top half should come off. Be careful as the rotor can fall out, and damaging it.

Image

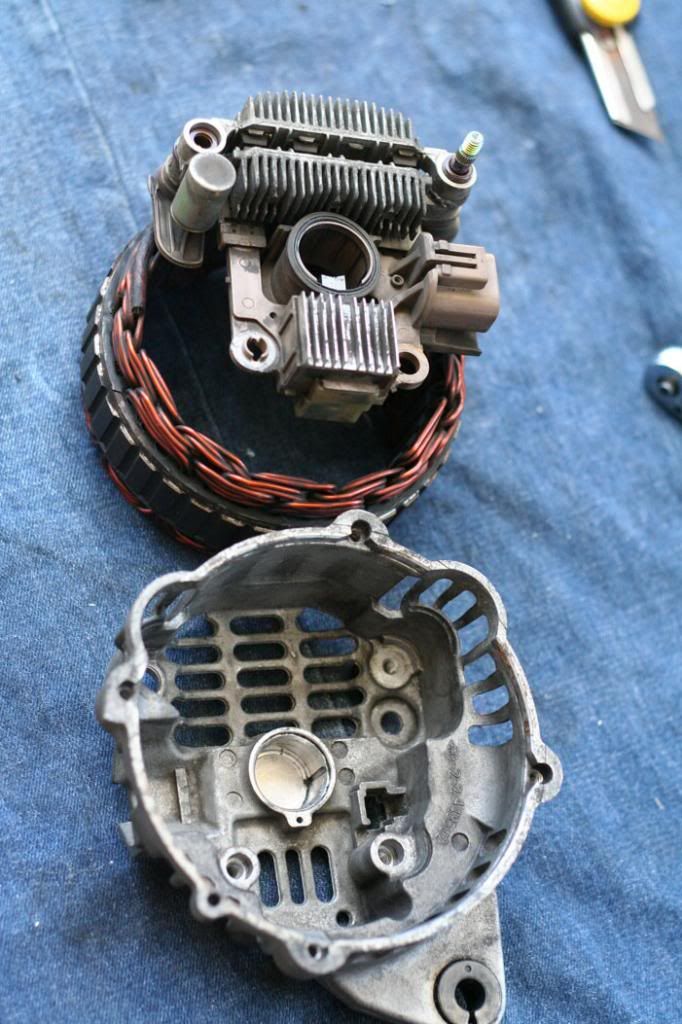
Once the rotor and the top half is off, give the lower half a tap with the hammer and the stator should seperate from the lower casing. Be careful here as the stator is attached to the rectifier/regulator unit. You want to tap it just enough to seperate it from the casing but not too hard that you rip the wires from the rectifier unit.

Image

Now you can go ahead and remove the rectifier and voltage regulator unit. Remove the three screws holding it in.

Image

And then the 10mm at the back, if there's a cover on it, pop it off.

Image

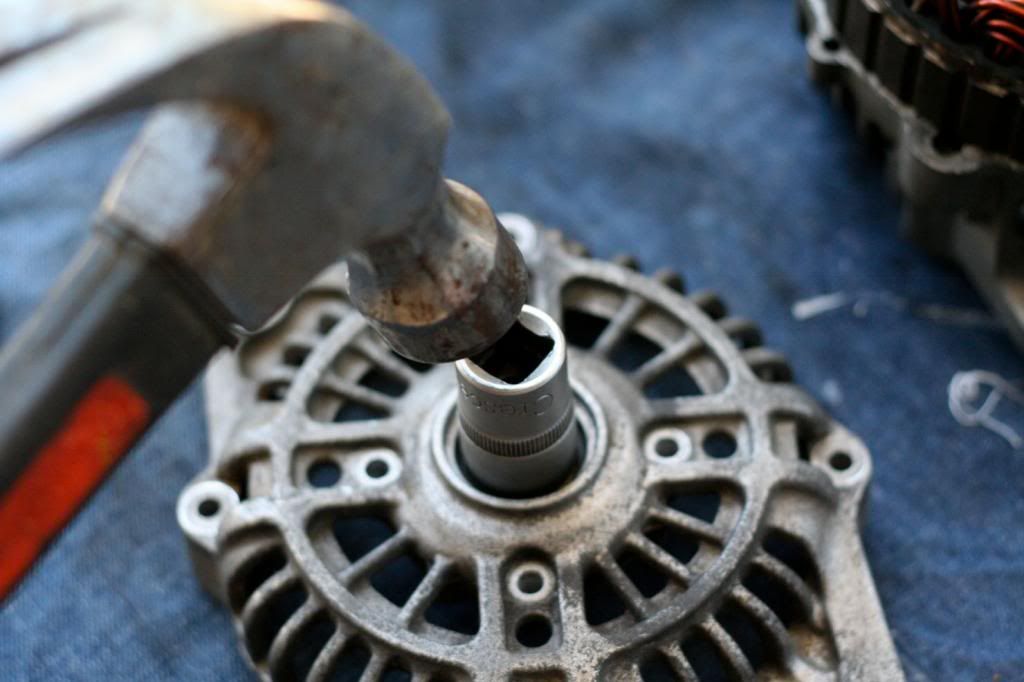
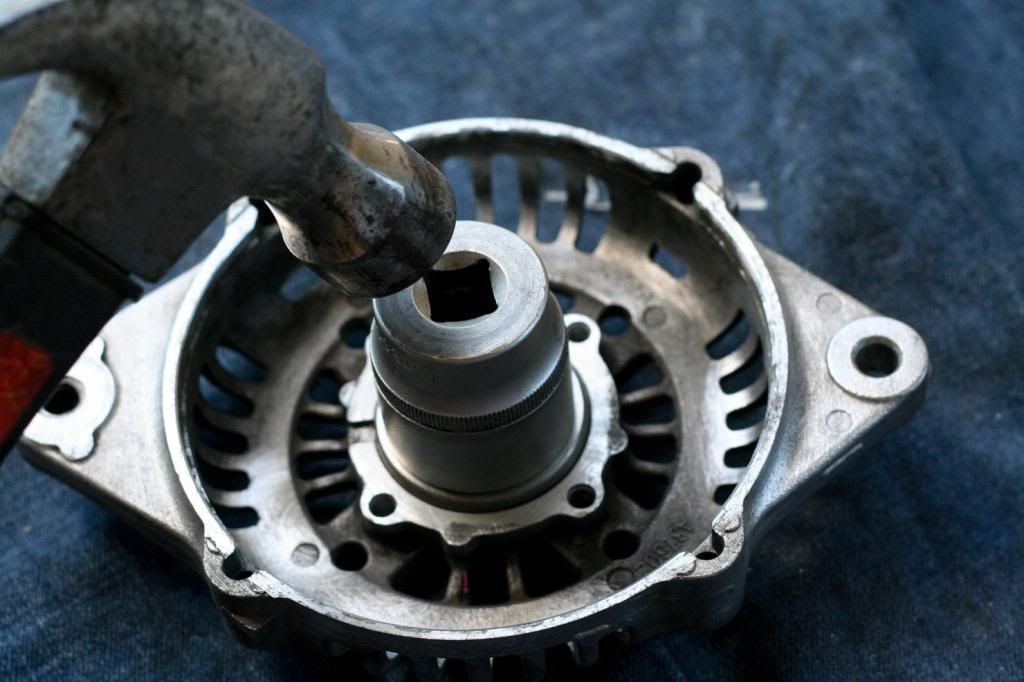
Now, remove the front bearing plate, and drift the bearing out

Image

Image
And drive the new bearing in.

Image

Image

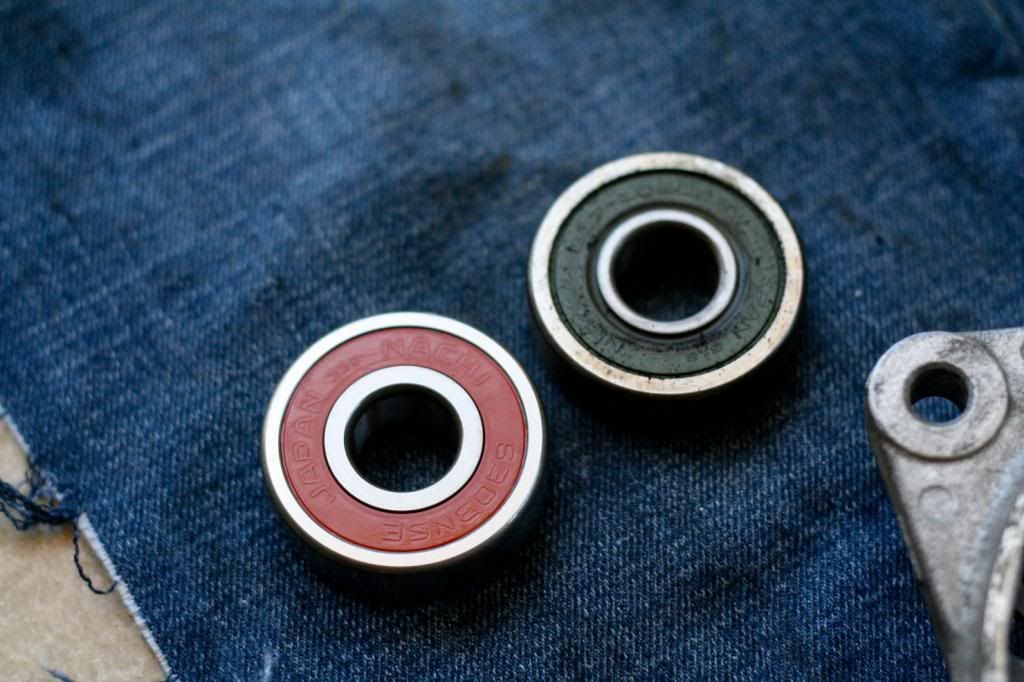
New vs old

Image


The rear bearing, use a 3-jaw puller to pull it off. I didn't manage to get any pics at this stage, was too involved and forgot.

This is the rear bearing
Image

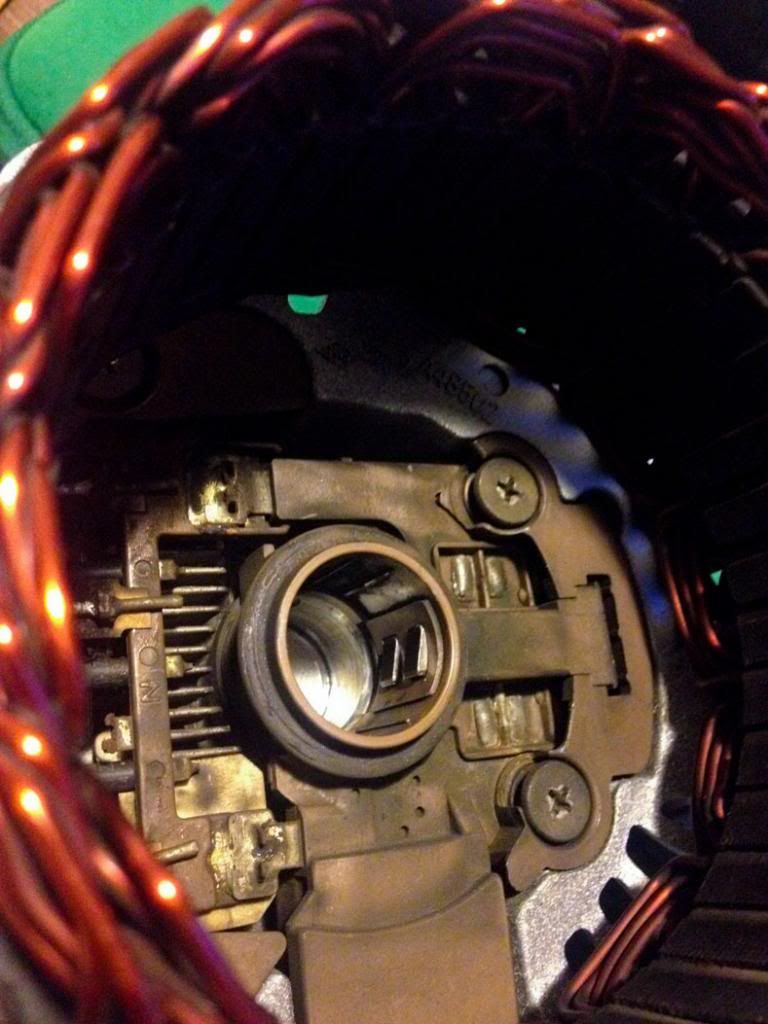
The rectifier/regulator unit

Image

I followed these steps to test my rectifier/regulator, and all was in good working order.

Image

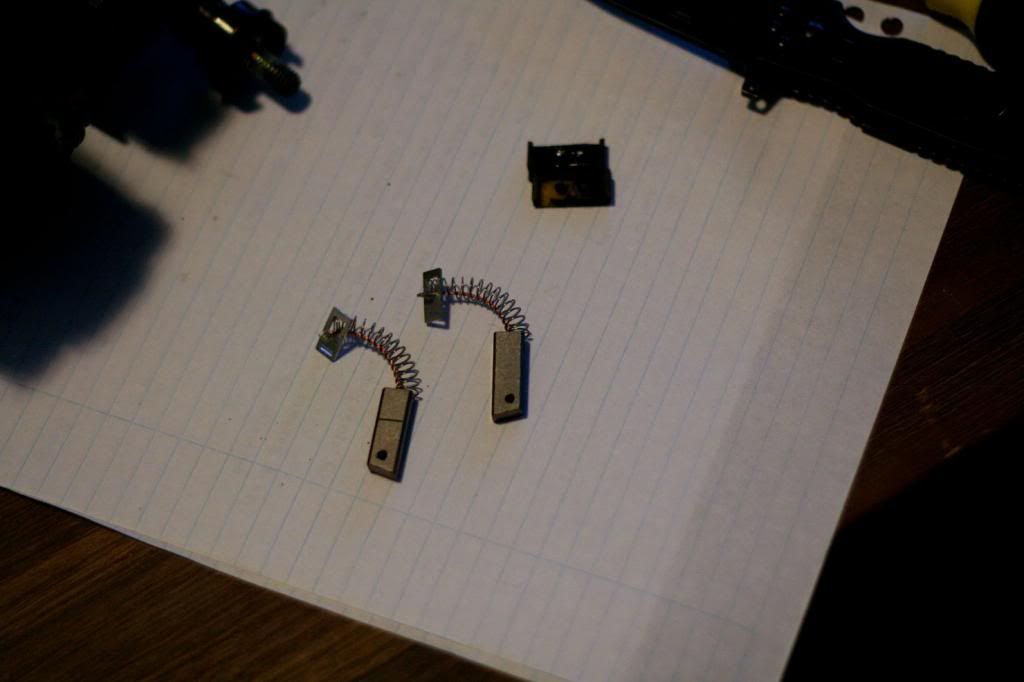
Now onto the brushes, found these guys on eBay for $4.50 posted.
Image

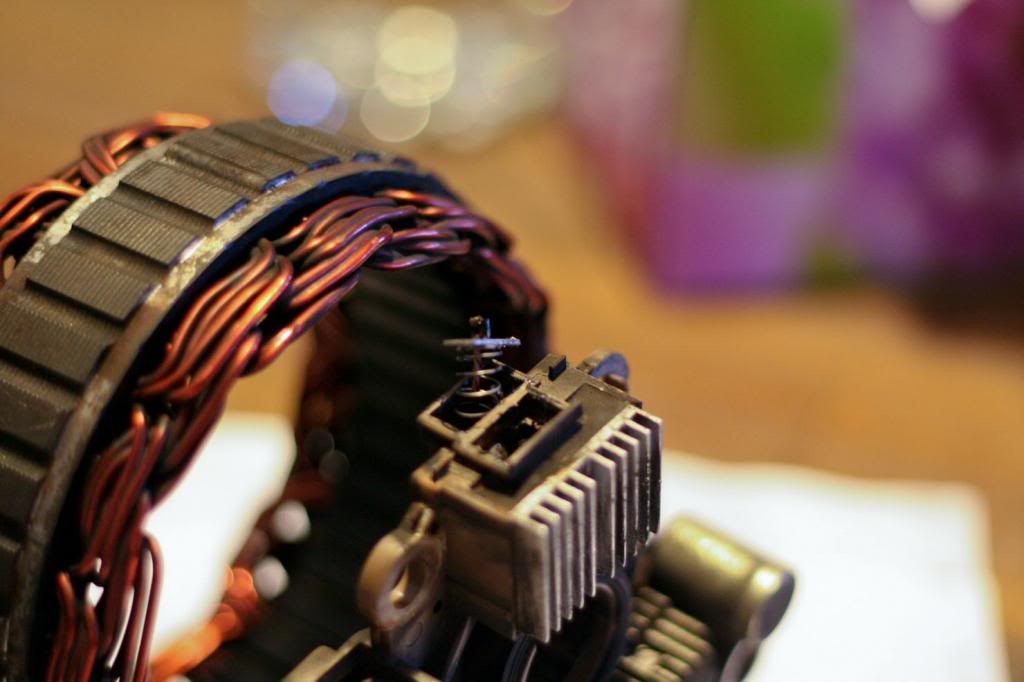
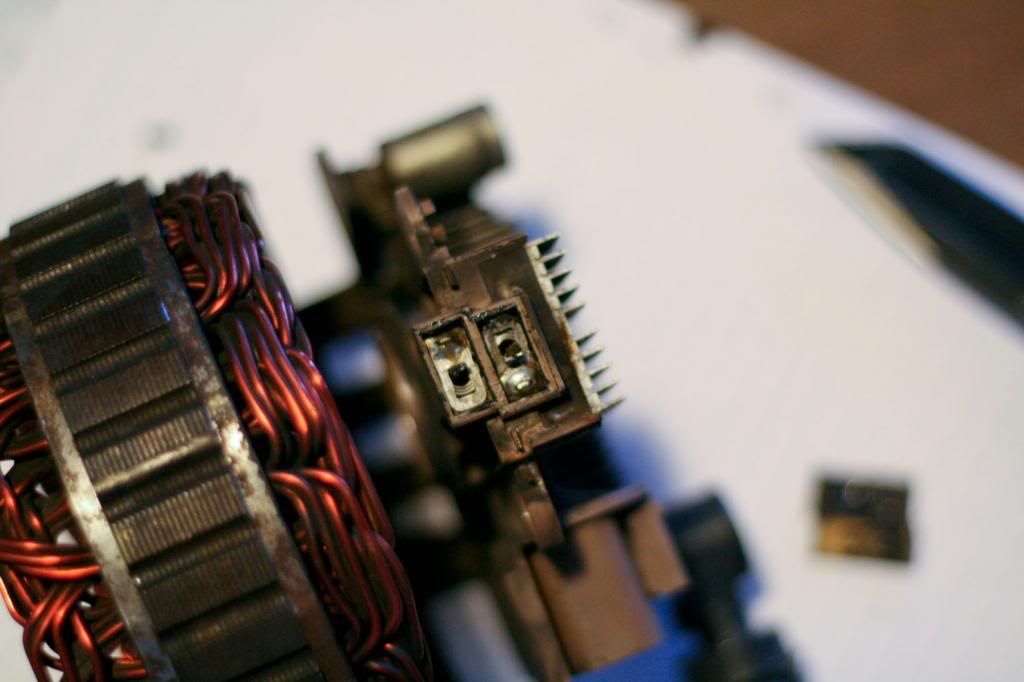
Pop the plastic cover off to expose the brushes
Image

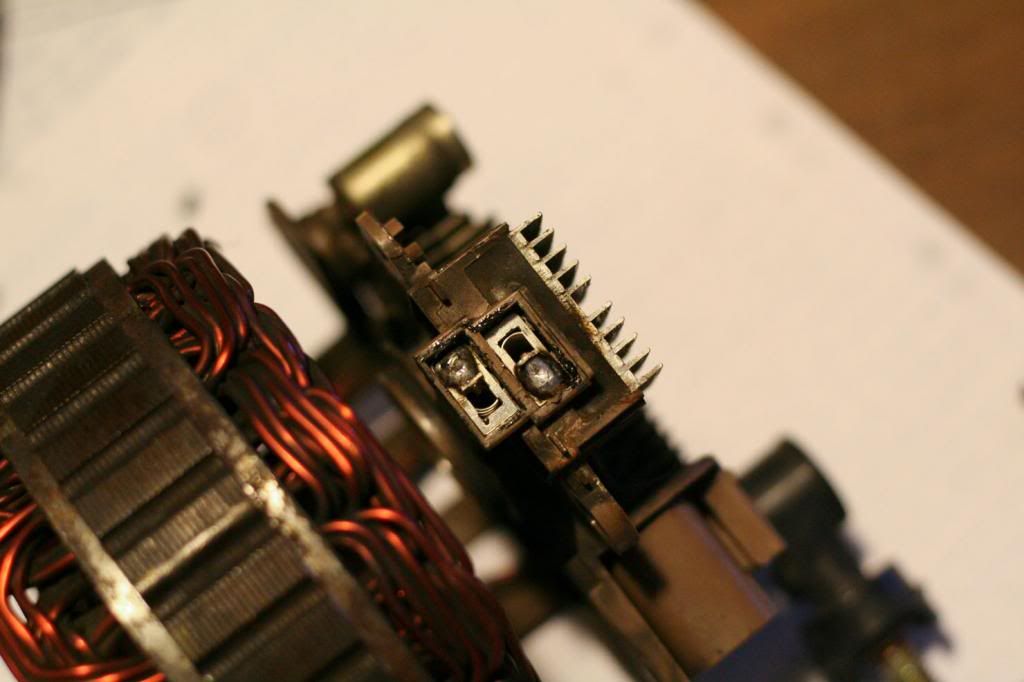
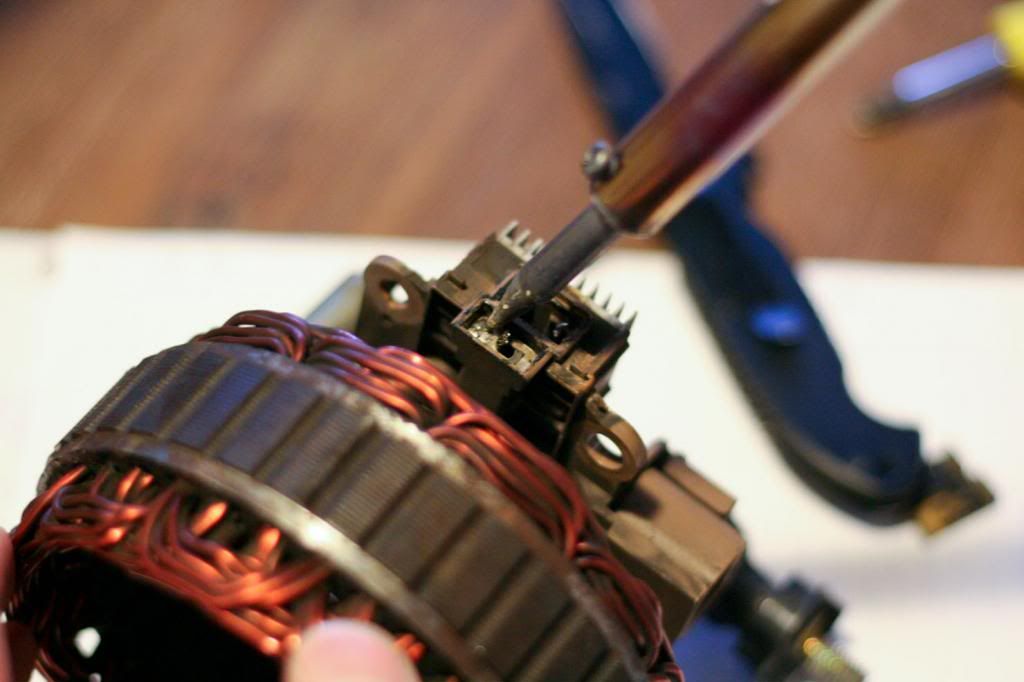
Using a soldering iron, melt the solder and the top of the plate holding the brushes will pop out.
Image

Hey presto!

Image

And solder the new ones in

Image

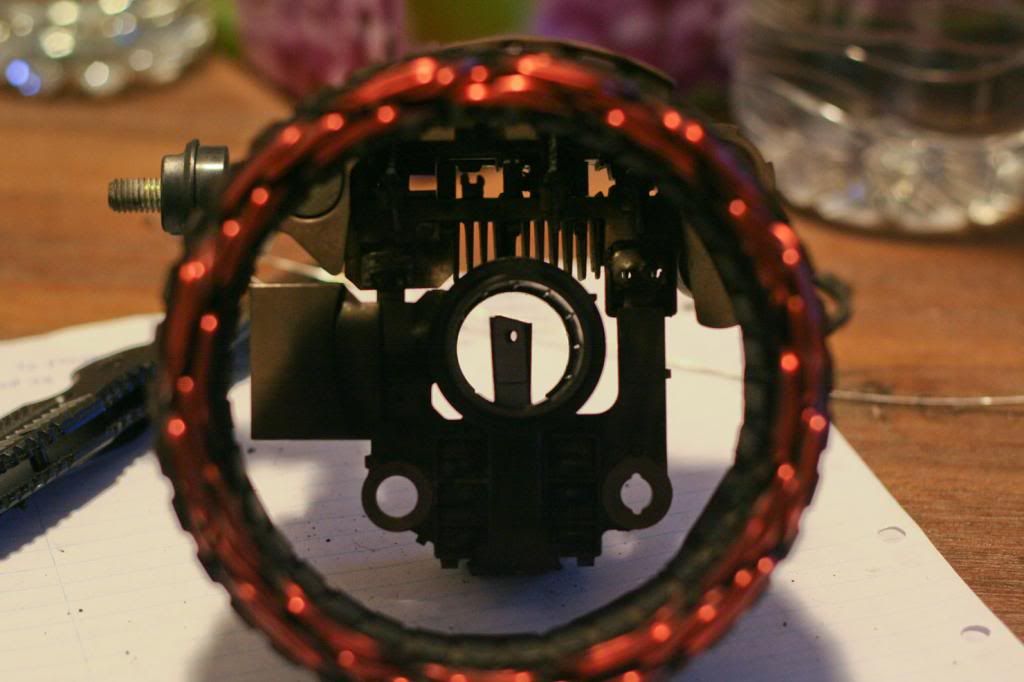
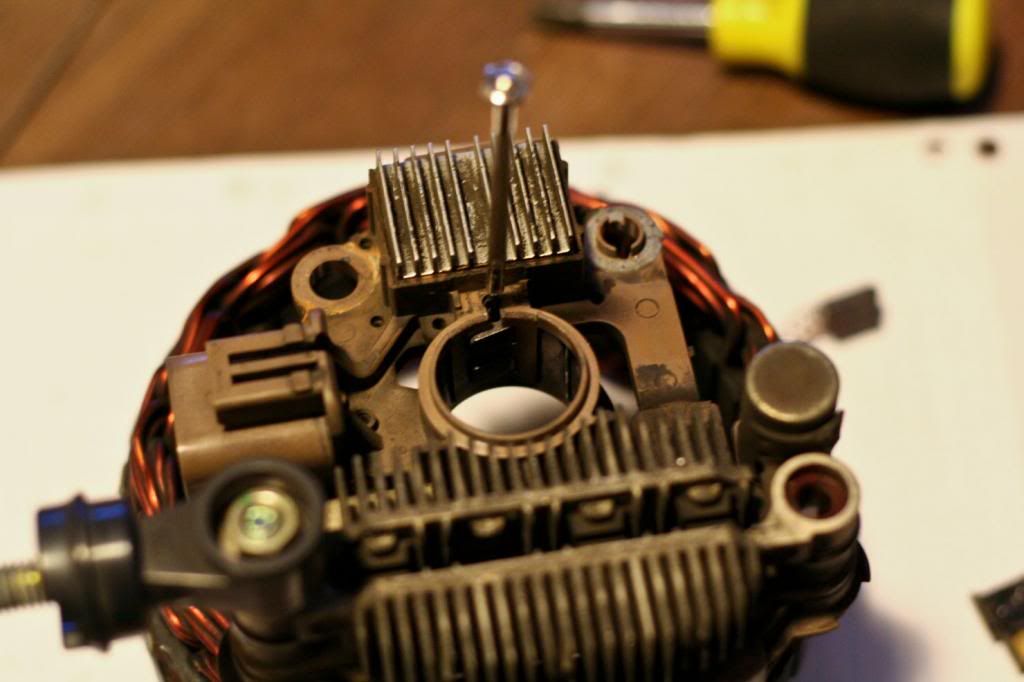
Make sure these holes line up, because you will use that to hold the brushes down to insert the rotor. Also, I'd recommend giving the slip rings and rough once over with some fine sand paper, just roughing the surface up a little.
Image

Image
Last edited by spikes on Thu Nov 28, 2013 9:53 pm, edited 1 time in total.

spikes
Fast Driver
Posts: 495
Joined: Fri Apr 08, 2011 3:12 pm
Vehicle: NA6
Location: Sydney

Re: How to rebuild your alternator (54K unfriendly)

Postby spikes » Thu Nov 28, 2013 9:44 pm

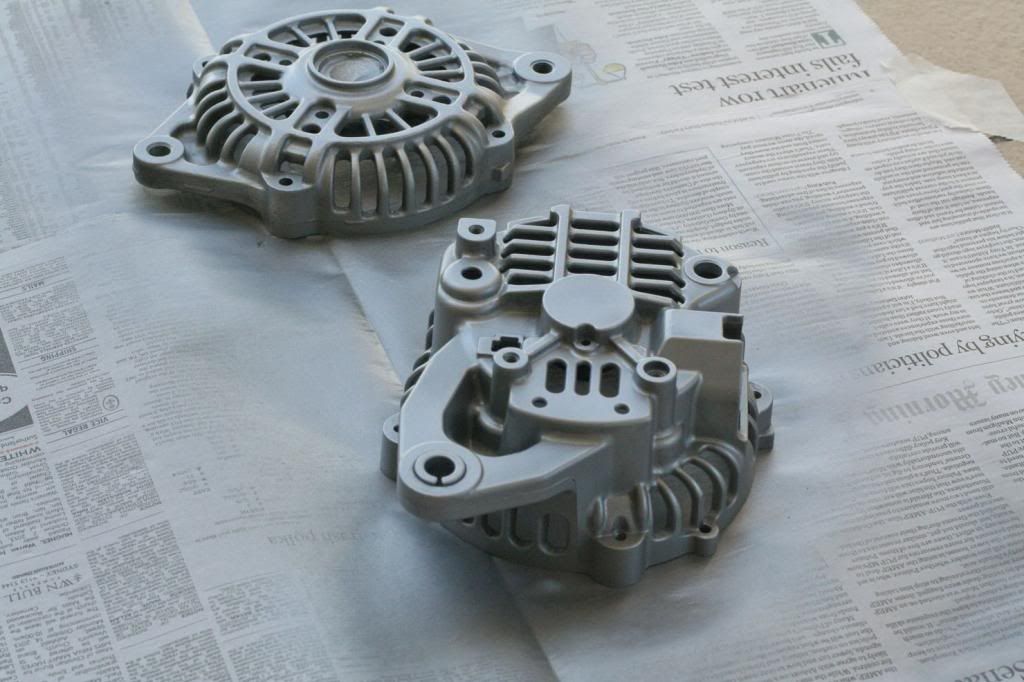
I also cleaned up the cases, and sprayed them with high temp paint.

Image

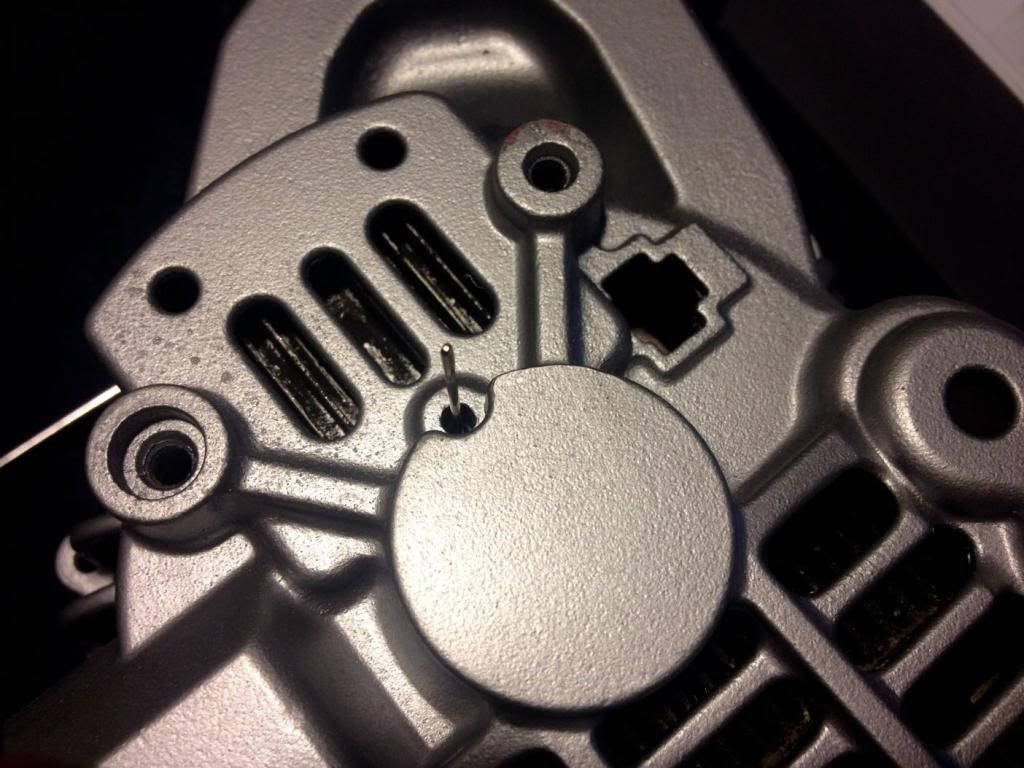
Now, put the stator/rectifier/regulator back in, screw it back up and find this hole at the back, if you don't have one, drill one. This is to insert a pin or needle to hold the brushes back.

Image

Image

And the reassemble in reverse order.

So there it is, it costed me $30 and about 2hrs of my time. Well worth it!

Image

User avatar
geofiz
Racing Driver
Posts: 583
Joined: Fri Jun 11, 2010 1:04 am
Vehicle: NA8
Location: Perth Hills

Re: How to rebuild your alternator (54K unfriendly)

Postby geofiz » Fri Nov 29, 2013 9:31 am

Awseome write up, thanks for sharing. :NETPOINTZ: :NETPOINTZ:


NA8 - BP4W IHI VJ35, 3.9 Torsen2, Adaptronic - SOLD
NB8A - mostly stock for now

User avatar
Okibi
Speed Racer
Posts: 10898
Joined: Thu Aug 21, 2003 11:00 am
Vehicle: NB SE
Location: Perth, Western Australia
Contact:

Re: How to rebuild your alternator (54K unfriendly)

Postby Okibi » Fri Nov 29, 2013 9:57 am

Great write up, a mate (ex mechanic) got given the run around trying to buy alternator bushes recently, glad you can just ebay them.

I've watched this video before, wasn't a bad way to get an idea how a typical alternator is fixed but your photos are 1 better!

If you had access to a car like this, would you take it back right away? Neither would I.

bigmaxy
Driver
Posts: 98
Joined: Sat Sep 08, 2012 9:40 pm

Re: How to rebuild your alternator (54K unfriendly)

Postby bigmaxy » Fri Nov 29, 2013 10:19 am

Excellent post and I had a little LOL at the title. I don't even know if it is possible to get a 56k modem connection anymore in most pasts of the country.

Dehamsta
Fast Driver
Posts: 226
Joined: Sat Mar 02, 2013 10:52 am
Vehicle: NA6
Location: Sydney

Re: How to rebuild your alternator (54K unfriendly)

Postby Dehamsta » Fri Nov 29, 2013 1:23 pm

Great post! Will be very handy one day.

spikes
Fast Driver
Posts: 495
Joined: Fri Apr 08, 2011 3:12 pm
Vehicle: NA6
Location: Sydney

Re: How to rebuild your alternator (54K unfriendly)

Postby spikes » Fri Nov 29, 2013 1:30 pm

bigmaxy wrote:Excellent post and I had a little LOL at the title. I don't even know if it is possible to get a 56k modem connection anymore in most pasts of the country.


Nowadays, it's more of a warning for lots a lots of pictures haha

User avatar
mrpham
Forum sponsor
Posts: 856
Joined: Tue Sep 20, 2011 8:42 pm
Vehicle: NA6
Location: Brisbane
Contact:

Re: How to rebuild your alternator (54K unfriendly)

Postby mrpham » Fri Nov 29, 2013 4:43 pm

Awesome stuff mate! Wish you posted this before I did mine, would have helped a lot :)
Current Forum Specials!

Frame Rail Braces - http://goo.gl/xJtRTs
COPs Bracket - http://goo.gl/sxJWhF

Build Thread - http://goo.gl/L3ZuKU

maxgus
Fast Driver
Posts: 364
Joined: Tue May 29, 2012 10:35 pm
Vehicle: NB8A - Supercharged
Location: Brisbane North

Re: How to rebuild your alternator (54K unfriendly)

Postby maxgus » Fri Nov 29, 2013 10:33 pm

Great write up thanks. I am going to tackle this very job soon and this will be a massive help.
Feather weight

spikes
Fast Driver
Posts: 495
Joined: Fri Apr 08, 2011 3:12 pm
Vehicle: NA6
Location: Sydney

Re: How to rebuild your alternator (54K unfriendly)

Postby spikes » Sat Nov 30, 2013 1:40 am

mrpham wrote:Awesome stuff mate! Wish you posted this before I did mine, would have helped a lot :)


Your obsession with clean parts was my inspiration for wanting a clean new looking alternator in the first place! :)

User avatar
fastfreddygassit
Waitin' for a mate
Posts: 1773
Joined: Sat Jun 25, 2005 8:00 pm
Vehicle: NB SE
Location: Waitin' for a mate in Melbourne somewhere
Contact:

Re: How to rebuild your alternator (54K unfriendly)

Postby fastfreddygassit » Tue Dec 03, 2013 12:57 pm

Excellent write-up and some nice pics too!
:BROADY: :NETPOINTZ:
May I suggest we sticky this and possibly include it in the MX5 technical guide sub forum too?


Return to “MX5 Audio, Electronics & Lighting”

Who is online

Users browsing this forum: No registered users and 262 guests