Emily's 04 VR SE
Moderators: timk, Stu, -alex, miata, StanTheMan, greenMachine, ManiacLachy, Daffy, zombie, Andrew, The American, Lokiel
-
Hjt
- Speed Racer
- Posts: 2499
- Joined: Thu Jan 13, 2011 12:46 pm
- Vehicle: NB8A
Re: Emily's NA6 V-Special Roadster
Nice work, sounds looks like the weather was perfect. Nice photography as well.
-
luist
- Driver
- Posts: 37
- Joined: Mon Aug 16, 2010 5:34 pm
- Vehicle: NB8A
- Location: Cammeray, Sydney
Re: Emily's NA6 V-Special Roadster
95er wrote:emily_mxV wrote:
Pretty certain I drive past the far left NB8A everyday to work in the mornings and arvos in Silverwater. Also, saw the second to the left NA in Silverwater this morning too!
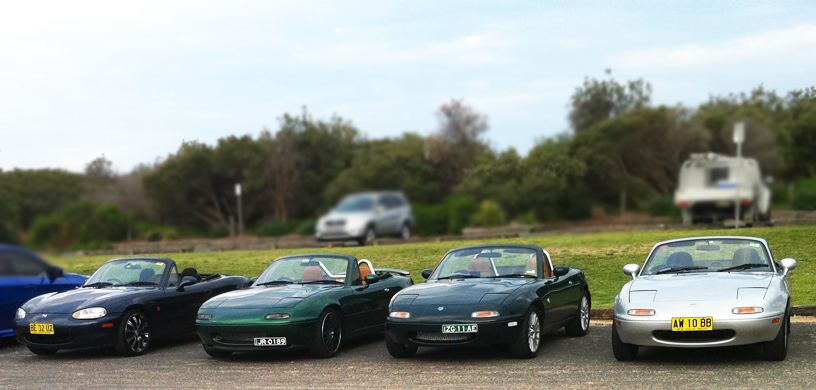
yep, that would be us! was a great drive. good day for a cruise. our other flatmate, james, is about to buy his first 5 as well. so we have a fair few in the family!
-
emily_mx5
- Racing Driver
- Posts: 1720
- Joined: Wed Aug 03, 2011 5:57 pm
- Vehicle: NB SE
- Location: Sydney
Re: Emily's NA6 V-Special Roadster
Update 
busy busy week
A/C drainage hose
It completely bewilders me that someone would go to the effort of plugging up the hole rather than putting the hose back
This caused water to leak all over my passenger &/or my ecu. Either way not good at all. Thanks to JBT for taking a pic to show me what it should look like.
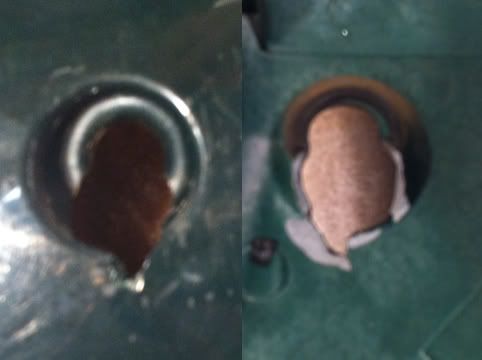
I found a replacement hose, although I am still missing the rubber grommet.
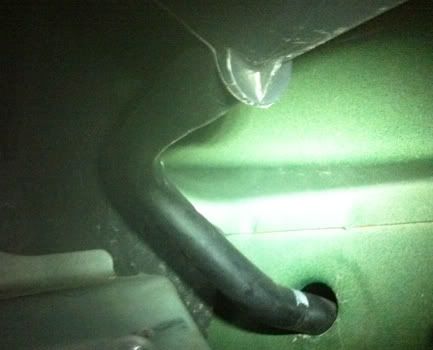
Yay fixed
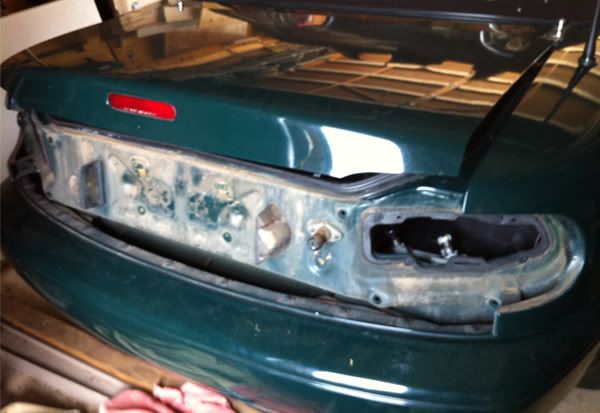
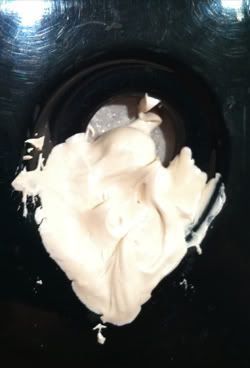
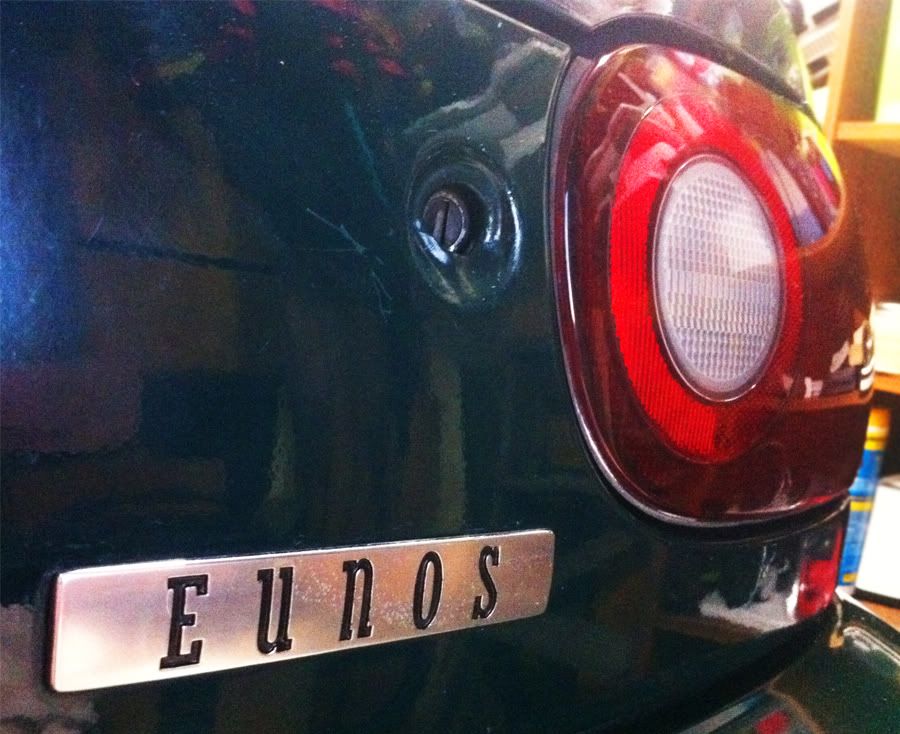
Rear Garnish Panel
So someone tried to break in and in the process ripped a big chunk of plastic from around the keyhole 
So I took it off and attempted to repair it lol.
Step 1: Bog. (somehow got it everywhere haha)
Step 2: Sand with trusty dremmel
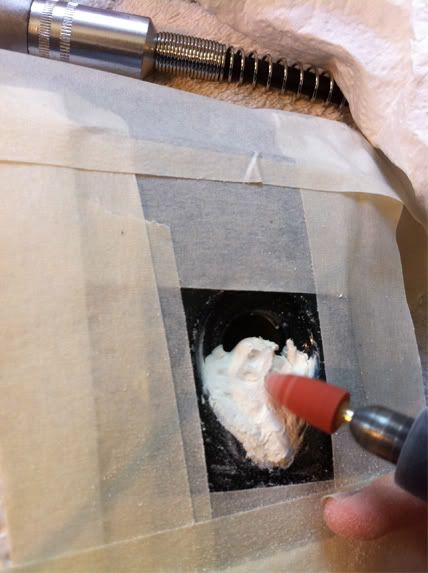
Step 3: sand some more and then paint
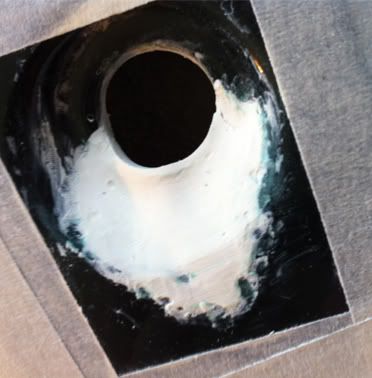
Final result is OK, not fantastic, but abit better than damage.
Painted Badges
Whilst the garnish was off I figured may aswell paint the badges, plus it always annoyed my that the "eunos" letters were blank.
Mid Paint:
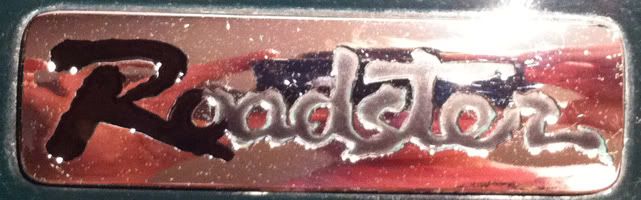
You can see how much more vibrant the black "R" is compared to the faded "oadster" letters
Shaved/Sanded Read Lights
So to get the panel off I had to take the lights out aswell, so I figured may aswell get rid of the ugly letters that just collect polish and dirt.
Step 1: Sand letters off with 600 wet&dry
Step 2: Sand with 1200 wet&dry (could use finer, thats all I had)
Step 3: Pollish with buffing wheel and plastic polish
Step 4: Hand polish with plastic cleaner
Quite a pointless thing to do I know, but I was bored and now they are clearer and shinier than they were before so no harm done
busy busy week
A/C drainage hose
It completely bewilders me that someone would go to the effort of plugging up the hole rather than putting the hose back
This caused water to leak all over my passenger &/or my ecu. Either way not good at all. Thanks to JBT for taking a pic to show me what it should look like.
I found a replacement hose, although I am still missing the rubber grommet.
Yay fixed
Rear Garnish Panel
So someone tried to break in and in the process ripped a big chunk of plastic from around the keyhole
So I took it off and attempted to repair it lol.
Step 1: Bog. (somehow got it everywhere haha)
Step 2: Sand with trusty dremmel
Step 3: sand some more and then paint
Final result is OK, not fantastic, but abit better than damage.
Painted Badges
Whilst the garnish was off I figured may aswell paint the badges, plus it always annoyed my that the "eunos" letters were blank.
Mid Paint:
You can see how much more vibrant the black "R" is compared to the faded "oadster" letters
Shaved/Sanded Read Lights
So to get the panel off I had to take the lights out aswell, so I figured may aswell get rid of the ugly letters that just collect polish and dirt.
Step 1: Sand letters off with 600 wet&dry
Step 2: Sand with 1200 wet&dry (could use finer, thats all I had)
Step 3: Pollish with buffing wheel and plastic polish
Step 4: Hand polish with plastic cleaner
Quite a pointless thing to do I know, but I was bored and now they are clearer and shinier than they were before so no harm done
-
Apu
- Speed Racer
- Posts: 2399
- Joined: Tue Apr 12, 2011 3:04 pm
- Vehicle: NB8B
- Location: North West, NSW
Re: Emily's NA6 V-Special Roadster
Well done Emily! You can get the grommet at Clark Rubber.
-
Suspense

- Racing Driver
- Posts: 635
- Joined: Mon Apr 11, 2011 10:00 pm
- Vehicle: NB8B
- Location: Sydney
Re: Emily's NA6 V-Special Roadster
Where did they attempted theft occur?
-
emily_mx5
- Racing Driver
- Posts: 1720
- Joined: Wed Aug 03, 2011 5:57 pm
- Vehicle: NB SE
- Location: Sydney
Re: Emily's NA6 V-Special Roadster
Thanks Bryan
TWICE within 6 months at Mt. Druit.
It was pretty serious aswell, they
- slashed the soft top AND broke both windows
- broke the steering lock / twisted the steering column
- cut EVERY SINGLE wire under the steering column
- cracked the glove box and bent the hinge rail
- ripped and scratched the plastic around the boot key hole
So after his insurance repaired the soft top/windows/wires, the previous owner was fed up and sold to me really cheaply haha
But I still have a dodgy steering column and a dodgy glove box
Where did they attempted theft occur?
TWICE within 6 months at Mt. Druit.
It was pretty serious aswell, they
- slashed the soft top AND broke both windows
- broke the steering lock / twisted the steering column
- cut EVERY SINGLE wire under the steering column
- cracked the glove box and bent the hinge rail
- ripped and scratched the plastic around the boot key hole
So after his insurance repaired the soft top/windows/wires, the previous owner was fed up and sold to me really cheaply haha
But I still have a dodgy steering column and a dodgy glove box
-
Hjt
- Speed Racer
- Posts: 2499
- Joined: Thu Jan 13, 2011 12:46 pm
- Vehicle: NB8A
Re: Emily's NA6 V-Special Roadster
Mt. Druit.
There lies the problem...idc what people think, some neighbourhoods aren't designed for nice vehicles.
-
A.Chen89

- Racing Driver
- Posts: 509
- Joined: Thu Jun 10, 2010 6:09 pm
- Vehicle: NB8B - Turbo
- Location: Western Sydney
Re: Emily's NA6 V-Special Roadster
A hard top helps in the west hehe
-
emily_mx5
- Racing Driver
- Posts: 1720
- Joined: Wed Aug 03, 2011 5:57 pm
- Vehicle: NB SE
- Location: Sydney
Re: Emily's NA6 V-Special Roadster
Haha yeah I think thats why he sold the car to me after 6 months lol.
But I would have thought that you would only cut the wires you need to "hot-wire" it, which they obviously didn't manage to do,
haha what a fail
Does anybody know how hard it is to change the steering column? haha
But I would have thought that you would only cut the wires you need to "hot-wire" it, which they obviously didn't manage to do,
haha what a fail
Does anybody know how hard it is to change the steering column? haha
-
emily_mx5
- Racing Driver
- Posts: 1720
- Joined: Wed Aug 03, 2011 5:57 pm
- Vehicle: NB SE
- Location: Sydney
Re: Emily's NA6 V-Special Roadster
Front Intake Scoops + rewiring
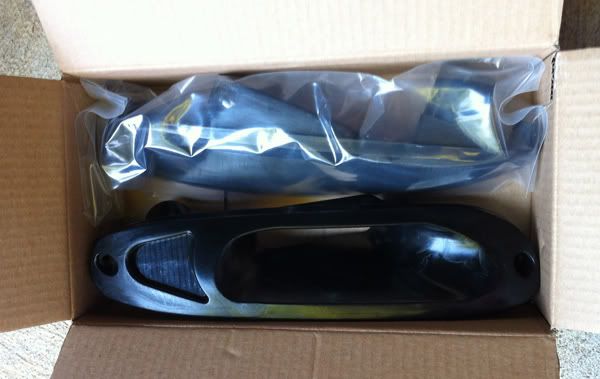
I have wanted these ever since I saw them on a tidy black NA that zoomed past me. I'm not trying to "aid performance" or anything, I just like the aesthetic look, so if they cool the engine bay a couple of degrees = bonus But mostly I just HATE the orange reflectors in the oem parkers.
However they don't have any space for a parking light, so I relocated the parker bulb to my new clear reflectors, which came with bulb holders.
(They look pretty crappy in raw black, so I will get them painted matching BRG in the coming weeks.)
The rewiring was really easy to do, and would be the same process if you wanted to duplicate the indicator signal.
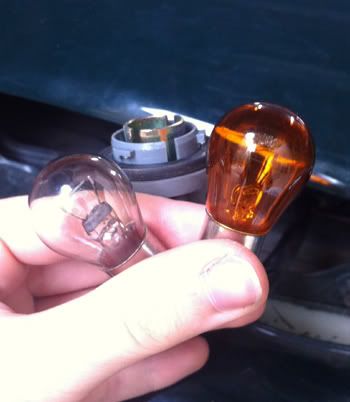
Step 1: Remove the parking light; undo the 2 screws and pull out. Take out both bulb holders. The small (T10) wedge bulb is the parker and the the larger bayonet bulb is the indicator
For my new units I needed to replace the clear indicators with orange bulbs.
Step 2: Cut the wiring of the parker bulb - make sure to leave enough wire to reconnect if you ever need too!
If you are duplicating the indicator lights you will need to tap the existing wiring.
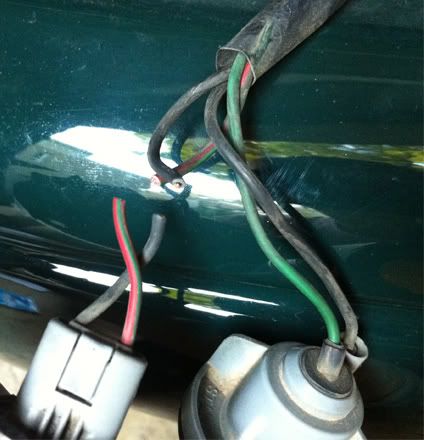
Step 3: Place the parker bulb into the new holders and check polarity. For mine: 'oem black = white' and 'oem red/green = pink'
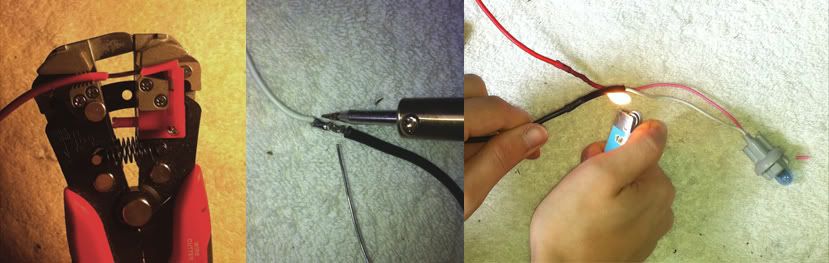
Step 4: Cut 2x 30cm lengths of wire. I used red and black 15amp auto cable as this is suitable for both the indicator and parker current draw.
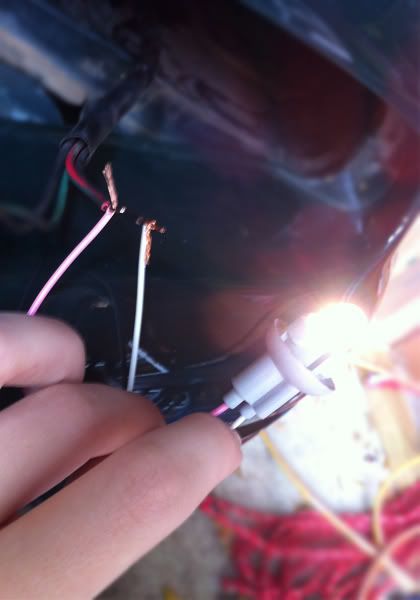
Step 5: Strip + solder + heatshrink to bulb holder wires. Basically this is just to elongate the bulb holder wires.
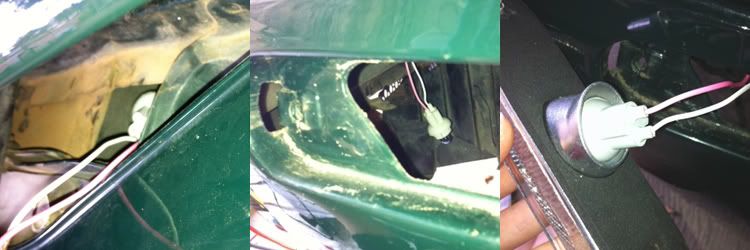
Step 6: Slide through hole just behind where the light sits; If you then look through the reflector hole you can see it hanging right there. Pull through and secure into reflector.
Step 7: Strip + solder + heatshrink the original car positive (green&red) to your new positive wire (red) and original car negative (black) to your new negative wire (black). Cut excess wire so there isn't too much hanging in there.
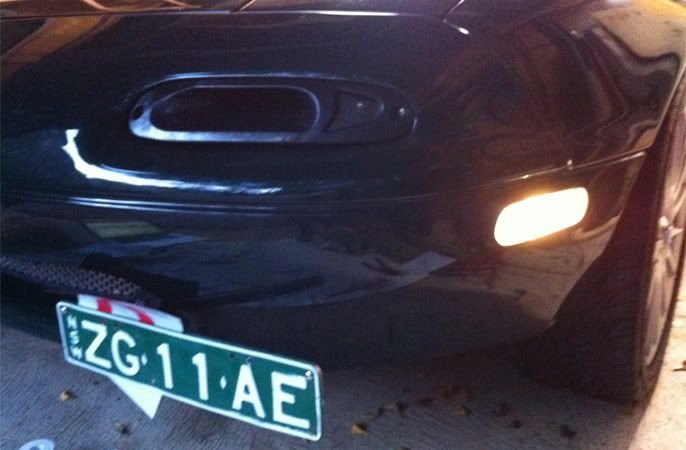
Put light unit back in and your done!
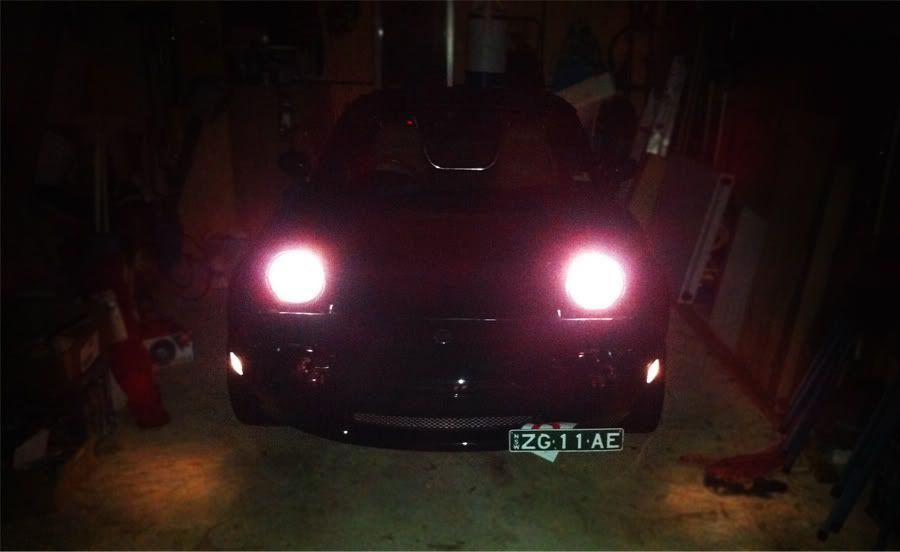
I think it looks really good at night time
I have wanted these ever since I saw them on a tidy black NA that zoomed past me. I'm not trying to "aid performance" or anything, I just like the aesthetic look, so if they cool the engine bay a couple of degrees = bonus
However they don't have any space for a parking light, so I relocated the parker bulb to my new clear reflectors, which came with bulb holders.
(They look pretty crappy in raw black, so I will get them painted matching BRG in the coming weeks.)
The rewiring was really easy to do, and would be the same process if you wanted to duplicate the indicator signal.
Step 1: Remove the parking light; undo the 2 screws and pull out. Take out both bulb holders. The small (T10) wedge bulb is the parker and the the larger bayonet bulb is the indicator
For my new units I needed to replace the clear indicators with orange bulbs.
Step 2: Cut the wiring of the parker bulb - make sure to leave enough wire to reconnect if you ever need too!
If you are duplicating the indicator lights you will need to tap the existing wiring.
Step 3: Place the parker bulb into the new holders and check polarity. For mine: 'oem black = white' and 'oem red/green = pink'
Step 4: Cut 2x 30cm lengths of wire. I used red and black 15amp auto cable as this is suitable for both the indicator and parker current draw.
Step 5: Strip + solder + heatshrink to bulb holder wires. Basically this is just to elongate the bulb holder wires.
Step 6: Slide through hole just behind where the light sits; If you then look through the reflector hole you can see it hanging right there. Pull through and secure into reflector.
Step 7: Strip + solder + heatshrink the original car positive (green&red) to your new positive wire (red) and original car negative (black) to your new negative wire (black). Cut excess wire so there isn't too much hanging in there.
Put light unit back in and your done!
I think it looks really good at night time
-
Apu
- Speed Racer
- Posts: 2399
- Joined: Tue Apr 12, 2011 3:04 pm
- Vehicle: NB8B
- Location: North West, NSW
Re: Emily's NA6 V-Special Roadster
Ohhh! I want to get those indicators! Good job as always! Love your hands on approach.
You've also given me ideas with what you did to your badges...will add to my colour scheme.
You've also given me ideas with what you did to your badges...will add to my colour scheme.
-
Hjt
- Speed Racer
- Posts: 2499
- Joined: Thu Jan 13, 2011 12:46 pm
- Vehicle: NB8A
Re: Emily's NA6 V-Special Roadster
I'm loving the P plate, i think i would get in trouble with the parker lights though
-
emily_mx5
- Racing Driver
- Posts: 1720
- Joined: Wed Aug 03, 2011 5:57 pm
- Vehicle: NB SE
- Location: Sydney
Re: Emily's NA6 V-Special Roadster
Ohhh! I want to get those indicators!
Totally worth it.
Will add to my colour scheme.
Keen to see!
I'm loving the P plate
Shut up haha its super stealth
i think i would get in trouble with the parker lights though
How do you mean?
-
Hjt
- Speed Racer
- Posts: 2499
- Joined: Thu Jan 13, 2011 12:46 pm
- Vehicle: NB8A
Re: Emily's NA6 V-Special Roadster
How do you mean?
Something in the ADRs about forward facing lights, and that only amber should be seen from sides. Forget exact wording and legislation, but my reflectors are to far around the edges to get away with it.
My wheels will be enough of an issue!
-
red devil
- Fast Driver
- Posts: 135
- Joined: Tue May 25, 2010 9:38 pm
- Vehicle: NA6
- Location: St Ives
Re: Emily's NA6 V-Special Roadster
arrrrrr more wire = more weight
Jokes aside if i ever need any electrical work done i know who to speak too
Jokes aside if i ever need any electrical work done i know who to speak too
I dont care that my laces aren't fat or that I'm not even close to flush and I certainly don't want to be the illest!
Who is online
Users browsing this forum: No registered users and 15 guests


