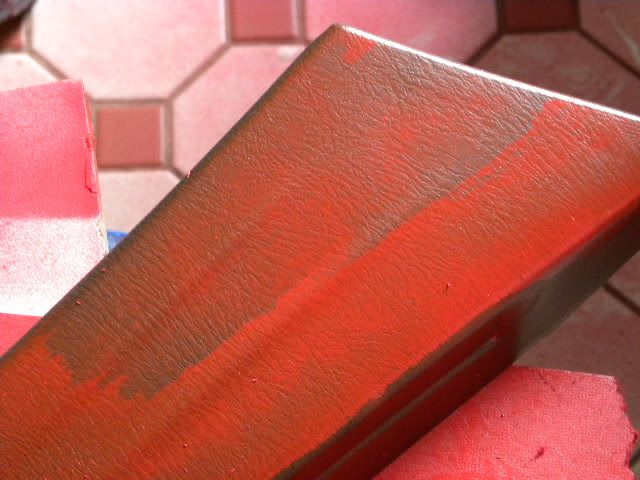
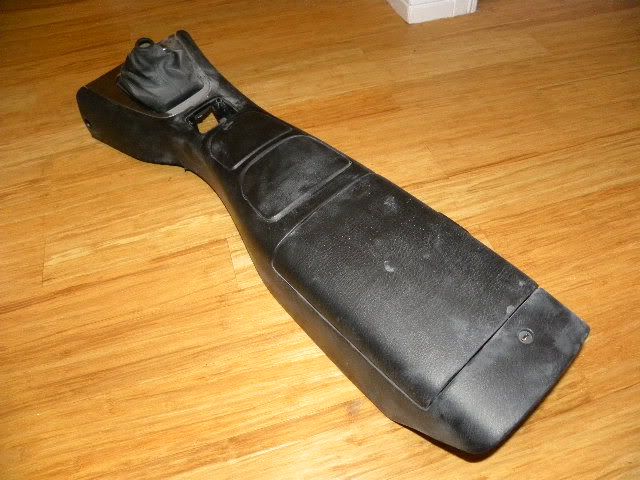
billybunters - from a bmw z4 to a mx5 se

Chat to do with your MX5/Miata/Eunos Garage Ride(s).

Moderators: timk, Stu, -alex, miata, StanTheMan, greenMachine, ManiacLachy, Daffy, zombie, Andrew, The American, Lokiel

billybunter
Racing Driver
Posts: 1531
Joined: Thu Nov 11, 2010 4:54 pm
Vehicle: NB SE
Location: orange nsw

Re: billybunters - from a bmw z4 to a mx5 se

Postby billybunter » Sun Oct 09, 2011 6:57 pm

guran
ive given this car about 6 or so heavy applications of armorall on the interior. i too was worried about getting the stuff off. i wet ragged it on and clean cloth off. did it several times. once you spray the first coat - if you have a problem it will show immediately.
dont do any further coats. get some g/w remover and wipe all paint from the problem area
let it dry and go again. same process when spraying the car. if uyou stike a grease spot - let it dry and rub it out. clean again with g/w and try again.

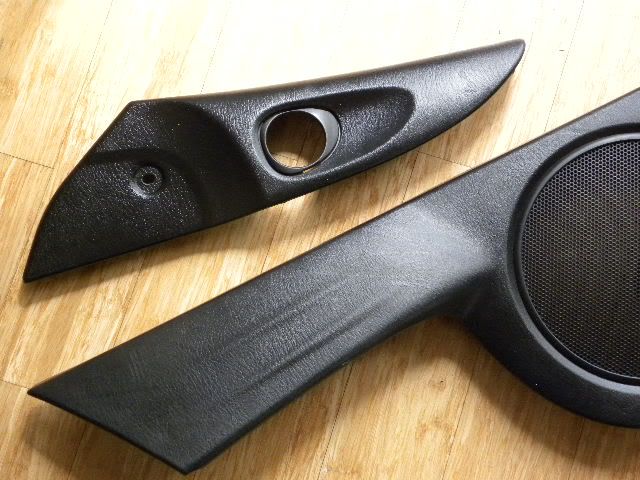
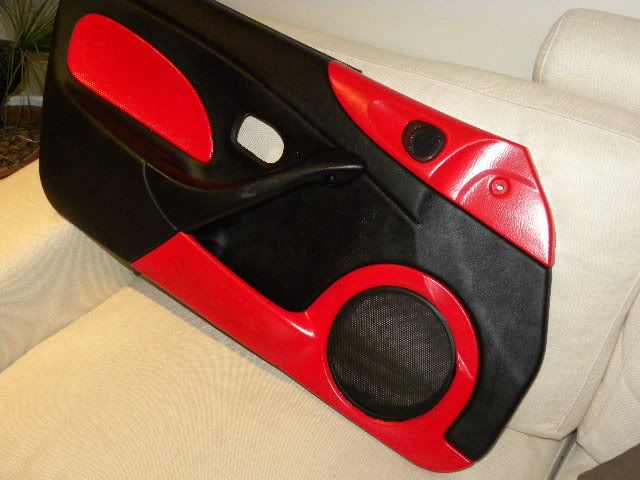
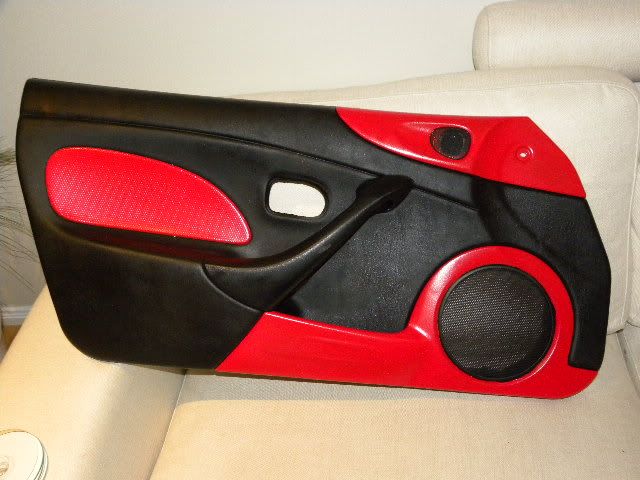
here's the first completed doot card

Image

Image

User avatar
Guran
Speed Racer
Posts: 3754
Joined: Sun Feb 15, 2009 6:42 pm
Vehicle: ND - 1.5
Location: Albion Park NSW
Contact:

Re: billybunters - from a bmw z4 to a mx5 se

Postby Guran » Sun Oct 09, 2011 8:57 pm

Good tip! Something for the newbies to watch out for.
Standard 2006 NC - YouTube
WP 1:11.89 | SMP-S 1:05.90 GP 1:54.93 N 1:18.09 L 2:22.49 | PW 1:02.52
PI 2:00.55 | W-S 1:12.44 W-L 1:43.36 | SR 1:33.25

billybunter
Racing Driver
Posts: 1531
Joined: Thu Nov 11, 2010 4:54 pm
Vehicle: NB SE
Location: orange nsw

Re: billybunters - from a bmw z4 to a mx5 se

Postby billybunter » Sun Oct 09, 2011 9:14 pm

yeah. sometimes it doesn't matter how much trouble you go to in your preparation of the spray it's not untill you apply the first coat of paint that trouble arises.
like you said -might help some-one. best tip- don't ever try to paint over the grease spot hoping it will go away. it won't,it looks bad and will get worse.

User avatar
Bizi
Racing Driver
Posts: 738
Joined: Sat Apr 09, 2011 4:17 pm
Location: Northern Sydney

Re: billybunters - from a bmw z4 to a mx5 se

Postby Bizi » Sun Oct 09, 2011 9:30 pm

Apu wrote:Please don't expose all of the car for now...the partly covered tease is really working well for me. Not that I'm comparing this to a strip show or anything like that...given I don't know what happens in a strip show anyway...


Yes, it's now onto the red light stuff!

Thanks again for the 'show' since you have been a great teacher to many people, since this is a practical on doing this thing the right way (and good fixes for when something goes awry).

One question about paint colour - did you consider pearl white? I just ask since seeing a beautiful pearl white today. It was something else.

Many :beer: to you for the great updates - hope there are a few to go.

Are the repeaters standard or premium ones from mx5parts.co.uk, sourced locally or directly or from elsewhere?

billybunter
Racing Driver
Posts: 1531
Joined: Thu Nov 11, 2010 4:54 pm
Vehicle: NB SE
Location: orange nsw

Re: billybunters - from a bmw z4 to a mx5 se

Postby billybunter » Sun Oct 09, 2011 9:52 pm

thats one good thing about acrylic paint. if you happen to get a grease spot or run........don't worry. just sit back and let it dry for half an hour then rub it out with wet dry paper. definately don't touch it when it's wet or you could end up with a big mess and a lot more work.
as for the vinyl primer it's a watery for a better word type of paint. if a grease spot comes up on the other card i will take a photo of it from the spot - to the wipe out and vinyk paint.
thought about pearl white and it was close to a contender. but i was really after a super white as as this is the base coat white for all colours - there's none whiter :wink:
so that why i'm now colouring up the interior.
repeater bought from the uk. had the bulbs fitted etc but at this stage i don't think i will worry about connecting.
still a fair bit to go yet and if some-ones get a bit of useful info then there's no harm done :beer:

billybunter
Racing Driver
Posts: 1531
Joined: Thu Nov 11, 2010 4:54 pm
Vehicle: NB SE
Location: orange nsw

Re: billybunters - from a bmw z4 to a mx5 se

Postby billybunter » Mon Oct 10, 2011 5:31 pm

my guide to painting the door cards.

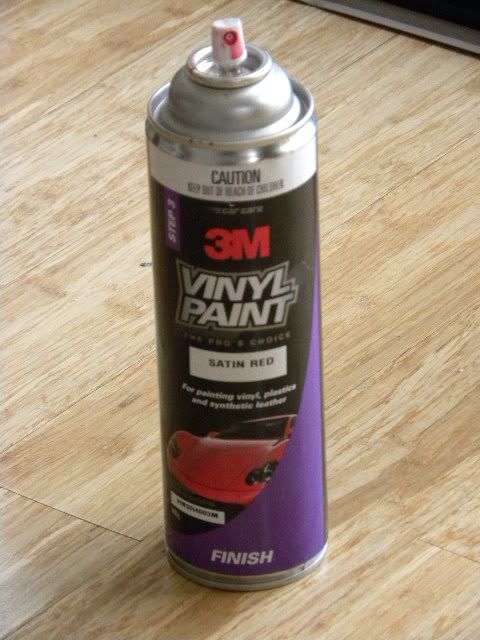
the paint - 3M vinyl
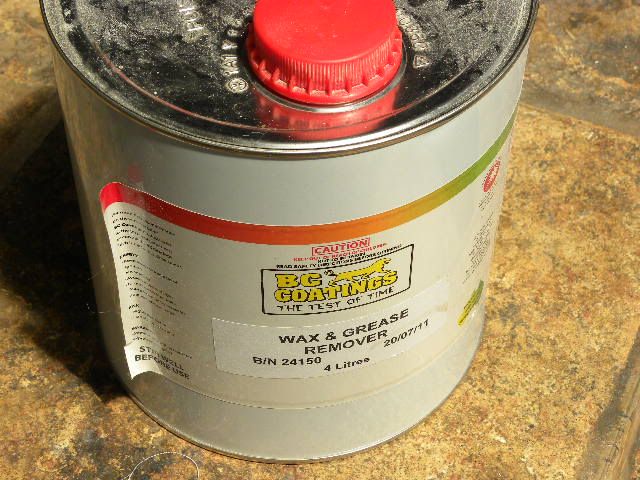
grease/wax remover 4 litres ( its cheaper in the long run)
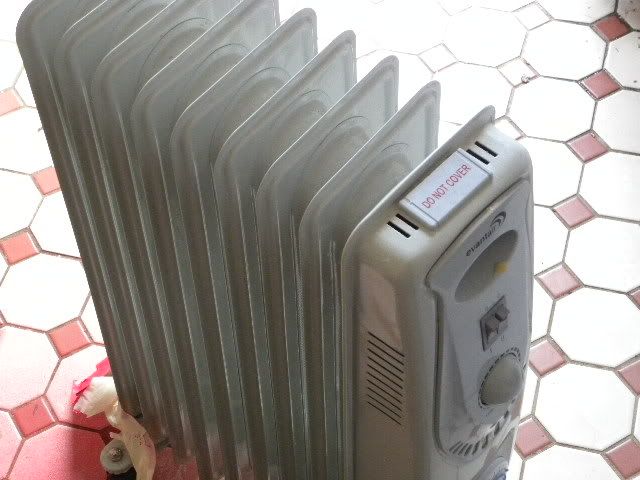
2000 watt oiled filled heater or any other heater
scaper/sandpaper and mashing tape.

i would have preferred to use vht vinyl dye as i have read good reviews but none was available locally in RED so i chose 3M vinyl from supercheap. no reports on this so time will tell if it's anygood. price about $17
Image

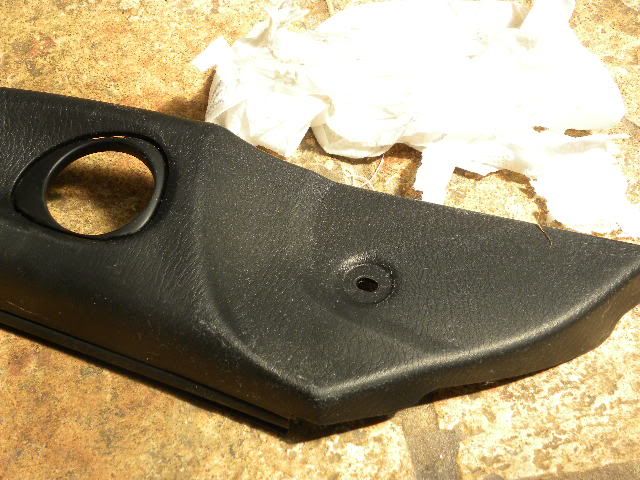
i gave all areas of the work job a good hard scrub with grease/wax remover. if possibly buy a 4 litre tin. it's a bit over $20 and a lot cheaper in the long run than a spray can of the stuff. you can then use it time and time again
Image

top area of door trim before/after the wax and grease remover. note after photo-the trim has lost its armorall gloss
Image

Image

give all areas to be painted a thorough scrub. even after that you may still find problems with hard to get grease areas which will show up later on in the job.

now if the temps around 20 celius you can spray outside or where ever you choose. if the temps under - like 10 degrees - way too cold to spray. if you do it will take ages to dry and may develop runs and be messy.
alternately do what i did. into the laundry or any other small area and hook up a 2000watt panel heater.
takes about half hour to warm up and your in business and ready to go
Image

while you area is heating up you can get on with the masking
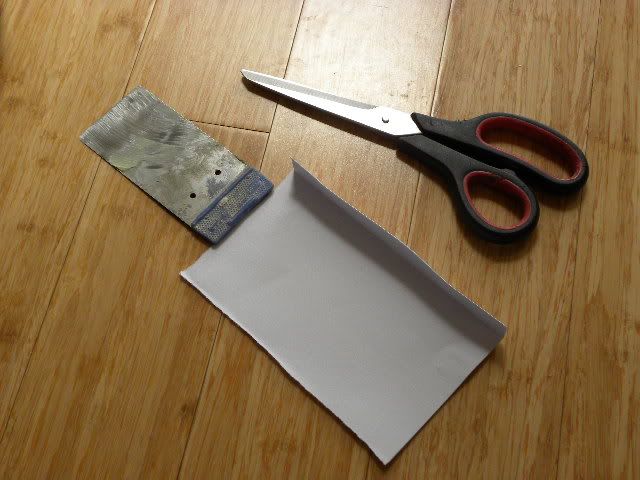
to make this easier use something like this
Image

get some A4's cut to quarters then fold the bottom egde up 10mm. slide in your applicator then slip it in behind the door card and follow on around the door trim
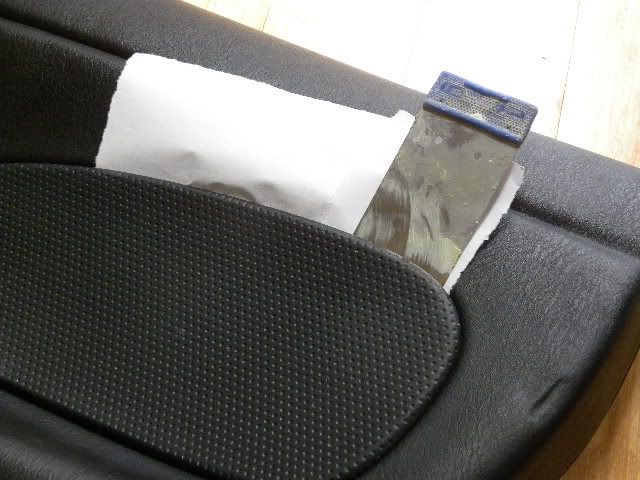
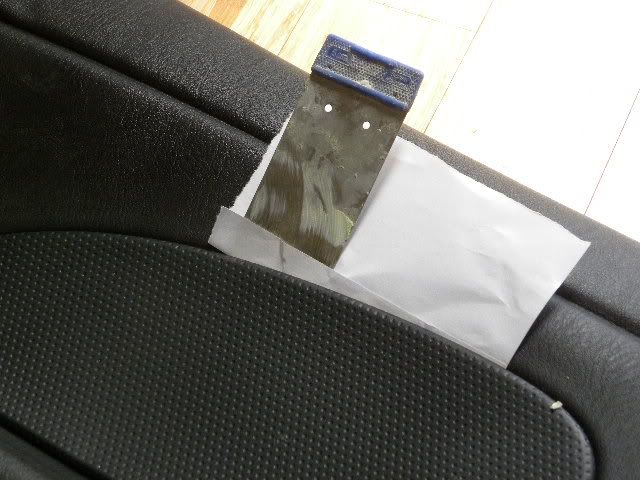
Image

Image

once you have everything masked up it's time to spray. give it a good shake for 2 minutes :wink: and do the same to the can :lol:
seriously, shake the can upside down for 2 full minutes to mix the paint thoroughly. i feel normal can shaking does not mix it well. after-all it's only a ball bearing doing the work. working the can upside down has the thick concentrate of paint at the high end -not the low.
with the paint i used i worked about 45 centimetres from the job. give the area a light coat -LIGHT!!!
place it in your drying room and go on to the next bit. by the time you do all three bits - here's what your pressure can sprayer looks like
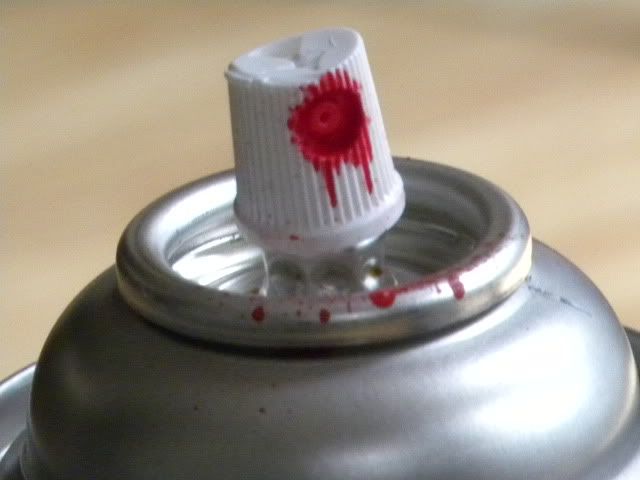
Image

now before you go to coat 2 allow 10 to 15 minutes and clean the spray nozzle. why? it will probably save you an unexpected burst of paint on you work . so keep it CLEAN!
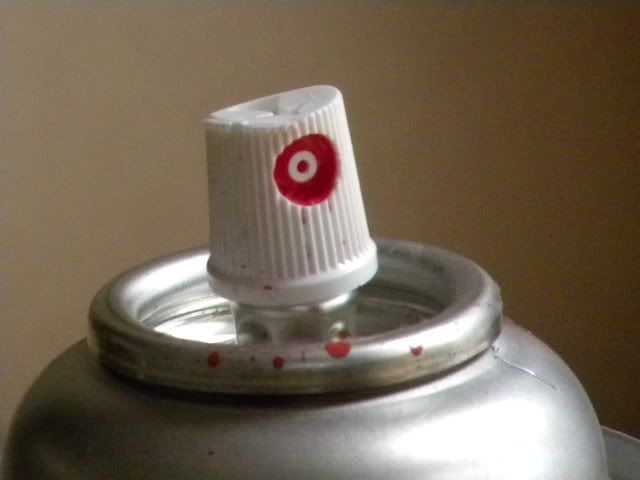
Image

during the painting of the door card - up came a grease mark. there were 4 dots in all over two sections
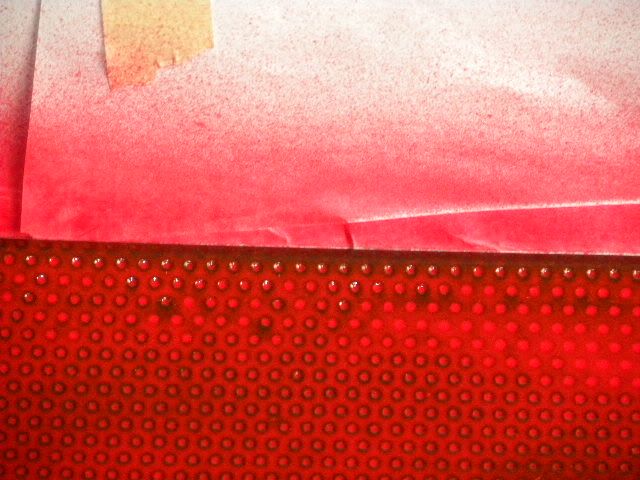
Image

only thing was to do was to totally rub out the areas with the grease/wax remover
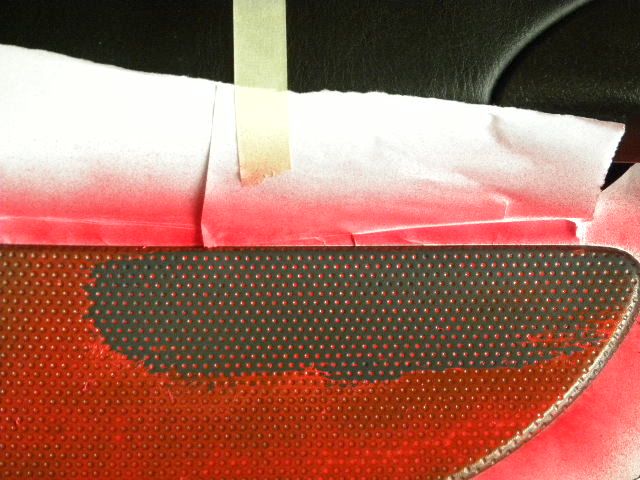
Image

Image

don't worry it's no big deal. clean the area up but make sure you don't leave any rough areas. if you have a couple of the rough areas give them a light rub with 600 wet/dry paper - again LIGHT! to smooth 'em out

now give go back to step one and give it a light spray. don't spray the total area - just the re-work.

here's a completed work photo of the mess taken about 2 hours later. looks good and everything is fine
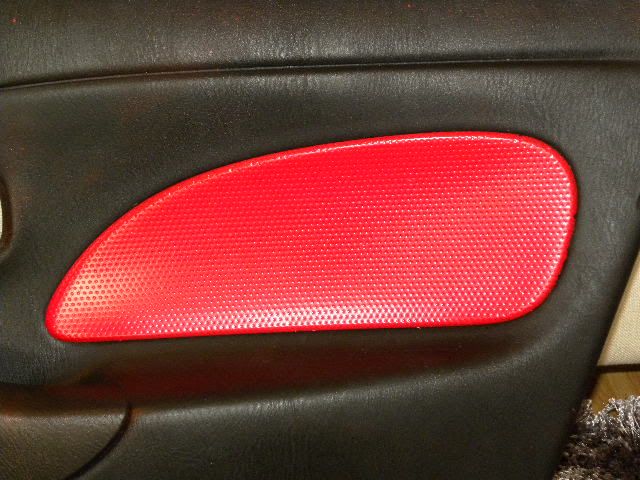
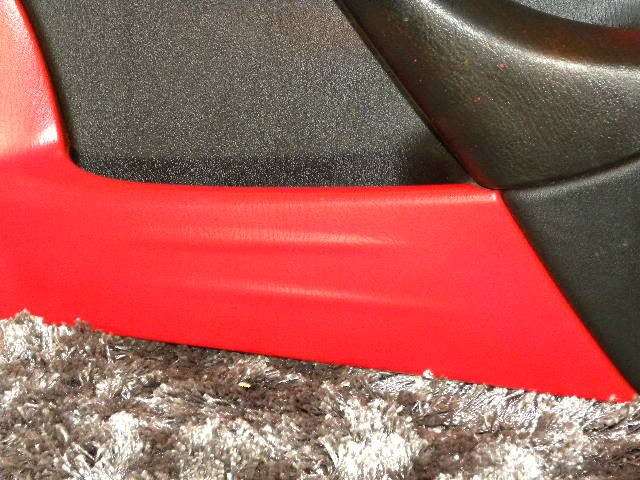
Image

Image

about 3 hours later the panel is completed with about 5 or 6 light coats of the vinyl paint. say 15 to 30 minutes flash times between the coats.
don't try spraying coat after coat in a short period of time. all you'll do is slap wet on wet and the paint will be soft and easily damaged. so please allow yourself proper drying time.
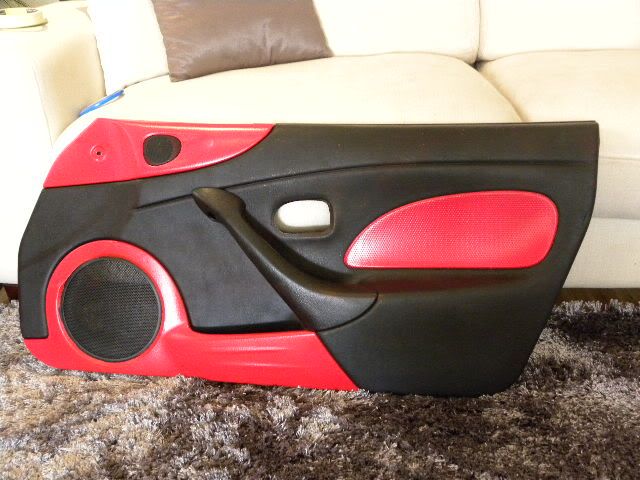
Image

any-way it's not a perfect job but it's good enough for me. eyes are shot and i have to get other members of the family to mask so i'm never in full control.
but for you younger blokes it should be a push over. hope this of some use to future door card/ interior/exterior sprayers. it's all the same process.
now would i use the 3m vinyl again - not if i could get the vht vinyl dye. i wasn't really happy with the spray can nozzle. at times it shot jets of vinyl paint
i recall using other spray cans say 20 cm from the work area -but 45 cm was :roll: and at times spray control was non existant.
on the other hand i might have had a crappy spray nozzle. one quick point to end. always pre fire the spray can nozzle elsewhere and not on the job. after a break it's usually the first burst that produces a paint splatter or excessive paint and a run.
enjoy your work and have fun. if you make a mistake its no big deal. rub it out and try again
cheers
davidau
Fast Driver
Posts: 149
Joined: Wed Aug 11, 2010 12:20 am
Vehicle: NA6
Location: Melbourne, VIC

Re: billybunters - from a bmw z4 to a mx5 se

Postby davidau » Mon Oct 10, 2011 5:46 pm

Thanks for documenting this step by step I am sure this will become very handle for people who want to DIY and have no ideas where to start with!! :mrgreen:
Leave your worries in God's hands

billybunter
Racing Driver
Posts: 1531
Joined: Thu Nov 11, 2010 4:54 pm
Vehicle: NB SE
Location: orange nsw

Re: billybunters - from a bmw z4 to a mx5 se

Postby billybunter » Mon Oct 10, 2011 7:14 pm

happy to be of assist :D

User avatar
Okibi
Speed Racer
Posts: 10912
Joined: Thu Aug 21, 2003 11:00 am
Vehicle: NB SE
Location: Perth, Western Australia
Contact:

Re: billybunters - from a bmw z4 to a mx5 se

Postby Okibi » Mon Oct 10, 2011 8:08 pm

Great write up, thanks for sharing.

I've bought some stuff from Bunnings that's meant to help paint bond to any surface (including glass), I wonder if it would be good to put a layer of this one once you've done the grease/wax remover.
If you had access to a car like this, would you take it back right away? Neither would I.

billybunter
Racing Driver
Posts: 1531
Joined: Thu Nov 11, 2010 4:54 pm
Vehicle: NB SE
Location: orange nsw

Re: billybunters - from a bmw z4 to a mx5 se

Postby billybunter » Mon Oct 10, 2011 9:56 pm

hi
there are some vinyl paints out there that require a plastic type primer prior to the top coat. this 3M and the VHT vinyl dye do away with that job.
probably best bet would be to trial a small area and see how it goes.

Apu
Speed Racer
Posts: 2399
Joined: Tue Apr 12, 2011 3:04 pm
Vehicle: NB8B
Location: North West, NSW

Re: billybunters - from a bmw z4 to a mx5 se

Postby Apu » Tue Oct 11, 2011 8:37 am

I noticed some overspray on the laundry floor...just wanted to see that you survived that? :lol:

billybunter
Racing Driver
Posts: 1531
Joined: Thu Nov 11, 2010 4:54 pm
Vehicle: NB SE
Location: orange nsw

Re: billybunters - from a bmw z4 to a mx5 se

Postby billybunter » Tue Oct 11, 2011 11:03 am

hi apu
very observant............wife saw it too :o while taking the photos i called here in to take a look at my new work. she appeared to looked down at my spray job and said.
"did you make that mess." :x
i replied "i thought they looked good to me" :D
she replied. " look at all that over spray on the tiles"
i replied. " oh that! I'll get you some all purpose thinners and you can have it looking like new in no time". :wink:

well that's how it thought it went. yes! i cleaned it up......but i'm back again today :beer:

Apu
Speed Racer
Posts: 2399
Joined: Tue Apr 12, 2011 3:04 pm
Vehicle: NB8B
Location: North West, NSW

Re: billybunters - from a bmw z4 to a mx5 se

Postby Apu » Tue Oct 11, 2011 12:31 pm

I'm glad you recall the conversation. I'd probably be suffering from impact induced amnesia.

billybunter
Racing Driver
Posts: 1531
Joined: Thu Nov 11, 2010 4:54 pm
Vehicle: NB SE
Location: orange nsw

Re: billybunters - from a bmw z4 to a mx5 se

Postby billybunter » Tue Oct 11, 2011 1:21 pm

back again - same place with newspaper on the floor. :wink: now working on the spraying of the centre console

billybunter
Racing Driver
Posts: 1531
Joined: Thu Nov 11, 2010 4:54 pm
Vehicle: NB SE
Location: orange nsw

Re: billybunters - from a bmw z4 to a mx5 se

Postby billybunter » Tue Oct 11, 2011 4:36 pm

today's project - centre console

Image


Return to “MX5 Garage Chat”

Who is online

Users browsing this forum: Google [Bot] and 5 guests