Slug Dub's NA
Moderators: timk, Stu, -alex, miata, StanTheMan, greenMachine, ManiacLachy, Daffy, zombie, Andrew, The American, Lokiel
- corners
- Racing Driver
- Posts: 1127
- Joined: Mon Aug 20, 2007 1:33 pm
- Vehicle: ND - Supercharged
- Location: Brisbane, QLD
Slug Dub's NA
I hadnt seen this thread til now!!
I see the mod bug has bitten hard!!!
Welcome and enjoy the many roads around SE Qld!!
PS Glad you enjoyed the Nebo & Samford run...
Cheers
Jaron
I see the mod bug has bitten hard!!!
Welcome and enjoy the many roads around SE Qld!!
PS Glad you enjoyed the Nebo & Samford run...
Cheers
Jaron
Steampunk wrote: Oh you've got Ohlins? You must like drugs too!!!
- slug_dub
- Racing Driver
- Posts: 1228
- Joined: Fri Jun 19, 2009 11:02 pm
- Vehicle: NA8
- Location: Brisbane
- Contact:
Slug Dub's NA
Purchased an exhaust from eBay... 4 in to 1 extractors all the way through to a Trust muffler. it has a 4 inch tip I'm not sure I dig too much 
Bought it because one of the rubber hangers on the existing muffler had broken and the movement had caused a crack on the join where the pipe in meets the muffler.
The new purchase arrived this week and just in time too... I went to Toowoomba last weekend and on the way home the pipe broke right off the muffler! A very noisy drive home
  Admittedly I hadn't purchased the new hangers and gaskets etc that I had planned to get for fitting the new one.
Fitted the mid pipe and muffler today, along with new rubber hangers all round. A very speedy process and wow... what no dramas?!?! Sound is a bit deeper than the stock and I like it quite a lot. 4 inch tip doesn't look quite so ridiculously large as I thought it might on the car but I think I'll still change it!
Will do the extractors one day soon, they need stripping back and some painting before they go on the car, and will grab some photos then as I totally forgot camera today
Bought it because one of the rubber hangers on the existing muffler had broken and the movement had caused a crack on the join where the pipe in meets the muffler.
The new purchase arrived this week and just in time too... I went to Toowoomba last weekend and on the way home the pipe broke right off the muffler!
Fitted the mid pipe and muffler today, along with new rubber hangers all round. A very speedy process and wow... what no dramas?!?! Sound is a bit deeper than the stock and I like it quite a lot. 4 inch tip doesn't look quite so ridiculously large as I thought it might on the car but I think I'll still change it!
Will do the extractors one day soon, they need stripping back and some painting before they go on the car, and will grab some photos then as I totally forgot camera today
The American wrote:hella sic stance flushing pard harker yolo something something.
- Okibi
- Speed Racer
- Posts: 10912
- Joined: Thu Aug 21, 2003 11:00 am
- Vehicle: NB SE
- Location: Perth, Western Australia
- Contact:
Slug Dub's NA
Look forward to seeing the photos. 
If you had access to a car like this, would you take it back right away? Neither would I.
- slug_dub
- Racing Driver
- Posts: 1228
- Joined: Fri Jun 19, 2009 11:02 pm
- Vehicle: NA8
- Location: Brisbane
- Contact:
Re: Slug Dub's NA
Not much to update as I haven't really been able to work on the car for ages... but cleaning out my phone of data I came across a photo I did take when the exhaust was changed...
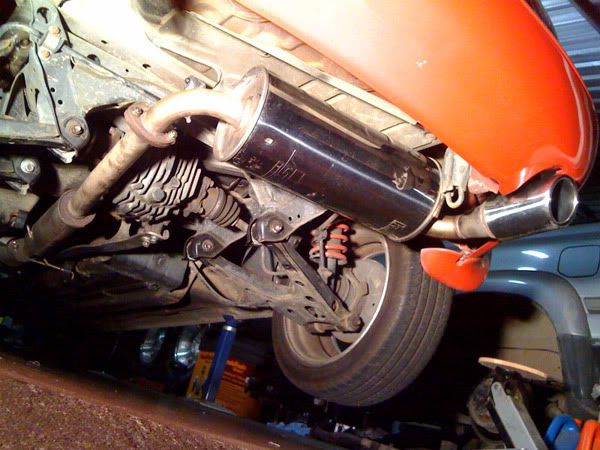
It will get taken off and the pipe cleaned and painted along with the extractors that are still to be fitted, and the tight arse bracket has yet to be put on... that'll sort the underneath out for the time being.
Being once again gainfully employed I've got a long list of stuff to get back into. Many plans for the interior mostly, and I'm trying to work out the best way to do a repaint of my wheels, since its the only set I have and I can't have them off for any length of time haha! I also have not been able to find a bolt that will fit the thread of the Rod Millen lip and it not being on the car is really starting to irk me!
The American wrote:hella sic stance flushing pard harker yolo something something.
- slug_dub
- Racing Driver
- Posts: 1228
- Joined: Fri Jun 19, 2009 11:02 pm
- Vehicle: NA8
- Location: Brisbane
- Contact:
Re: Slug Dub's NA
I've become a permanent resident of Toowoomba for the time being. Any other MX5cartalk posters up that way?
I saw a crazy black NA a few days back with a whole lot of body kit, bolts in the boot for what would be a huge wing, and scissor doors wow
wow
Ticking a few things off the to do list...
I found some bolts of the correct size I think finally for the lip, so I can get to that now.
Finally put on some bling I've had laying around for a while:
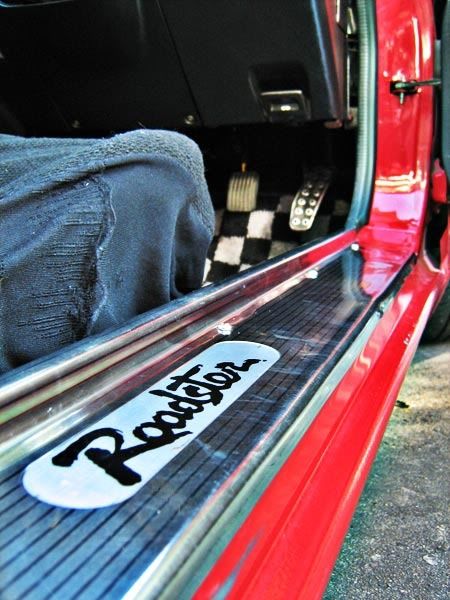
mmmm sill plates.
Next thing to be fixed is having a look at the door locks. The drivers is really loose and sticky with the key, and the passenger one seems to leave the handle stuck out instead of retracting.
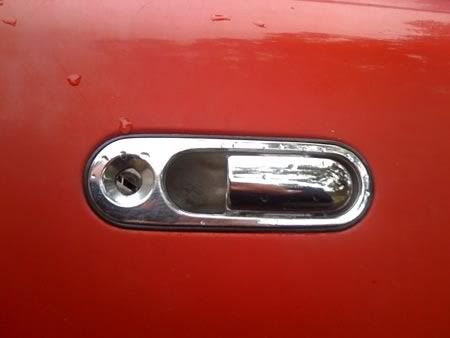
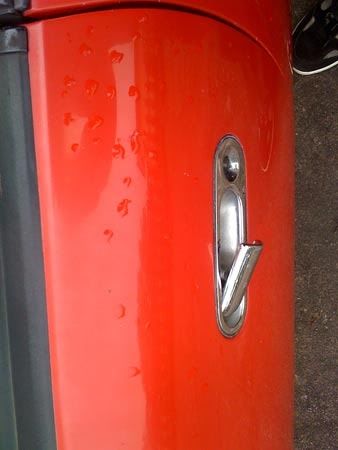
If they can be refreshed a bit it'll allow me to get going on some central locking action.
Washed, clayed, polished and waxed the toy for the first time in a while. The pics of those door locks might attest to how unshiny it was getting Here's a bit more post polish porn.
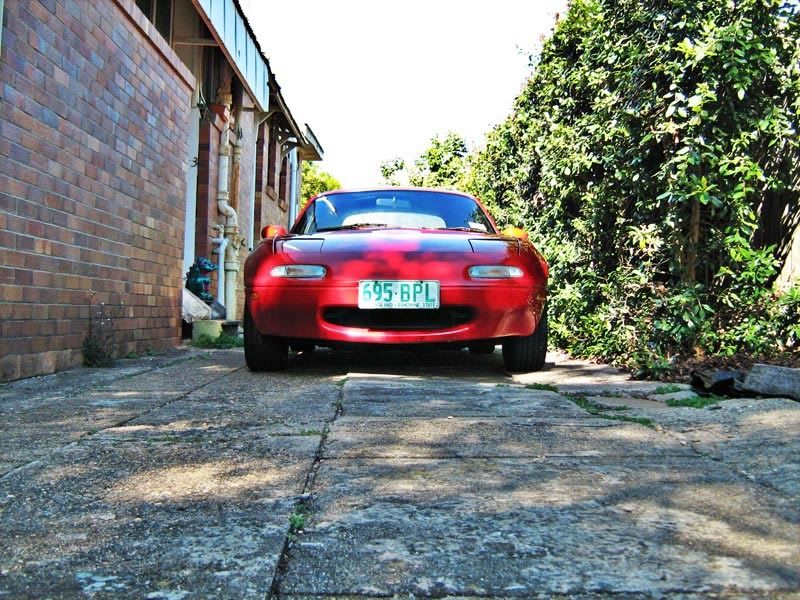
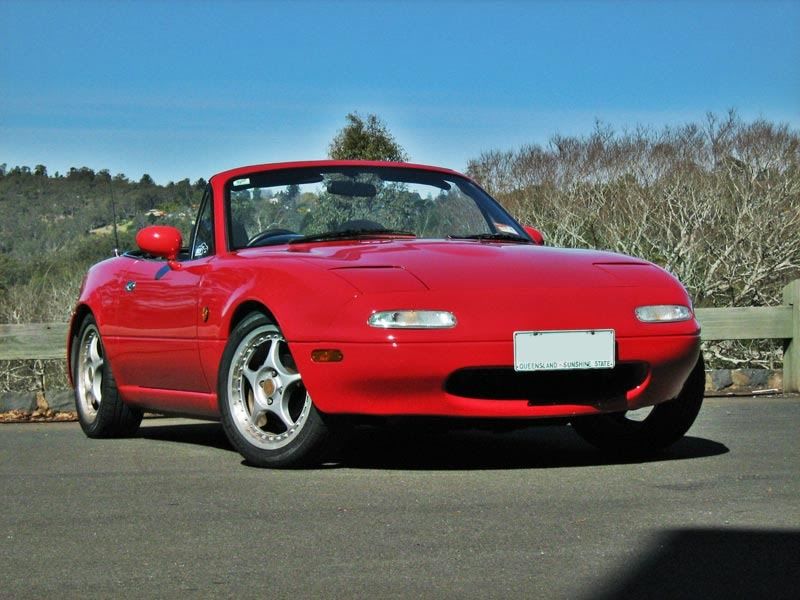
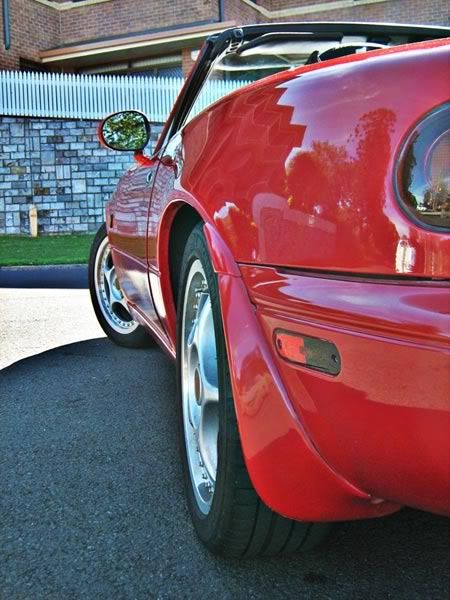
Scouring google maps a lot lately for nice roads to drive up here. Took a spin through Flagstone Creek which was nice though the twistiness is shortlived on that one. Next target is the Gatton-Clifton road.
Also going to Brisbane tomorrow and will take the long way via Hampton, Wivenhoe and Mt Glorious.
I saw a crazy black NA a few days back with a whole lot of body kit, bolts in the boot for what would be a huge wing, and scissor doors
Ticking a few things off the to do list...
I found some bolts of the correct size I think finally for the lip, so I can get to that now.
Finally put on some bling I've had laying around for a while:

mmmm sill plates.
Next thing to be fixed is having a look at the door locks. The drivers is really loose and sticky with the key, and the passenger one seems to leave the handle stuck out instead of retracting.


If they can be refreshed a bit it'll allow me to get going on some central locking action.
Washed, clayed, polished and waxed the toy for the first time in a while. The pics of those door locks might attest to how unshiny it was getting


Scouring google maps a lot lately for nice roads to drive up here. Took a spin through Flagstone Creek which was nice though the twistiness is shortlived on that one. Next target is the Gatton-Clifton road.
Also going to Brisbane tomorrow and will take the long way via Hampton, Wivenhoe and Mt Glorious.
The American wrote:hella sic stance flushing pard harker yolo something something.
- slug_dub
- Racing Driver
- Posts: 1228
- Joined: Fri Jun 19, 2009 11:02 pm
- Vehicle: NA8
- Location: Brisbane
- Contact:
Re: Slug Dub's NA
When my partner just happened to pull out a nicely sized spare piece of leather while I was reading Revlimiter's Padded Leather Armrest guide, I knew it was pre-ordained that I must make one. 
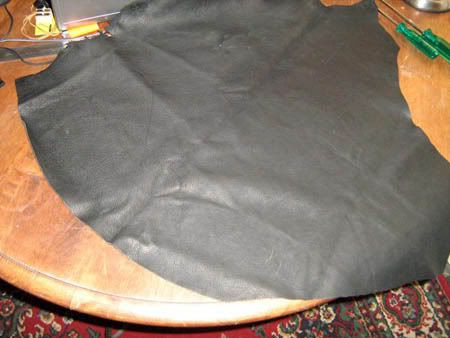
To Clark Rubber I sprang! To pick up an offcut of foam a little under an inch thick with a cardlike facing on one side that would make it easy to glue. One dollar.

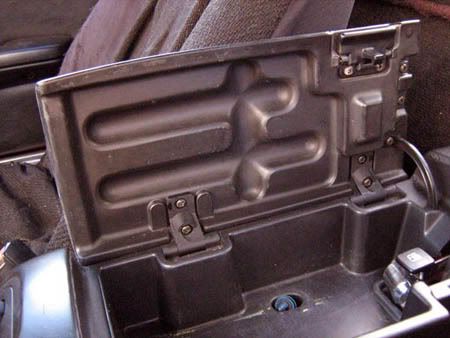
An easy start, unscrew all the screws you see here to free the console lid.
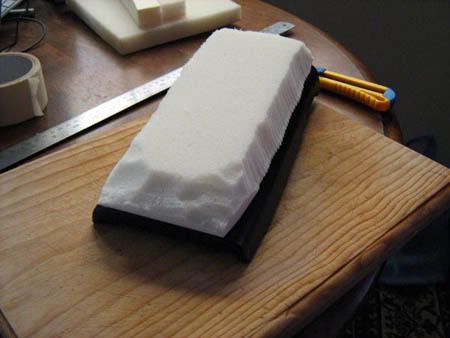
The foam cut to size, I proceeded to shear off the edges to shape it some. It was a little tricky to cut, especially small bits, the best way seems to be with a craft knife by using not too much pressure and a lot of sawing action. I don't know if its harder to cut than the foam Revlimiter used but it was a little difficult to cut finely. I anticipated that it would smooth out with the leather stretched over it anyway so I wasn't too concerned with a perfect shaping.
Glued it to the console lid with liquid nails. 8 dollars since we had run out of liquid nails.
Leather trimmed down a bit, with plenty to hold onto to stretch it, I started stapling furiously with ye olde staple gun. Your hands do get a bit tired but you have to stretch it as much as you can, probably more stretching than I did is good. I thought stapling it like you would staple an artists canvas would be the way to go, starting in the middle of a long side, then the opposite side, then the middle of the ends, and working out towards the corners, but it ended up being a bit easier to staple both long sides and then the ends to deal with the folds of the leather a bit more. After stapling I cut down the excess leather.
The finished stapling... (sorry for the blurriness in these ones!)
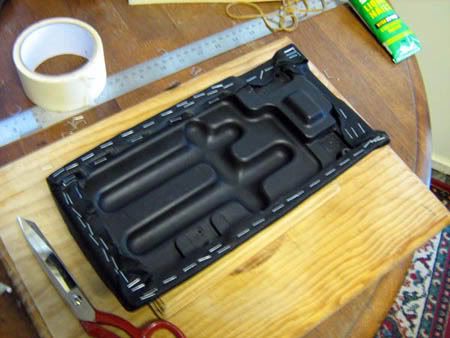
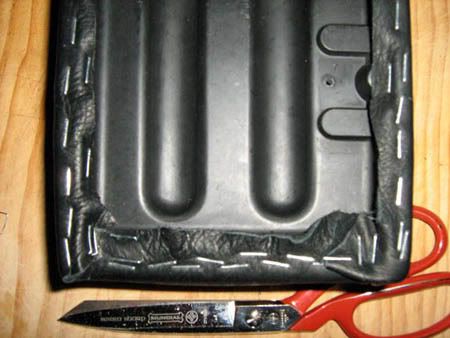
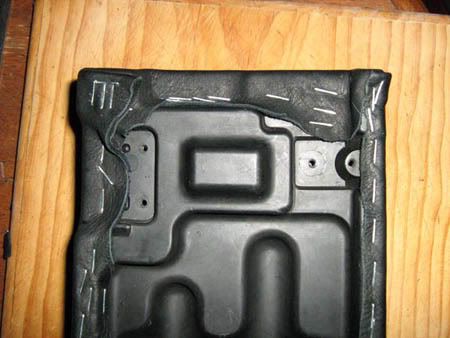
It looks a bit rough underneathe but I'm thinking I may add some stick on felt or velcro combined with a material sheet to line the inside of the cover to hide the stapling.
With a bit of care product applied to the leather it was ready to put back in the car.
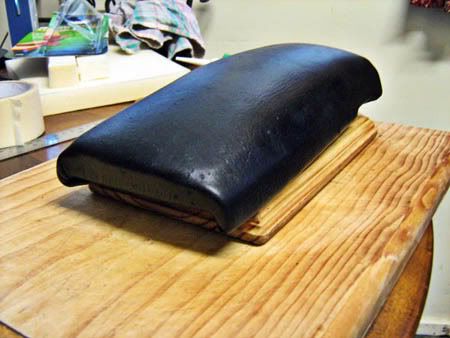
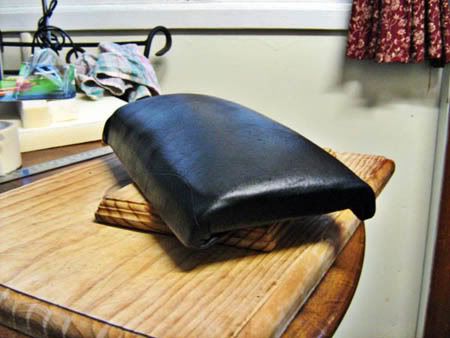
Out with the old...
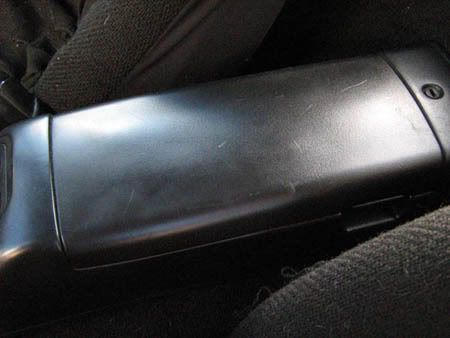
In with the new.
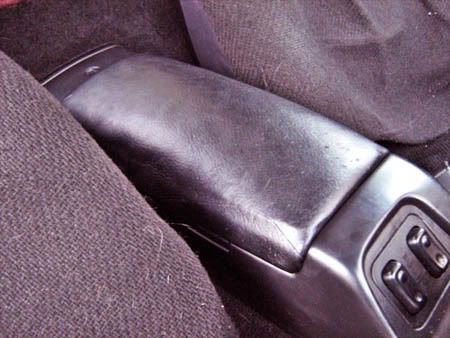
It fits snugly and tightly and is a stiff enough fit that if you're missing the spring in the latch like I am, it will no longer be loose. I punched holes though the leather over the screw holes to make the screws go back in easier, though I did strip the thread a bit on a couple of the holes winding those screws going back in since they just go into the plastic, but nothing loose enough to be a problem.
Its padded and its comfy, and an easy mod. All props to Revlimiter the originator!

To Clark Rubber I sprang! To pick up an offcut of foam a little under an inch thick with a cardlike facing on one side that would make it easy to glue. One dollar.

An easy start, unscrew all the screws you see here to free the console lid.

The foam cut to size, I proceeded to shear off the edges to shape it some. It was a little tricky to cut, especially small bits, the best way seems to be with a craft knife by using not too much pressure and a lot of sawing action. I don't know if its harder to cut than the foam Revlimiter used but it was a little difficult to cut finely. I anticipated that it would smooth out with the leather stretched over it anyway so I wasn't too concerned with a perfect shaping.
Glued it to the console lid with liquid nails. 8 dollars since we had run out of liquid nails.

Leather trimmed down a bit, with plenty to hold onto to stretch it, I started stapling furiously with ye olde staple gun. Your hands do get a bit tired but you have to stretch it as much as you can, probably more stretching than I did is good. I thought stapling it like you would staple an artists canvas would be the way to go, starting in the middle of a long side, then the opposite side, then the middle of the ends, and working out towards the corners, but it ended up being a bit easier to staple both long sides and then the ends to deal with the folds of the leather a bit more. After stapling I cut down the excess leather.
The finished stapling... (sorry for the blurriness in these ones!)


It looks a bit rough underneathe but I'm thinking I may add some stick on felt or velcro combined with a material sheet to line the inside of the cover to hide the stapling.
With a bit of care product applied to the leather it was ready to put back in the car.


Out with the old...

In with the new.

It fits snugly and tightly and is a stiff enough fit that if you're missing the spring in the latch like I am, it will no longer be loose.
Its padded and its comfy, and an easy mod.
The American wrote:hella sic stance flushing pard harker yolo something something.
- A.Chen89
- Racing Driver
- Posts: 509
- Joined: Thu Jun 10, 2010 6:09 pm
- Vehicle: NB8B - Turbo
- Location: Western Sydney
Re: Slug Dub's NA
if you want to shape the foam easier next time try a hot wire cutter,
arm rest looks comfy!
arm rest looks comfy!
- slug_dub
- Racing Driver
- Posts: 1228
- Joined: Fri Jun 19, 2009 11:02 pm
- Vehicle: NA8
- Location: Brisbane
- Contact:
Re: Slug Dub's NA
Lip painting in progress... at last! Only took a whole year to get around to it...
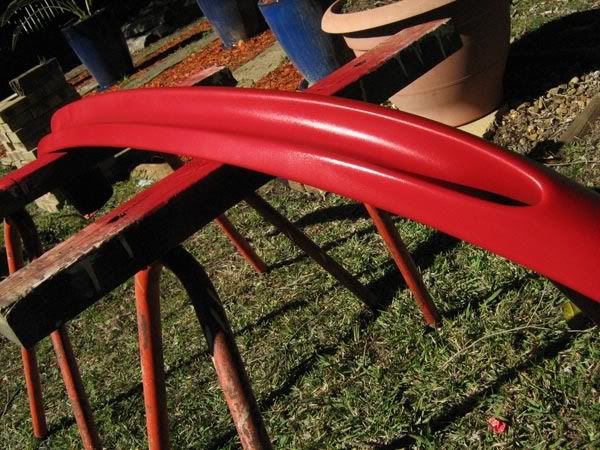
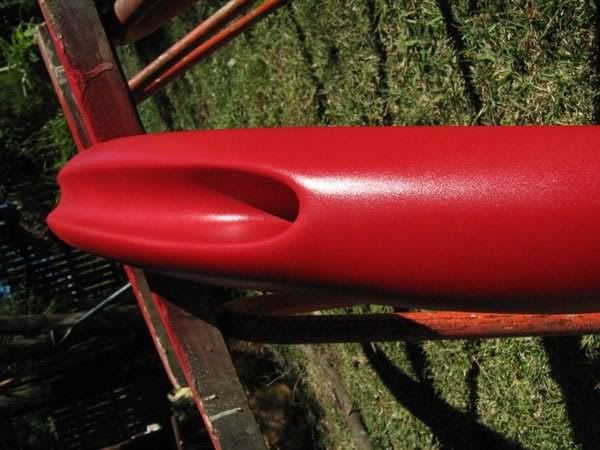
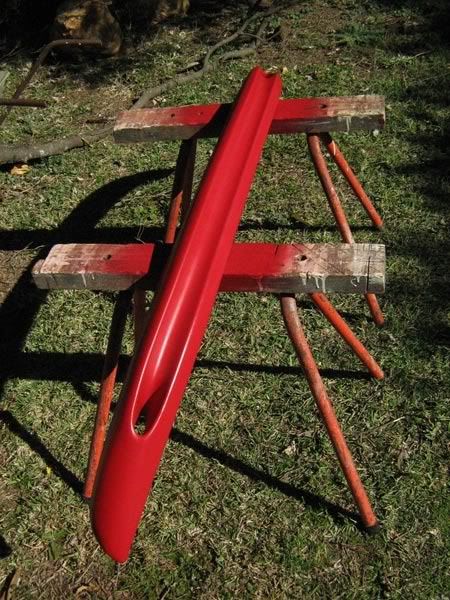
Had two cans and have already depleted them with 2 very thin coats to start and 3 coats a bit heavier.
So now need to sand, and acquire some more paint as I think it needs several more coats to be able to get it sanded down smooth.


Had two cans and have already depleted them with 2 very thin coats to start and 3 coats a bit heavier.
So now need to sand, and acquire some more paint as I think it needs several more coats to be able to get it sanded down smooth.
The American wrote:hella sic stance flushing pard harker yolo something something.
-
dmaccc
- Driver
- Posts: 45
- Joined: Thu Apr 15, 2010 11:07 pm
- Vehicle: NA6
- Location: Sydney - Bankstown
Re: Slug Dub's NA
by slug_dub: Next thing to be fixed is having a look at the door locks. The drivers is really loose and sticky with the key, and the passenger one seems to leave the handle stuck out instead of retracting.
Hi mate,
I've got the same problem with the door locks, in regards to the driverside some WD40 will do the trick.
I havent worked out why my passenger side has the same problem with the handle being stuck. So let me know if you come up with the idea. Only problem with it was that i couldnt lock the door (from the inside) if the handle was stuck open (which can be easily avoided with a little more care from my gf
Also, I had no issue in putting central locking on with the problems above tho. So I don't think you need to hinder the process of central locking its likea necessity!!
My 1993 Brilliant Black NA6, My First and Only Car. 
- Okibi
- Speed Racer
- Posts: 10912
- Joined: Thu Aug 21, 2003 11:00 am
- Vehicle: NB SE
- Location: Perth, Western Australia
- Contact:
Re: Slug Dub's NA
I put the jaycar kit in my NA6, very easy to do. Recently I had one of the solenoids hyper extend and seize on me, they're cheap to replace but it was easy enough to drill out the rivets, unseize and replace the rivets with tiny nuts and bolts.
If you had access to a car like this, would you take it back right away? Neither would I.
- slug_dub
- Racing Driver
- Posts: 1228
- Joined: Fri Jun 19, 2009 11:02 pm
- Vehicle: NA8
- Location: Brisbane
- Contact:
Re: Slug Dub's NA
dmaccc wrote:Only problem with it was that i couldnt lock the door (from the inside) if the handle was stuck open (which can be easily avoided with a little more care from my gf)
The very same happens here! Polite coaxing has fixed the gf issue though hah
I'll be going for the central locking regardless of the locks getting some servicing love I'd like to get a keyless entry device to go with it anyway which would see much less use of the locks directly. Mx5centre.com.au have a complete lock/ ignition barrel set on special which is kind of tempting but I can think of far more fun things to spend on...
The American wrote:hella sic stance flushing pard harker yolo something something.
-
dmaccc
- Driver
- Posts: 45
- Joined: Thu Apr 15, 2010 11:07 pm
- Vehicle: NA6
- Location: Sydney - Bankstown
Re: Slug Dub's NA
Like Okiba said, you can get the Jarcar kits, there is a remote central locking kit for about 70 bucks (no actuators included tho). Not worth paying extra $ for installation i reckon.
Its a easy job to do if you give yourself half a day at max.
Its a easy job to do if you give yourself half a day at max.
My 1993 Brilliant Black NA6, My First and Only Car. 
-
FMS01
- Fast Driver
- Posts: 151
- Joined: Sun Mar 05, 2006 5:48 pm
- Vehicle: ND - 2 GT
- Location: Brisbane
- Contact:
Re: Slug Dub's NA
slug_dub wrote:Lip painting in progress... at last! Only took a whole year to get around to it...
Had two cans and have already depleted them with 2 very thin coats to start and 3 coats a bit heavier.
So now need to sand, and acquire some more paint as I think it needs several more coats to be able to get it sanded down smooth.
I've been keeping an eye on this thread to see when you'd get around to installing it!
Cheers,
Julian
- slug_dub
- Racing Driver
- Posts: 1228
- Joined: Fri Jun 19, 2009 11:02 pm
- Vehicle: NA8
- Location: Brisbane
- Contact:
Re: Slug Dub's NA
Hehe sorry to have been keeping ya waiting! 
The American wrote:hella sic stance flushing pard harker yolo something something.
- slug_dub
- Racing Driver
- Posts: 1228
- Joined: Fri Jun 19, 2009 11:02 pm
- Vehicle: NA8
- Location: Brisbane
- Contact:
Re: Slug Dub's NA
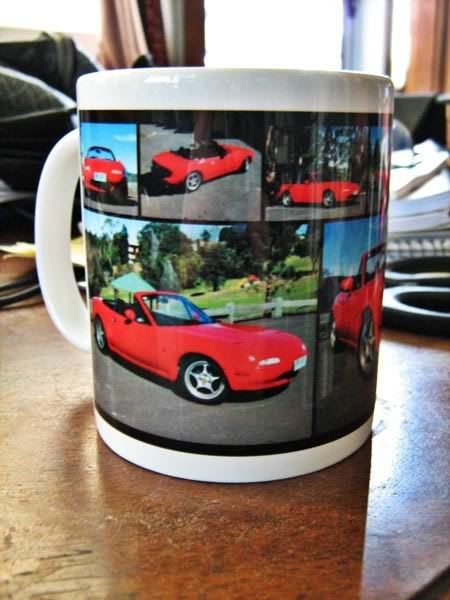
Courtesy of Snapfish, arrived today! 
Front lip has now many coats of clearcoat and will wait out the week curing, before a polish and fitting over the weekend.
Also should be fitting something else over the weekend as well...

Front lip has now many coats of clearcoat and will wait out the week curing, before a polish and fitting over the weekend.
Also should be fitting something else over the weekend as well...
The American wrote:hella sic stance flushing pard harker yolo something something.
Who is online
Users browsing this forum: No registered users and 9 guests


