Rolley - It's A Boy! (NA6)
Moderators: timk, Stu, -alex, miata, StanTheMan, greenMachine, ManiacLachy, Daffy, zombie, Andrew, The American, Lokiel
- Rolley
- Racing Driver
- Posts: 564
- Joined: Fri Nov 15, 2013 6:59 am
- Vehicle: NA6
- Location: Brisbane
Re: Rolley - It's A Boy! (NA6)
Cheers Lokiel,
I managed to mask off the breather pipe but then I got a bit carried away...
I'll get off as much as I can but next stop for any that does come away is the sump really and it'll be pretty soft after soaking in oil so wont do any damage before it hits the oil filter. The real problem in not cleaning it off will be it sticking the oil cap permanently into the threads when the paint swells.
I also need to dig up a new PCV Grommet before it can go on. The old one had turned into some form of concrete.
That 10AE looks buggered. Salted roads, no thanks.
- Rolley
- Racing Driver
- Posts: 564
- Joined: Fri Nov 15, 2013 6:59 am
- Vehicle: NA6
- Location: Brisbane
Re: Rolley - It's A Boy! (NA6)
I've still done nothing with the floor...
I have tried though. I headed over to help a friend who was swapping shells. I'm not 100% on the specs but the Pink one was originally a clubman, then a drift car which had a Honda of some description under the bonnet. the body was beaten and metallic pink. Everything is slowly making it's way across to a very tidy NA6 red shell.
He wanted the Pink one cut up into ute sized pieces so he could get rid of it. I've got a bit of experience at this now so I offered to split it into 3 parts if I could crow pick the remains for what I needed. Small problem, one of his mates decided to help me out by making a start on cutting out the floor, he cut right down the center of the panel I needed... sh*t. Also the fuel tank was still in place with no sender cover and about 20L of fuel in it. Lines were removed from the body but still on the ground under the car connected to the tank.
All of the fuel system was properly removed and I got to work dismembering the body.
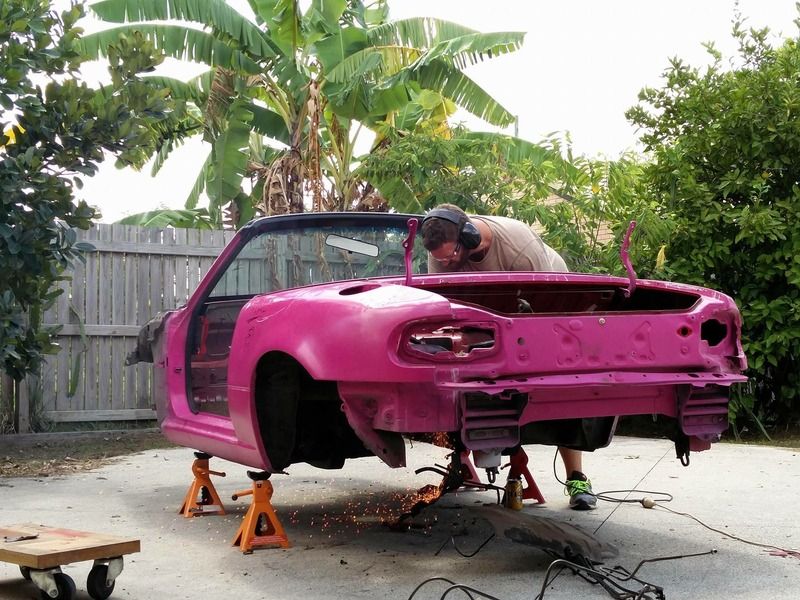
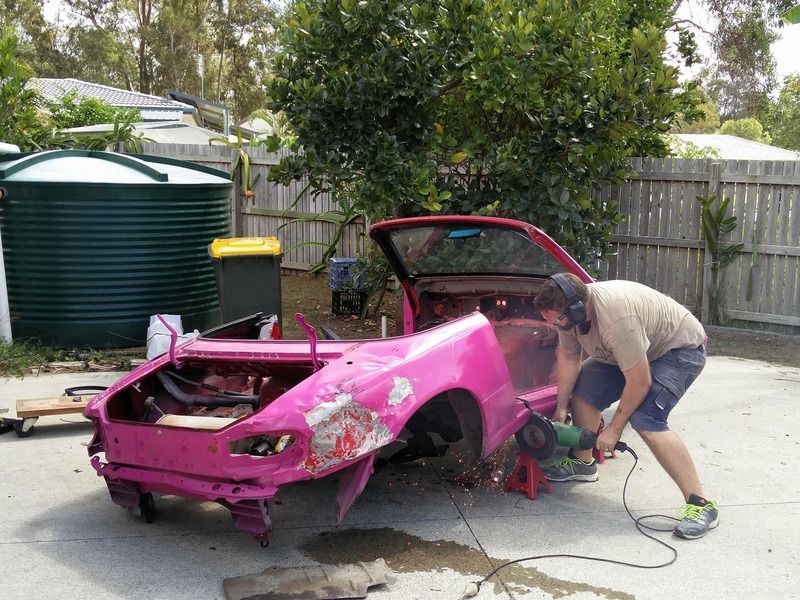
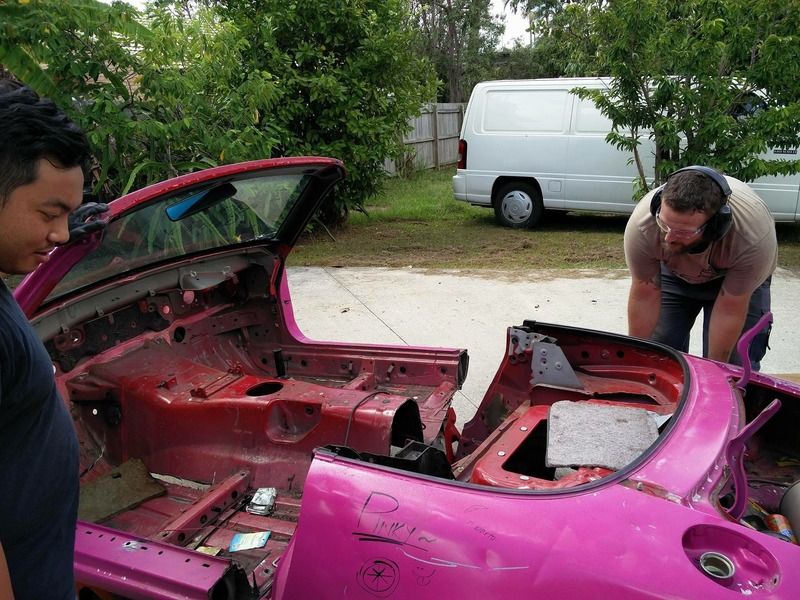
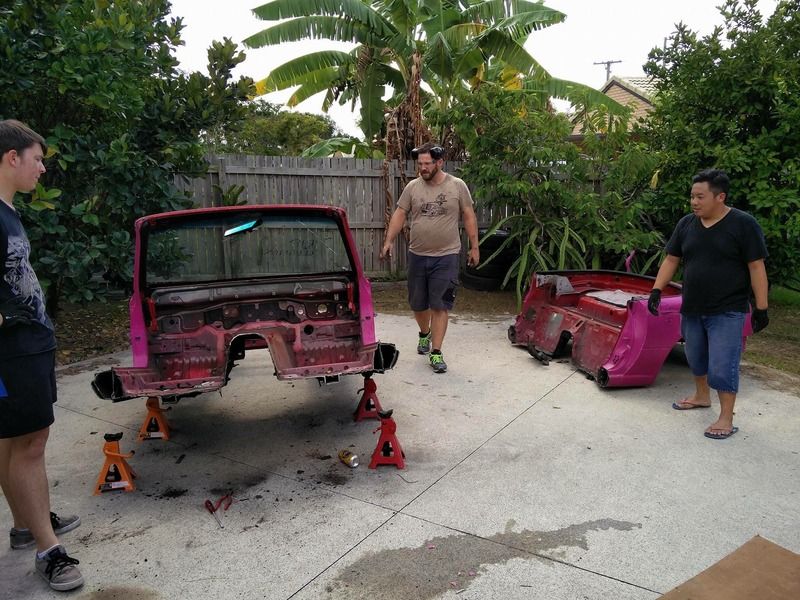
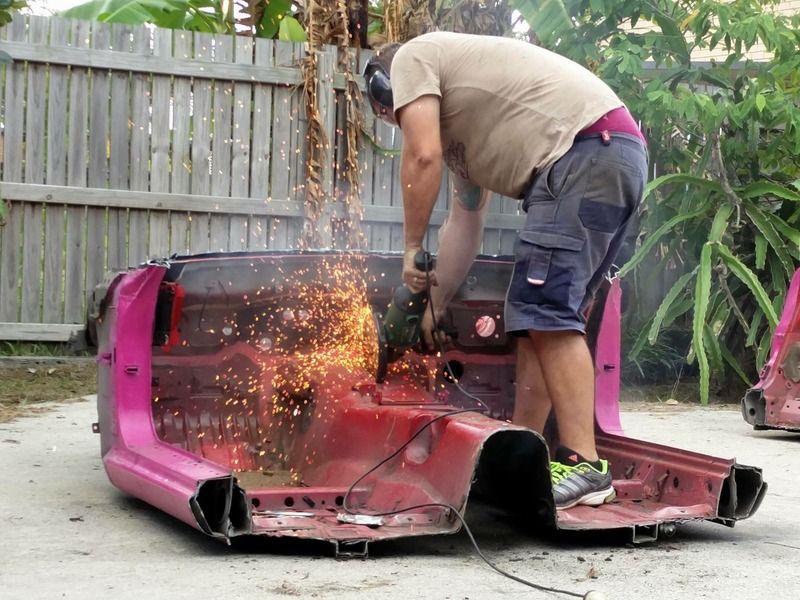
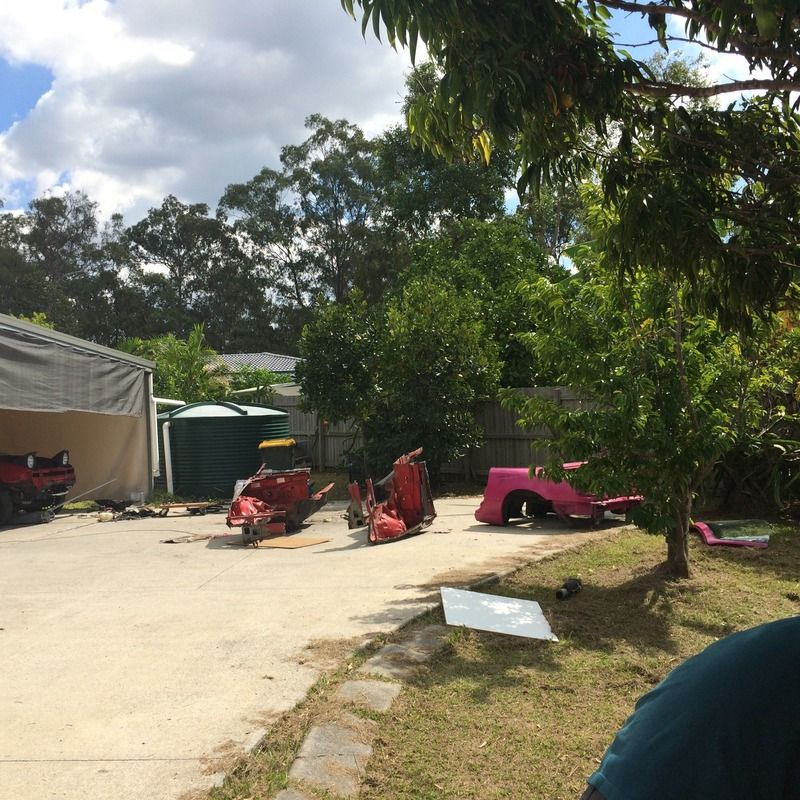
So looks like its back to Plan "B" and I'll bend up my own floorpan. I did walk away with a fuel tank and a pair of mud flaps for my trouble though, I call that a win.
I have tried though. I headed over to help a friend who was swapping shells. I'm not 100% on the specs but the Pink one was originally a clubman, then a drift car which had a Honda of some description under the bonnet. the body was beaten and metallic pink. Everything is slowly making it's way across to a very tidy NA6 red shell.
He wanted the Pink one cut up into ute sized pieces so he could get rid of it. I've got a bit of experience at this now so I offered to split it into 3 parts if I could crow pick the remains for what I needed. Small problem, one of his mates decided to help me out by making a start on cutting out the floor, he cut right down the center of the panel I needed... sh*t. Also the fuel tank was still in place with no sender cover and about 20L of fuel in it. Lines were removed from the body but still on the ground under the car connected to the tank.
All of the fuel system was properly removed and I got to work dismembering the body.


So looks like its back to Plan "B" and I'll bend up my own floorpan. I did walk away with a fuel tank and a pair of mud flaps for my trouble though, I call that a win.
-
joshuam
- Fast Driver
- Posts: 241
- Joined: Sat Mar 21, 2015 11:24 pm
- Vehicle: NB8B
- Location: Brisbane (southside), QLD
Re: Rolley - It's A Boy! (NA6)
That is very frustrating about already getting a cut through the floor panel -.-
Car is looking great as always!
Car is looking great as always!
-
Magpie
- Speed Racer
- Posts: 7468
- Joined: Fri Feb 11, 2011 12:49 pm
- Vehicle: NA6
- Location: Purga, QLD
Re: Rolley - It's A Boy! (NA6)
How urgent is the floor panel? I still have to decide what to do with the shell at home, more than likely it will be removed so that another project can start. All I need to do is remove the loom, steering, control arms and it would be surplus.
Rumour is a dodgy day is being planned...
Rumour is a dodgy day is being planned...
- Rolley
- Racing Driver
- Posts: 564
- Joined: Fri Nov 15, 2013 6:59 am
- Vehicle: NA6
- Location: Brisbane
Re: Rolley - It's A Boy! (NA6)
Thanks Magpie,
As we discussed, let me know when you're all done with it and I will gladly take you up on that offer!
The last couple of months I have been working more on others Mazdas than Rolley. I've replaced a couple of broken pedal boxes with my reinforced units, helped remove stubborn steering wheels and have done a NA6 to NB8B brake swap as well as new shocks.
So I was due to spend some quality time with Rolley.
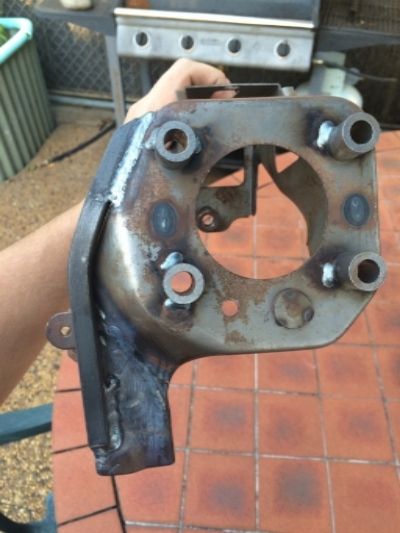
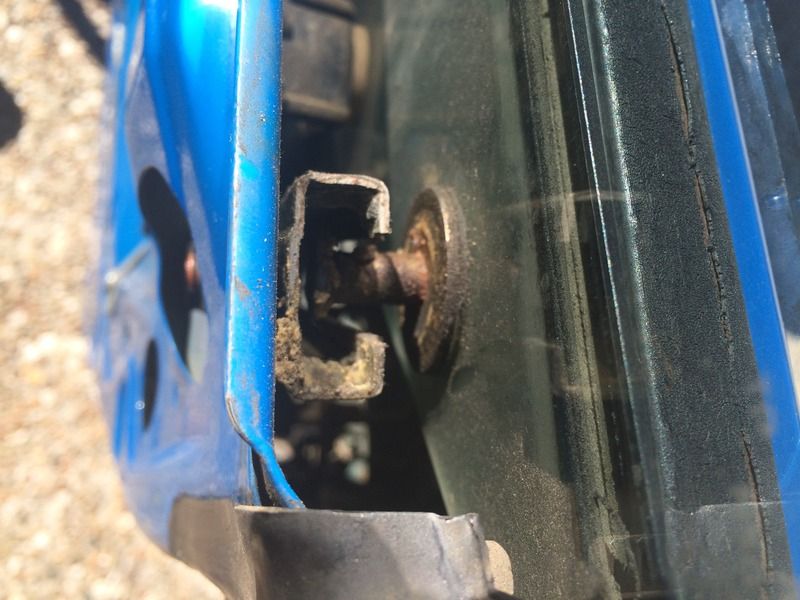
The drivers door sounds like a paint can full of bolts being thrown at a wall when you shut it. The passengers side is better but not compared to some cars I have come across lately. The noise is 90% caused by the fact the nylon rear guides on the window glass are non-existent, the center bolt for the guide bangs back and fourth in the track as the glass flexes.
The bushes on both of my windows are nothing but powdered crumbs in the bottoms of the doors now so I decided this was my next project.
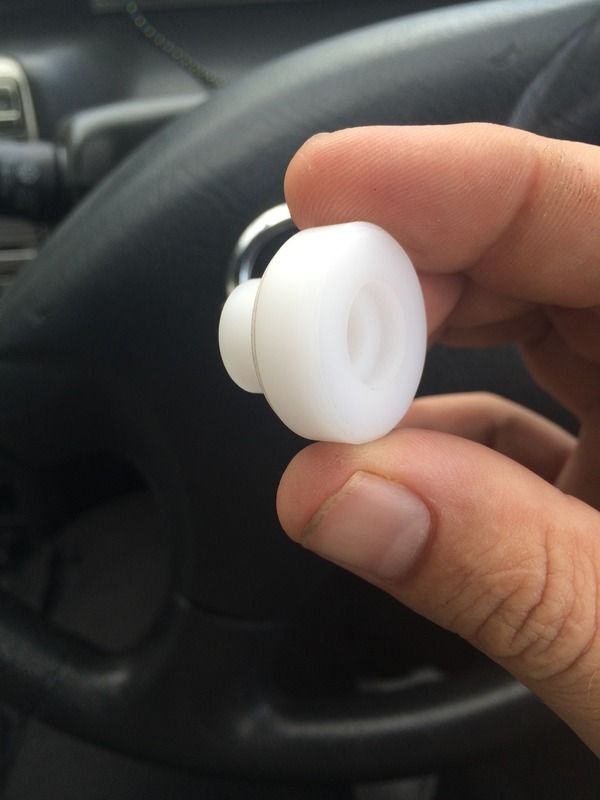
With the dollar the way it is at the moment it costs between $70-$100 to get a pair of these landed from the states so I did some measurements and went and got a whole bunch turned up from PTFE impregnated Acetal.
This weekend will be the crunch test. I'll strip down my doors and clean them out. Degrease and Regrease the window regulators and door latches and fit my new Bushes and regrease their track. I will do a bit of a walk through on how to replace them, I apoligise in advance if I don't go nuts on the photos. I have a habit of getting caught in the job and I'm finished before I remember the camera was there.
I also succumbed to the hype and ordered myself a tube of the Honda Shin-Etsu Grease. There are lots of recommendations around but it is the only one to get nothing but positive feedback. Of course it's a discontinued part in Oz according to the 3 dealers and couple of motorbike shops I called so eBay to the rescue on that one.
Here is and example of a GOOD original nylon window guide bush. Mine are just the stub, the whole top sections of mine are missing...
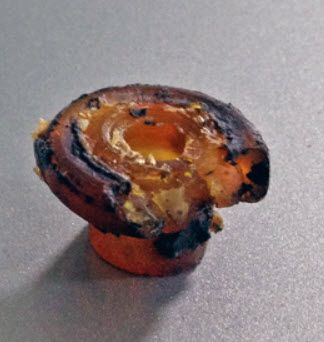
And one of the Acetal ones I had made
Roll on Friday!!!
As we discussed, let me know when you're all done with it and I will gladly take you up on that offer!
The last couple of months I have been working more on others Mazdas than Rolley. I've replaced a couple of broken pedal boxes with my reinforced units, helped remove stubborn steering wheels and have done a NA6 to NB8B brake swap as well as new shocks.
So I was due to spend some quality time with Rolley.

The drivers door sounds like a paint can full of bolts being thrown at a wall when you shut it. The passengers side is better but not compared to some cars I have come across lately. The noise is 90% caused by the fact the nylon rear guides on the window glass are non-existent, the center bolt for the guide bangs back and fourth in the track as the glass flexes.
The bushes on both of my windows are nothing but powdered crumbs in the bottoms of the doors now so I decided this was my next project.
With the dollar the way it is at the moment it costs between $70-$100 to get a pair of these landed from the states so I did some measurements and went and got a whole bunch turned up from PTFE impregnated Acetal.
This weekend will be the crunch test. I'll strip down my doors and clean them out. Degrease and Regrease the window regulators and door latches and fit my new Bushes and regrease their track. I will do a bit of a walk through on how to replace them, I apoligise in advance if I don't go nuts on the photos. I have a habit of getting caught in the job and I'm finished before I remember the camera was there.
I also succumbed to the hype and ordered myself a tube of the Honda Shin-Etsu Grease. There are lots of recommendations around but it is the only one to get nothing but positive feedback. Of course it's a discontinued part in Oz according to the 3 dealers and couple of motorbike shops I called so eBay to the rescue on that one.
Here is and example of a GOOD original nylon window guide bush. Mine are just the stub, the whole top sections of mine are missing...

And one of the Acetal ones I had made

Roll on Friday!!!
- Rolley
- Racing Driver
- Posts: 564
- Joined: Fri Nov 15, 2013 6:59 am
- Vehicle: NA6
- Location: Brisbane
Re: Rolley - It's A Boy! (NA6)
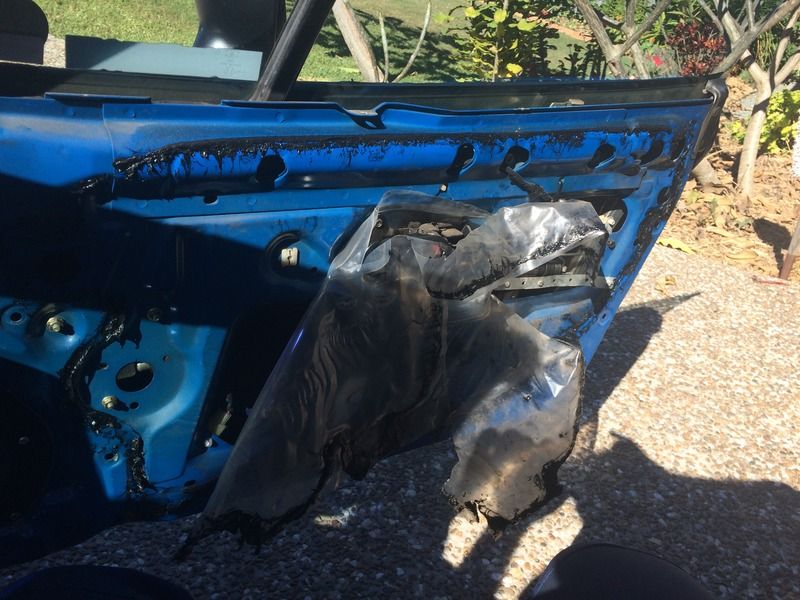
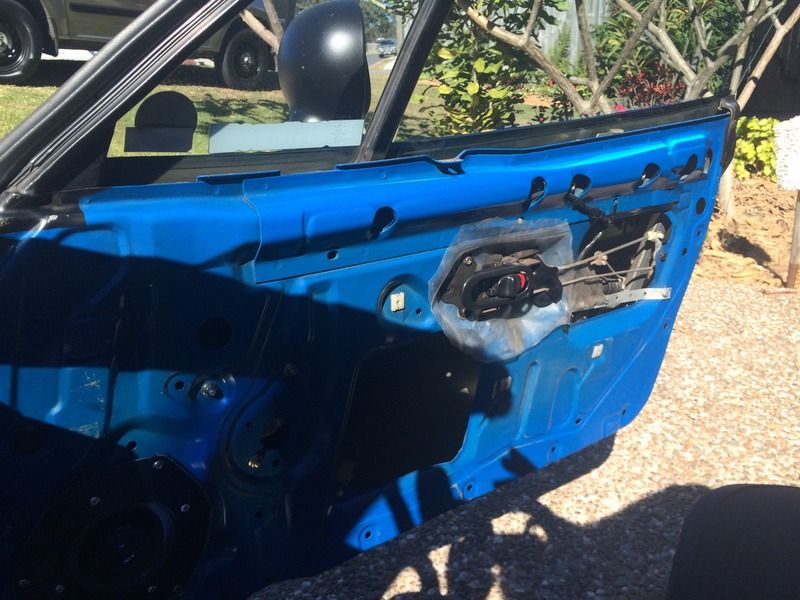
I made a start but after cleaning down the massive mess the vapour barrier mastic had left behind the door cards went back on as the call to the pub was greater.
I wound up just cutting the old vapour barriers off and scrubbing the doors down with petrol to remove the mastic. Nothing else was going to cut it off without taking days. I'll find some heavy builders plastic to make new vapour barriers and hopefully some repositionable double sided tape to refit them and avoid this disaster happening again.
I thought I got a shot of the new guide slotted into the rail but I can't find it.


-
Magpie
- Speed Racer
- Posts: 7468
- Joined: Fri Feb 11, 2011 12:49 pm
- Vehicle: NA6
- Location: Purga, QLD
Re: Rolley - It's A Boy! (NA6)
By the way a heat gun works to get that black 'gunk' off, heat it up and wipe it off.
- Rolley
- Racing Driver
- Posts: 564
- Joined: Fri Nov 15, 2013 6:59 am
- Vehicle: NA6
- Location: Brisbane
Re: Rolley - It's A Boy! (NA6)
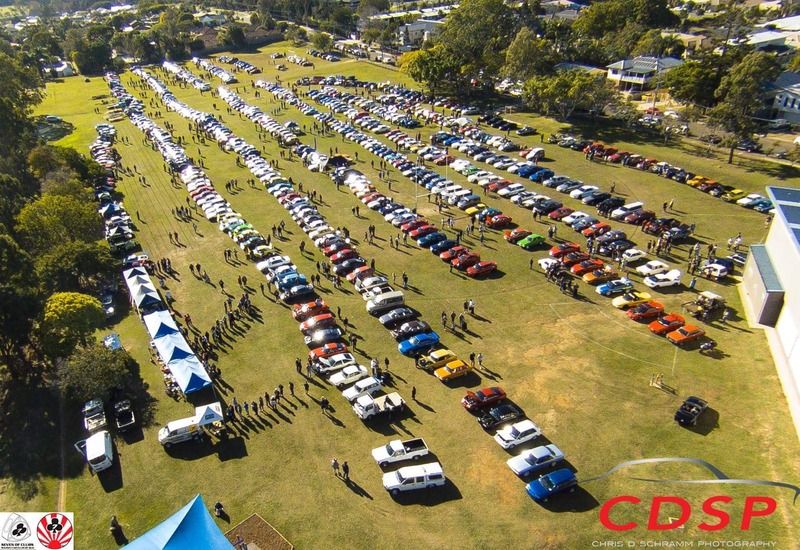
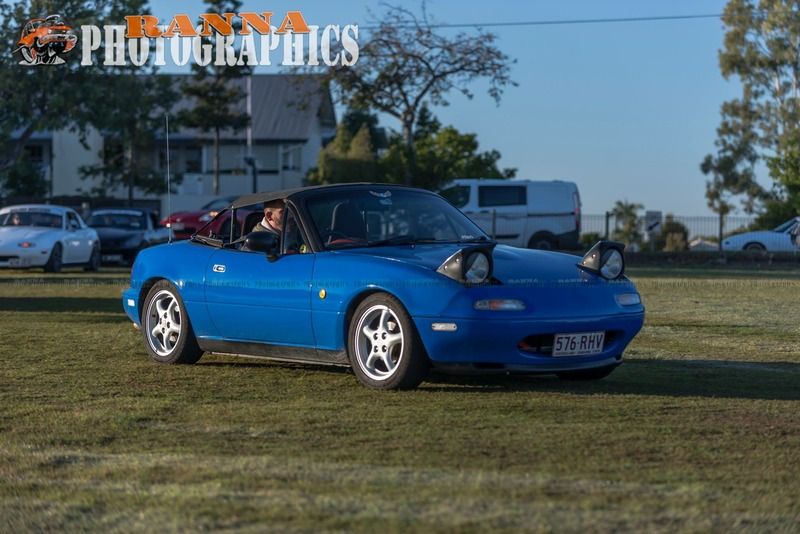
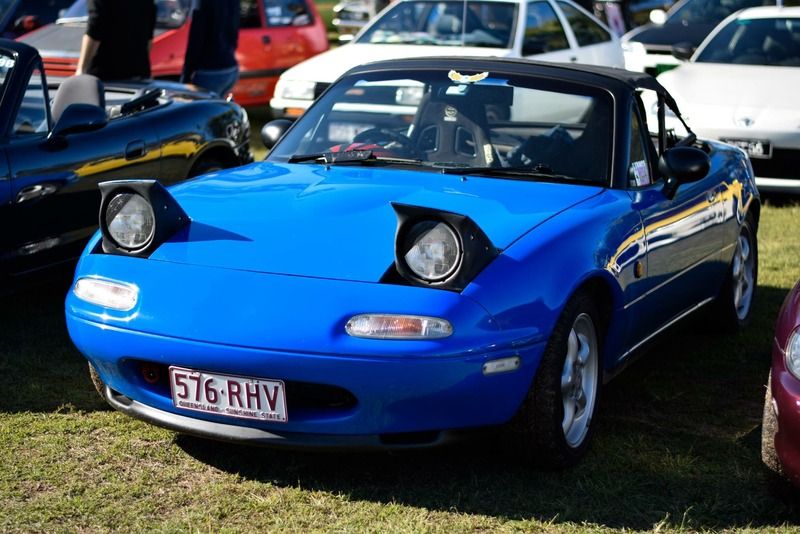
I made it to a Cars'n'Coffee! Not sure it will ever happen again but it's nice when the stars align for a weekend of nothing but cars.
It was good to meet SlugDub and a big thanks for the beltline mouldings, only the drivers has been installed so far but it has shaved 10yrs off the appearance age of the car.
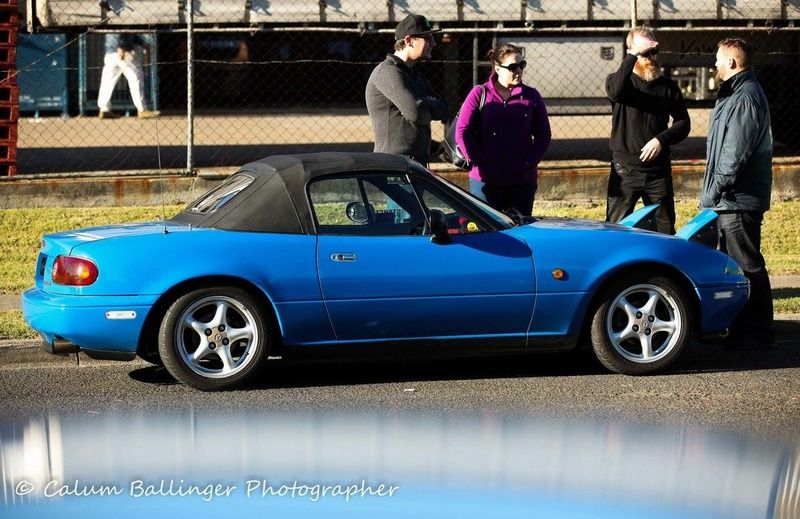
All Jap Day and the pre meet were a good day out.
It's always good to hang around and just talk cars...
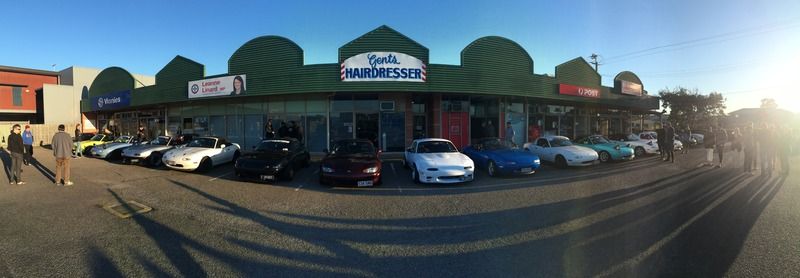
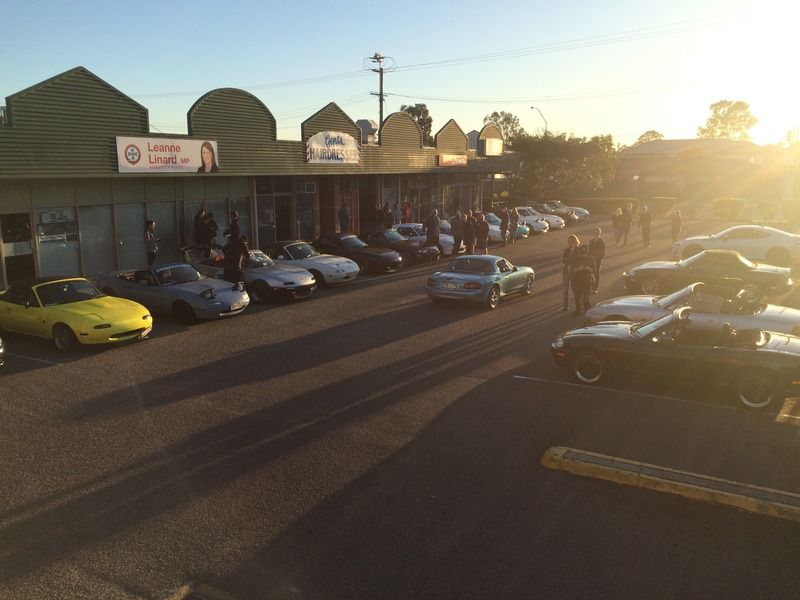
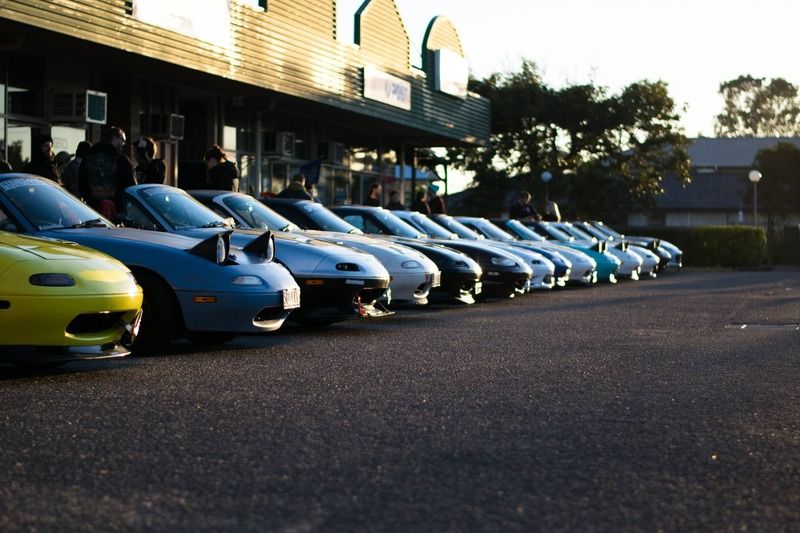
In amongst a lot of other little bits and pieces I finished the How-To on the guide replacement.
http://mx5cartalk.com/forum/viewtopic.php?f=76&t=72566
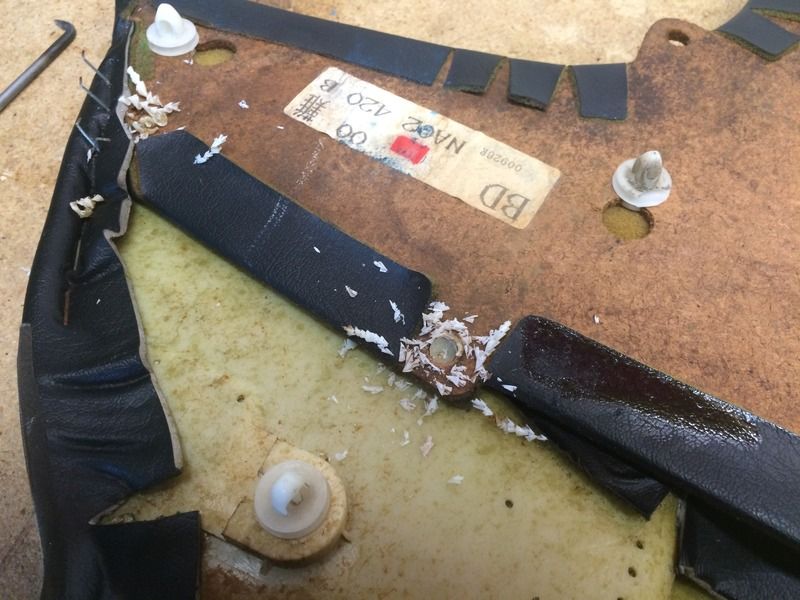
This, as always opened another can of worms. From the front the door cards looked in good condition but the board was very water damaged and most of the clips just pulled through. So time to make some new Weatherproof door cards.
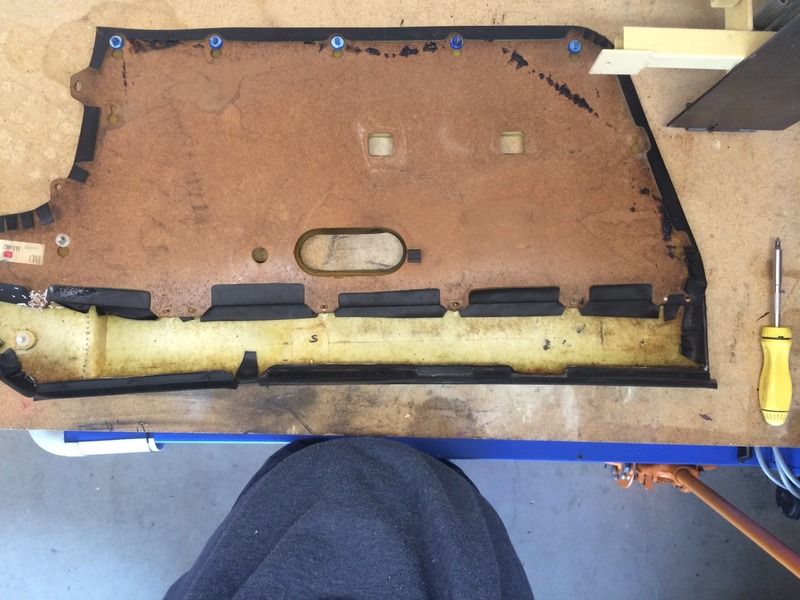
Three of the mounting tabs that secure the door tops to the cards were cracked away so badly I needed to come up with another way to attach the two pieces to each other. Some bits were still holding together quite well though, I had to drill out a couple of studs that Mazda melt into place on the front end of the door tops and remove some trim staples to free the tops completely from the cards.
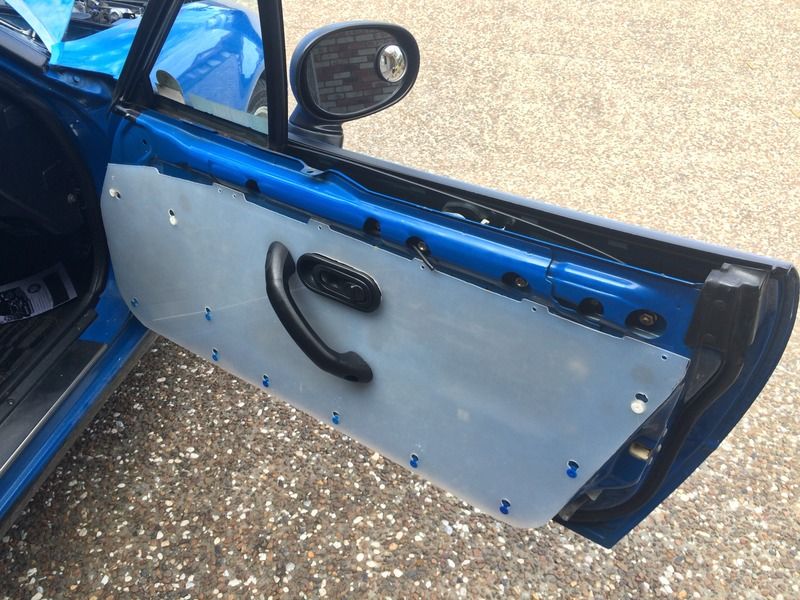
Using the original as a template I traced the details over onto a sheet of 2.5mm nylon I picked up from my plastics guy. I have decided to do a full panel like the NA8's and ditch the separate speaker covers this time. It was not an easy material to cut so I ended up shaping most of the curves with my die grinder. I also took about 10mm off the entire rear edge and about the same along the bottom. This bought it inline with the curve of the actual door; the stock cards are oversized, not finishing where the metal of the door starts to fold away from them.
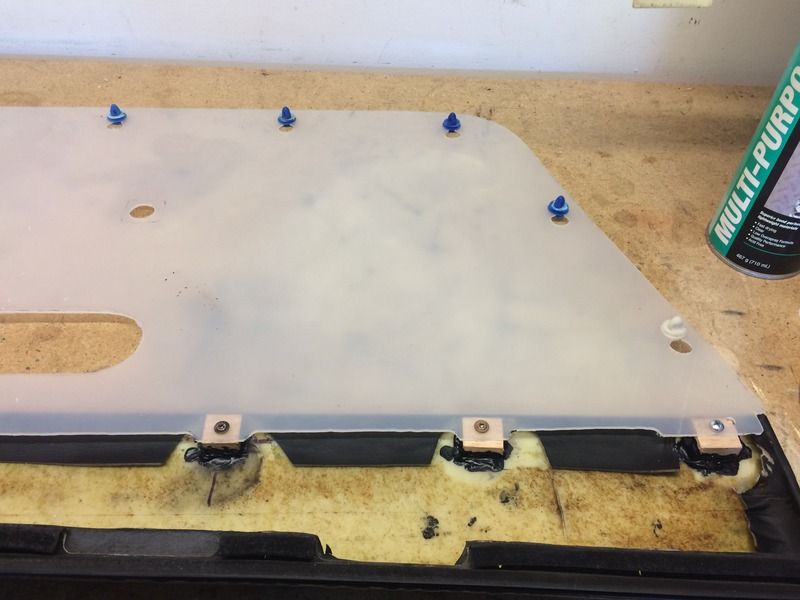
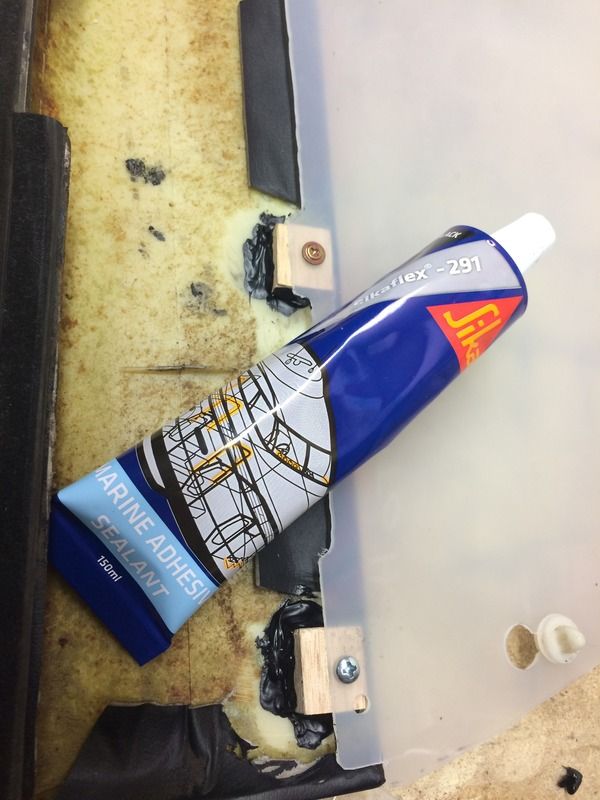
I fashioned some wedges out of hardwood and Attached them to the door tops with sikaflex. I had some scrap 10mm acetal block I was going to use but there weren't many readily available adhesives that would be compatible with The acetal and the ABS the door tops are made from.
This solution seems to of worked well. Time will tell if the sika was a good choice.
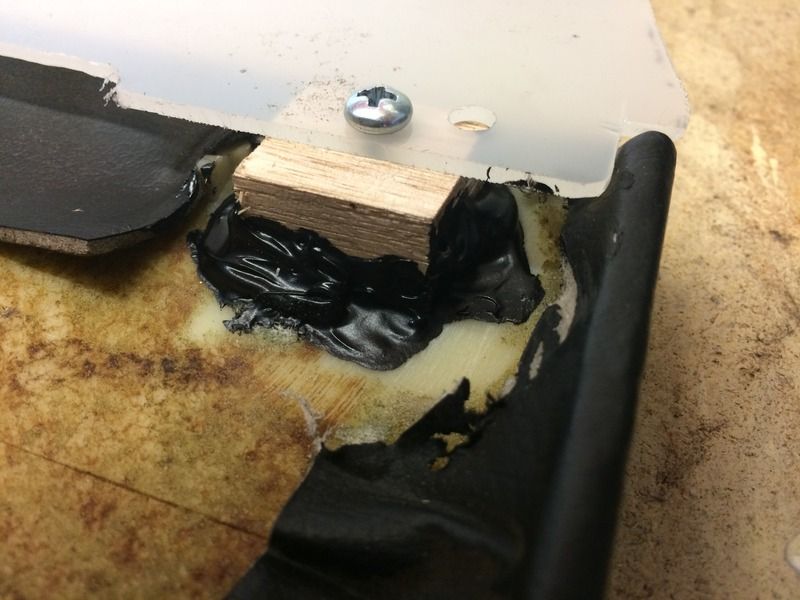
Still need to figure out what I want to do about speaker grilles and I am waiting for a bloke on the other side of town to get in another roll of vinyl, old style basket weave similar to 70's corollas and XY falcons used.
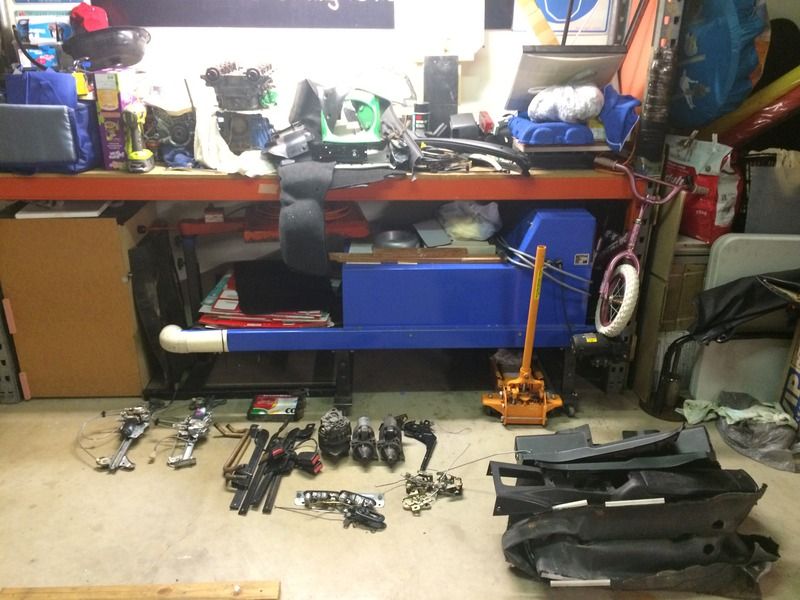
I have plans but they're for another post. Here's where we stand right now.

Also a mate mentioned they couldn't move in their garage anymore and a dump run was on the cards. I bought/took as much as I thought I could without risking my marriage.
It was good to meet SlugDub and a big thanks for the beltline mouldings, only the drivers has been installed so far but it has shaved 10yrs off the appearance age of the car.

All Jap Day and the pre meet were a good day out.
It's always good to hang around and just talk cars...


In amongst a lot of other little bits and pieces I finished the How-To on the guide replacement.
http://mx5cartalk.com/forum/viewtopic.php?f=76&t=72566
This, as always opened another can of worms. From the front the door cards looked in good condition but the board was very water damaged and most of the clips just pulled through. So time to make some new Weatherproof door cards.

Three of the mounting tabs that secure the door tops to the cards were cracked away so badly I needed to come up with another way to attach the two pieces to each other. Some bits were still holding together quite well though, I had to drill out a couple of studs that Mazda melt into place on the front end of the door tops and remove some trim staples to free the tops completely from the cards.

Using the original as a template I traced the details over onto a sheet of 2.5mm nylon I picked up from my plastics guy. I have decided to do a full panel like the NA8's and ditch the separate speaker covers this time. It was not an easy material to cut so I ended up shaping most of the curves with my die grinder. I also took about 10mm off the entire rear edge and about the same along the bottom. This bought it inline with the curve of the actual door; the stock cards are oversized, not finishing where the metal of the door starts to fold away from them.

I fashioned some wedges out of hardwood and Attached them to the door tops with sikaflex. I had some scrap 10mm acetal block I was going to use but there weren't many readily available adhesives that would be compatible with The acetal and the ABS the door tops are made from.
This solution seems to of worked well. Time will tell if the sika was a good choice.


Still need to figure out what I want to do about speaker grilles and I am waiting for a bloke on the other side of town to get in another roll of vinyl, old style basket weave similar to 70's corollas and XY falcons used.
I have plans but they're for another post. Here's where we stand right now.

Also a mate mentioned they couldn't move in their garage anymore and a dump run was on the cards. I bought/took as much as I thought I could without risking my marriage.

- Rolley
- Racing Driver
- Posts: 564
- Joined: Fri Nov 15, 2013 6:59 am
- Vehicle: NA6
- Location: Brisbane
Re: Rolley - It's A Boy! (NA6)
I've said it more than once lately, "Why finish a project when you can start another, or six".
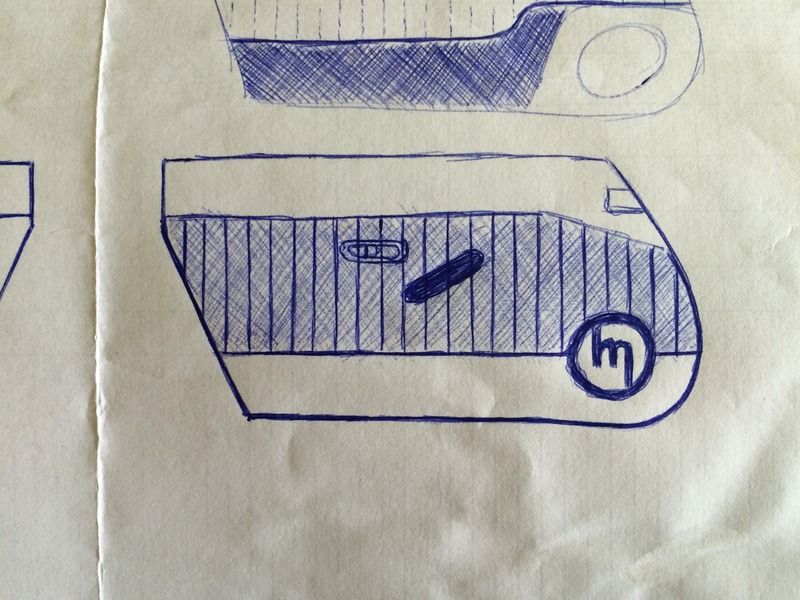
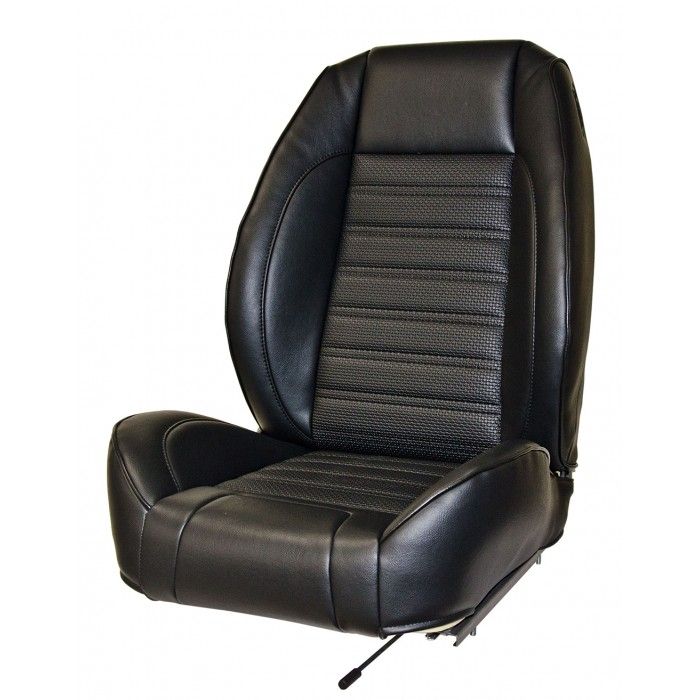
While still needing to go out buy the cloth backed 5mm foam to finish the door cards, I have pretty much finalised the design. Once I have the foam it just needs me to sit down and stitch it up and glue it on. Here's a napkin sketch of where I'm headed, the insert in the seat is how I want the pleating to look in the basketweave section, it will be separated from the lower smooth piece with piping.
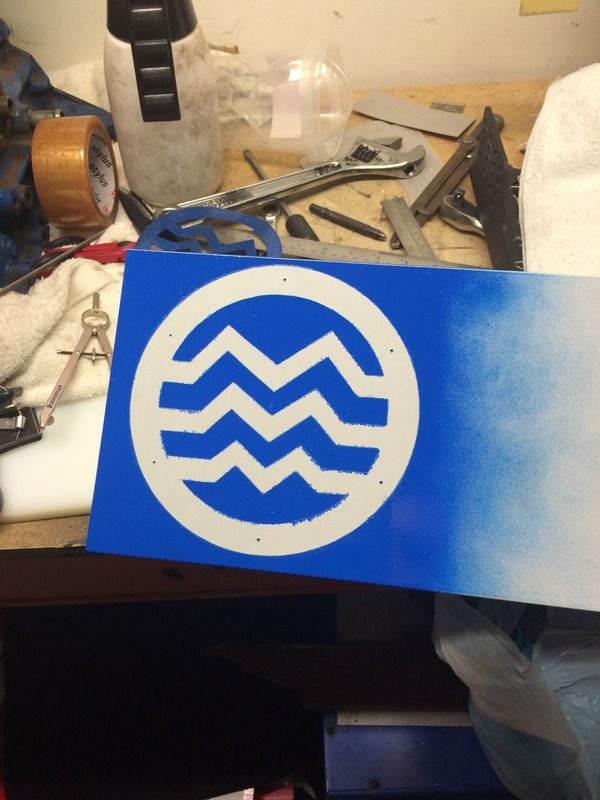
After looking into the Carbon Miata speaker covers I was about to pull the trigger but decided I like the 1930's MMM logo better. Time to hit the scrap pile, there was a piece of 2.5mm aluminium in there that would get me started. I marked it out and am slowly drilling and filing away the blue. Hopefully They come out OK. I want to end up heading down a Spartan/Retro path with the interior.
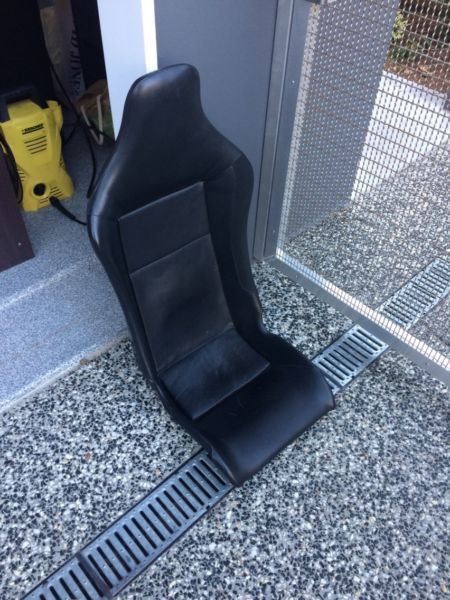
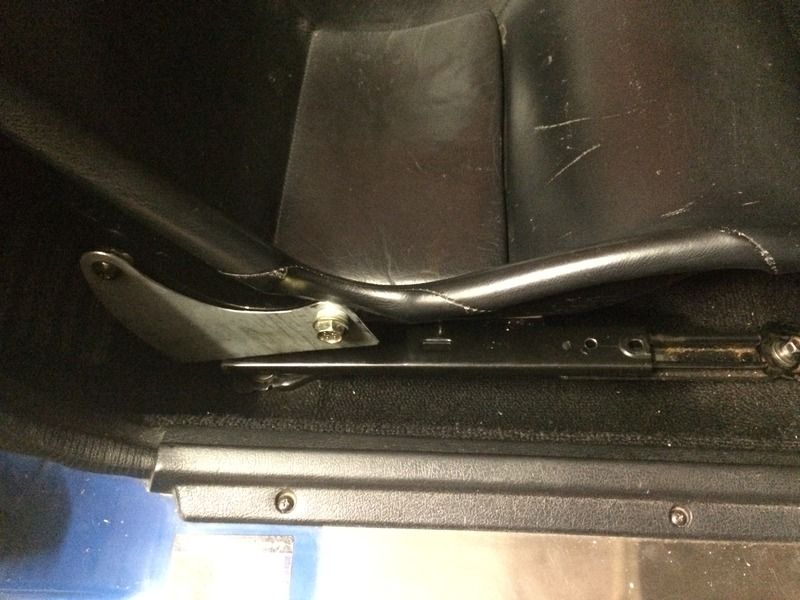
Gumtree popped up a little gem just around the corner from me. This means I'm back playing around with seats too in the interior search for more Low. With brackets onto stock rails it wasn't much better than the Sparco on the PCI Mount, the bucket is to wide to drop down between the sliders. moving them outward presented it's own problems so back to the drawing board.
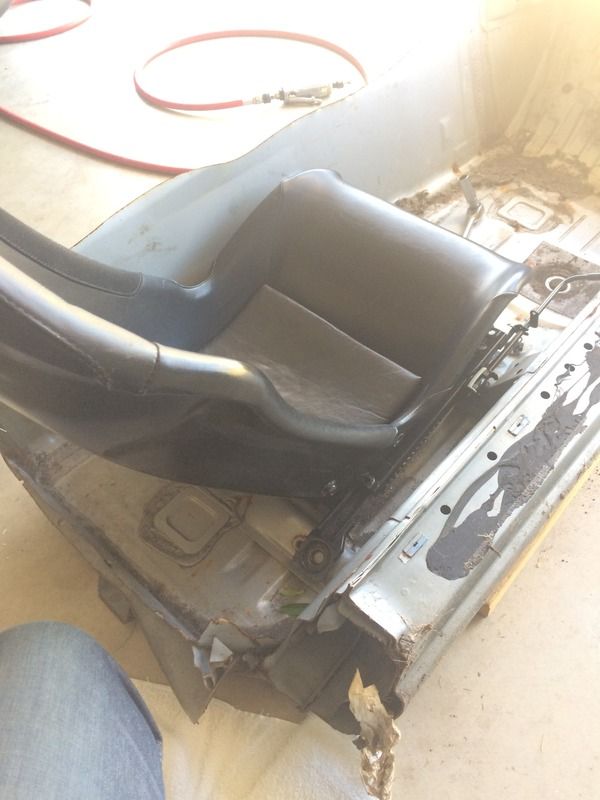
My old man was a boiler maker. His talents were put to use to weld up a fixed mount that we have definitely OVER ENGINEERED. There is about 10mm between the bottom of the shell and the floorpan without carpet. We were going to make it still have recline but in the end I'm the only one who drives the car so measurements were taken and we fixed it in one spot.
Still need to do a couple of final gussets on the rear plates and then blast and paint it. It is LOW. Next problem will be wether the headlight doors block vision now instead of the windscreen frame... Down the track I also plan to reupholster the insert in the seat with the same Basketweave as the new door cards.
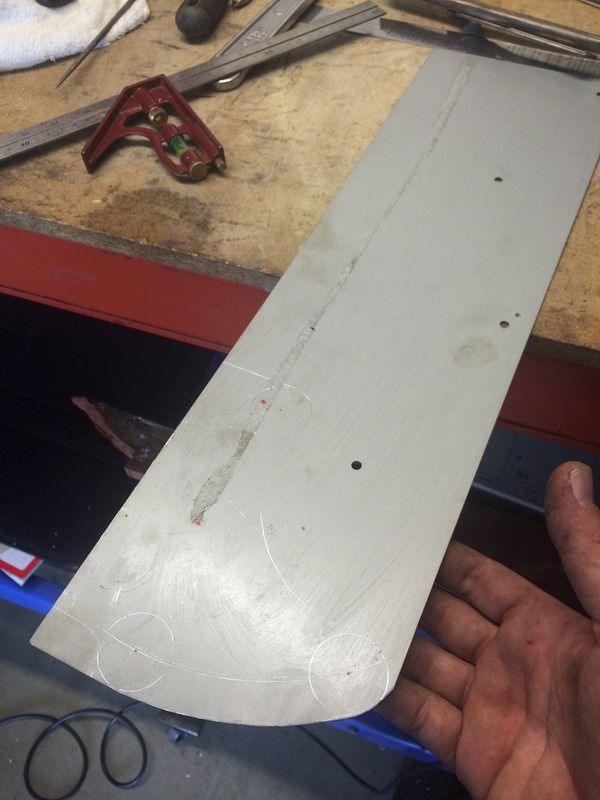
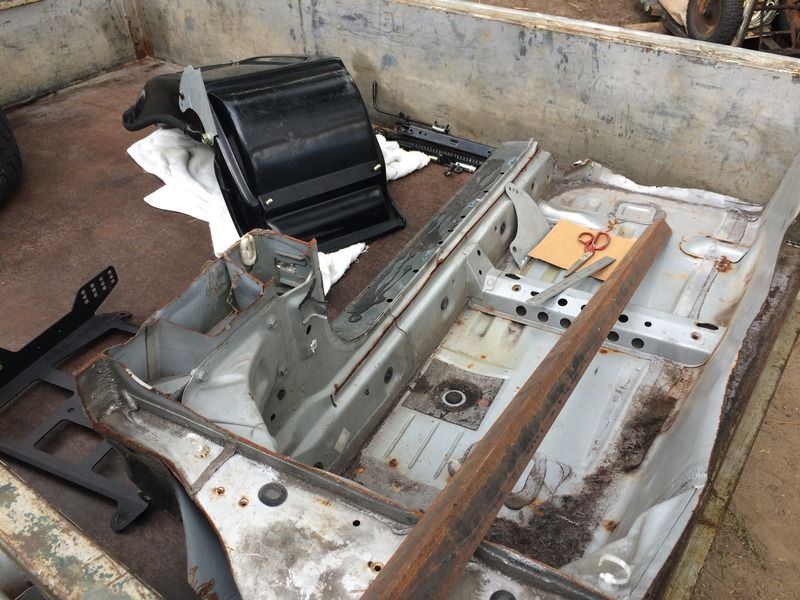
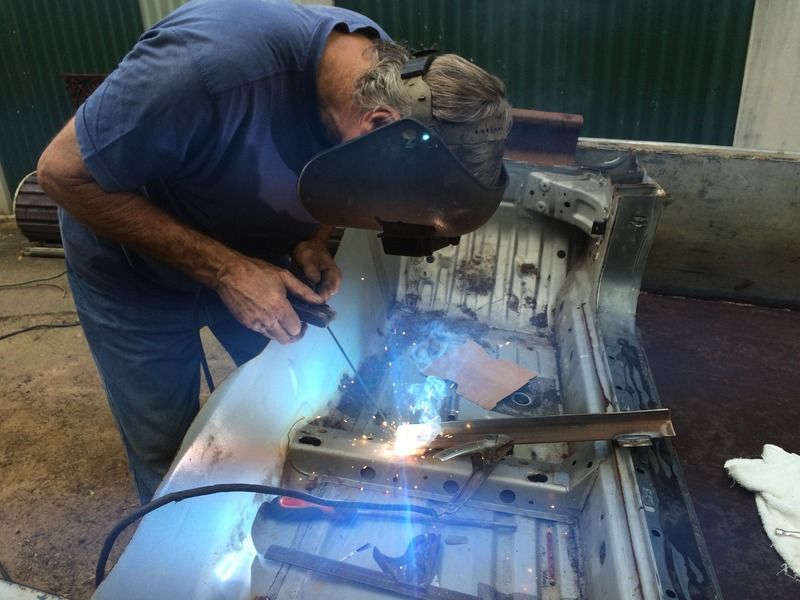
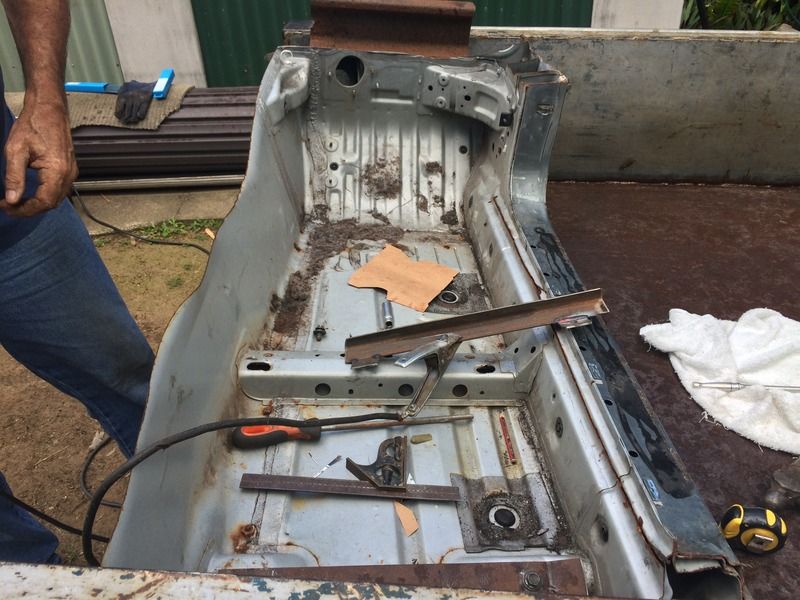
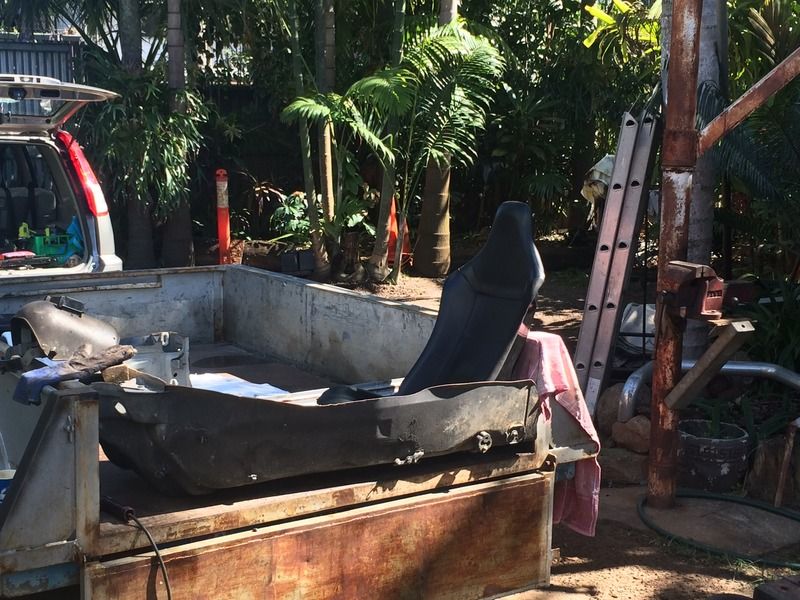
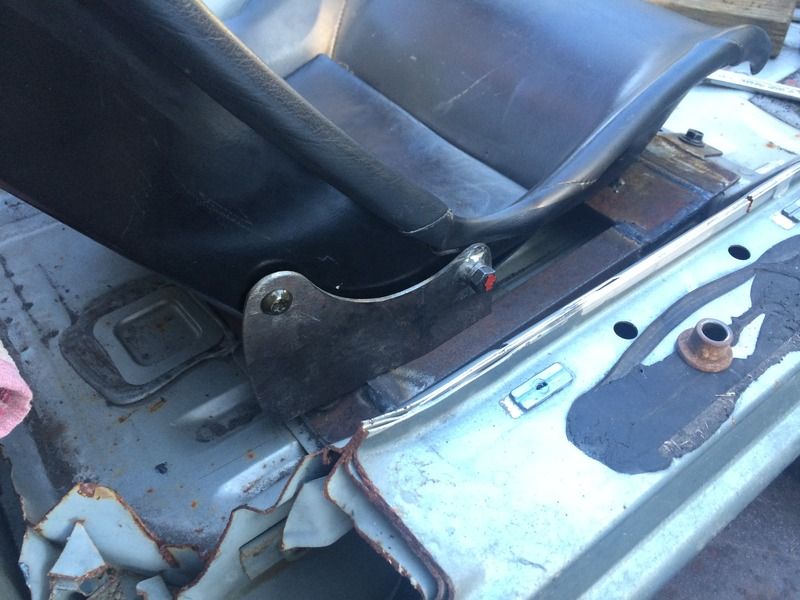
The Quartercut has finally paid its way after just mooching around in the bottom corner of the yard for the last 12months. It made it so much easier to line stuff up, Make sure I will actually be able to reach in to bolt it down and weld in place rather than tacking and removing all the time or worrying about damaging my car! Now I just need to get around to welding up the pin hole of rust in the same spot as my floor started rusting, cut it out and glue it into mine... One day.
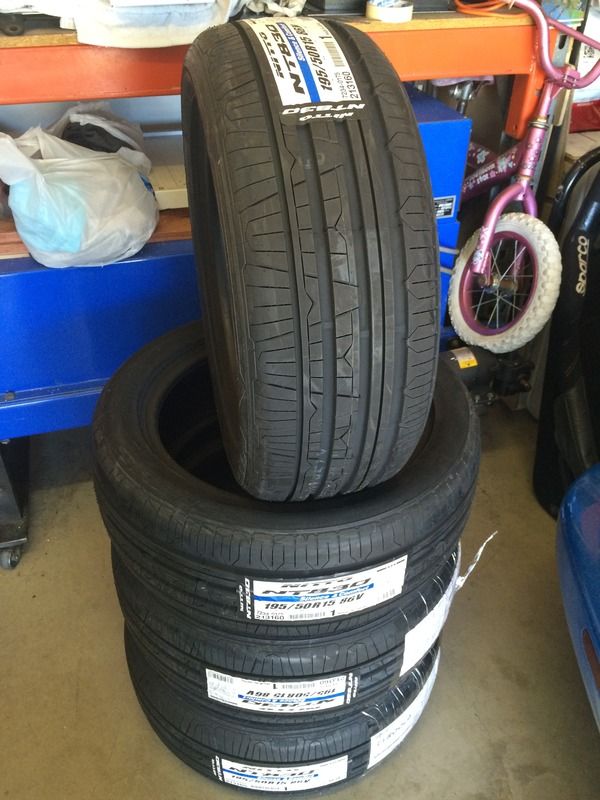
I have new rubber for new shoes sitting in the garage as well. A set of four Nitto NT830 delivered for $260.
Once the wheels show up end of this week early next week I'll show them off.
While still needing to go out buy the cloth backed 5mm foam to finish the door cards, I have pretty much finalised the design. Once I have the foam it just needs me to sit down and stitch it up and glue it on. Here's a napkin sketch of where I'm headed, the insert in the seat is how I want the pleating to look in the basketweave section, it will be separated from the lower smooth piece with piping.


After looking into the Carbon Miata speaker covers I was about to pull the trigger but decided I like the 1930's MMM logo better. Time to hit the scrap pile, there was a piece of 2.5mm aluminium in there that would get me started. I marked it out and am slowly drilling and filing away the blue. Hopefully They come out OK. I want to end up heading down a Spartan/Retro path with the interior.

Gumtree popped up a little gem just around the corner from me. This means I'm back playing around with seats too in the interior search for more Low. With brackets onto stock rails it wasn't much better than the Sparco on the PCI Mount, the bucket is to wide to drop down between the sliders. moving them outward presented it's own problems so back to the drawing board.
My old man was a boiler maker. His talents were put to use to weld up a fixed mount that we have definitely OVER ENGINEERED. There is about 10mm between the bottom of the shell and the floorpan without carpet. We were going to make it still have recline but in the end I'm the only one who drives the car so measurements were taken and we fixed it in one spot.
Still need to do a couple of final gussets on the rear plates and then blast and paint it. It is LOW. Next problem will be wether the headlight doors block vision now instead of the windscreen frame... Down the track I also plan to reupholster the insert in the seat with the same Basketweave as the new door cards.


The Quartercut has finally paid its way after just mooching around in the bottom corner of the yard for the last 12months. It made it so much easier to line stuff up, Make sure I will actually be able to reach in to bolt it down and weld in place rather than tacking and removing all the time or worrying about damaging my car! Now I just need to get around to welding up the pin hole of rust in the same spot as my floor started rusting, cut it out and glue it into mine... One day.
I have new rubber for new shoes sitting in the garage as well. A set of four Nitto NT830 delivered for $260.
Once the wheels show up end of this week early next week I'll show them off.

- ManiacLachy
- Engaged
- Posts: 3315
- Joined: Mon Jan 13, 2014 2:35 pm
- Vehicle: NB SE
- Location: Brisbane
Re: Rolley - It's A Boy! (NA6)
Can I see more pictures of those brackets? There is money to be made in producing those I reckon! I'd love to see a before shot of you in the car with the seat and mounts on the rails then an after with the floor mounts.
- Rolley
- Racing Driver
- Posts: 564
- Joined: Fri Nov 15, 2013 6:59 am
- Vehicle: NA6
- Location: Brisbane
Re: Rolley - It's A Boy! (NA6)
Hey Lachy,
(Woah I just read this back...I ramble on a bit sorry, basically that bracket is a one off.)
A lot of time and thought have gone into it and there were compromises made once I whittled away all the "nice to have's" and got down to the point that I only needed the seat to fit me and my driving position in the car. As a result I gave up on sliders and adjustable rake, opting to set it up once and forget about it.
I'll snap off a couple more photos when I have it finished and am fitting it up to my 5.
Next time I'm up at coffee I'll show you why I went the way I did with a fixed mount, the shape of the base (you can see it in the 5th pic) means that the "Butt Bucket" section is too wide to fit between the rails. This way it's lower than stock but not by a huge margin.
With the rails widened so the "Butt Bucket" fits between them it "could" fit in the car but you would need to make an adaptor to bolt between the slider bolt holes and the floor mounts. It would also not be centred with the steering wheel. This setup would be Low but the offset steering wheel killed it for me.
The easiest way with sliders seems to be to try and track down a set of Rykou Rob brackets (unicorns) or use a variation of Rev Limiters bolt on bracket pattern which will need to be modified too to suit your preferred seating angle and gusseted because if you were in a shunt I think this design as it is would not be the strongest.
http://revlimiter.net/blog/2010/06/chance91-elise-seat-brackets/
To make another like mine, we would either need the person there so we could work out the right pitch and distance for them or we would have to send it out to them in four pieces (floor plate, two rear side plates and front support bar) so they could mark out the points to mount the brackets to the frame and then organise their own fabricator to finish weld it.
It would be great to be able to make these but I would never be able to make them legal. As a one off I've got a much better chance of my engineer signing it off. After all it's made of heavier steel than my PCI mount and has more reinforcement and he signed that off.
If anybody wanted to use the ideas as a base for their own Lotus seat mount I'd be more than happy to run through it with you or come have a look if you're in Brisbane.
- ManiacLachy
- Engaged
- Posts: 3315
- Joined: Mon Jan 13, 2014 2:35 pm
- Vehicle: NB SE
- Location: Brisbane
Re: Rolley - It's A Boy! (NA6)
Yeah, I get the limitations of the sliders, bolting to the floor is the only way to get properly low. Rykou Rob brackets actually bolt to the floor, but allow for a variety of seating positions by various bolt holes. But like you say, they're as rare as unicorns! Which is why I think there is demand for solution like yours, but if yours are custom, as they appear to be then I guess they'll be a one-off.
I have a set of Flipside Customs brackets, and they'll do for me. They're very similar to RevLimiter's designs, they use the sliders to they aren't low-low. They aren't optimal in their position though as they leave some rear movement on the table by not setting the seat back a little on the rail. Again, not too much of an issue for me, I just want a slight drop in height, and some better lateral hold. Once I get a workbench back in the garage I'll fit them up to the car.
http://www.flipsidecustoms.com/mazda-miata/lotus-elise-seat-bracket-set
http://www.motoiq.com/MagazineArticles/ID/4153/PageID/10280/My-Girlfriends-Miata-Part-3--Lotus-Elise-Seats-and-Flipside-Customs-Brackets.aspx
Keen to see yours in the flesh though.
- Rolley
- Racing Driver
- Posts: 564
- Joined: Fri Nov 15, 2013 6:59 am
- Vehicle: NA6
- Location: Brisbane
Re: Rolley - It's A Boy! (NA6)
Those look like a nice simple solution and without a million dollar price tag.
What series seat did you get your hands on? I don't remember seeing on in your garage thread.
The third photo on the third page of your second link shows exactly what I was talking about with the seat dropping between the rails.
I'll be interested to see what you think of the seating angle. That is one thing that got to me with the slider mounts for the Sparco, I was not happy with how upright the seat was.
Seating position is such a personal preference, building off the shelf solutions must be a real pain in the arse.
I'll be test fitting my setup again tonight in the car to make sure all the spacing's we figured out and tacked in the Quatercut actually working or if we need to make adjustments.
- ManiacLachy
- Engaged
- Posts: 3315
- Joined: Mon Jan 13, 2014 2:35 pm
- Vehicle: NB SE
- Location: Brisbane
Re: Rolley - It's A Boy! (NA6)
Yeah, I haven't included them in my garage thread because they aren't fitted yet. I had an attempt and fitting them one day, but without a work bench it was tough going. I have a pair of the Probax (Elise S2?) in cloth, they came up on here a few months back and I pounced.
I won't have much say in the angle of recline with these seats/brackets, most I could do to add some would be to stack some washers under the front bar, but I don't think it'll be necessary - I like a relatively upright position. Also, added recline means my knees are closer to the wheel which is something I want to minimise.
I'll be keen to check yours out when they're fitted and sorted, and eventually compare them to mine.
- Rolley
- Racing Driver
- Posts: 564
- Joined: Fri Nov 15, 2013 6:59 am
- Vehicle: NA6
- Location: Brisbane
Re: Rolley - It's A Boy! (NA6)
I really need to get some good photos taken now.
After digging around trying to get new genuine seals for the valves I ended up frankenstiening something together after digging through a pile of aftermarket stems at Eagle SMF tyre supply down the road from me.
because the valve sits so far into the barrel and the hole is unusually large, we found some truck stems with similar sized seals that with some minor modification did the job perfectly.
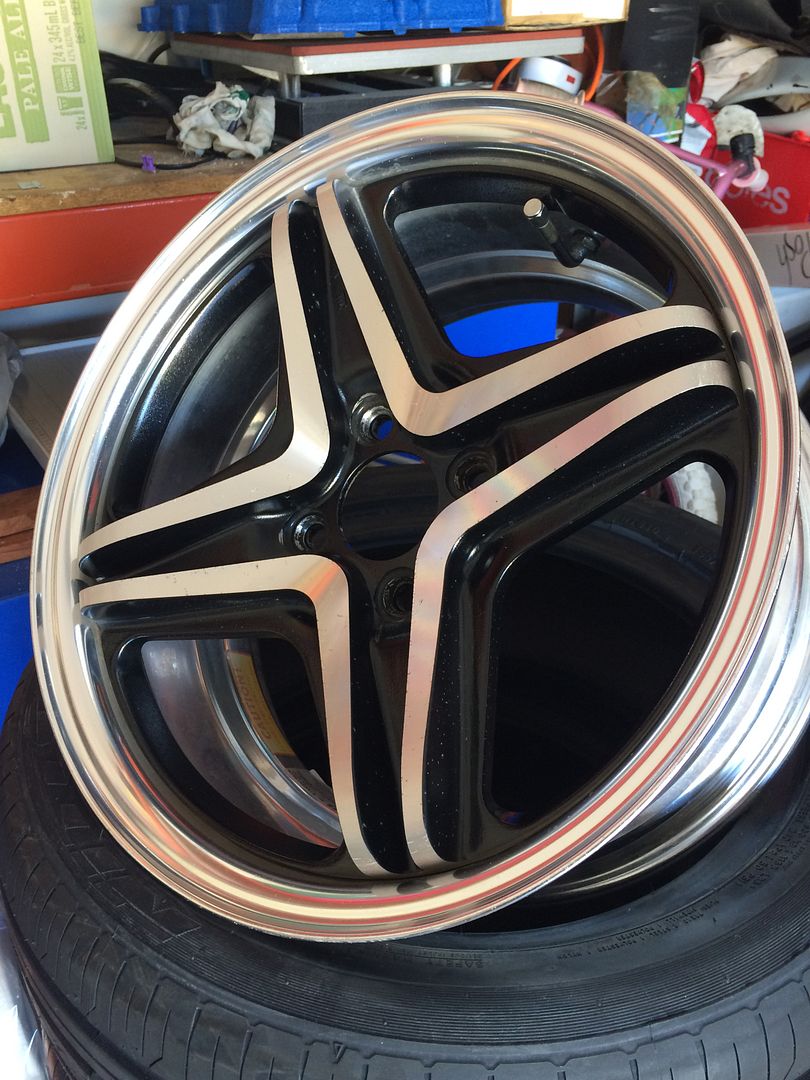
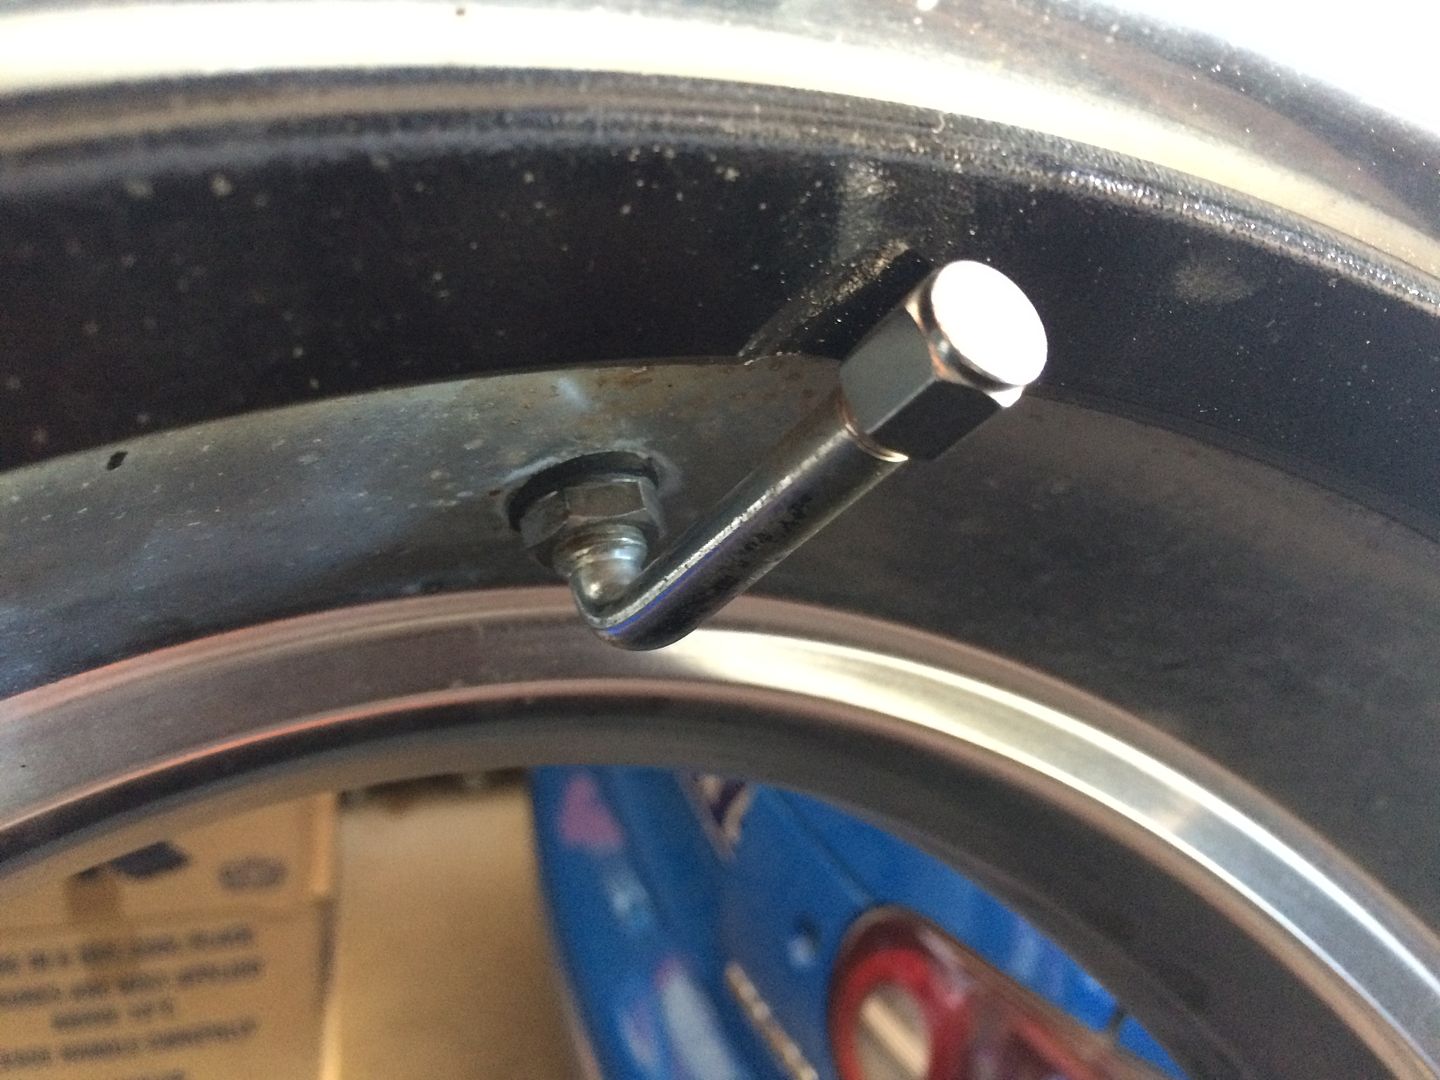
For my own reference, the genuine part number for the assembly is V286-0043CE.
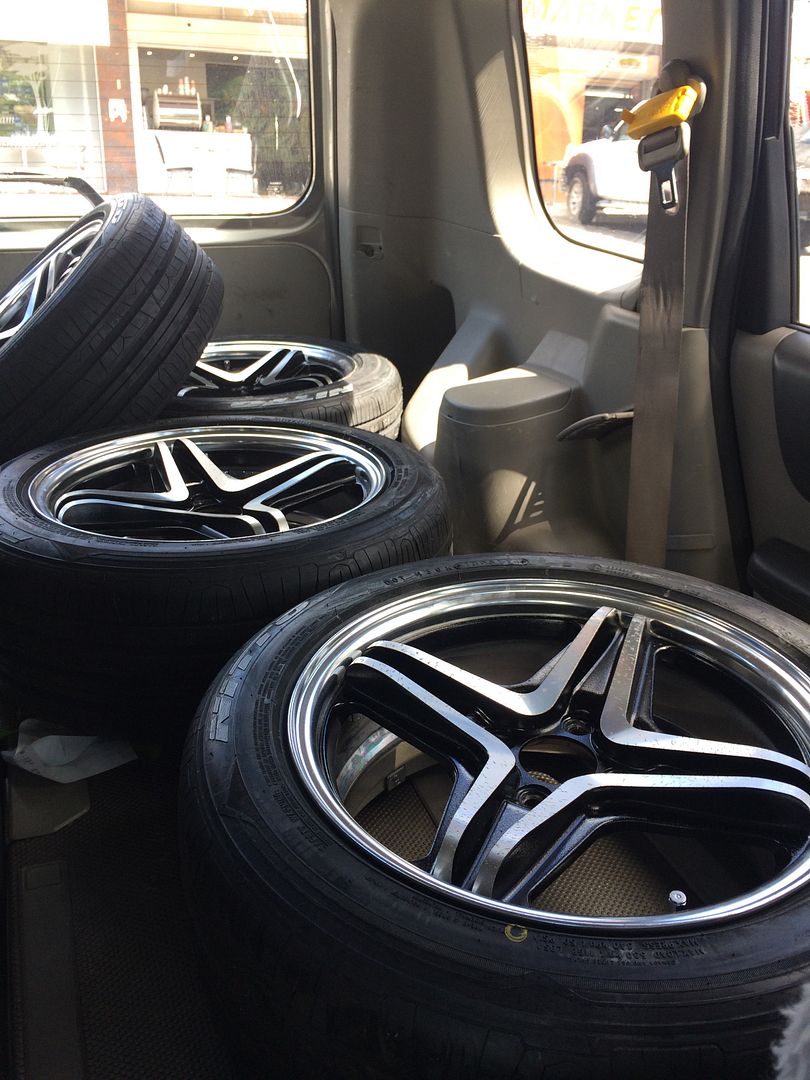
They then copped a polish, tyres and on they went.
Enkei also said there was never a center cap offered specifically the Rodders. They told me people in Japan often wanted to pick their own caps and places like Autobacs carried a big range of different sizes and styles. I need to go to Japan...
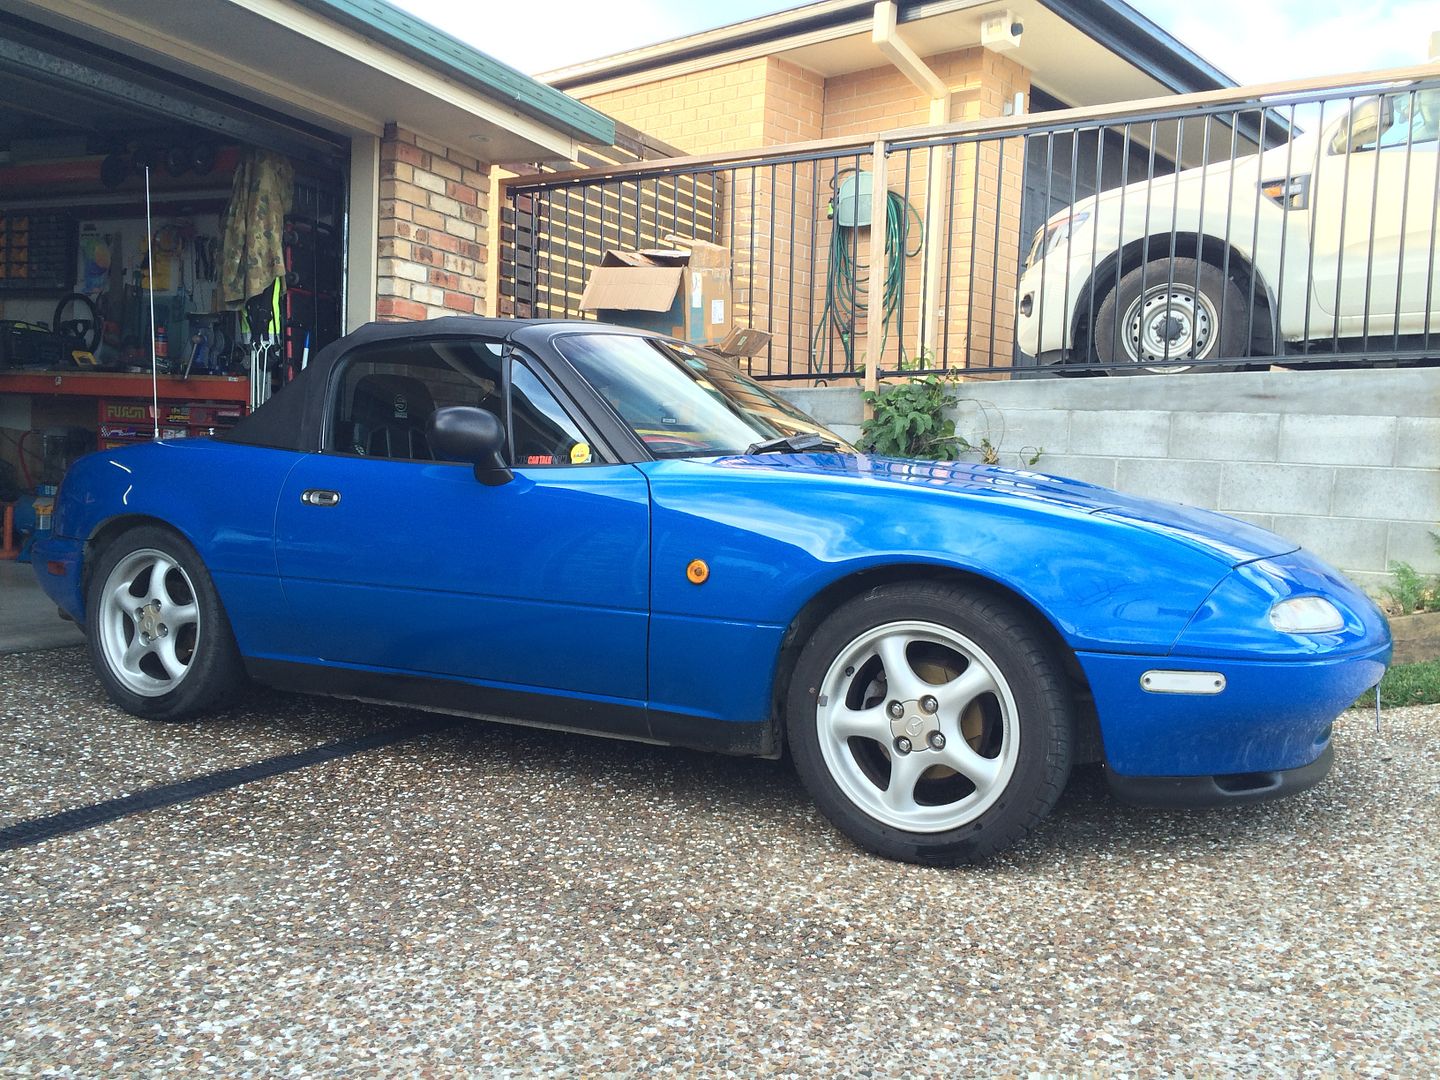
Before.
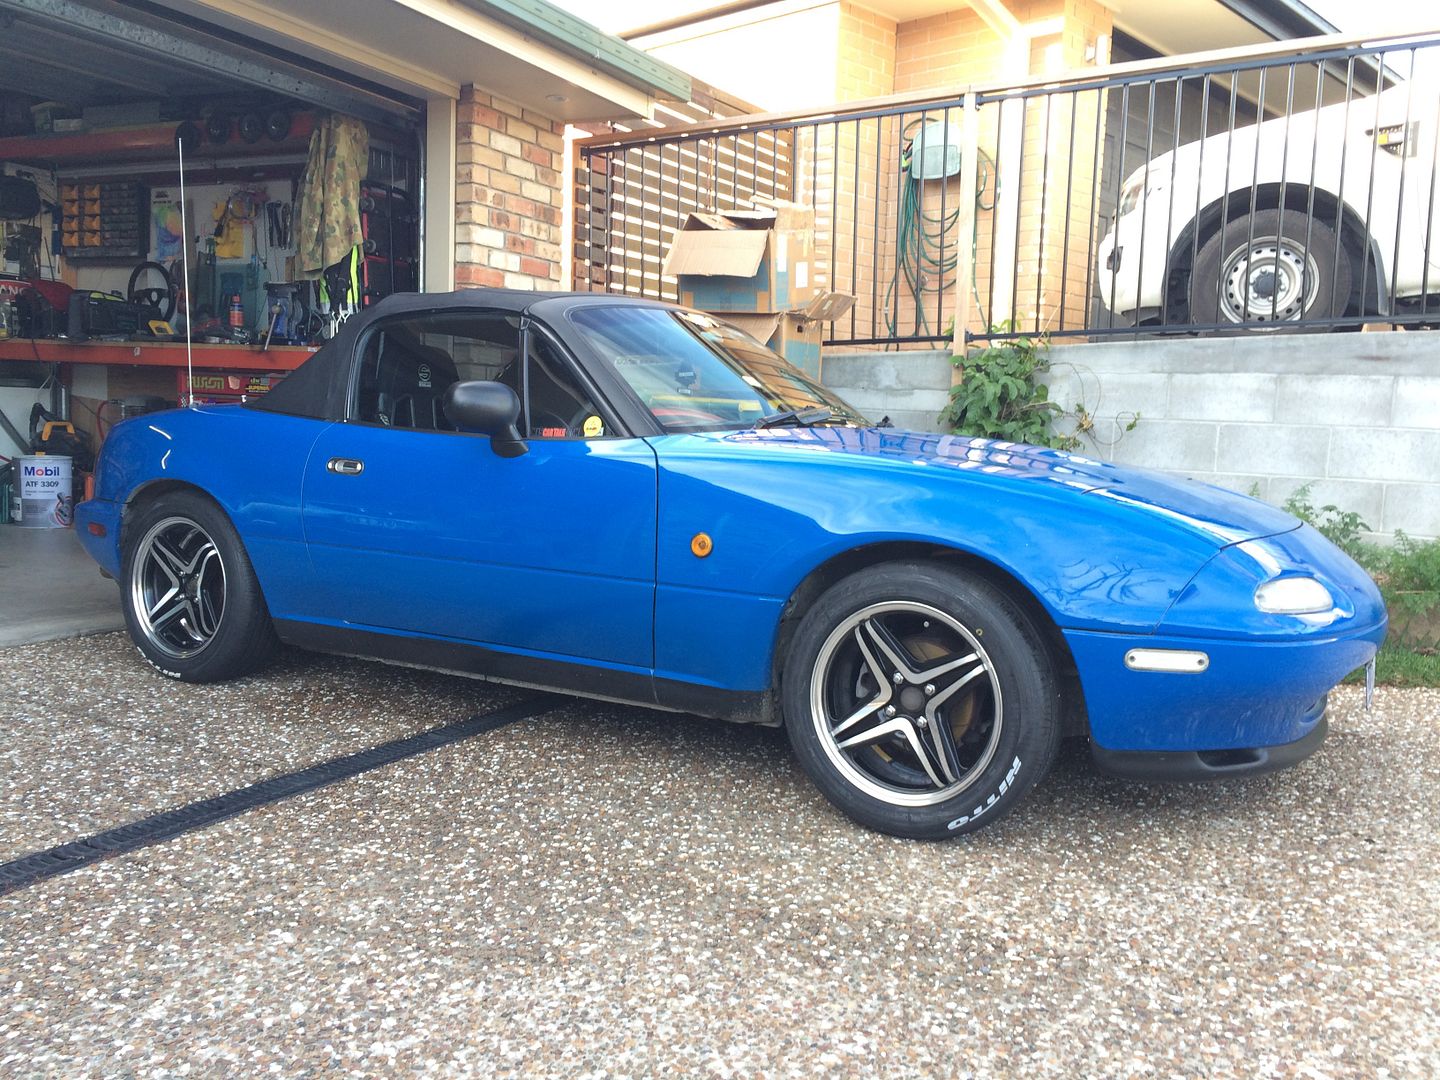
After.
After digging around trying to get new genuine seals for the valves I ended up frankenstiening something together after digging through a pile of aftermarket stems at Eagle SMF tyre supply down the road from me.
because the valve sits so far into the barrel and the hole is unusually large, we found some truck stems with similar sized seals that with some minor modification did the job perfectly.


For my own reference, the genuine part number for the assembly is V286-0043CE.
They then copped a polish, tyres and on they went.
Enkei also said there was never a center cap offered specifically the Rodders. They told me people in Japan often wanted to pick their own caps and places like Autobacs carried a big range of different sizes and styles. I need to go to Japan...
Before.

After.

Who is online
Users browsing this forum: No registered users and 9 guests


