Stoogey's NA6 - Moving Up In Life

Chat to do with your MX5/Miata/Eunos Garage Ride(s).

Moderators: timk, Stu, zombie, Andrew, The American, Lokiel, -alex, miata, StanTheMan, greenMachine, ManiacLachy, Daffy

User avatar
Stoogey
Driver
Posts: 98
Joined: Wed Sep 28, 2011 1:29 am
Vehicle: NB8A
Location: Sydney!

Re: Stoogey's NA6 - Moving Up In Life

Postby Stoogey » Wed Oct 19, 2011 2:10 am

Over the past week or so i collected some car care stuff so that i could really get stuck into looking after this thing.

Image

The Autoglym pack was on sale so i figured i'd give it a try, i had originally intended to go with Megs stuff.

The car was cleaned right after i got it, but wasn't touched till tonight.

Got stuck into it and spent a good few hours cleaning it, drying it, then applying the Super Resin Polish and buffing the excess off. All by hand. Started at 10:30pm, finished at 1:30 in the morning.

End result made my bumhole tingle abit from excitement.

Image

Photo was taken super quickly cause i was freezing my ass off and wanted to get inside. Will eventually take some proper photos during the day.

Starting to love this thing more then my girlfriend...

User avatar
Stoogey
Driver
Posts: 98
Joined: Wed Sep 28, 2011 1:29 am
Vehicle: NB8A
Location: Sydney!

Re: Stoogey's NA6 - Moving Up In Life

Postby Stoogey » Thu Oct 20, 2011 2:22 am

Super quick one.

Rego is due in under a months time.

The clutch pedal rubber was worn and broken.

Image

The brake one was ok, worn in the corner though, but i figured since i was already doing yoga trying to get down into the pedal area and replace the pads, i might as well do both. They aren't too expensive anyway.

Quick trip to West End Mazda Parts and they had 2 left in stock.

Image

Too easy.

Im sure you can all imagine what the finished product would look like anyway, no need for photos of no dirty pedals :D

User avatar
Stoogey
Driver
Posts: 98
Joined: Wed Sep 28, 2011 1:29 am
Vehicle: NB8A
Location: Sydney!

Re: Stoogey's NA6 - Moving Up In Life

Postby Stoogey » Sat Oct 22, 2011 6:17 pm

Clutch has started slipping these past couple of days.

Abit bummed out. Will have to be replaced very soon as this increasing sydney heat isn't helping either.

Looking into places to go/people to speak to re: clutch replacement now...

User avatar
Stoogey
Driver
Posts: 98
Joined: Wed Sep 28, 2011 1:29 am
Vehicle: NB8A
Location: Sydney!

Re: Stoogey's NA6 - Moving Up In Life

Postby Stoogey » Mon Oct 24, 2011 10:53 pm

NEW CLUTCH!

Clutch started slipping pretty badly in this heat/humidity so i bit the bullet and had to get it done, wasn't as expensive as i thought it would be.

Big thanks to the guys at My Hiep Automotive. No farking around, very easy to deal with and was more then happy to spend some time having a chat with me about the car.

Image

(Taken with shitty iphone)

Dropped it off this morning then took the train home, in this blaring heat.

I was told it will be finished by tomorrow because the clutch kit they ordered wouldn't come in till the arvo sometime.

Got called at 6pm (closing time for them) and was told the car was done! They waited around for 20 minutes or so for me to catch a lift there and pick up the car as well.

When i got there i asked to see the old clutch that was taken out.

Image

I had also asked before dropping the car off if he could do the rear main seal as well. He confirmed with me that it was indeed leaking and a new one has been fitted.

New Exedy OEM replacement was dropped in.

Image

He also explained that the flywheel looked like a big mess but was still in good nick so that was machined as well and didn't need to be replaced (as i told him i had heard stories of flywheels with cracks and bad heatspots and what not on them).

He also checked my a/c system as well because i told him that the previous owner hadn't touched it in a while and i didn't know what sort of condition it was in.

His conclusion after inspecting it was that the a/c compressor wasn't getting any power, but was still functional. He would have had to have call in his auto-electrician and the car would have to be left there tomorrow as well. I said i'll sort it out next time. I might go back to the guys at Shift Performance and get them to have a look at it. Im not cluey enough with a/c systems.

The rocker cover gasket was also weeping abit but nothing serious so he told me to replace that if i can, and he also pointed out that my cas seal was leaking too (which he thought was a dizzy at first glance). This is all in preparation for my pink slip that i need very soon.

All in all, very happy that i dont have to worry about a clutch/rear main for a while yet.

User avatar
Stoogey
Driver
Posts: 98
Joined: Wed Sep 28, 2011 1:29 am
Vehicle: NB8A
Location: Sydney!

Re: Stoogey's NA6 - Moving Up In Life

Postby Stoogey » Tue Nov 01, 2011 8:31 pm

Righteo.

Last night i planned to replace my cam angle sensor (or cas for all you cool kids) o-ring, its a fairly straight forward job but i ended up doing abit more...probably out of sheer late night/early morning boredom.

There was alot of oil and just sh*t build up around the cas area.

Image

From reading how to guides it seemed like all i needed was to unbolt the cas, slide it out, remove the o-ring, pop a new one on, line the thingymajigs up and put it back in. I had read that it was pretty easy to slide out because there wasnt alot of room back there as its only 2 inches or so from the firewall.

I unbolted it, slid it out, and....nothing. It was stuck, hitting the firewall and i couldn't slide it out even though it LOOKED like it could come out if i just spun it around at different angles. Bastard was in there unless i yanked it out which would have damaged something...

So i thought ƒü¢k it...the valve cover gasket was already leaking abit so i might as well remove it and re-rtv silicon it up and hope to god the gasket was still good.

Off the valve cover came, and the bracket holding down the cas...too bloody easy.

Image

Image

Image

As a side note, i made a booboo whilst trying to remove the cas bolt.

Image

Was fine till i accidentally got some degreaser on it...


So the valve cover was put aside and i gave the cas a good clean and replaced the o-ring.

You can see the old o-ring on the right had gone flat and was letting oil pass.

Image

The part number for the oem o-ring is 9954-10-3801 for those interested.

(and yes, i have a long fingernail :D)

The cas was done and set aside to be put back in and i gave the valve/rocker cover a good clean and let it dry.

Image

As it was drying, i set about removing the old crappy gasket maker from the gasket and gave it a good clean. To my relief it was in perfect condition. The previous workshop did a dodgey job at installing it.

Once it was clean and dry it looked like new so i was lucky i didnt have to get a new one.

Image

As recommended by a forum member here i went and got some Three Bond rtv gasket maker.

Image

Was only a dollar or two more expensive then the permatex stuff and apparently its the oem stuff from alot of car manufacturers. Looks good so far, will see how it goes in the long run.

So using the threebond, i made sure all surfaces were clean and dry and applied it onto the cas bracket and the rocker cover gasket. Also making sure i got the corners of the cas bracket and the cam ends.

Image

Image

Image

Everything went back together and i set about putting everything back where it was when this happened.

Image

It was so dry and brittle it just snapped a piece clean off.

Good thing i had some silicone tubing on hand. It's blue as well which is about a 7kw increase i think.

Image


Rego is due in just over 2 weeks, dreading it.

Tyres are worn so i will stick the old 16"ers back onto it just for rego.

The 15"s i am considering keeping with 195/55 when i replace it because i dont mind the bigger side profile look. 195/50's in khumho ku31's are so cheap though....

Taking a trip to mx5mania tomorrow as well possibly.

initial D
Fast Driver
Posts: 294
Joined: Wed Aug 24, 2011 8:52 pm

Re: Stoogey's NA6 - Moving Up In Life

Postby initial D » Tue Nov 01, 2011 8:41 pm

coming up well

User avatar
Stoogey
Driver
Posts: 98
Joined: Wed Sep 28, 2011 1:29 am
Vehicle: NB8A
Location: Sydney!

Re: Stoogey's NA6 - Moving Up In Life

Postby Stoogey » Mon Nov 07, 2011 3:16 pm

initial D wrote:coming up well


Thanks for the comment :D


UPDATE!

After some inspiration from a thread on jdmstyletuning about bleeding clutches, i've decided i'd do the same. I did however spot behind my pedals what looks like a clutch master that could do with a rebuild.

Image

The carpet seems fine, nothings wet or damp around there.

First things first, sucked out abit of the old stanky ass fluid.

Image

I know it could be done just by turning the wheel all the way to the left and going through the gap there but i'd much rather a more open working space so i took the wheel off. So much betterer.

While i was there i checked to see if the slave was leaking, pulled back the boot.

Image

All is good.

I have a receipt that says it was replaced only 30 or so thousand km's ago. Doesn't hurt to check.

Got my awesome bleeding apparatus setup.

Image

Worked at it till the reservoir had no shiznit left inside and clean solid fluid was running down the tube.

This is what came out.

Image

Clutch definitely feels abit firmer now and not as spongey.

Too easy.

My previous replacement of the cracked breather hose had me informed by another jdmst member that i hadn't replaced the restrictor/orifice doodad into the new hose yet.

Luckily i kept the old hose....very nearly binned it.

The car ran perfectly normal without it though, but what was there shouldnt be played around with. So in it went.

Image


Onto the next thing.

This is the current condition of my radiator. What looks to be the original one that was in the car.

Image

Image

Im not losing coolant at any dramatic rate, and there are no signs of hissing or any overheating whatsoever.

But the leaks and cracks are definitely there and in my face.

I've had to play around with my (crappy uni student) budget and put money into a replacement rad. Fastway Couriers delivered it today, twice apparently, and i was home all morning but saw nothing....tomorrow they reckon.

I have a fresh 5l bottle of Nulon green coolant at home here i havn't touched yet. And a 3 litre bottle of demineralised water as well. From what i gather, i will need more then 5ltrs to fill up the cooling system, and a higher water to coolant mixture is better for hotter temps where i don't have to worry about coolant freezing at anytime. So i was thinking to put the entire 5ltr bottle of Nulon in there and then topping off the rest with the soft water.

Called up West End Mazda to see if they had a thermostat as well, none in stock and i'd have to pay in full for them to order one in, $39. Might just go with a Tridon one from supercheap.

Now to just play the waiting game with Fastway for the rad...

mitch_f1
Racing Driver
Posts: 858
Joined: Wed Jun 17, 2009 8:59 pm
Vehicle: NA6
Location: Sydney

Re: Stoogey's NA6 - Moving Up In Life

Postby mitch_f1 » Mon Nov 07, 2011 7:47 pm

Get a Mazda gasket for the thermostat; the cheapie ones are crap and worthless

evil_weevil
Racing Driver
Posts: 1401
Joined: Wed Nov 19, 2008 2:50 pm
Vehicle: NA8

Re: Stoogey's NA6 - Moving Up In Life

Postby evil_weevil » Mon Nov 07, 2011 8:00 pm

re: clutch - hows the exceedy OEM holding up? stronger? good bite?

mines on the way out and thinking its a good option
Looking for an SVT motor for this:
viewtopic.php?f=73&t=62834

emily_mx5
Racing Driver
Posts: 1720
Joined: Wed Aug 03, 2011 5:57 pm
Vehicle: NB SE
Location: Sydney

Re: Stoogey's NA6 - Moving Up In Life

Postby emily_mx5 » Mon Nov 07, 2011 8:57 pm

It's blue as well which is about a 7kw increase i think.

I'm happy to see someone who agrees with me about colours = power :lol:

i hadn't replaced the restrictor/orifice doodad into the new hose yet.

sh*t. I just replaced my breather hose and didn't transfer this. Do you know what it does/how important it is? :oops:

User avatar
Stoogey
Driver
Posts: 98
Joined: Wed Sep 28, 2011 1:29 am
Vehicle: NB8A
Location: Sydney!

Re: Stoogey's NA6 - Moving Up In Life

Postby Stoogey » Tue Nov 08, 2011 12:54 am

mitch_f1 wrote:Get a Mazda gasket for the thermostat; the cheapie ones are crap and worthless


Hmmm, was planning on getting the rad in tomorrow arvo/evening, may have to try and squeeze in a run to West End Maz after work, hopefully they have one.

If all else fails i may have to resort to the Tridon (from supercheap) one and use some blue rtv gasket sealer.

evil_weevil wrote:re: clutch - hows the exceedy OEM holding up? stronger? good bite?

mines on the way out and thinking its a good option


Awesome.

Its been 600-700km's (or something like that) since its been fitted and its well and truly broken in now, the bite is just right, being an oem spec one its not too strong so its just right for daily driving.

Weathers been getting hot and humid in Sydney lately as well and it's not slipping or doing anything funny at all in this heat, so a big thumbs up from me.

emily_mxV wrote:I'm happy to see someone who agrees with me about colours = power :lol:

sh*t. I just replaced my breather hose and didn't transfer this. Do you know what it does/how important it is? :oops:


Have a good read of this thread here.

http://forum.miata.net/vb/showthread.php?t=303862

Will give you all your answers and more.

In short. Yes. It is important. Replace it when possible.

According to the links in the thread, B61P-13-986 is the part number for the orifice if you have misplaced it or thrown it out.

And yes, everybody knows different colours contributes to different power gains :mrgreen:

User avatar
Stoogey
Driver
Posts: 98
Joined: Wed Sep 28, 2011 1:29 am
Vehicle: NB8A
Location: Sydney!

Re: Stoogey's NA6 - Moving Up In Life

Postby Stoogey » Tue Nov 08, 2011 6:38 pm

Was about to head out the door for work this morning. Doorbell rang. About time Fastway Couriers.....

Image


Couldn't open the damn thing till i got home from work.

Image

Shinyyyyyyyyyyyyy.


Didn't have time to pick up a thermostat after work today so it will have to wait. Pouring rain doesn't help anyway.

Can hopefully get it in within the next few days.

User avatar
Stoogey
Driver
Posts: 98
Joined: Wed Sep 28, 2011 1:29 am
Vehicle: NB8A
Location: Sydney!

Re: Stoogey's NA6 - Moving Up In Life

Postby Stoogey » Thu Nov 17, 2011 8:11 pm

Right.

Got stuck into the radiator on...tuesday....at least i think it was tuesday.

The radiator was starting to leak abit quicker as the days went and i didnt wanna take the risk of it blowing up on me anytime soon.

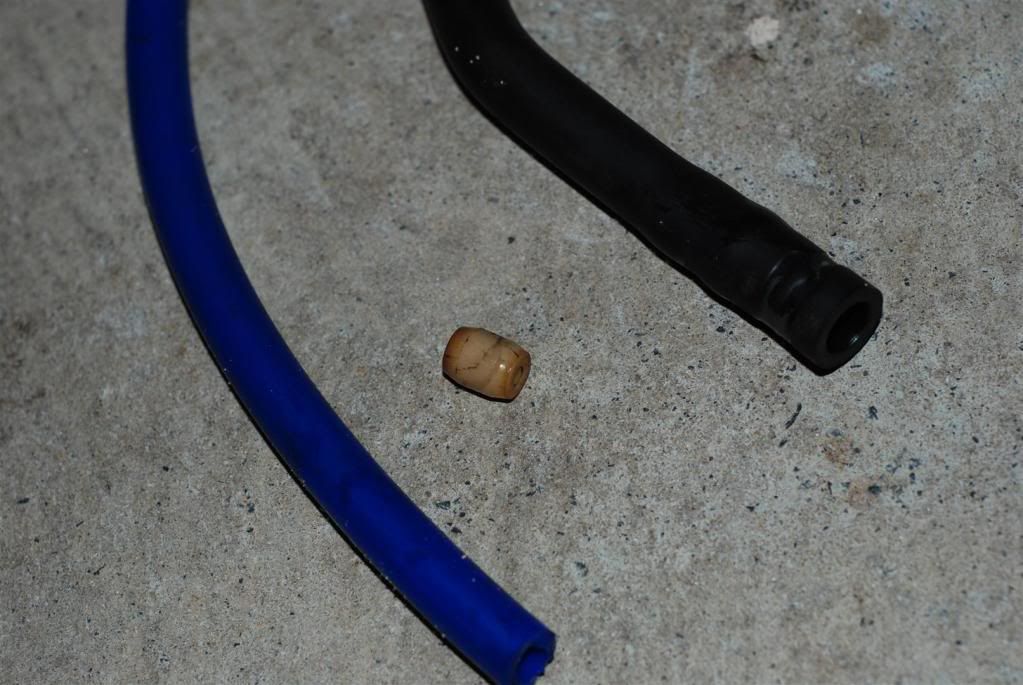
Was abit low on funds so i couldn't grab an upper hose or heater hoses. Those will have to come hopefully very soon. I had my local auto shop order in a lower bottom hose for me and that same day i went on the hunt for the "upper bottom hose" if you will.

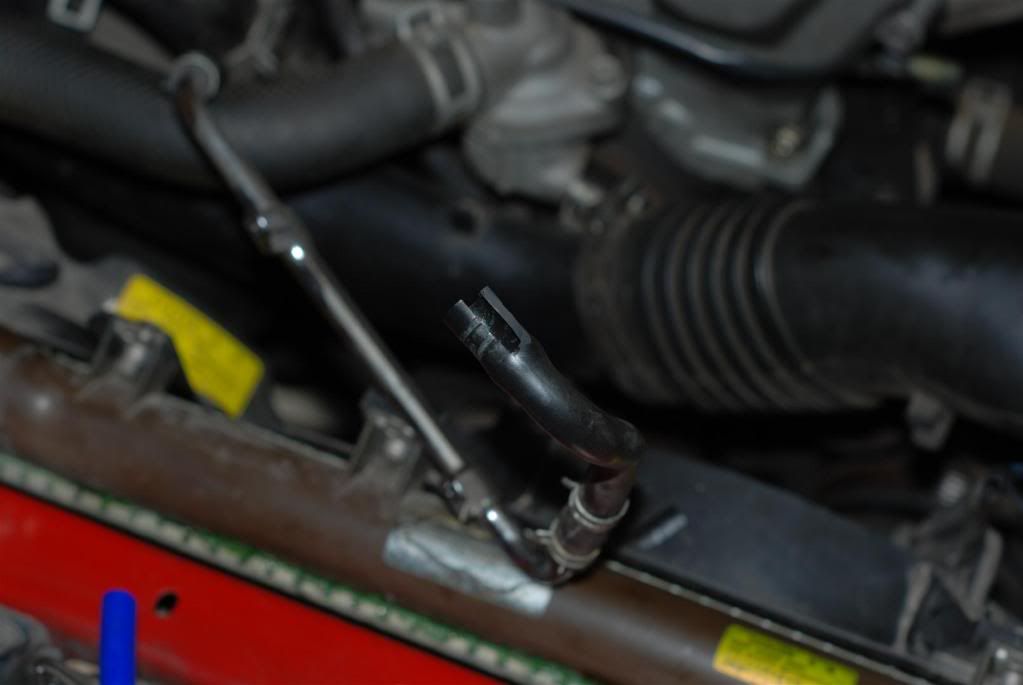
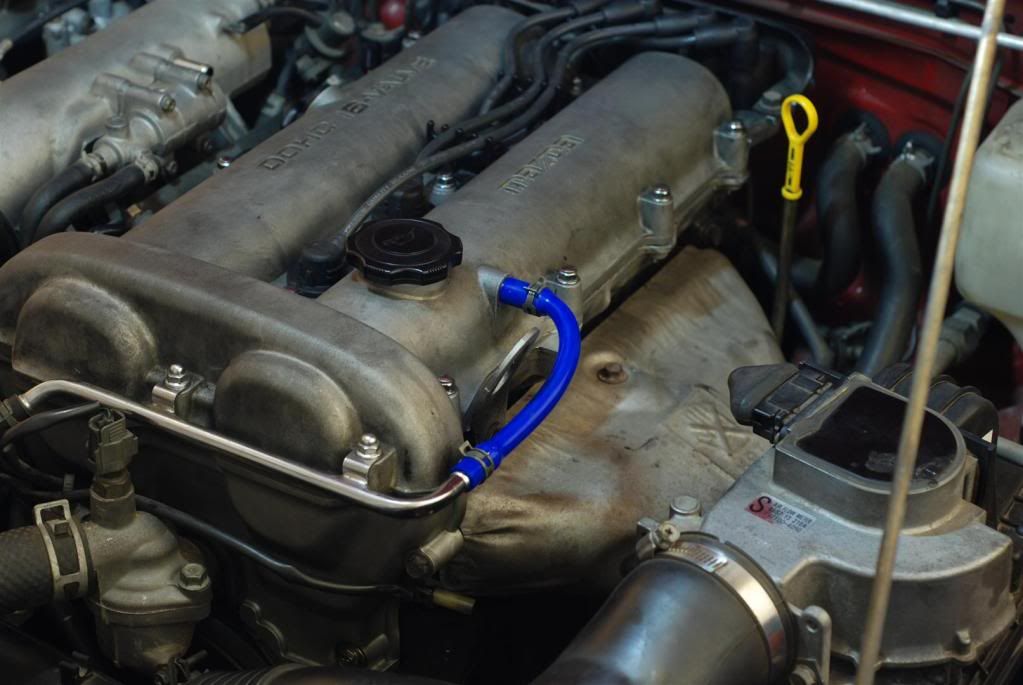
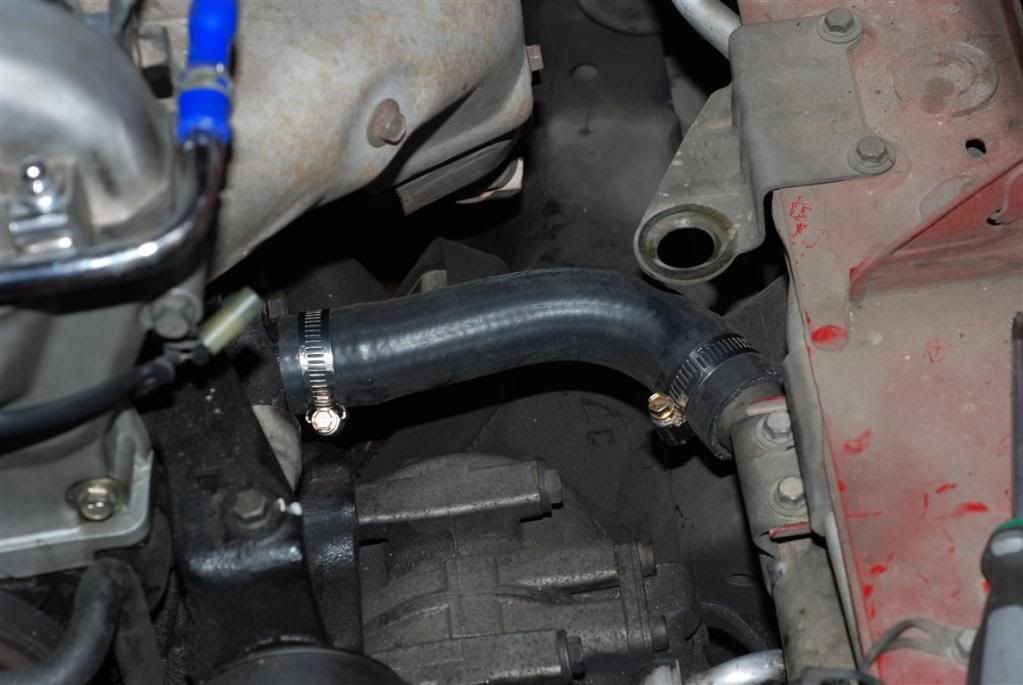
This is the one im talking about.

Image

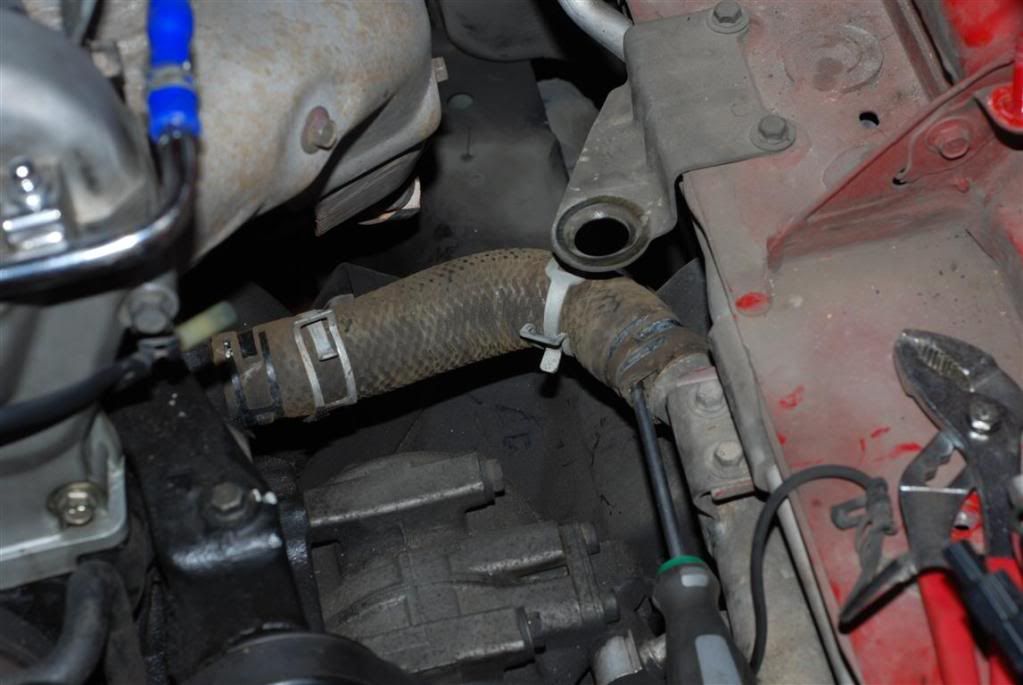
For now, lets call it the "mid hose".

Headed off to supercheap and i was on the hunt through the clusterfuck of hoses for something similiar.

I ended up with a top hose from i think a 2000 model camry.

Mackay part number CH1619. Ended up costing me about $16.

Image

Off course it needed some quick work with the stanley knife.

Had some mates over to join in on the radiator replacement fun as well.

I let some Nulon Radiator Flush run through it for a while and then let it cool.

The splash guard then had to come off which was easy enough.

Image

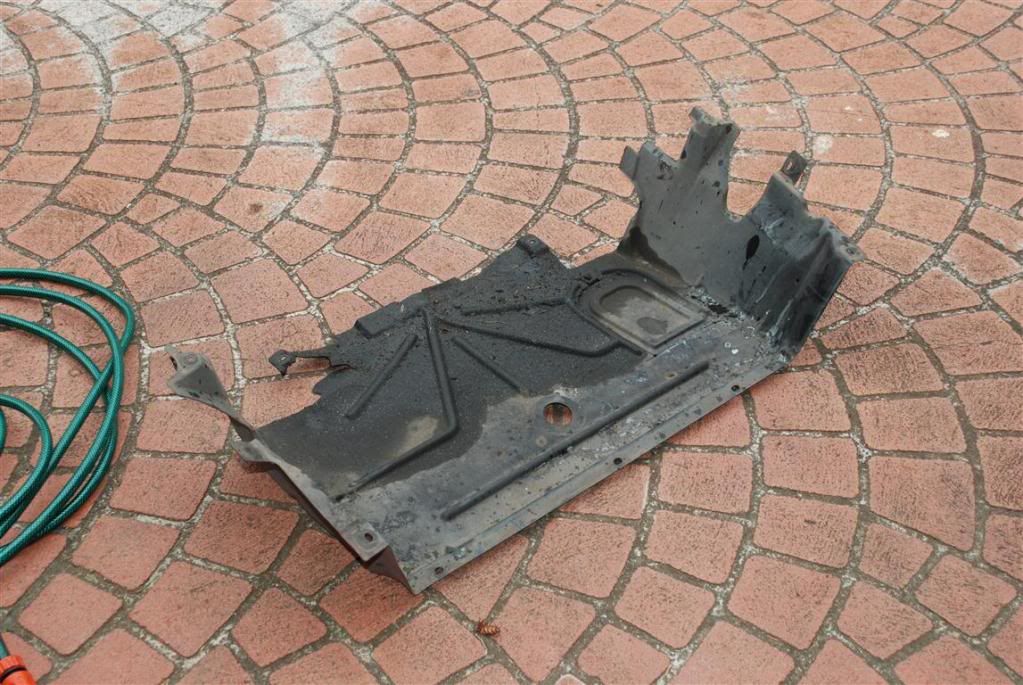
(photo was taken next morning before i degreased and hosed it)

After draining the system, i removed the thermostat and ran some straight water through it flushing out any remaining crap that may have been lingering in there.

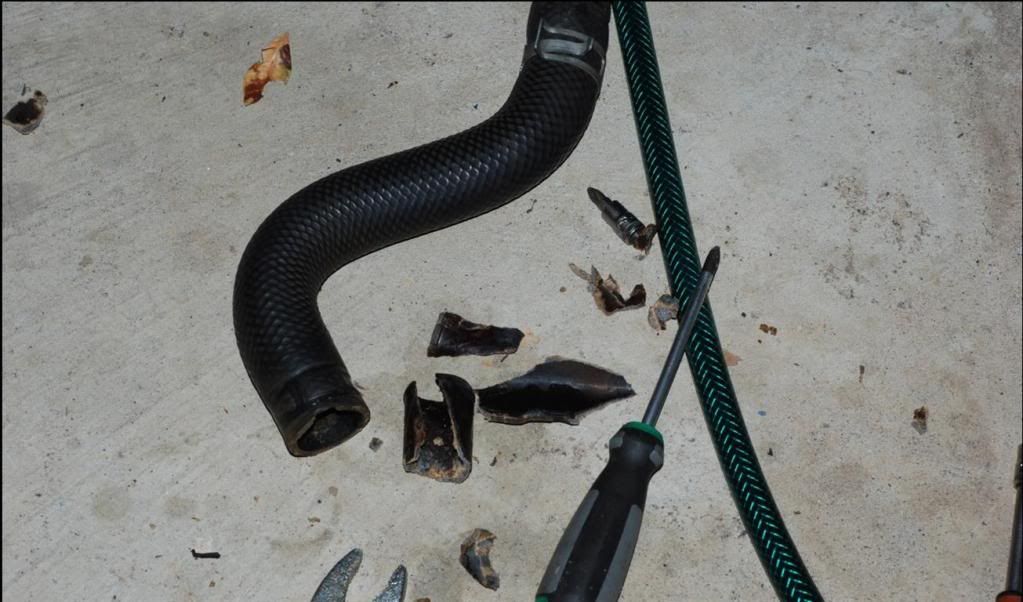
First to go was the lower radiator hose. Then the mid hose. Both had to be cut off, good thing i had some new ones handy. I never would have been able to pull them off by hand.

Next was the fun part.

Because i didnt have a new upper hose. I had to be careful taking off the upper one. Couldn't cut it obviously, so at it i went.

Eventually the thermostat housing side slid off. Easy enough.

Now it was the radiators turn.

HNNNNNNNNNNNGGG!

Image

/facepalm.

2 minutes later i thought YAY THE HOSE IS OFF!!!

2 minutes after that i thought GAHHHHH THE RADIATOR IS STUCK INSIDE!!!

20 minutes later i win.

Image

It was at this point i realised that if the alloy rad didn't fit. I was pretty much raped.

But then again, if it didnt fit, i would have made it fit...

Anyway.

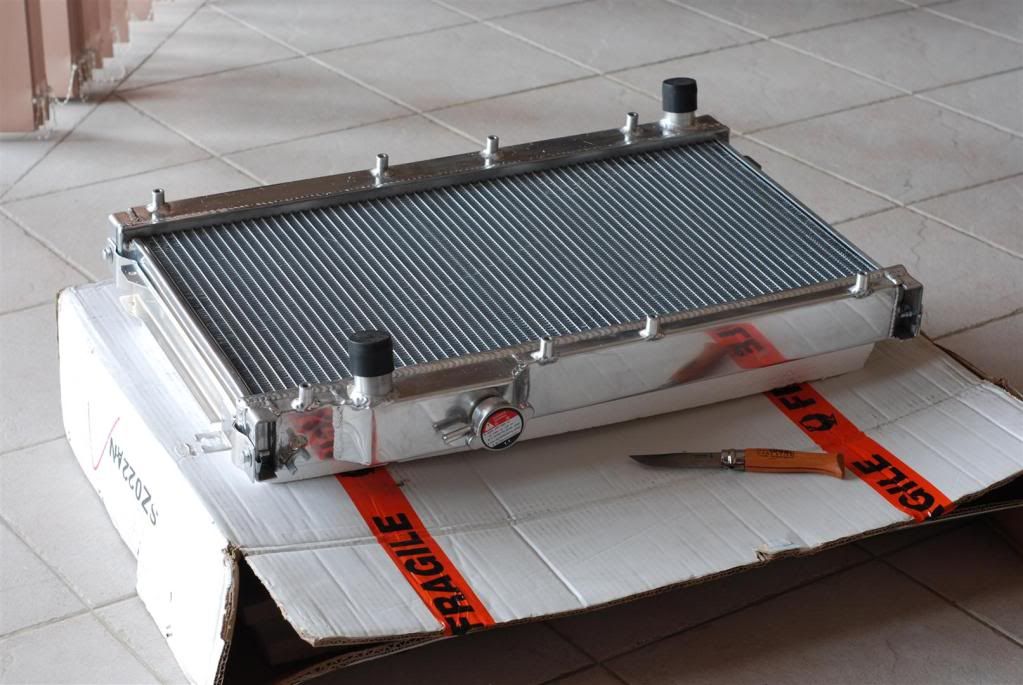
The radiator slid out with ease.

Time to slide the new rad in, but not before fitting all the rubber mounts.

The upper mounts went in fine, no issues there.

The lower side mounts however...
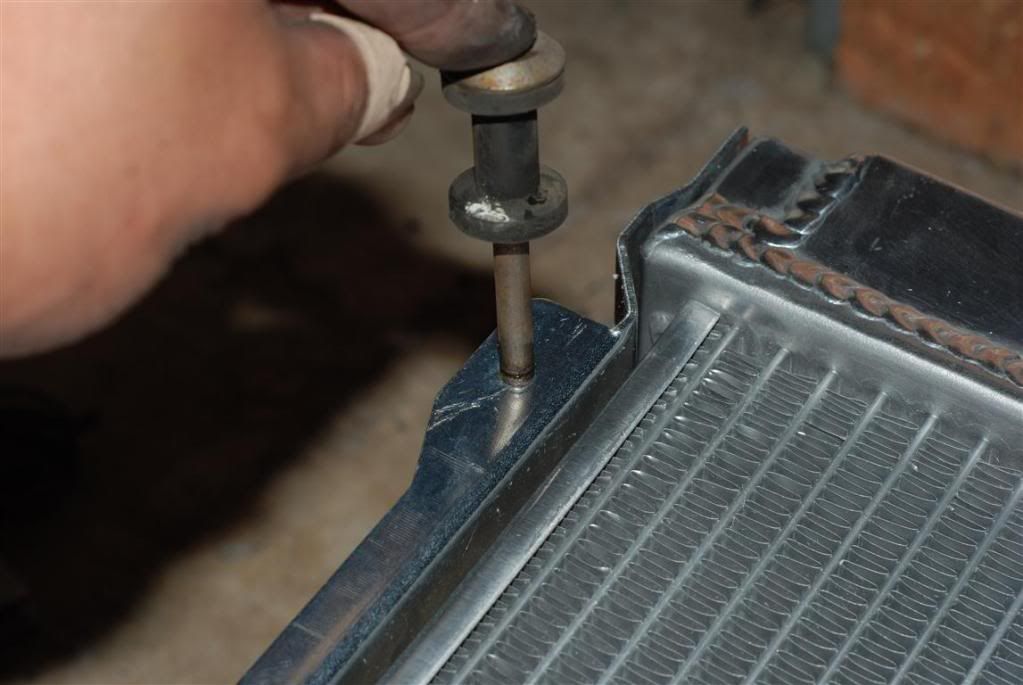
Image

....

Not to worry. Some quick work with the power drill and problem solved.

Image

Goddamit i hate e-clips...

Righteo, time to pull the fans off the original rad and pop them onto the new one.

Some quick work with the 10mm and i layed them down onto the new rad, the larger plastic one lined up SPOT ON.

Awesome i thought. Bolted that in.

Next fan, should fit even awesomer...

Image

.....

Again, not to worry, it really wasn't off by much. The drill was still out, and problem solved.

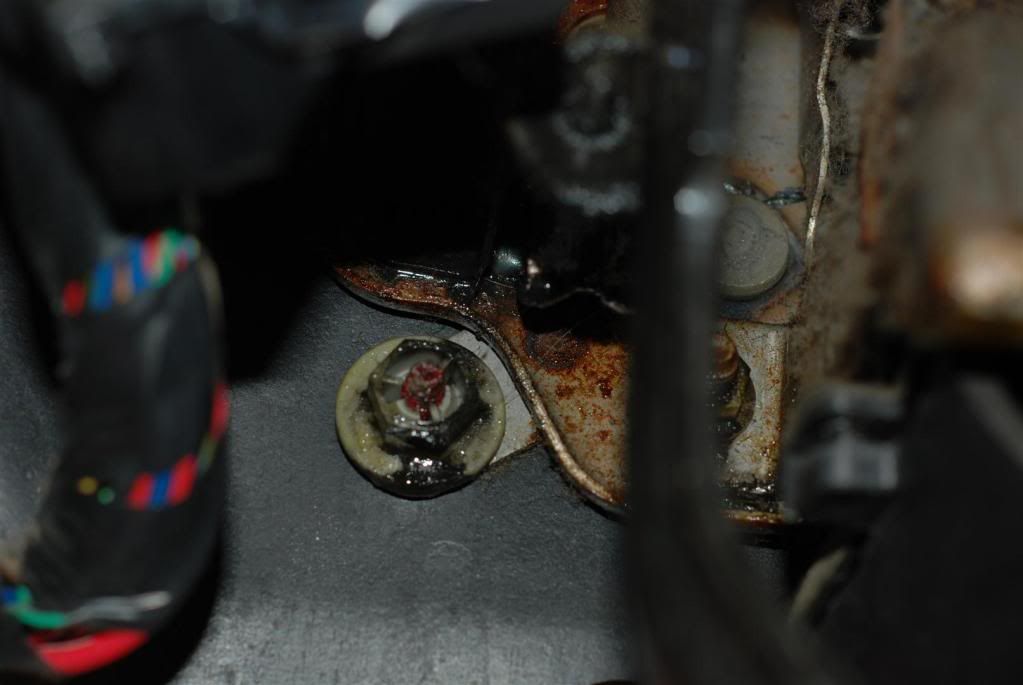
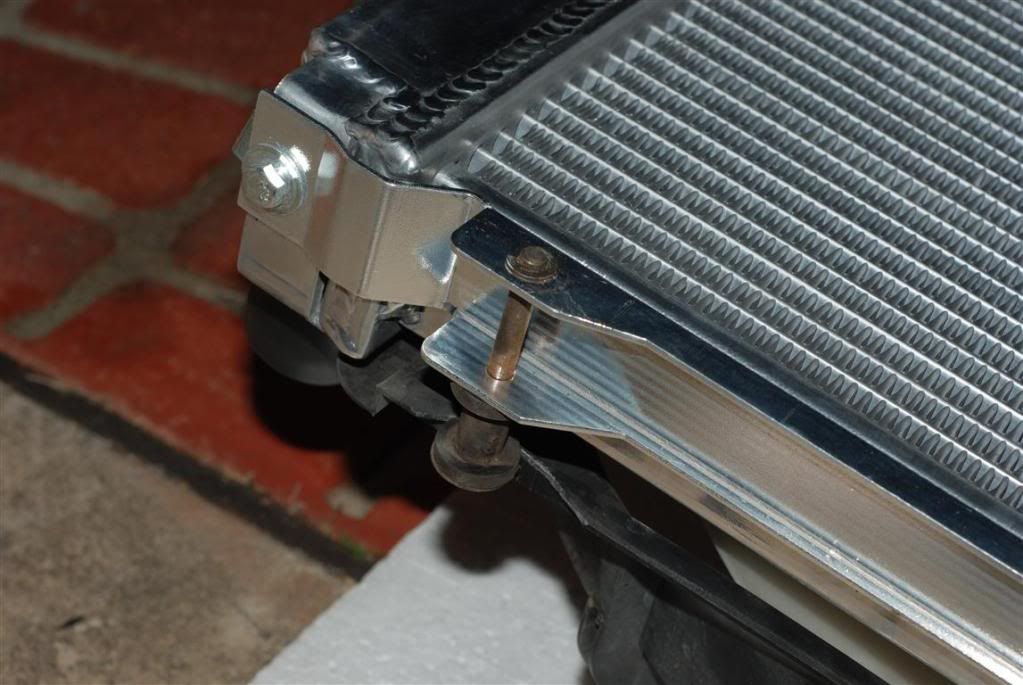
That same hole where the mount was off centre, also had some thread depth issues. The standard bolt wouldnt go in all the way without bottoming out so i had to add a 6mm nut and 2 washers to it (i'll grab a photo of that later).

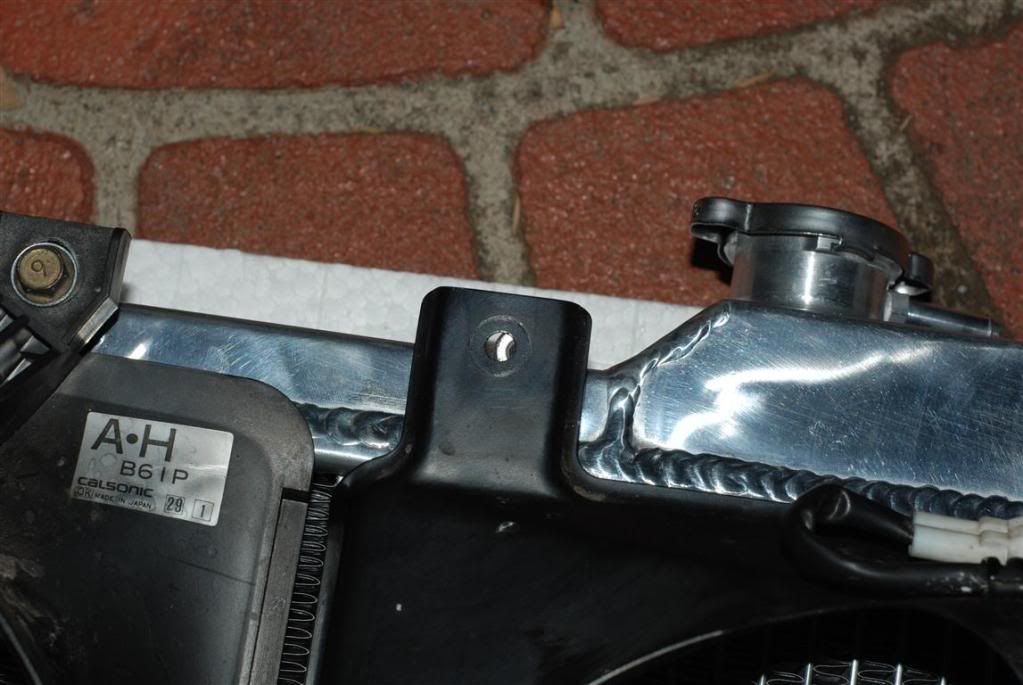
Some issues with the new rad fitting. My car has a/c. So there are extra hoses and piping running around the base of the rad area and it bolts on twice to the original rad. I take it to stop it from moving around and what not. Being as this rad is thicker, i had to work around that and make do with only bolting it in on one place only. Holds fine.

Next problem. It didn't slide in as easy as i thought. The damn a/c condensor is in the way and stopping me from hooking it into the lower mounting brackets. So i unbolted the 2 bottom bolts on the a/c condensor and pushed it out of the way as it was slid down and hooked into place. Good thing the condensor didn't have to be removed.

Everything fits, the hoses and pipes dont hit anything.

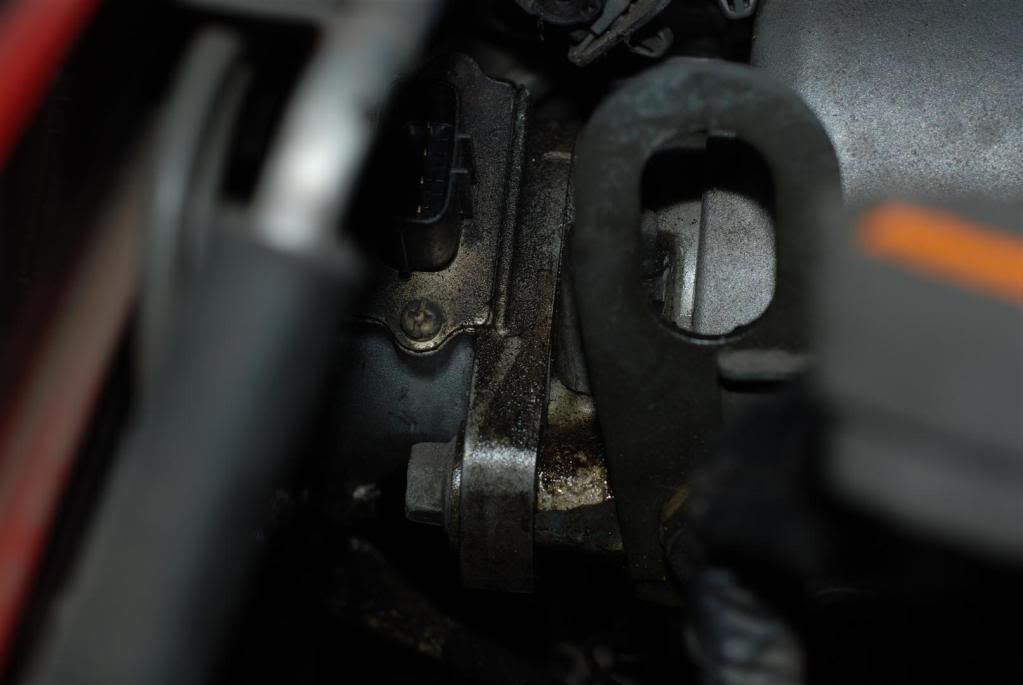
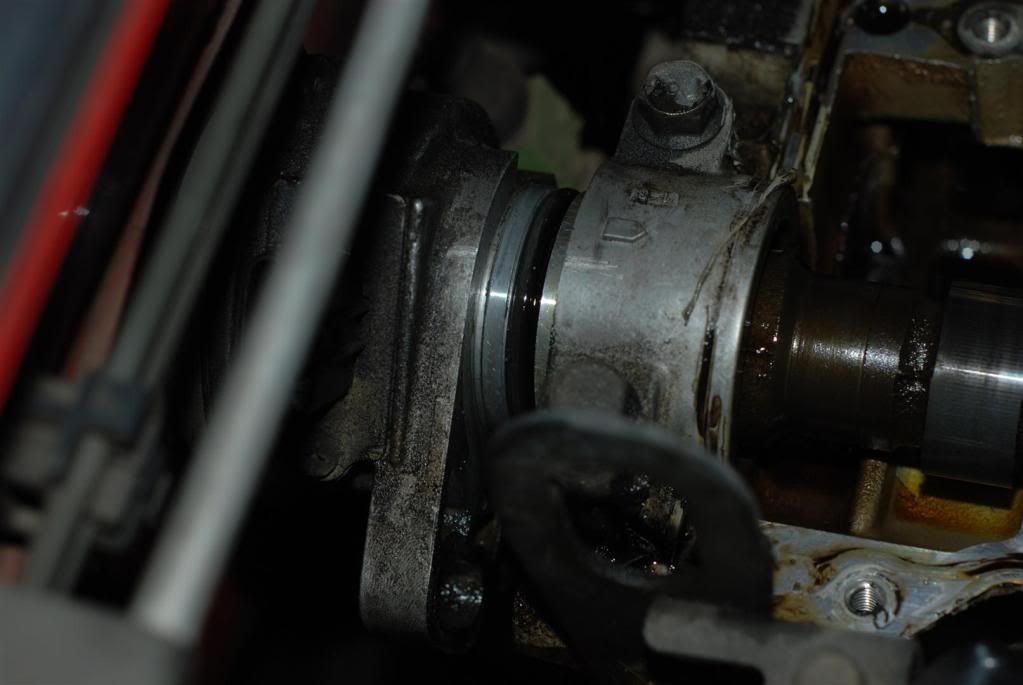
This is the gap between one of the a/c lines and the crank pulley however.

Image

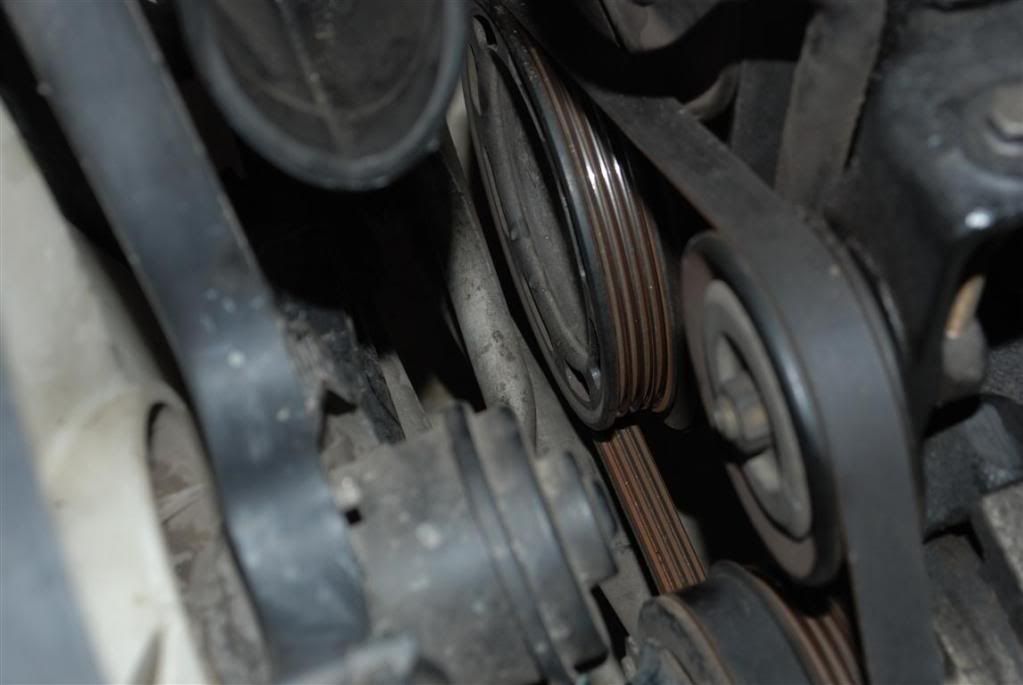
Nothing too concerning though.

After the new rad was in it was time to cut the mackay hose and fit that and the bottom hoses. Too easy.

Image

Fits awesome.

Image

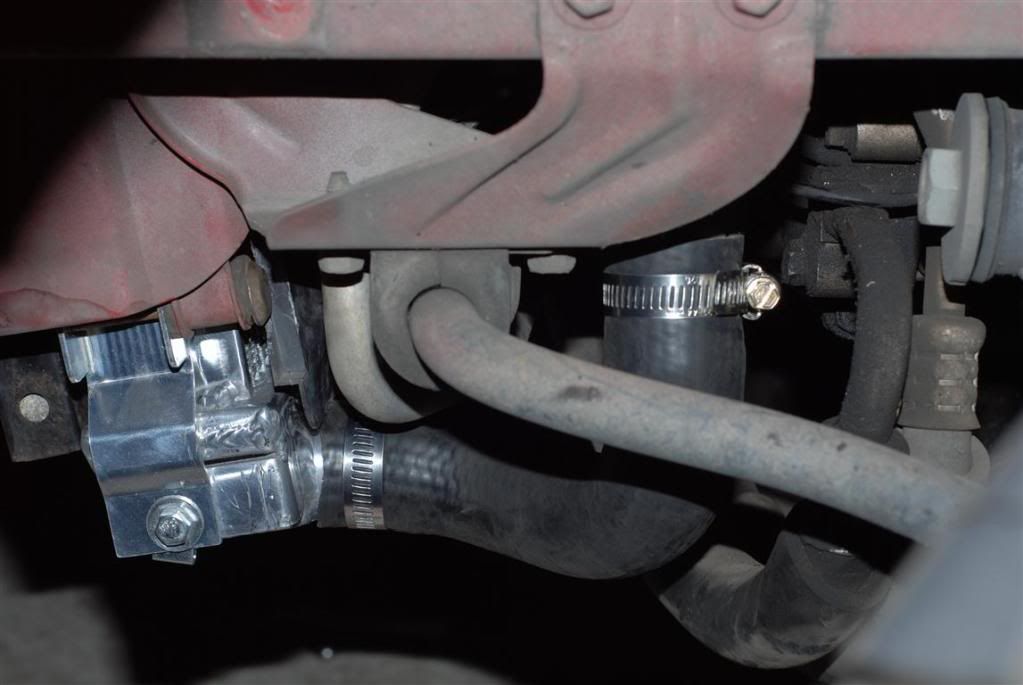
The bottom hose had to be trimmed abit to accommodate the extra thickness of the alloy rad.

Next up, ze zermostart

Image

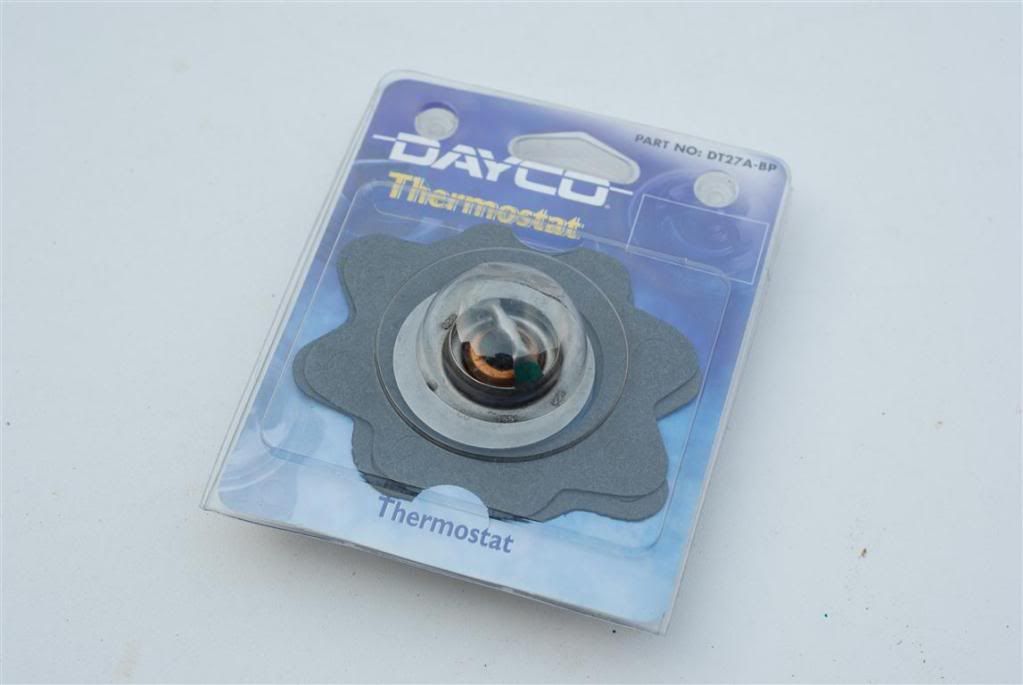
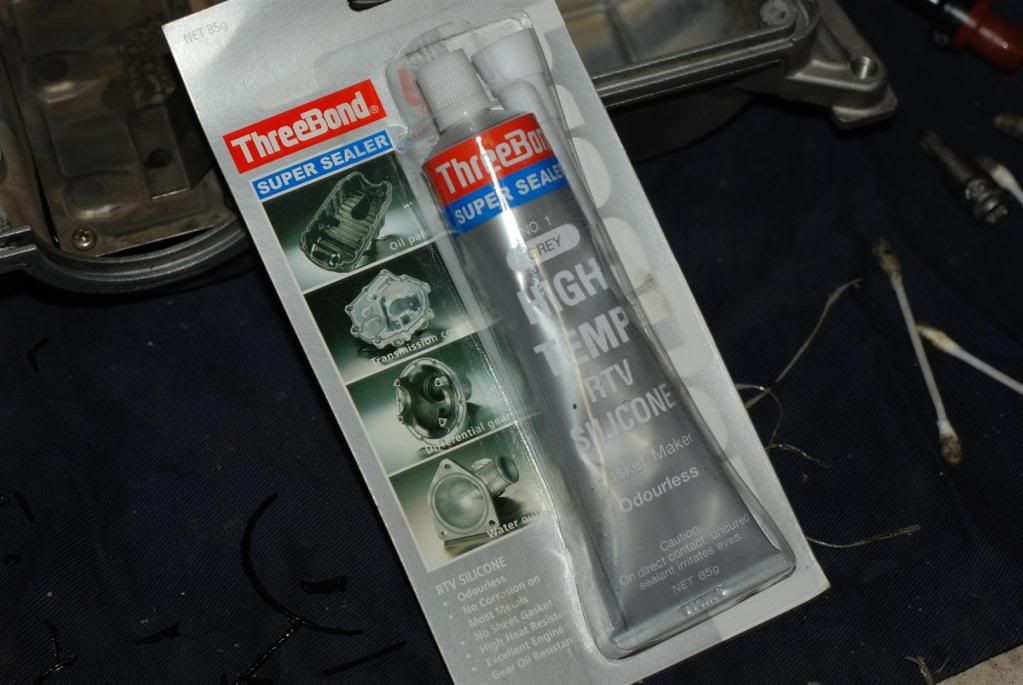
Got to work on the gasket with some silicone gasket maker for leak free thermostatage action.

When the original stat came out, the bulky side of the stat was sticking up, i got a little confused as i recalled reading somewhere and seeing the bulky part sticking down into the stat housing.

I never had cooling issues prior to this, no overheating, nothing. So i quickly ran inside, hopped on the computer, jumped on miata.net and saw that yes, i was right, the bulky part was to face down.

Got that sorted out and all bolted up. So far, no leaks from there yet.


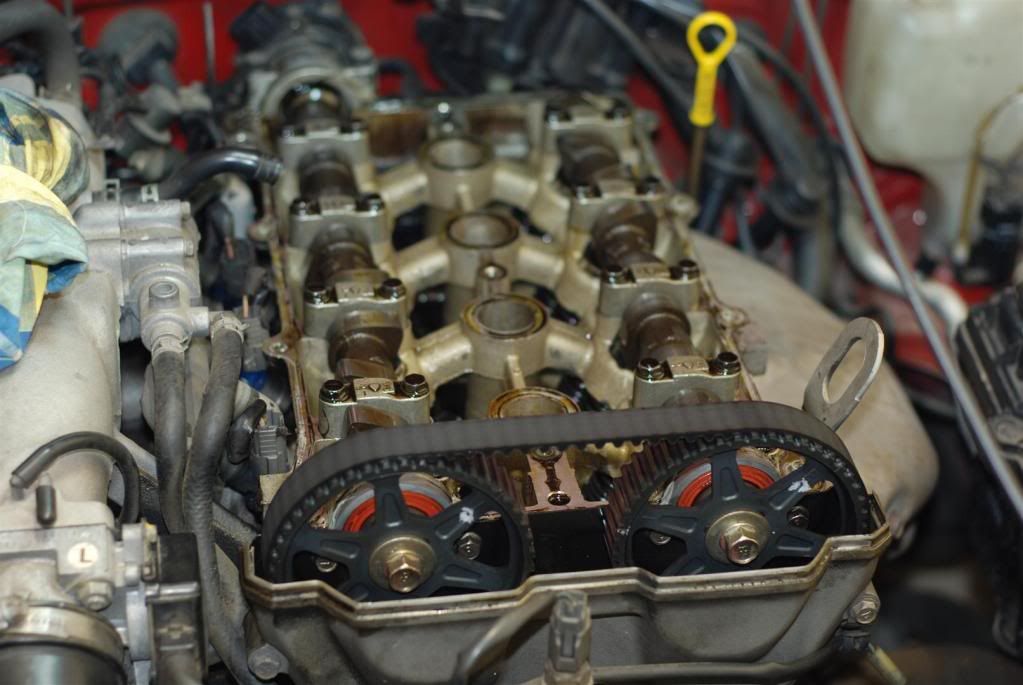
At that point in time, it was getting pretty damn late. So i dropped everything. Took a quick snap, dragged everything inside the garage and locked it up. Sleep time.

Image

Hang on, no i didnt.

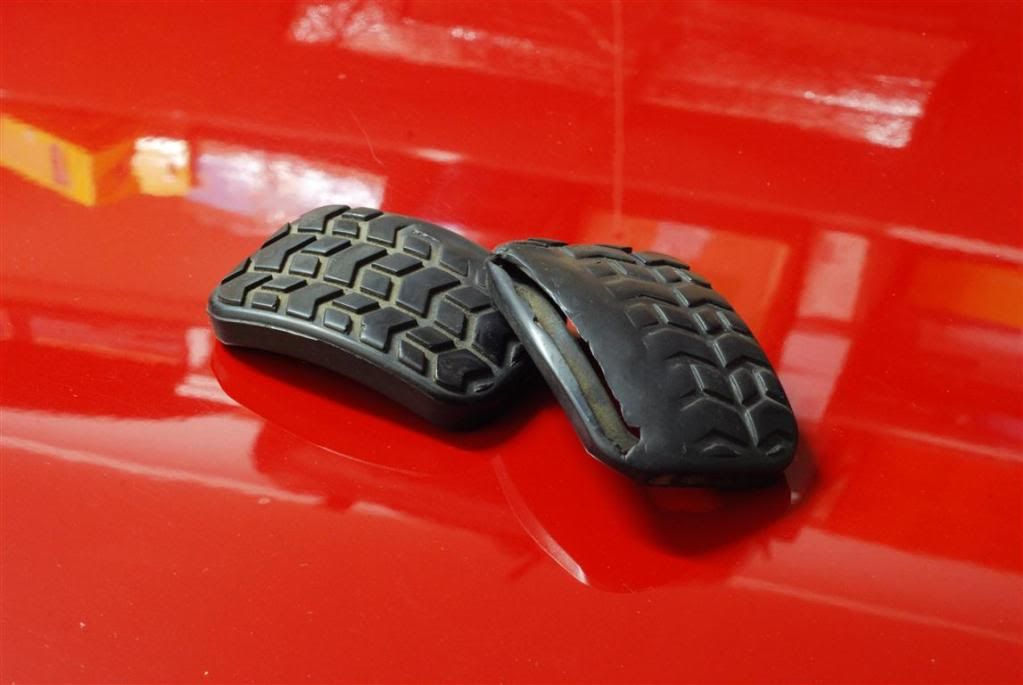
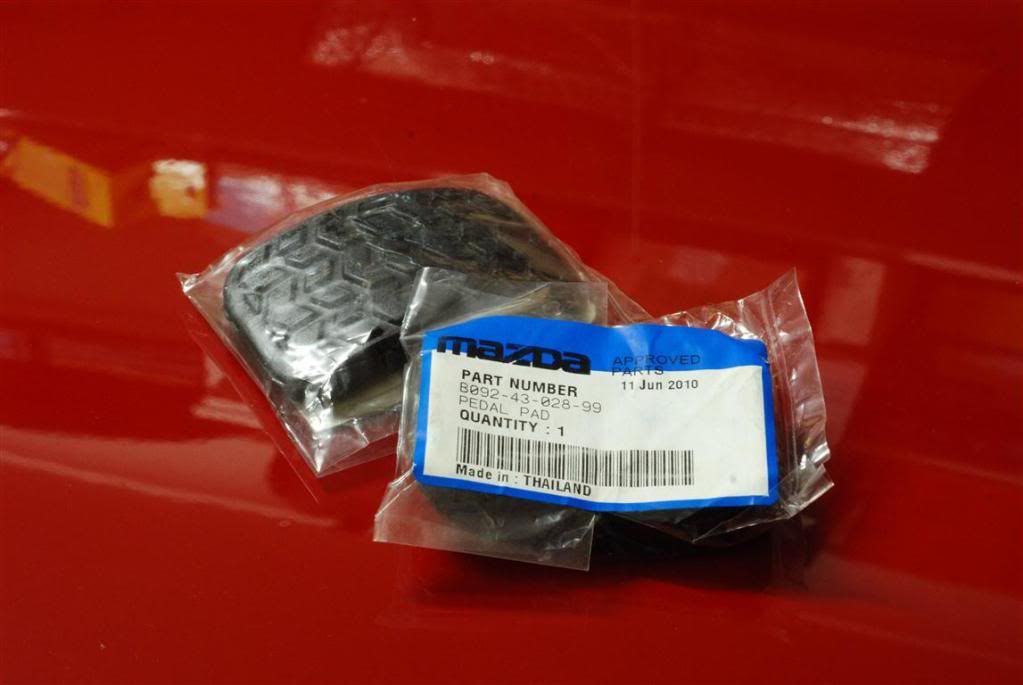
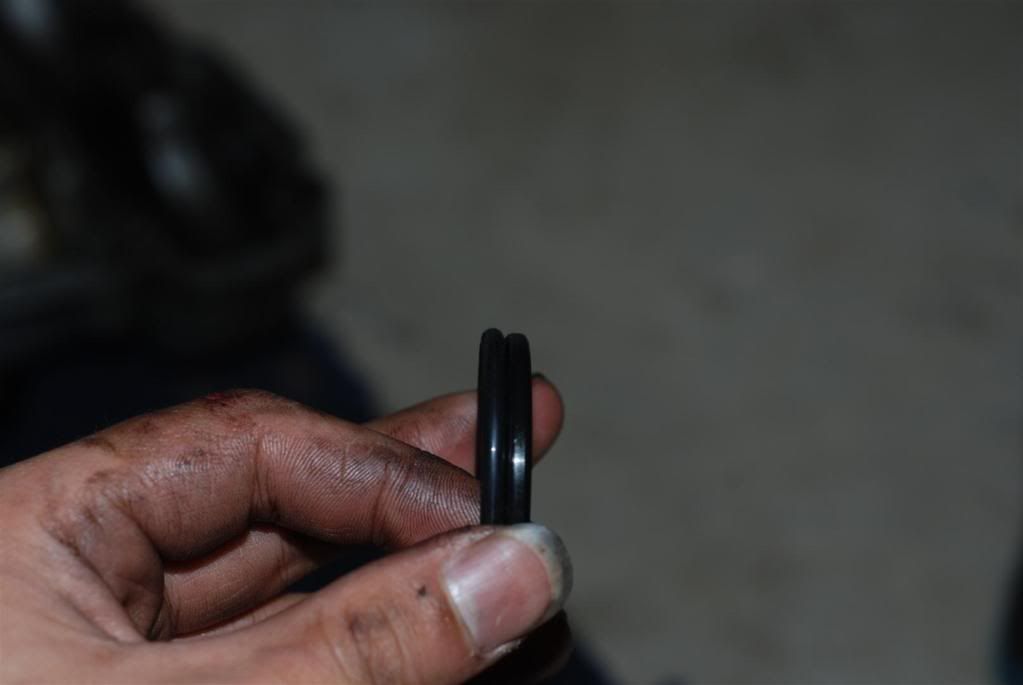
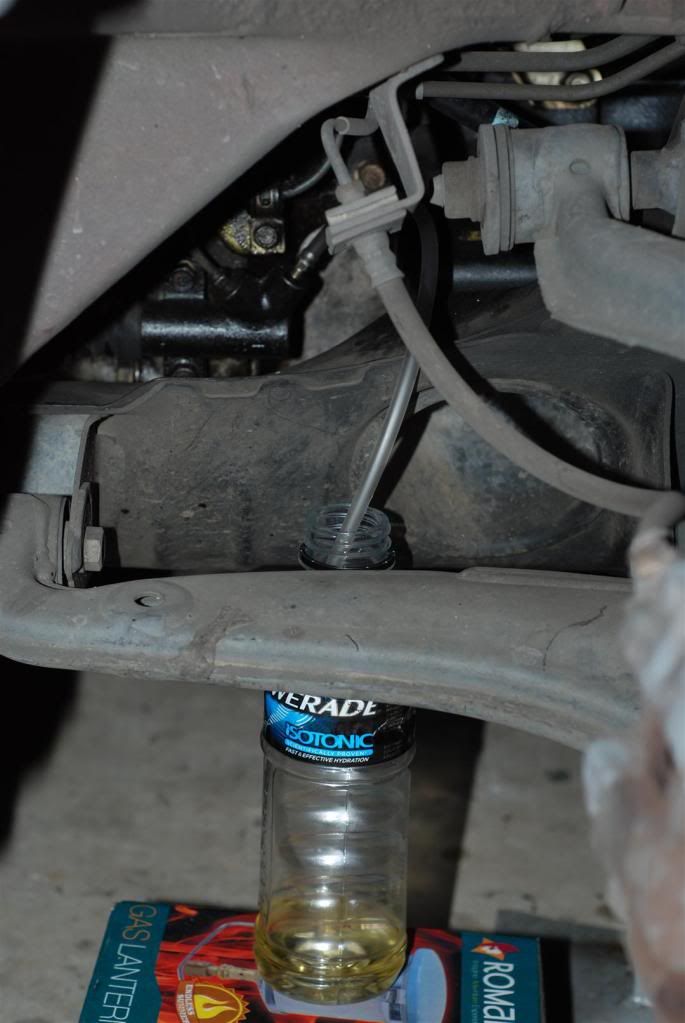
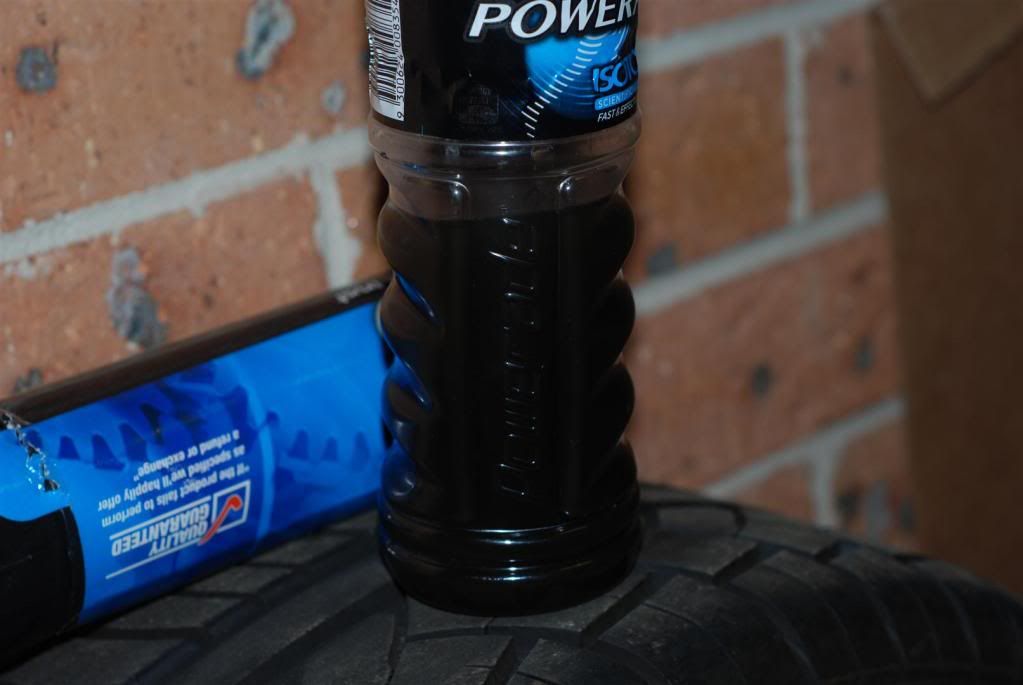
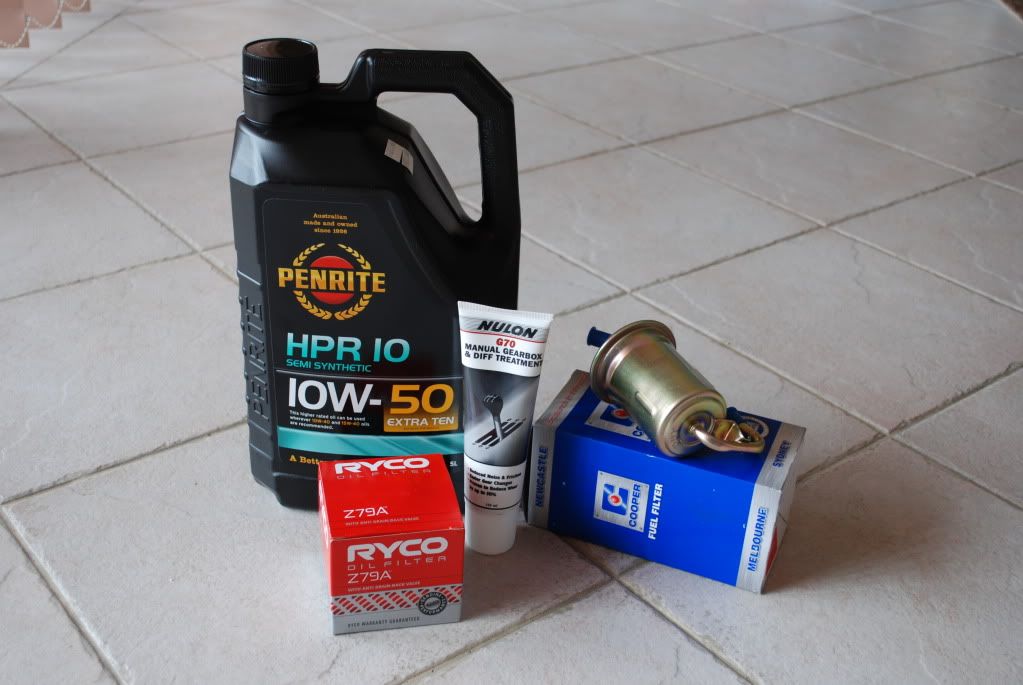
Right before i snuck into bed. I remembered i bought this a couple of weeks ago.

Image

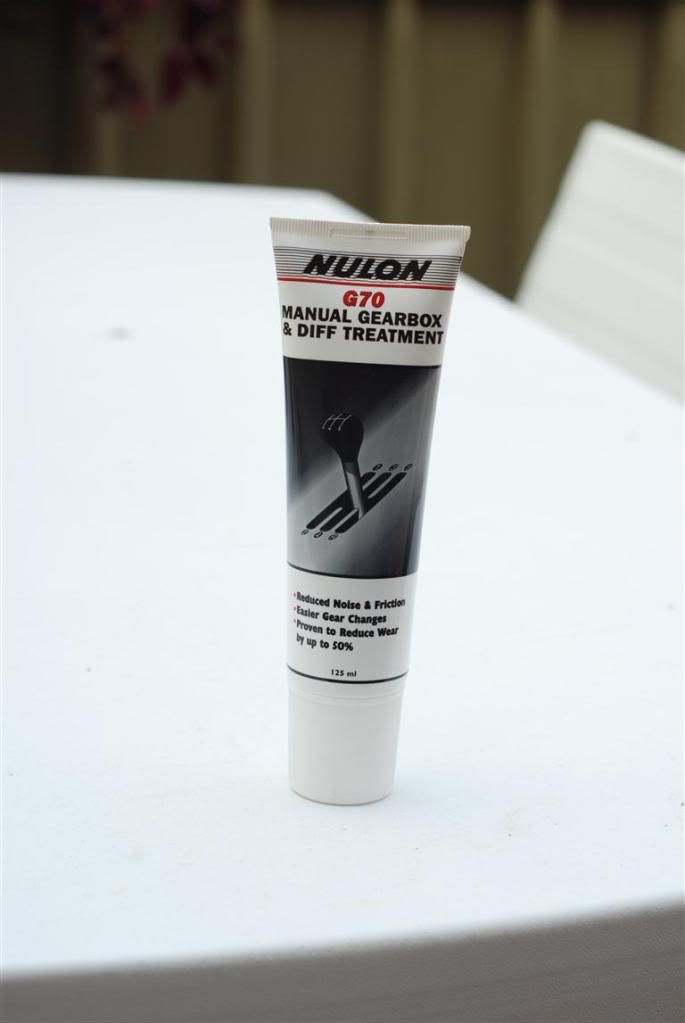
Got under the car quickly with the 14mm spanner. Squirted it inside the hole (...you heard me...) and made sure i anti-seized the fill plug before i put it back in again.

Next morning, got up and checked all my fittings again before setting about filling the rad up.

Image

I made sure the car was jacked up at the front to in order to aid with the bleeding.

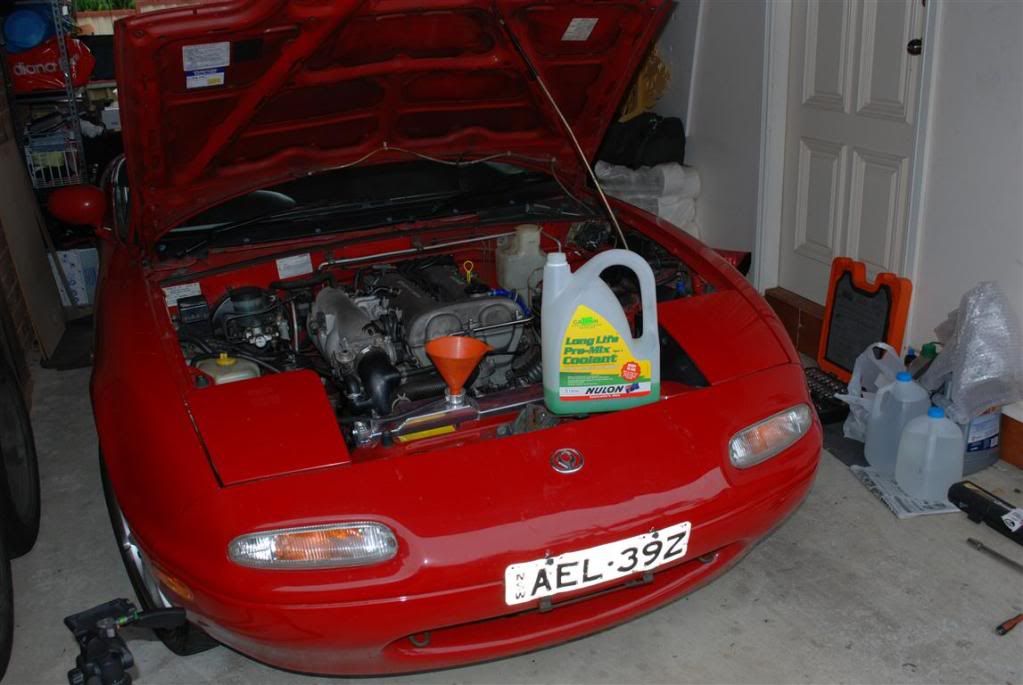
So i did what i initially planned to do. Fill it mostly with the Nulon premix stuff and then top up the rest with the demineralised water so i have a higher water to coolant ratio. Its probably roughly around 60:40.

Took the car for a spin (at this point completely forgetting i had used the Nulon gearbox additive) and made sure the temp needle stayed put. It did, the fan clicked on when it was supposed to as well. Awesome.

Stopped for some petrol. Took it home, cleaned up and admired my newly installed radiator.

This morning, before uni i checked to see if the coolant level stayed the same as i didnt check it after getting home yesterday. Ended up topping up abit with some demin. water.

As i left home, i realised, holy crap, the gearbox has quietened down abit, and my cold morning 1-2 shifts are less notchy and smoother, so i can definitely vouch that the stuff actually WORKS. When i drain and refill my diff i'll definitely add some of this stuff in as well.

About 10 minutes into my trip to uni at the traffic lights, i noticed some light steam wafting out from the bonnet....my heart sank....i felt sick in the guts....all i could think in my head was "what was that number for the tow truck dude again?".

Pulled into the nearest side street. Popped the bonnet. Loe and behold, the rad was simply just burning off some coolant/water i had spilt on and around the radiator...thank farking god..... Got the rag out from the boot, wiped it down as much as i could and off i went again...no more steam for the rest of the trip, not on the way home either. Awesome.

Thats pretty much it for now.

Got my rego renewed as well so im back to being broke for the time being.

User avatar
Stoogey
Driver
Posts: 98
Joined: Wed Sep 28, 2011 1:29 am
Vehicle: NB8A
Location: Sydney!

Re: Stoogey's NA6 - Moving Up In Life

Postby Stoogey » Mon Nov 21, 2011 11:53 pm

Quick update.

The tyres on the 16" wheels that came with the car are pretty mediocre (budget chinese tyres), and im not a big fan of 16" on mx5's (unless done properly). The tyres on the rota's were worn and crap, the recent sydney rains had me slipping at every roundabout, and not in the cool initial d way...

(If anyone wants to buy those 16" wheels and tyres off me...let me know lol).

So i decided i'd prefer not to understeer into a tree anytime soon and sorted out some new tyres today.

Image

(dont mind the brake dust :mrgreen:)

Kumho KU31's in 195/50/15.

Also got a front and rear alignment done as well.

Im guessing the tyres are still being broken in but the way the car drives now has just completely transformed. The lower profile has improved steering response and feel and the car felt much more confident in todays rain too. A big thumbs up from me for the ku31's, you cant beat them for the price.

I was contemplating on keeping the 195/55 size but im glad i went to 50 instead. Feels much better and i reckon it looks great as well. Will look even better once its lowered...

On the way home, picked up some stuff.

Image

That Valvoline stuff i put in....is crap....well, maybe not crap, perhaps its just the wrong viscosity but its only been 3000-3500kms and im getting lifter noises like crazy when the engines warmed up. No cold ticking, just a hot tick. So according to my research that indicates that the hot temp weight is too light.

Hopefully this Penrite 10w-50 stuff will do the trick. Havn't heard much bad about it.

And yes, i am gonna squeeze in another tube of the g70 stuff into the gearbox. Will be interesting to see how much more of an improvement it makes, if it makes any extra that is.

I couldnt see anything in the records about the fuel filter being replaced so i can only imagine that its probably gone to junk. Even if it was replaced recently it can't hurt to swap it again :)

User avatar
RedMX
Fast Driver
Posts: 314
Joined: Tue Apr 05, 2011 3:16 pm
Vehicle: Non MX-5
Location: Ballarat, Central Victoria

Re: Stoogey's NA6 - Moving Up In Life

Postby RedMX » Tue Nov 22, 2011 7:23 am

:D good writeup so far :) looks like your loving teh car. :NA6:


Return to “MX5 Garage Chat”

Who is online

Users browsing this forum: Bing [Bot] and 33 guests