Wazman's NB8a
Moderators: timk, Stu, -alex, miata, StanTheMan, greenMachine, ManiacLachy, Daffy, zombie, Andrew, The American, Lokiel
- wazman
- Fast Driver
- Posts: 394
- Joined: Sun Feb 15, 2009 11:39 pm
Wazman's NB8a
The ASI raditor fitted perfect no probs.....everything lined up fine.
Yeah i'll be getting the guards rolled after i get coilovers....
Yeah i'll be getting the guards rolled after i get coilovers....
ilovedrift.com
- lukey
- Fast Driver
- Posts: 141
- Joined: Sat Jul 05, 2008 2:31 pm
- Vehicle: NB SE
- Location: Sydney
Wazman's NB8a
Very nice Waz
I cant wait to see the finished result
I cant wait to see the finished result
1997 MX5 Montego Blue - Gone
1999 MX5 Brilliant Black - Gone
2004 MX5 SE Titanium - OOOOOHH BABY!!!!
'Jinbai Ittai' - Rider and Horse as one
1999 MX5 Brilliant Black - Gone
2004 MX5 SE Titanium - OOOOOHH BABY!!!!
'Jinbai Ittai' - Rider and Horse as one
-
RG.net
- Racing Driver
- Posts: 1692
- Joined: Thu Apr 06, 2006 7:48 pm
- Vehicle: NA6
- Location: Sydney
- Contact:
- wazman
- Fast Driver
- Posts: 394
- Joined: Sun Feb 15, 2009 11:39 pm
Wazman's NB8a
YAY !!!! Stuff came today in the mail and it wasn't bill's !  wooooooo
Payed for em late thursday night and they rocked up 9:30 mon morning from NZ...... Good Game! (GG)
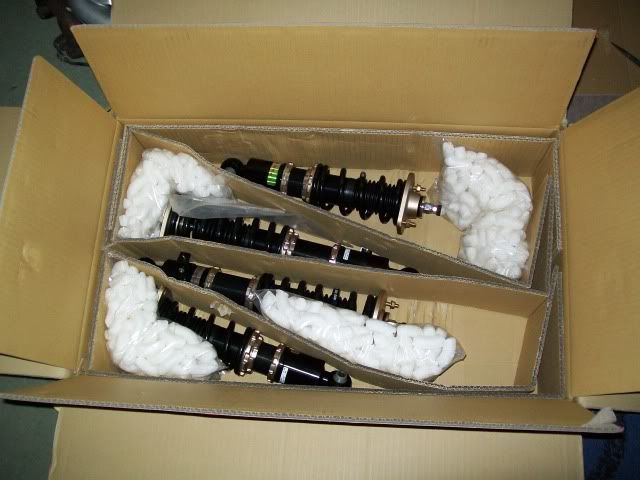
One set of BC coilovers $1199 + $100 delivery off ebay.....
Here comes the install....... Some may not approve of my methods.....But there in and i didn't leak a single drop of blood= GG
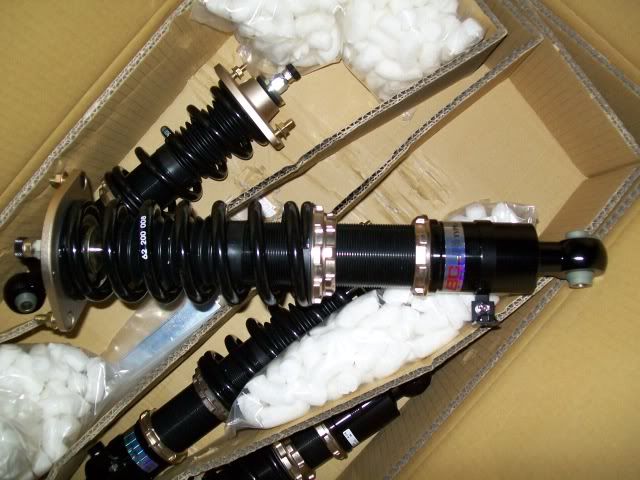
I've heard rumours that these coilovers are made in the same factory that produces the "Greddy/trust" coilovers..... My housemate has greddy's in his silvia and the similarities in build quality and labeling is uncanny.......
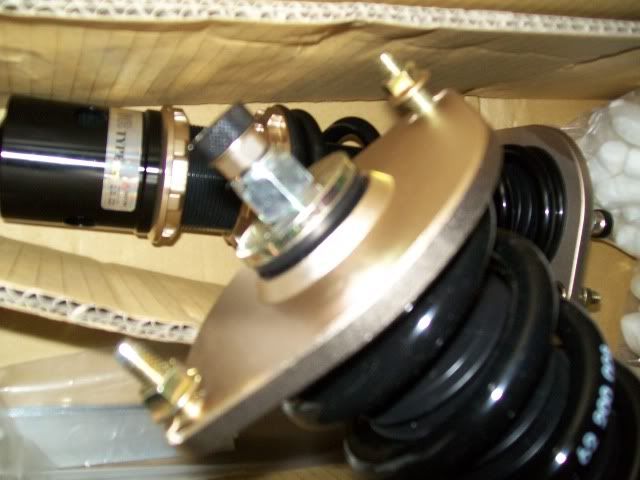
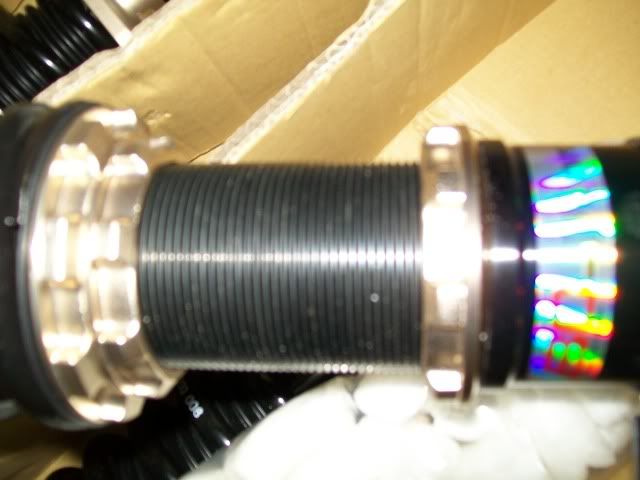
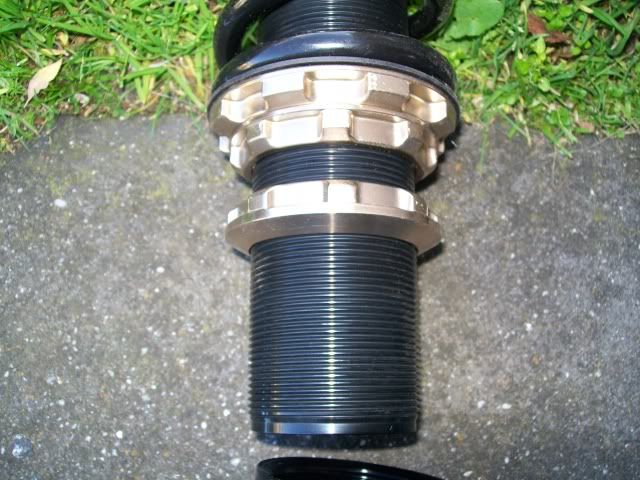
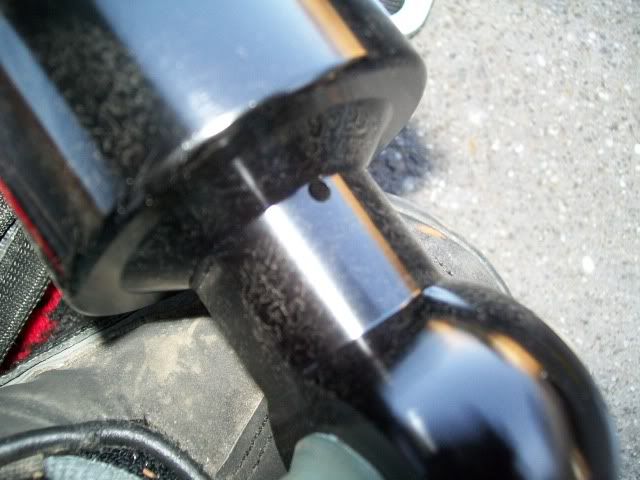
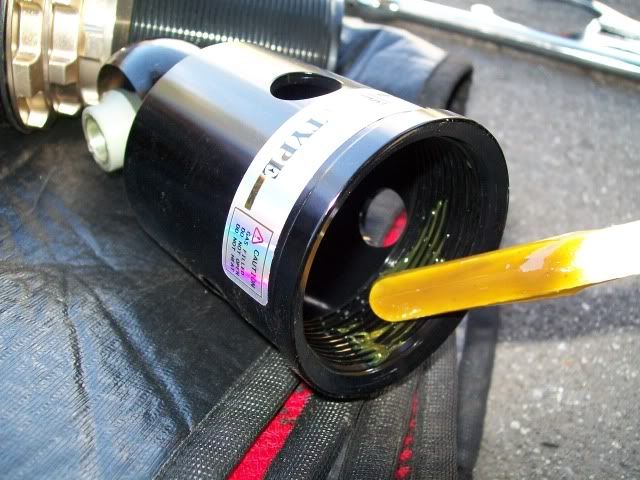
I find the idea of having holes in the side of the bottom cup where the thread is...... a little confussing, wouldn't it just let more water/crud in to corrode the thread? ......the drainage hole at the bottom makes up for it though...... the JIC's i had in my 180sx didn't have this feature
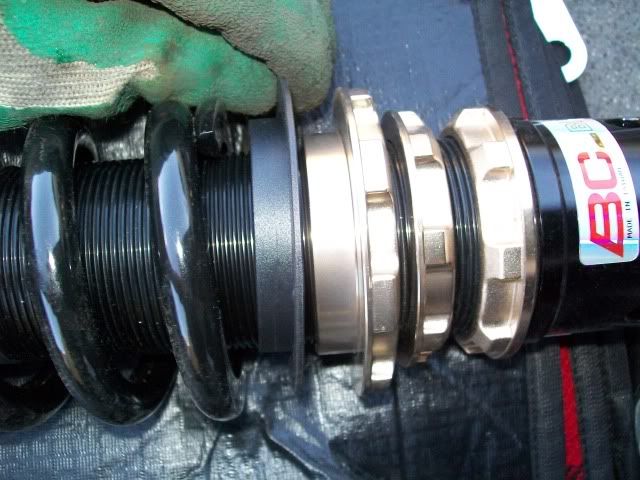
Payed for em late thursday night and they rocked up 9:30 mon morning from NZ...... Good Game! (GG)

One set of BC coilovers $1199 + $100 delivery off ebay.....
Here comes the install....... Some may not approve of my methods.....But there in and i didn't leak a single drop of blood= GG

I've heard rumours that these coilovers are made in the same factory that produces the "Greddy/trust" coilovers..... My housemate has greddy's in his silvia and the similarities in build quality and labeling is uncanny.......


I find the idea of having holes in the side of the bottom cup where the thread is...... a little confussing, wouldn't it just let more water/crud in to corrode the thread? ......the drainage hole at the bottom makes up for it though...... the JIC's i had in my 180sx didn't have this feature

ilovedrift.com
- wazman
- Fast Driver
- Posts: 394
- Joined: Sun Feb 15, 2009 11:39 pm
Wazman's NB8a
I thought i took alot more pic's at the time but once i uploaded em there aint that many 
Last edited by wazman on Tue Jun 30, 2009 6:28 am, edited 1 time in total.
ilovedrift.com
- wazman
- Fast Driver
- Posts: 394
- Joined: Sun Feb 15, 2009 11:39 pm
Wazman's NB8a
I decided to start with the rear.... Because i new it would be easiest......Undo the sway bar, it makes moving seperate sides up and down much easier....
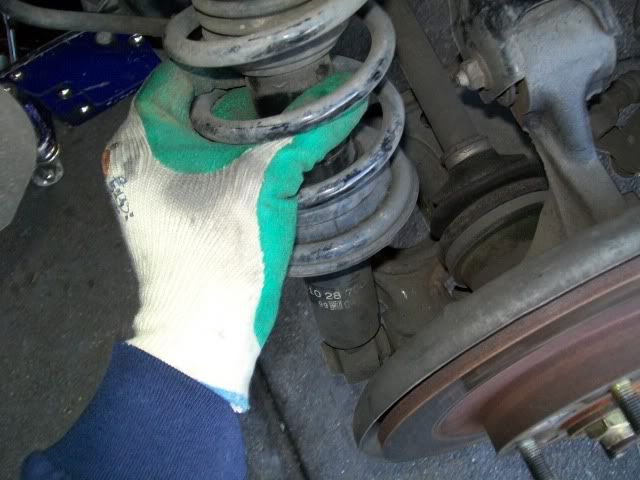
Pull out the trim in the boot and the metal fuel hose guard to get access to the strut top bolts....I loosened these until just a few threads remained, so i can just reach in and undo by finger whilst holding up with other hand when it come time to take out.
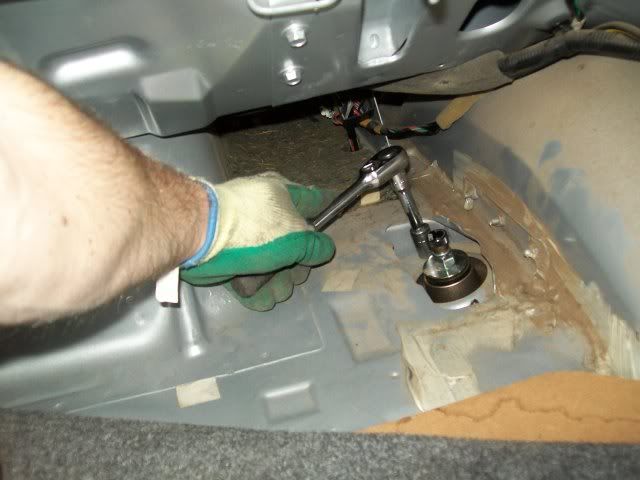
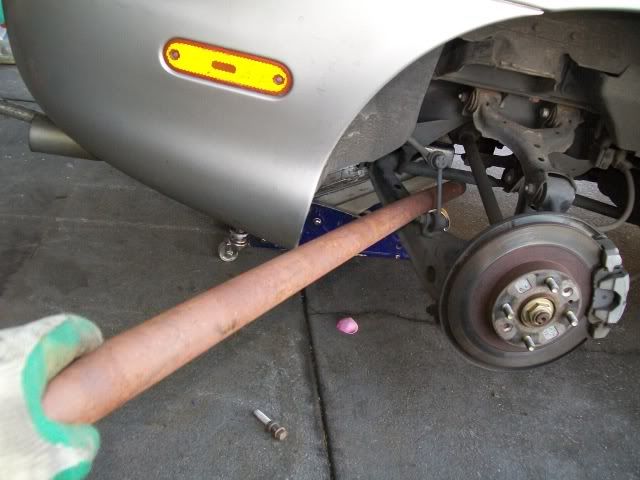
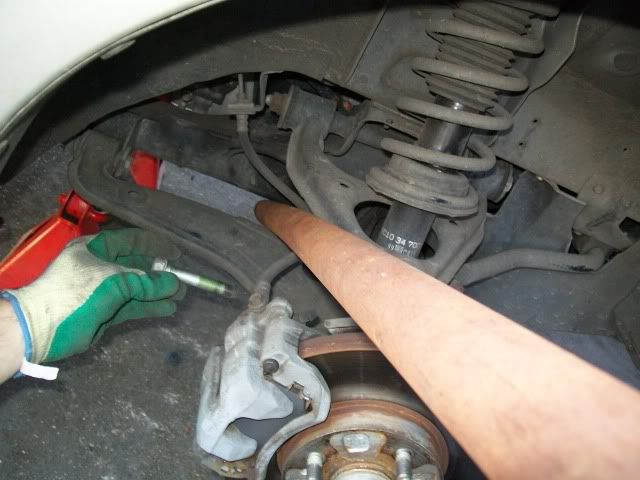
I didn't have a pic of undoing the standard strut top but you get the idea...... Below you cant see but i have the rusty pole jambed through the top wishbone to push the whole lot down so i can get the strut out......Its tucked under my arm while i take photo and grab strut ......
Very handy to have in your garage..... 1 piece of 1.5m x 38mm rusty pipe ! Rusty pole is a must for quick and easy one man coilover installs
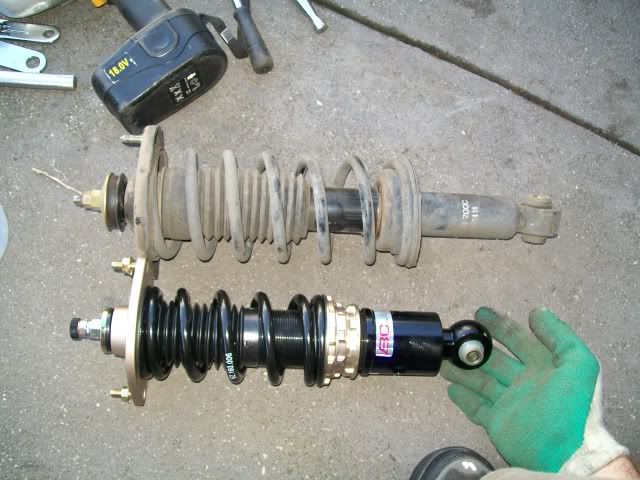
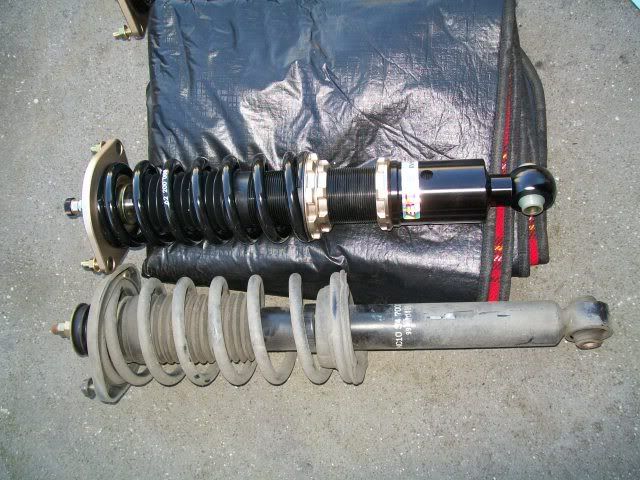
Here you can see the length difference between stock and BC (with base screwed all the way on as far as it would go) but with NO preload on the spring, just held firm by a couple of turns....
Pull out the trim in the boot and the metal fuel hose guard to get access to the strut top bolts....I loosened these until just a few threads remained, so i can just reach in and undo by finger whilst holding up with other hand when it come time to take out.

I didn't have a pic of undoing the standard strut top but you get the idea...... Below you cant see but i have the rusty pole jambed through the top wishbone to push the whole lot down so i can get the strut out......Its tucked under my arm while i take photo and grab strut

Very handy to have in your garage..... 1 piece of 1.5m x 38mm rusty pipe !

Here you can see the length difference between stock and BC (with base screwed all the way on as far as it would go) but with NO preload on the spring, just held firm by a couple of turns....

ilovedrift.com
- wazman
- Fast Driver
- Posts: 394
- Joined: Sun Feb 15, 2009 11:39 pm
- wazman
- Fast Driver
- Posts: 394
- Joined: Sun Feb 15, 2009 11:39 pm
Wazman's NB8a
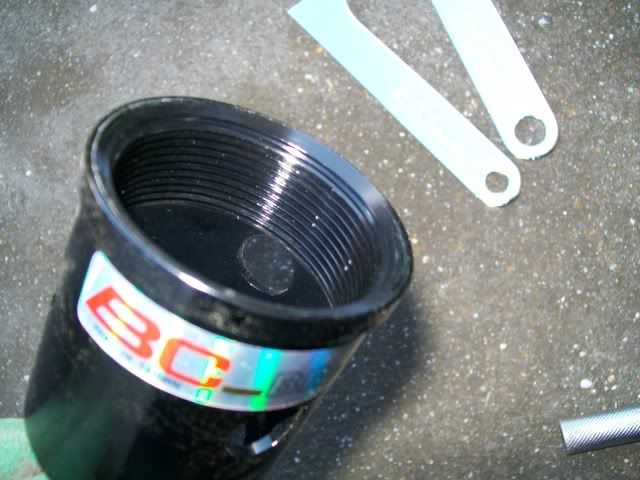
If you've ever had a set of seized up coilovers before and tried to get em moving then you'll appreciate what i'm doing here....A small amount of grease onto the thread inside the height adjustable base. Yes i'm male and no i didn't read the instructions......i just do stuff like this...
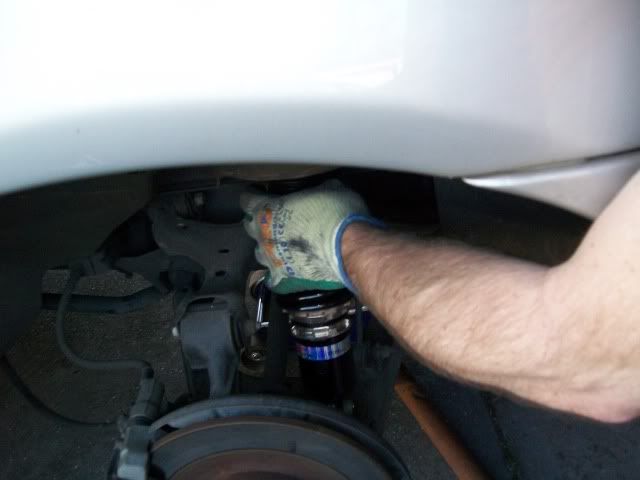
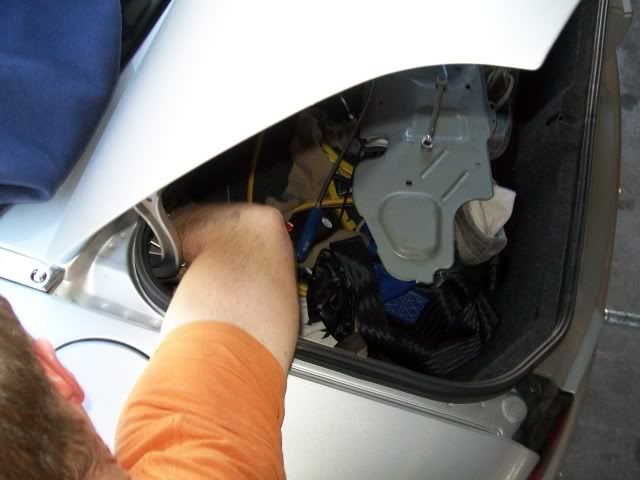
This is the awkward reach/feel around in the dark for a thread to put your nut onto..... Hold it up while you try get the nut on
ilovedrift.com
- sliq
- Speed Racer
- Posts: 3414
- Joined: Sat Jan 13, 2007 12:33 am
- Vehicle: ND - 2 GT
- Location: Sydney
- Contact:
- Pamex
- Racing Driver
- Posts: 1366
- Joined: Sun Aug 10, 2008 9:28 pm
- Vehicle: NA6
- Location: SE Melb
Wazman's NB8a
Awesome write up. That's coming along a treat!
I concur on the rusty pole. I was lacking a rusty pole when I did mine so super awesome purple wheel brace sufficed.
Oh and KAAZ LSD... Wow. Nice.
I concur on the rusty pole. I was lacking a rusty pole when I did mine so super awesome purple wheel brace sufficed.
Oh and KAAZ LSD... Wow. Nice.
Red 1990 NA | 1949 MG TC. TC 6568 | 244GL Rally Volvo | 1979 HZ Kingswood
"If you can't undestand from wiki, I can't help you." - A wise man
"If you can't undestand from wiki, I can't help you." - A wise man
- Hammer
- Speed Racer
- Posts: 2849
- Joined: Fri Apr 25, 2003 11:00 am
- Vehicle: NB SP
- Location: Sydney
- Contact:
Wazman's NB8a
Wicked!  I too am considering swapping the springs and shocks of my NB.
This is a very good pictorial "How-to". Very handy for a newbie, like me.
I might IM you for more hints and tips. Like, what tools did you end up using etc.
This is a very good pictorial "How-to". Very handy for a newbie, like me.
I might IM you for more hints and tips. Like, what tools did you end up using etc.
H@mmer - 1994 Clubman | 2002 SP

GO TOPLESS!!!
GO TOPLESS!!!
- Jeo
- Speed Racer
- Posts: 3659
- Joined: Thu Jun 26, 2008 9:33 am
- Vehicle: NB8B
- Location: Canberra
Wazman's NB8a
I like what I see  Needs completed pics asap
- Okibi
- Speed Racer
- Posts: 10912
- Joined: Thu Aug 21, 2003 11:00 am
- Vehicle: NB SE
- Location: Perth, Western Australia
- Contact:
Wazman's NB8a
Pamex wrote:.... I was lacking a rusty pole when I did mine so super awesome purple wheel brace sufficed....
I used a mattock
If you had access to a car like this, would you take it back right away? Neither would I.
- wazman
- Fast Driver
- Posts: 394
- Joined: Sun Feb 15, 2009 11:39 pm
Wazman's NB8a
Sorry i fell asleep before i could finish.....
Here's some more...
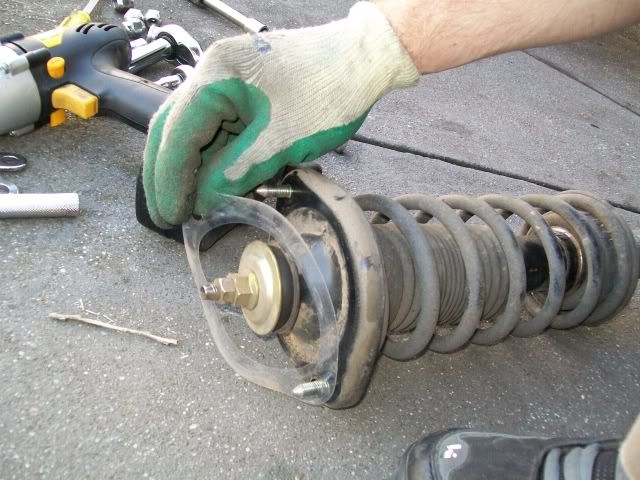
Undo the strut top nuts all the way....
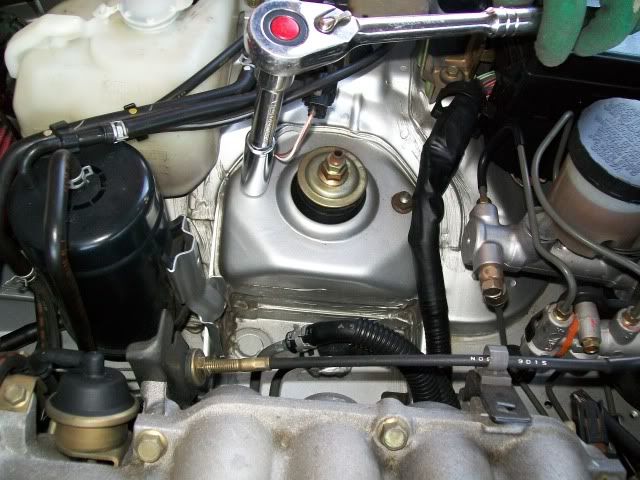
If your suspension has never been undone before then nuts will be tight....Enter the old double spanner technique
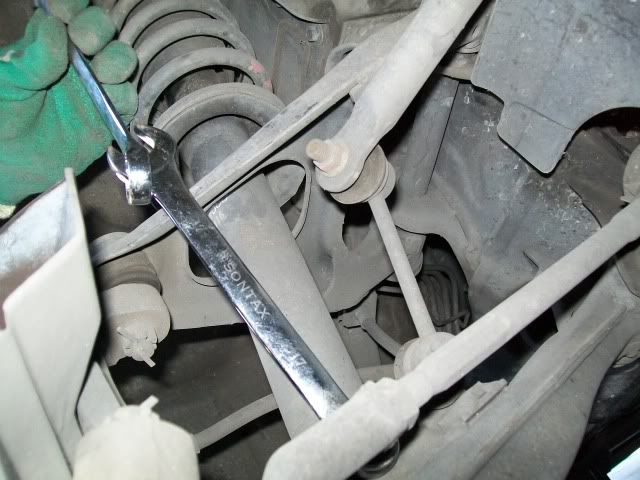
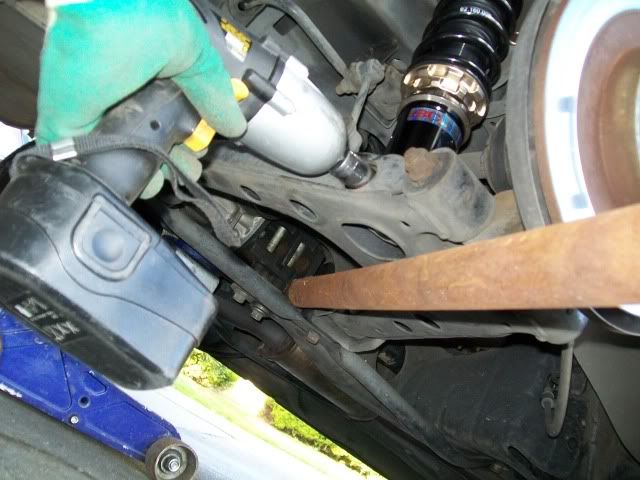
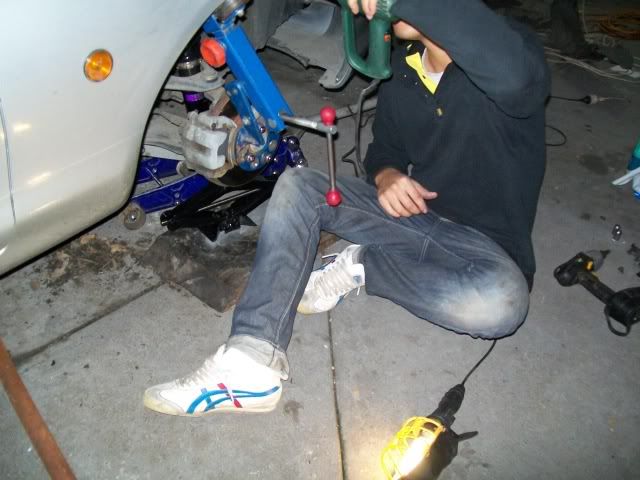
use "Old rusty" to lever the suspension down so you can undo lower strut bolt and remove with fingers....(after you've loosened it with rachet )
)
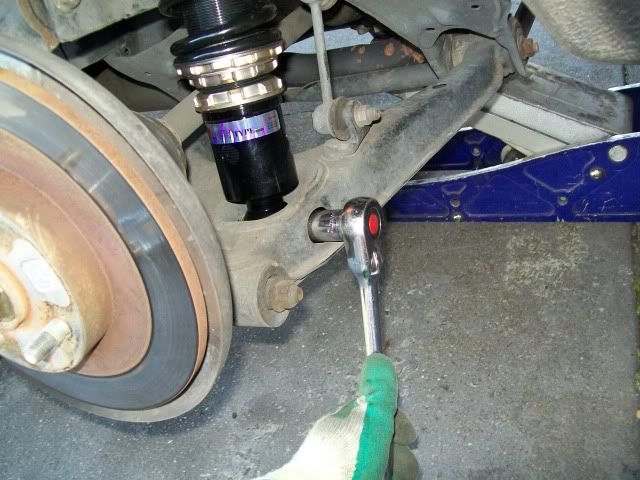
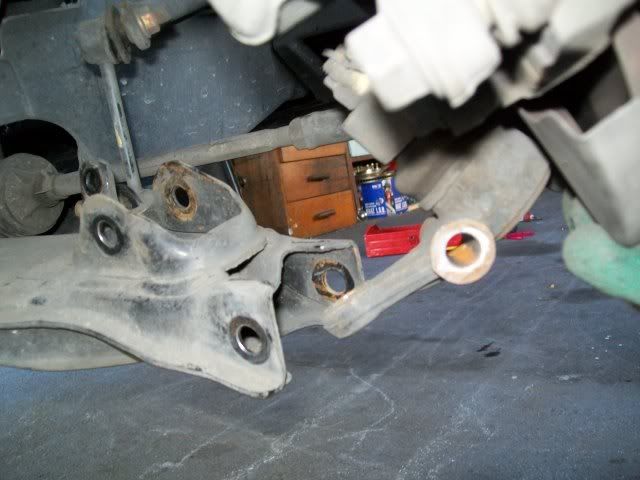
You have to undo the bottom ball joint thingy out of the lower control arm so you can drop it low enough to get the strut out.
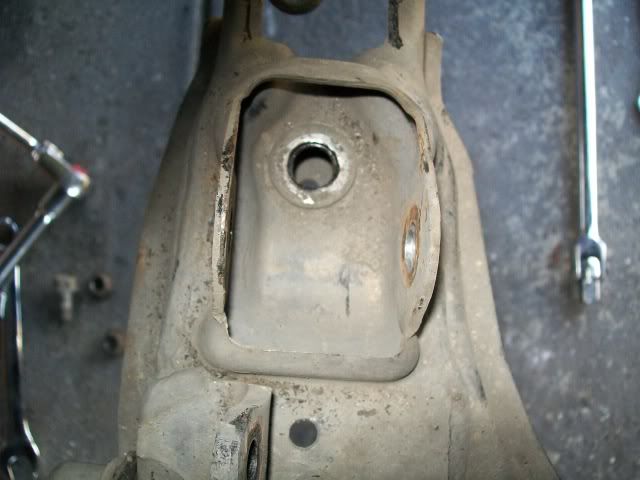
this shows the hole where the bolt is under the bottom of the strut....never done this before..... i was making it up as i went...
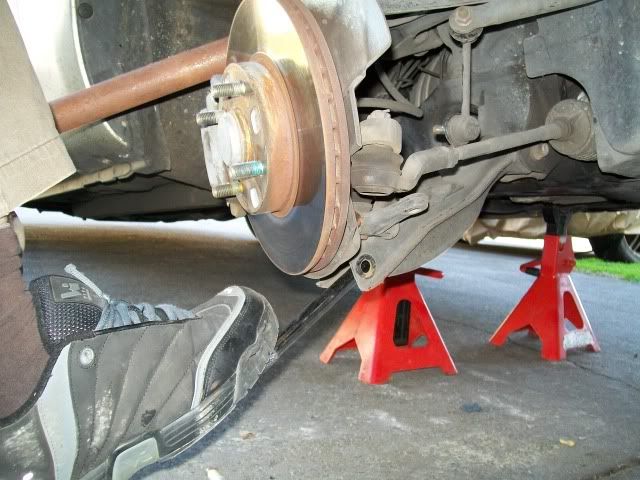
This is how i got it out with only one pair of hands......and a foot...
Here's some more...
Undo the strut top nuts all the way....

If your suspension has never been undone before then nuts will be tight....Enter the old double spanner technique

use "Old rusty" to lever the suspension down so you can undo lower strut bolt and remove with fingers....(after you've loosened it with rachet

You have to undo the bottom ball joint thingy out of the lower control arm so you can drop it low enough to get the strut out.

this shows the hole where the bolt is under the bottom of the strut....never done this before..... i was making it up as i went...

This is how i got it out with only one pair of hands......and a foot...

Last edited by wazman on Wed Jul 01, 2009 4:56 am, edited 1 time in total.
ilovedrift.com
- wazman
- Fast Driver
- Posts: 394
- Joined: Sun Feb 15, 2009 11:39 pm
Wazman's NB8a
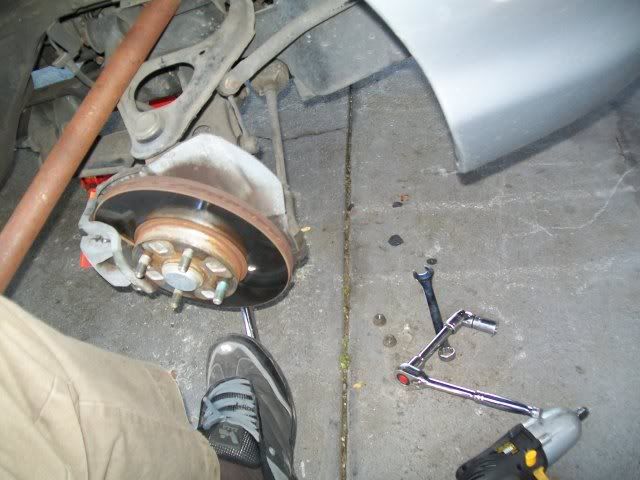
As your pulling the old/ stock strut out, remember which way you do so you can get the new one back in.....its kinda tight....
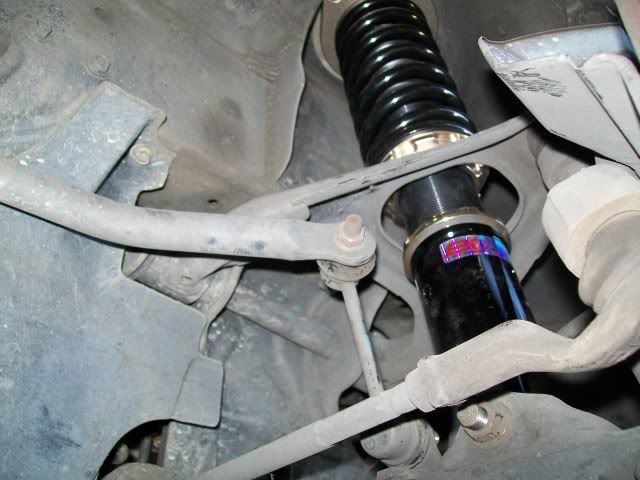
As with the rear i undid the sway bar to make things move easier...
All in and drove it around the yard a bit to settle it in......
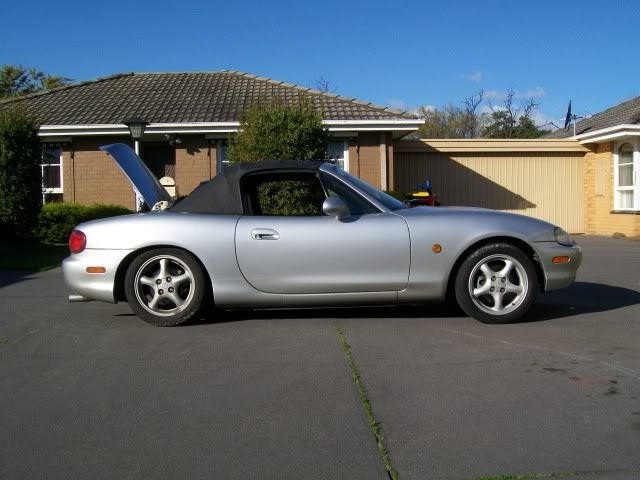
One thing to remember kids....... Use stand or blocks and let the car down in stages..... I just dropped it and found the height was to low to get my jack out!
Yep i felt a bit silly.....
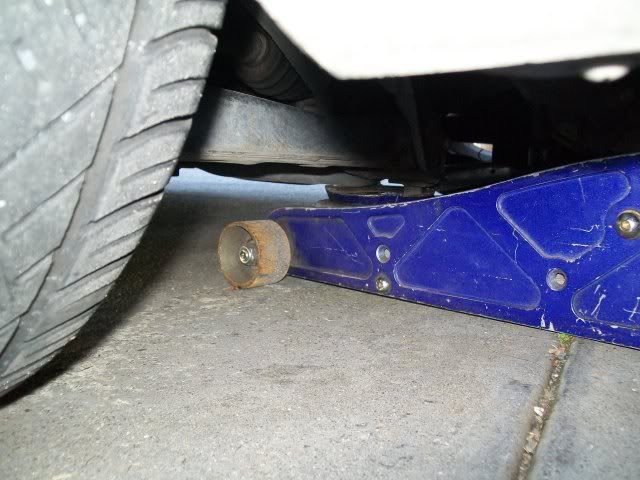
Now for some guard rolling so i can put my babies on
Though first i knew that i would need more camber on the front to tuck my tyres in under the guards.....so i adjusted the lower control arm camber bolts out
as far as they would go......(Yes i'll be getting a wheel alighment later)
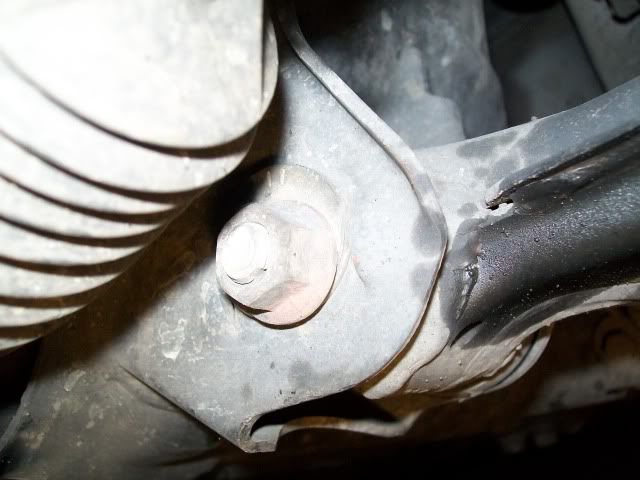
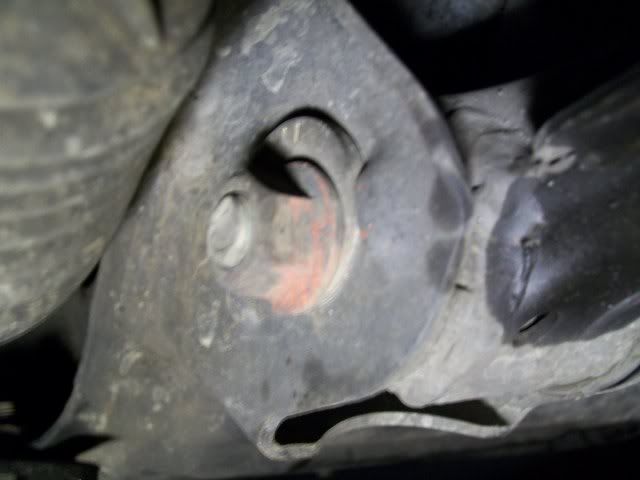
A quick phone call to a trusted guard rolling pro Athid.....This guys done merc's, beamers and Lexus's = trust!
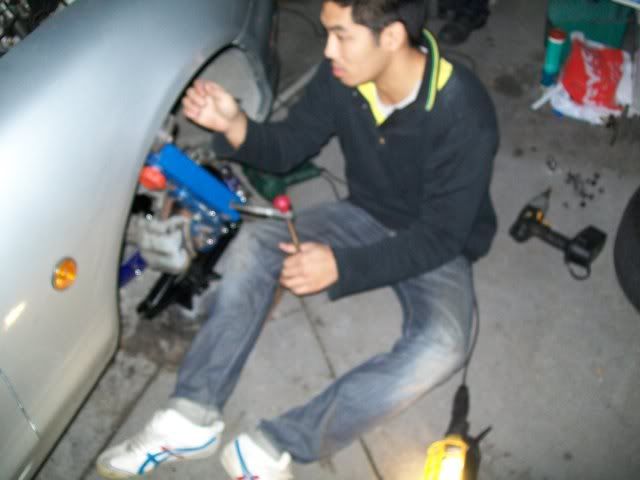
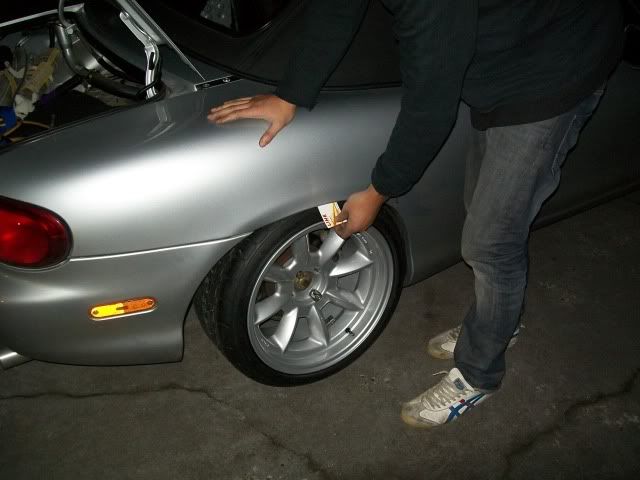
This is what we are looking for...Buisness card clearance between tyre and guard
ilovedrift.com
Who is online
Users browsing this forum: No registered users and 16 guests


